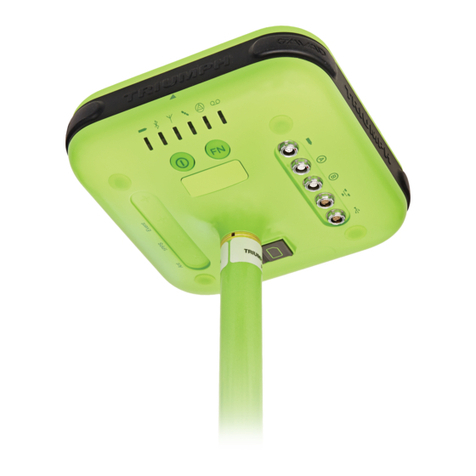
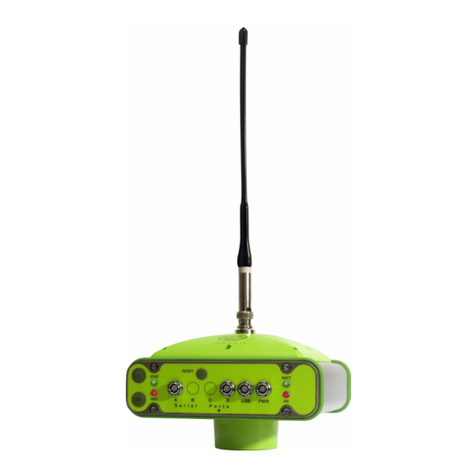
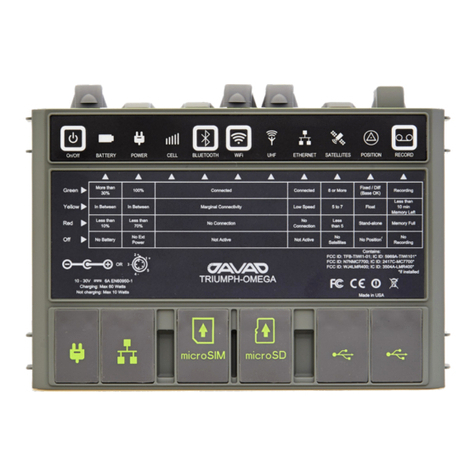
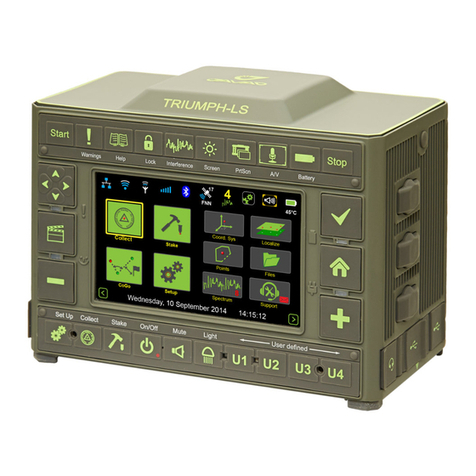
Javad TRIUMPH-2 User manual

Pairing Supplement and Appendix Update
E
Version 20150309

www.javad.com
2
AC Power Cable
(14-578153-01)
Ext Power/Charger
(22-570101-02)
Acces. Power Cable
(14-578125-01)
AC Power Adapter*
(23-590029-01) * Plug shown is for USA
Shown assembled while the TRIUMPH-2 is being charged
TRIUMPH-2
(01-630100-01)
Extension cord
not included
TRIUMPH-2 + Charging Kit
Depending on the which options you purchased with your
TRIUMPH-LS, you may have in your RTK kit the TRIUMPH-2 to
serve as the RTK Base. The above illustration is how the as-
sembled charging system looks for the TRIUMPH-2 while it’s
being charged.
Ancillaries

www.javad.com
3
Pairing the Radio
Pairing the Radio
Your radio (HPTxxxBT) and the TRIUMPH-2 receiver come
from the factory already paired and ready to communicate
with each other out of the box. Once powered, both the
radio and receiver will show their blue LEDs lit indicating
their linked communications. Usually this only takes a few
seconds.
When you purchase a radio from Javad GNSS separately
from the purchase of the receiver, NetView is available to
establish their pairing. It can also be used in establishing a
pairing with multiple radios in the series which include: the
HPT901BT*, HPT401BT, HPT404BT and the HPT435BT.
* Note: The TRIUMPH-2 paired with the HPT901BT works as a UHF
base for the TRIUMPH-LS when the FH915 radio has been installed
at the factory on the TRIUMPH-LS.
Procedure
Step 1. Connect the TRIUMPH-2 to your PC using the USB ca-
ble: USB Cable, A / micro B, (3.3 ft / 1.0 m) [14-578156-01].
Power the TRIUMPH-2 on.
Step 2. Connect the HPTxxxBT to your PC via a serial port
or through a USB to serial adapter. Be sure to connect the
antenna before powering the radio on. Depending on your
radio, the following cable choices will then apply:

www.javad.com
4Pairing the Radio
Standard Cabling
Radio Cable
HPT901BT
HPT401BT
HPT404BT
[14-578110-02] for Data-
Ser-Pwr Cable, DB9/DB15/
SAE (6 ft / 1,8m)
HPT435BT [14-578110-01] for Da-
ta-Ser Cable, DB9/DB15 (6
ft / 1,8m)
Alternative Cabling*
HPT901BT
HPT401BT
HPT404BT
[14-578123-02] for Data-
USB-Pwr Cable, USB/DB15/
SAE (6 ft / 1,8m)
HPT435BT [14-578123-01] for Da-
ta-USB Cable, USB/DB15 (6
ft / 1,8m)
*Available for purchase from our website:
http://www.javad.com/jgnss/products/accessories/
Step 3. If you have previously installed the USB drivers, Run
NetView and connect to the TRIUMPH‐2 before skipping
ahead to Step 4; otherwise proceed with the completion of
Step 3.
The very rst time that your TRIUMPH‐2 is connected to your
PC using a USB port and powered on, your Windows operat-
ing system will likely begin automatically searching for the
drivers and then prompt you indicating that the drivers will
need to be installed.
Click Close
Procedure for Driver Installation
Once installed, the drivers will allow your operating system
to create a virtual serial port whenever you’ve connected
your TRIUMPH‐2 to your PC via USB.
The USB drivers for the TRIUMPH‐2 can be downloaded from
our website: http://www.javad.com/jgnss/support/update.html;
scroll down the page and download jgnssusb.zip
Extract the les into an easy to nd folder; e.g.:
F:\Jobs\JAVAD\Software\Drivers\jgnssusb

www.javad.com
5
Pairing the Radio
The package (jgnssusb.zip) includes:
jgnssusb_x86L.exe - JAVAD GNSS USB Drivers Installer for x86 (32-bit)
OS;
jgnssusb_x64L.exe - JAVAD GNSS USB Drivers Installer for x64 (64-bit)
OS;
jgnss_usbser_news.txt - news le for USB Serial drivers: TRIUMPH-2,
HPT401BT, HPT901BT, HPT404BT, HPT435BT, ALPHA
jgnss_usbio_news.txt - news le for USBIO driver:TRIUMPH-1,
TRIUMPH-1M, DELTA, SIGMA
Choose the appropriate executable for your particular oper-
ating system, double click it and if prompted by the User Ac-
count Control, allow the Installation Wizard program to run.
Click Install

www.javad.com
6Pairing the Radio
Once the drivers have been successfully installed, power o
your triumph-2 and disconnect the USB cable from the PC.
Click Restart Now
Connect your TRIUMPH‐2 to your PC using a USB port (not a
USB hub) and power it on. Your Windows operating system
will now be able to automatically complete the installation
for the virtualization of that specic USB port.
Because virtualized serial ports are transitory and populat-
ed by Windows on-the-y as needed by a given device, their
names may not always be visible. You can conrm the iden-
tication of the virtualized port before launching NetView
through Device Manager.
Click on File, and then
Device Manager
Click on Start, and then Devices and Printers

www.javad.com
7
Pairing the Radio
Make note which virtualized serial port your receiver is con-
nected to. In the example above, COM8 is shown, but your
system may show some other name. When your device is
turned o or unconnected, it will be removed from view. If
you use the same USB port the next time, the COM assign-
ment will be the same and once again visible.
That’s it - congratulations! Your GNSS USB drivers are in-
stalled and working. You’re now ready to launch NetView,
but you might want to review some basic concepts on pair-
ing Bluetooth devices.
HPTxxxBT Pairing Concepts
These concepts pertain to the HPT901BT, HPT401BT,
HPT404BT and to the HPT435BT. Many thanks to Vlad Zhu-
kov for his tutoring.
Each device has its own unique media access control (MAC) ad-
dress that allows network communications to take place. If a
device has more than one mode of communication, like the
TRIUMPH-2 does, there will be one unique MAC address for
the WiFi adapter and a second unique address for the Blue-
tooth adapter. The TRIUMPH-LS has a 3rd unique address for
its LAN adapter. Communications cannot take place if two
devices have the same MAC address.
Master Mode
The HPTxxxBT radio will automatically initiate a Bluetooth
connection to the TRIUMPH-2 provided that the Bluetooth
MAC address of the TRIUMPH-2 has previously been stored in
the memory of the radio. In this respect, the radio is said to
be in master mode.
Once paired, that specic TRIUMPH-2 will be the slave to that
specic radio and accordingly only accept the Bluetooth
connection from the master with its stored Bluetooth MAC
address.
If you have two, or more radios that are each congured in
master mode, avoid turning them on at the same time in
the presence of the TRIUMPH-2 as they will interfere with one
another.
www.javad.com
8Pairing the Radio
On the left panel, click on Connection and then
choose from a previously saved prole in any of
the 10 available slots, or click on an empty slot to
create a new one.
In this example, an empty slot has been chosen.
Step 5. Choose SER for the Connection setting
from the pull down menu and then choose the
appropriate (virtualized) serial port.
Pairing Using NetView
Step 4. This article is intended to speed you along
in getting your radio paired with your receiver. It
is not meant to be a comprehesive guide on the
use of NetView.
For additional details on using NetView, please
refer to the NetView Software Manual available at
our website:
http://www.javad.com/downloads/javadgnss/manuals/
NetView/NetView_Software_Manual.pdf

www.javad.com
9
Pairing the Radio
Step 6. Choose a Baud Rate. The baud rate setting
will be by default 115,200, but faster transfer rates
may be realized from the choices available to you
in the pull down Baud Rate menu.
Step 7. Click on Connect.
Once connected, NetView will indicate the cur-
rent status of the connection under the Last Con-
nections area.
If you expect to sometime connect your receiver
using these settings again, choose whichever slot
you like and enter a unique name for that slot for
easy recall the next time you run NetView.
From this pane, you may also Disconnect with a
click on Dis

www.javad.com
10 Pairing the Radio
Step 9. Click OK
Step 10. Choose the appropriate (virtualized) se-
rial port from the pull down list for the HPTxxxBT.
Click Pair to begin the automated pairing pro-
cess.
Step 8. On the left panel, click Parameters,
then the Networking tab,
and then Modems; use Modem b
Make sure that you have previously attached the
antenna to your radio before powering it on and
then connect the radio to your PC using the ap-
propriate cable as discussed earlier in this article.
Click External Modem via Bluetooth

www.javad.com
11
Pairing the Radio
If your radio and receiver have been previous-
ly paired, you’ll be presented with a message to
conrm continuing with the pairing process.
Clicking Yes will not harm anything.
Step 11. Monitor the progress as the pairing pro-
cess is executed. Once the radio and receiver have
been successfully paired, look for the word Paired
in the lower left corner.
Click Close
Step 12. The Bluetooth LED on both the TRIUMPH‐2
and HPTxxxBT should now be blue.
Click Connection (on the left panel), followed by a
click on Dis to disconnect. Power o the radio and
then the receiver before exiting NetView.
Now take them outside and put them to work!

TRIUMPH-2
Specifications are subject to change without notice
JAVAD GNSS
www.javad.com
Main Features*
• GPS L1/L2
• GLONASS L1/L2
• SBAS L1
• Positioning using Kalman Filter
SBAS DGPS
• RTK Rate up to 100 Hz
• Data Recording up to 2GB
• RAIM
• USB
• Multi-Base Code Differential Rover
• Advanced Multipath Reduction
• Internal GNSS Antenna
• Bluetooth® and WiFi Interface
• Internal Bluetooth/WiFi Antenna
• Internal Rechargeable Li-Ion Battery
Description
Total 216 channels: all-in-view (GPS L1/L2, GLONASS L1/L2, SBAS
L1) integrated receiver
Tracking Specification
Signals tracked
GPS C/A, P1, P2, L2C (L+M)
GLONASS C/A, L2C, P1, P2
SBAS L1
Performance Specifications
Autonomous <2 m
Static, Fast Static Accuracy Horizontal: 0.3 cm + 0.5 ppm *base_line_length
Vertical: 0.35 cm + 0.4 ppm *base_line_length
Kinematic Accuracy Horizontal: 1 cm + 1 ppm *base_line_length
Vertical: 1.5 cm + 1 ppm *base_line_length
RTK (OTF) Accuracy Horizontal: 1 cm + 1 ppm *base_line_length
Vertical: 1.5 cm + 1 ppm *base_line_length
DGPS Accuracy < 0.25 m post processing; < 0.5 m real-time
Cold Start <35 seconds
Warm Start <5 seconds
Reacquisition <1 second
Power Specification
Battery Internal Li-Ion battery ( 7.2 V, 8.85 Ah) with internal charger
Operation Time Up to 25 hours
Input Voltage +10 to +16 volts
GNSS Antenna Specifications
GNSS Antenna Internal
NGS calibrated
Antenna Type Microstrip (Zero Centered)
Ground Plane Antenna on a flat ground plane
I/O
Communication Ports
Built-in USB to RS232 FTDI converter. 12Mbps USB 2.0 Full-Speed;
Wi-Fi (IEEE 802.11b/g);
Bluetooth V2.0+EDR Class 2 supporting SPP Slave Profile
External Power port 1 port
Memory & Recording
Internal Memory Up to 2 GB of onboard non-removable memory for data storage
Raw Data Recording Up to 100 times per second (100Hz)
Real Time Data
Input/Output JPS, RTCM SC104 v. 2.x and 3.x, CMR
Output NMEA 0183 v. 2.x and 3.0, BINEX
Status Indicator Six LEDs, two function keys (MinPad)
Environmental Specifications
Enclosure Metal base, plastic cover; IP67
Operating Temperature -40° C to +60° C **
Storage Temperture -45° C to +85° C **
Humidity 100% condensing
Dimensions 3.34 x 2.40 x 5.20 inches (85 x 61 x 132 mm)
Weight 1.23 lbs (0.56 kg)
1. GNSS Antenna
2. On/Off button
3. GNSS Receiver, power board with Bluetooth, WiFi, and
on-board Memory
4. 1/4-20" Mounting Thread
5. Record button
6. Rechargeable Li-Ion battery pack
1
4
23
6
Rev.1.2 March 5, 2014
* For the full list of standard and optional features see www.javad.com
** The operating temperature range of Li-Ion batteries is -30 ° C to +55°
The storage temperature of Li-Ion batteries is -20 ° C to +45°
5
Specications
www.javad.com
12 Specications
1
2
3
4
5
6

TRIUMPH-2
Specifications are subject to change without notice
JAVAD GNSS
www.javad.com
Main Features*
• GPS L1/L2
• GLONASS L1/L2
• SBAS L1
• Positioning using Kalman Filter
SBAS DGPS
• RTK Rate up to 100 Hz
• Data Recording up to 2GB
• RAIM
• USB
• Multi-Base Code Differential Rover
• Advanced Multipath Reduction
• Internal GNSS Antenna
• Bluetooth® and WiFi Interface
• Internal Bluetooth/WiFi Antenna
• Internal Rechargeable Li-Ion Battery
Description
Total 216 channels: all-in-view (GPS L1/L2, GLONASS L1/L2, SBAS
L1) integrated receiver
Tracking Specification
Signals tracked
GPS C/A, P1, P2, L2C (L+M)
GLONASS C/A, L2C, P1, P2
SBAS L1
Performance Specifications
Autonomous <2 m
Static, Fast Static Accuracy Horizontal: 0.3 cm + 0.5 ppm *base_line_length
Vertical: 0.35 cm + 0.4 ppm *base_line_length
Kinematic Accuracy Horizontal: 1 cm + 1 ppm *base_line_length
Vertical: 1.5 cm + 1 ppm *base_line_length
RTK (OTF) Accuracy Horizontal: 1 cm + 1 ppm *base_line_length
Vertical: 1.5 cm + 1 ppm *base_line_length
DGPS Accuracy < 0.25 m post processing; < 0.5 m real-time
Cold Start <35 seconds
Warm Start <5 seconds
Reacquisition <1 second
Power Specification
Battery Internal Li-Ion battery ( 7.2 V, 8.85 Ah) with internal charger
Operation Time Up to 25 hours
Input Voltage +10 to +16 volts
GNSS Antenna Specifications
GNSS Antenna Internal
NGS calibrated
Antenna Type Microstrip (Zero Centered)
Ground Plane Antenna on a flat ground plane
I/O
Communication Ports
Built-in USB to RS232 FTDI converter. 12Mbps USB 2.0 Full-Speed;
Wi-Fi (IEEE 802.11b/g);
Bluetooth V2.0+EDR Class 2 supporting SPP Slave Profile
External Power port 1 port
Memory & Recording
Internal Memory Up to 2 GB of onboard non-removable memory for data storage
Raw Data Recording Up to 100 times per second (100Hz)
Real Time Data
Input/Output JPS, RTCM SC104 v. 2.x and 3.x, CMR
Output NMEA 0183 v. 2.x and 3.0, BINEX
Status Indicator Six LEDs, two function keys (MinPad)
Environmental Specifications
Enclosure Metal base, plastic cover; IP67
Operating Temperature -40° C to +60° C **
Storage Temperture -45° C to +85° C **
Humidity 100% condensing
Dimensions 3.34 x 2.40 x 5.20 inches (85 x 61 x 132 mm)
Weight 1.23 lbs (0.56 kg)
1. GNSS Antenna
2. On/Off button
3. GNSS Receiver, power board with Bluetooth, WiFi, and
on-board Memory
4. 1/4-20" Mounting Thread
5. Record button
6. Rechargeable Li-Ion battery pack
1
4
23
6
Rev.1.2 March 5, 2014
* For the full list of standard and optional features see www.javad.com
** The operating temperature range of Li-Ion batteries is -30 ° C to +55°
The storage temperature of Li-Ion batteries is -20 ° C to +45°
5
www.javad.com
13
Specications

To turn ON the receiver press the power button. To turn OFF the receiver, press and hold
the power button until LEDs are off and then release the button.
The MinPad is the receiver’s minimum interface used to display and control data
input and output.
TRIUMPH-2
Start Guide
USB port is used for high-speed
data transfer and communication be-
tween the receiver and an external
device.
Power port is used to connect
the receiver to an external power
source and to charge the batteries.
Input voltage: +10...16 VDC.
Function Symbol Green Yellow Red OFF
BATTERY 1Full Half Almost empty OFF/No power
WLAN Connected Initialization Error Not Active
SATELLITES28 or more 5 to 7 Less than 5 No Satellite
POSITION Fixed/Diff/
OK (Base) Float/No-Diff No Position Receiver OFF
RECORDING3Recording Less than 10
min memory left Memory Full Not Active
1.Blinking every 1 sec according to the battery means receiver is ON without external power. LED solid according to the battery means
external power is connected.
2. Effective number of satellites are total number of satellites tracked minus the number of non-GPS systems tracked. For example if
8 GPS and 5 GLONASS are tracked the effective number of satellites is 12.
3. RECORDING LED blinks on each recording.
Function Symbol Blue Yellow Red OFF
BLUETOOTH Connected Searching No connection Not Active
The record button
starts/stops data
recording.
Revision 1.3 from May 28, 2014
www.javad.com
14 Appendix A - Blinking LEDs Explained
Appendix A - Blinking LEDs
Appendices

The bottom 1/4-20” thread connector allows mounting TRIUMPH-2 on the monopode, in-
stall 1/4-20” to 5/8-11” adapter to mount TRIUMPH-2 on the pole.
2www.javad.com
External radio status indication:
HPT404BT HPT401BT/HPT901BT with battery HPT435BT
Function Color Description
PWR Green
Radio with internal battery:
Solid - external power is connected, battery charger is off.
Blinking every 1 second - external power is connected, the battery is being charged
Blinking every 4 seconds - external power is not connected, internal battery is being
used as power source
Blinking every 0.5 second - external power is not connected, the battery
is near to full discharge
OFF - external power is not connected.
Radio without internal battery:
Solid - external power is connected
OFF - external power is not connected
RX Green ON - radio receives data
TX Green ON - radio transmits data
BT Blue
OFF - Bluetooth®is OFF;
Solid blue - Bluetooth®is ON;
Blinking if radio receives or transmits data over Bluetooth®
To operate TRIUMPH-2 as RTK base station it could be equipped with Bluetooth® capable external radio like either
one of three UHF 406.1-470 MHz radio transceivers: 35W HPT435BT, 4W HPT404BT, 1W HPT401BT or license free
frequency hopping 902-928 MHz 1 W HPT901BT radio transceiver.
WARNING! To avoid serious damage of the equipment, do not use the radio without the antenna.
TRIUMPH-2 communicates with radio via Bluetooth wireless link. Up to 50 ft (~15 m) is the practicable range of
the communication between TRIUMPH-2 and HPT401BT/HPT404BT. Actually in the field they keep reliable con-
nection up to 130 ft (~40 m). TRIUMPH-2 and radio are paired at the factory, so they automatically connect together
after power applied.
To turn ON the radio without the internal battery, connect the external power using the cable included to the kit.
To turn ON the radio with the internal battery, either connect the external power or press and hold the power but-
ton for more than 5 seconds to operate from the battery. To charge the internal battery, connect the external power.
Communication and power port ON/OFF button Power port Communication port
www.javad.com
15
Appendix A - Blinking LEDs Explained

www.javad.com
16 Appendix B - TRIUMPH-2 AntCal
Appendix B - TRIUMPH-2 AntCal Data
http://www.ngs.noaa.gov/ANTCAL/Antennas.jsp?manu=Javad
TRIUMPH-2 shown above with its slant height measurement
point (SHMP). The green triangle is also the indication of the
north orientation mark (NOM); the direction the antenna
should be facing when surveying.
PREFACE
ARPs
During its rst year in existence, the TRIUMPH-2 had a special
distinction made by NGS, specically in regards to its an-
tenna calibration data. During the year 2014, NGS had two
dierent antenna models: one with the 25mm x 1/4” x 20
threaded adapter [10-590293-01] included and one without
it. The net result related only to the Antenna Reference Point
(ARP).
Beginning in January 2015, and in accordance with the
standardized denition that the ARP is the lowest non-re-
movable part of the antenna, NGS has removed the an-
tenna type model that had included the 25 mm x 1/4” x 20
threaded adapter in its ARP. Accordingly, as of January 2015,
NGS is listing only one model antenna type for the internal
antenna of the TRIUMPH-2; the JAVTRIUMPH_2A. This is the
rst distinction that users need to pay very close attention
to; specically, their HIs (ARPs) if they have recorded obser-
vations using the TRIUMPH-2 during the calendar year 2014
and then process those data after 2014.
PCOs and PCVs
Additionally, the second distinction that users need to be
aware of is the antenna calibration data for the internal an-
tenna has been updated. This separate distinction relates to
both Phase Center Oset and Phase Center Variation values
for the internal antenna of the TRIUMPH-2.
The original PCOs and PCVs that the NGS Antenna Cali-
bration team had initially determined in March 2014 have
been superseded by the highly precise values produced
after recalibration on a Geo++ robot. These so-called near-
eld calibrations included the use of the 25mm x 1/4” x 20
threaded adapter [10-590293-01] and is reected by the
sux Aattached at the end of the antenna model’s name:
JAVTRIUMPH_2A. Finalization was coordinated through the
International GNSS Service (IGS) in December 2014.
If survey work has been performed with the TRIUMPH-2 and
processed using the superseded NGS values and which had
critical elevation determinations, users are advised to reex-
amine those projects and to reprocess their data using the
superior antenna model published in January 2015.
Dierences in the elevation of surveyed points have been
reported to be as much as 7 cm as improper Phase Center
Variations will cause errors most notably in the vertical com-
ponent in precise GPS surveys.

12/10/2014
L1
L2
IGS - PCO
Note: IGS Phase Center Oset locations
added for illustrative purposes
www.javad.com
17
Appendix B - TRIUMPH-2 AntCal
For further reading on this general subject, please see the
excellent National Research Institute of Astronomy and
Geophysics (NRIAG) article: Inuence of GPS antenna phase
center variation on precise positioning, by Dr. Ahmed I. EL-Hat-
tab which appeared in NRIAG Volume 2, Issue 2, December
2013, Pages 272-277.
Measuring your HI
Beginning with the new standardized
ARP denition, all antenna heights are
to be measured to the lowest non-re-
movable part of the antenna. This
means that, for example, using a 2-me-
ter xed-height GPS pole, the correct
HI will reect the addition of the 25 mm adapter; i.e., 2.025
m. If the TRIUMPH-2 is setup on a standard tripod, measure
the slant height from the mark to the green triangle on the
side.
OPUS kindly reminds users of non-conforming antennas
like the TRIUMPH-2 and the TRIUMPH-LS that the adapter must
be added.
Please refer to the NGS Antenna Calibration webpage for addi-
tional information.

www.javad.com
19
Appendix B - TRIUMPH-2 AntCal
Terse explanation of NGS’s formatted tabular antenna calibration data
<ant_info.003> <TYP:ABS SRC:,NGS-Database> <NGS-15/02/05=526>
AVE = # in average
ANTENNA ID DESCRIPTION DATA SOURCE (# OF TESTS) YR/MO/DY
[north] [east] [up] L1 PCO Offset (mm)
[90] [85] [80] [75] [70] [65] [60] [55] [50] [45] L1 PCV at Elevation (mm)
[40] [35] [30] [25] [20] [15] [10] [ 5] [ 0]
[north] [east] [up] L2 PCO Offset (mm)
[90] [85] [80] [75] [70] [65] [60] [55] [50] [45] L2 PCV at Elevation (mm)
[40] [35] [30] [25] [20] [15] [10] [ 5] [ 0]
IGS’s superseding antenna calibration data for the internal antenna of the Triumph2 receiver
<ant_info.003> <TYP:ABS SRC:,NGS-Database> <IGS-15/02/05=526>
AVE = # in average
JAVTRIUMPH_2A NONE Integrated GPS L1/L2, GLO G1/G2, GAL E1, IGS ( 5) 14/12/10
[2.8] [-0.5] [50.3] L1 PCO Offset (mm)
[0.0] [0.0] [-0.0] [-0.1] [-0.3] [-0.5] [-0.7] [-0.8] [-0.6] [-0.4] L1 PCV at Elevation (mm)
[-0.1] [-0.0] [-0.2] [-0.4] [-0.5] [-0.3] [0.3] [1.1] [1.3]
[-3.2] [1.9] [35.6] L2 PCO Offset (mm)
[0.0] [-0.1] [-0.5] [-1.0] [-1.7] [-2.6] [-3.5] [-4.3] [-4.7] [-4.5] L2 PCV at Elevation (mm)
[-3.5] [-1.9] [-0.1] [1.1] [1.4] [0.7] [0.2] [1.6] [6.8]
NGS’s superseded antenna calibration data for the internal antenna of the Triumph2 receiver
<ant_info.003> <TYP:ABS SRC:,NGS-Database> <NGS-14/09/09=506>
AVE = # in average
JAVTRIUMPH_2 NONE Integrated GPS L1/L2, GLO G1/G2, GAL E1, NGS ( 3) 14/03/13
[3.8] [-1.7] [53.0] L1 PCO Offset (mm)
[0.0] [0.2] [0.3] [0.4] [0.4] [0.1] [-0.3] [-0.7] [-1.2] [-1.6] L1 PCV at Elevation (mm)
[-2.0] [-2.1] [-2.1] [-1.8] [-1.0] [0.6] [3.2] [0.0] [0.0]
[1.6] [2.8] [48.7] L2 PCO Offset (mm)
[0.0] [2.4] [4.4] [6.1] [7.4] [8.1] [8.5] [8.3] [7.9] [7.1] L2 PCV at Elevation (mm)
[6.4] [5.7] [5.3] [5.1] [5.2] [5.9] [7.3] [0.0] [0.0]

www.javad.com
20 Appendix C - TRIUMPH-LS AntCal
Appendix C - TRIUMPH-LS AntCal Data
http://www.ngs.noaa.gov/ANTCAL/Antennas.jsp?manu=Javad
TRIUMPH-LS shown above with its slant height measurement
point (SHMP). The green triangle is also printed on the op-
posite side of the unit.
The display screen is the antenna’s north reference; that is,
the direction the antenna should be facing when doing pre-
cise surveying. Because the Phase Center Oset values for
both L1 and L2 are less than 1 mm in northing and easting
from the central vertical axis, there is negligible impact due
to improper orientation.
PREFACE
ARPs
The TRIUMPH-LS requires the 25 mm x 1/4” x 20 threaded
adapter [10-590293-01] to be used whenever the unit is
attached to a 5/8” x 11 threaded tting. The Antenna Ref-
erence Point (ARP) is the bottom of the TRIUMPH-LS. Accord-
ingly, always be sure to remember to add that 25 mm when
using a 2-meter xed-height GPS pole.
PCOs and PCVs
Beginning in January 2015, NGS is listing the model anten-
na type for the internal antenna of the TRIUMPH-LS as the
JAVTRIUMPH_LSA. Additionally, the antenna calibration
data for the internal antenna has been updated. This sep-
arate distinction relates to both Phase Center Oset and
Phase Center Variation values for the internal antenna of
the TRIUMPH-LS.
The original PCOs and PCVs that the NGS Antenna Calibra-
tion team had initially determined in October 2013 have
been superseded by the highly precise values produced
after recalibration on a Geo++ robot. These so-called near-
eld calibrations included the use of the 25mm x 1/4” x 20
threaded adapter [10-590293-01] and is reected by the
sux Aattached at the end of the antenna model’s name:
JAVTRIUMPH_LSA. Finalization was coordinated through the
International GNSS Service (IGS) in December 2014.
If survey work has been performed with the TRIUMPH-LS and
processed using the superseded NGS values and which had
critical elevation determinations, users are advised to reex-
amine those projects and to reprocess their data using the
superior antenna model published in January 2015.
Dierences in the elevation of surveyed points have been
reported to be as much as 2 to 3 cm as improper Phase Cen-
ter Variations will cause errors most notably in the vertical
component in precise GPS surveys1.
1 For further reading on this general subject, please see the excellent National
Research Institute of Astronomy and Geophysics (NRIAG) article: Inuence
of GPS antenna phase center variation on precise positioning, by
Dr. Ahmed I. EL-Hattab which appeared in NRIAG Volume 2, Issue 2, December
2013, Pages 272-277.
Other manuals for TRIUMPH-2
1
Table of contents
Other Javad Receiver manuals

Javad
Javad TRIUMPH-3 Guide

Javad
Javad TRIUMPH-1M User manual

Javad
Javad TRIUMPH-1 User manual

Javad
Javad OMEGA User manual

Javad
Javad DELTA User manual

Javad
Javad TRIUMPH-LS User manual

Javad
Javad Maxor User manual

Javad
Javad TRIUMPH-VS User manual

Javad
Javad TRIUMPH-VS User manual

Javad
Javad TRIUMPH-LS User manual

Javad
Javad UHFSSRx User manual

Javad
Javad TRIUMPH-1 Quick guide

Javad
Javad GISmore User manual

Javad
Javad DELTA-3 User manual

Javad
Javad TRIUMPH-2 Guide

Javad
Javad ALPHA User manual

Javad
Javad TRIUMPH-LS User manual

Javad
Javad SIGMA Quick guide

Javad
Javad TRIUMPH-3NR User manual

Javad
Javad DELTAGNSS Receiver User manual