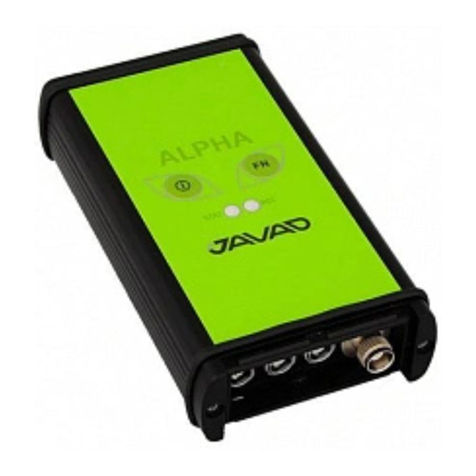
Javad GISmore User manual

All contents in this manual are copyrighted by JAVAD GNSS.
All rights reserved.The information contained herein may not be used, accessed, copied,
stored, displayed, sold, modified, published, or distributed, or otherwise reproduced without express written
consent from JAVAD GNSS
GISmore
Operator’s Manual
Version 2.0
Last Revised June 29, 2012

www.javad.com

3www.javad.com
TABLE OF CONTENTS
Preface . . . . . . . . . . . . . . . . . . . . . . . . . . . . . . . . . . . . . . . . . . . . . . . . . . . . . . . . . . . . . . 5
Terms and Conditions. . . . . . . . . . . . . . . . . . . . . . . . . . . . . . . . . . . . . . . . . . . . . . . . . . . . . . . .5
Regulatory Information . . . . . . . . . . . . . . . . . . . . . . . . . . . . . . . . . . . . . . . . . . . . . . . . . . . . . .6
Manual Conventions. . . . . . . . . . . . . . . . . . . . . . . . . . . . . . . . . . . . . . . . . . . . . . . . . . . . . . . . .8
Screen Captures . . . . . . . . . . . . . . . . . . . . . . . . . . . . . . . . . . . . . . . . . . . . . . . . . . . . . . . . . . . .8
Technical Assistance . . . . . . . . . . . . . . . . . . . . . . . . . . . . . . . . . . . . . . . . . . . . . . . . . . . . . . . .8
Chapter 1. Description and Operation. . . . . . . . . . . . . . . . . . . . . . . . . . . . . . . . . . . . . . . 9
1. Principles of Operation. . . . . . . . . . . . . . . . . . . . . . . . . . . . . . . . . . . . . . . . . . . . . . . . . . . . .9
1.1. GNSS Overview. . . . . . . . . . . . . . . . . . . . . . . . . . . . . . . . . . . . . . . . . . . . . . . . . . . .10
1.2. Calculating Absolute Positions . . . . . . . . . . . . . . . . . . . . . . . . . . . . . . . . . . . . . . . .10
1.3. Calculating Differential Positions . . . . . . . . . . . . . . . . . . . . . . . . . . . . . . . . . . . . . .11
2. Getting Acquainted. . . . . . . . . . . . . . . . . . . . . . . . . . . . . . . . . . . . . . . . . . . . . . . . . . . . . . .12
2.1. Bluetooth® Module . . . . . . . . . . . . . . . . . . . . . . . . . . . . . . . . . . . . . . . . . . . . . . . . .12
2.2. Modem . . . . . . . . . . . . . . . . . . . . . . . . . . . . . . . . . . . . . . . . . . . . . . . . . . . . . . . . . . .13
2.3. External Components. . . . . . . . . . . . . . . . . . . . . . . . . . . . . . . . . . . . . . . . . . . . . . . .13
3. Option Authorization File (OAF). . . . . . . . . . . . . . . . . . . . . . . . . . . . . . . . . . . . . . . . . . . .14
4. Operation . . . . . . . . . . . . . . . . . . . . . . . . . . . . . . . . . . . . . . . . . . . . . . . . . . . . . . . . . . . . . .15
4.1. Software Installation. . . . . . . . . . . . . . . . . . . . . . . . . . . . . . . . . . . . . . . . . . . . . . . . .15
Installing NetView. . . . . . . . . . . . . . . . . . . . . . . . . . . . . . . . . . . . . . . . . . . . . . . . . .15
Installing ModemVU . . . . . . . . . . . . . . . . . . . . . . . . . . . . . . . . . . . . . . . . . . . . . . . .15
4.2. Installing Optional SIM Card. . . . . . . . . . . . . . . . . . . . . . . . . . . . . . . . . . . . . . . . . .16
4.3. Charging the Battery . . . . . . . . . . . . . . . . . . . . . . . . . . . . . . . . . . . . . . . . . . . . . . . .17
Power supply requirements . . . . . . . . . . . . . . . . . . . . . . . . . . . . . . . . . . . . . . . . . . .18
Powering the Receiver . . . . . . . . . . . . . . . . . . . . . . . . . . . . . . . . . . . . . . . . . . . . . . .18
4.4. Turning On/Off the Receiver . . . . . . . . . . . . . . . . . . . . . . . . . . . . . . . . . . . . . . . . . .18
4.5. Connecting the Receiver and a Computer . . . . . . . . . . . . . . . . . . . . . . . . . . . . . . . .19
5. GISmore Configuration . . . . . . . . . . . . . . . . . . . . . . . . . . . . . . . . . . . . . . . . . . . . . . . . . . .20
5.1. Configuring Receiver. . . . . . . . . . . . . . . . . . . . . . . . . . . . . . . . . . . . . . . . . . . . . . . .20
5.2. Configuring the GSM/GPRS Module . . . . . . . . . . . . . . . . . . . . . . . . . . . . . . . . . . .25
Configuring the GSM module for Point-to-Point radio link . . . . . . . . . . . . . . . . . .26
Configuring the GSM module for Internet access . . . . . . . . . . . . . . . . . . . . . . . . . .27
Settings for the RCV subtab. . . . . . . . . . . . . . . . . . . . . . . . . . . . . . . . . . . . . . . . . . .30
Settings for the NTRIP subtab . . . . . . . . . . . . . . . . . . . . . . . . . . . . . . . . . . . . . . . . .30
6. Setup and Survey . . . . . . . . . . . . . . . . . . . . . . . . . . . . . . . . . . . . . . . . . . . . . . . . . . . . . . . .31

4www.javad.com
6.1. Receiver Setup. . . . . . . . . . . . . . . . . . . . . . . . . . . . . . . . . . . . . . . . . . . . . . . . . . . . . 31
6.2. Single-Frequency Static Surveying. . . . . . . . . . . . . . . . . . . . . . . . . . . . . . . . . . . . . 32
6.3. Kinematic (Stop & Go) Surveying . . . . . . . . . . . . . . . . . . . . . . . . . . . . . . . . . . . . . 32
6.4. Differential GPS (DGPS) Surveying. . . . . . . . . . . . . . . . . . . . . . . . . . . . . . . . . . . . 33
7. Receiver and File Maintenance . . . . . . . . . . . . . . . . . . . . . . . . . . . . . . . . . . . . . . . . . . . . . 34
7.1. Downloading Files to a Computer. . . . . . . . . . . . . . . . . . . . . . . . . . . . . . . . . . . . . . 34
7.2. Deleting Files. . . . . . . . . . . . . . . . . . . . . . . . . . . . . . . . . . . . . . . . . . . . . . . . . . . . . . 35
7.3. Managing Receiver Options . . . . . . . . . . . . . . . . . . . . . . . . . . . . . . . . . . . . . . . . . . 35
Checking an OAF . . . . . . . . . . . . . . . . . . . . . . . . . . . . . . . . . . . . . . . . . . . . . . . . . . 35
Loading OAFs. . . . . . . . . . . . . . . . . . . . . . . . . . . . . . . . . . . . . . . . . . . . . . . . . . . . . 35
7.4. Clearing the NVRAM . . . . . . . . . . . . . . . . . . . . . . . . . . . . . . . . . . . . . . . . . . . . . . . 36
7.5. Checking Firmware Version . . . . . . . . . . . . . . . . . . . . . . . . . . . . . . . . . . . . . . . . . . 36
7.6. Loading New Firmware. . . . . . . . . . . . . . . . . . . . . . . . . . . . . . . . . . . . . . . . . . . . . . 36
Chapter 2. Troubleshooting . . . . . . . . . . . . . . . . . . . . . . . . . . . . . . . . . . . . . . . . . . . . . 37
1. Check This First! . . . . . . . . . . . . . . . . . . . . . . . . . . . . . . . . . . . . . . . . . . . . . . . . . . . . . . . . 37
2. Receiver Problems. . . . . . . . . . . . . . . . . . . . . . . . . . . . . . . . . . . . . . . . . . . . . . . . . . . . . . . 37
3. Technical Support . . . . . . . . . . . . . . . . . . . . . . . . . . . . . . . . . . . . . . . . . . . . . . . . . . . . . . . 40
Appendix A. Specifications . . . . . . . . . . . . . . . . . . . . . . . . . . . . . . . . . . . . . . . . . . . . . 41
1. Receiver Specifications . . . . . . . . . . . . . . . . . . . . . . . . . . . . . . . . . . . . . . . . . . . . . . . . . . . 41
1.1. General Details . . . . . . . . . . . . . . . . . . . . . . . . . . . . . . . . . . . . . . . . . . . . . . . . . . . . 41
1.2. GNSS Board Details . . . . . . . . . . . . . . . . . . . . . . . . . . . . . . . . . . . . . . . . . . . . . . . . 43
1.3. Bluetooth® Module Details. . . . . . . . . . . . . . . . . . . . . . . . . . . . . . . . . . . . . . . . . . . 44
1.4. GSM Module Details. . . . . . . . . . . . . . . . . . . . . . . . . . . . . . . . . . . . . . . . . . . . . . . . 44
Appendix B. Safety Warnings. . . . . . . . . . . . . . . . . . . . . . . . . . . . . . . . . . . . . . . . . . . . 45
General Warnings . . . . . . . . . . . . . . . . . . . . . . . . . . . . . . . . . . . . . . . . . . . . . . . . . . . . . . . . . 45
Battery Pack Warnings . . . . . . . . . . . . . . . . . . . . . . . . . . . . . . . . . . . . . . . . . . . . . . . . . . . . . 46
Power Supply. . . . . . . . . . . . . . . . . . . . . . . . . . . . . . . . . . . . . . . . . . . . . . . . . . . . . . . . . . . . . 46
Usage Warnings. . . . . . . . . . . . . . . . . . . . . . . . . . . . . . . . . . . . . . . . . . . . . . . . . . . . . . . . . . . 47
Storage Precautions . . . . . . . . . . . . . . . . . . . . . . . . . . . . . . . . . . . . . . . . . . . . . . . . . . . . . . . . 47
Appendix C. Warranty Terms . . . . . . . . . . . . . . . . . . . . . . . . . . . . . . . . . . . . . . . . . . . . 49

5www.javad.com
PREFACE
Thank you for purchasing this product. The materials available in this Manual (the “Manual”) have been prepared
by JAVAD GNSS, Inc. (“JAVAD GNSS”) for owners of JAVAD GNSS products. It is designed to assist owners
with the use of the GISmore and its use is subject to these terms and conditions (the “Terms and Conditions”).
Note: Please read these Terms and Conditions carefully.
Terms and Conditions
USE – JAVAD GNSS receivers are designed to be used by a professional. The user is expected to have a
good knowledge and understanding of the user and safety instructions before operating, inspecting or
adjusting. Always wear the required protectors (safety shoes, helmet, etc.) when operating the receiver.
COPYRIGHT – All information contained in this Manual is the intellectual property of, and copyrighted
material of JAVAD GNSS. All rights are reserved. You may not use, access, copy, store, display, create
derivative works of, sell, modify, publish, distribute, or allow any third party access to, any graphics,
content, information or data in this Manual without JAVAD GNSS’ express written consent and may only
use such information for the care and operation of your GISmore. The information and data in this
Manual are a valuable asset of JAVAD GNSS and are developed by the expenditure of considerable work,
time and money, and are the result of original selection, coordination and arrangement by JAVAD GNSS.
TRADEMARKS – GISmore™, ModemVU™, NetView™, and JAVAD GNSS®are trademarks or
registered trademarks of JAVAD GNSS. Windows®is a registered trademark of Microsoft Corporation;
Bluetooth®word mark is owned by the Bluetooth SIG, Inc. Product and company names mentioned
herein may be trademarks of their respective owners.
DISCLAIMER OF WARRANTY – EXCEPT FOR ANY WARRANTIES IN THIS MANUAL OR A
WARRANTY CARD ACCOMPANYING THE PRODUCT, THIS MANUAL AND THE GISmore ARE
PROVIDED “AS-IS.” THERE ARE NO OTHER WARRANTIES. JAVAD GNSS DISCLAIMS ANY
IMPLIED WARRANTY OF MERCHANTABILITY OR FITNESS FOR ANY PARTICULAR USE OR
PURPOSE. JAVAD GNSS AND ITS DISTRIBUTORS SHALL NOT BE LIABLE FOR TECHNICAL
OR EDITORIAL ERRORS OR OMISSIONS CONTAINED HEREIN; NOR FOR INCIDENTAL OR
CONSEQUENTIAL DAMAGES RESULTING FROM THE FURNISHING, PERFORMANCE OR
USE OF THIS MATERIAL OR THE GISmore. SUCH DISCLAIMED DAMAGES INCLUDE BUT
ARE NOT LIMITED TO LOSS OF TIME, LOSS OR DESTRUCTION OF DATA, LOSS OF PROFIT,
SAVINGS OR REVENUE, OR LOSS OF THE PRODUCT'S USE. IN ADDITION, JAVAD GNSS IS
NOT RESPONSIBLE OR LIABLE FOR DAMAGES OR COSTS INCURRED IN CONNECTION
WITH OBTAINING SUBSTITUTE PRODUCTS OR SOFTWARE, CLAIMS BY OTHERS,
INCONVENIENCE, OR ANY OTHER COSTS. IN ANY EVENT, JAVAD GNSS SHALL HAVE NO

Preface
Regulatory Information
FCC Class B Compliance
6www.javad.com
LIABILITY FOR DAMAGES OR OTHERWISE TO YOU OR ANY OTHER PERSON OR ENTITY IN
EXCESS OF THE PURCHASE PRICE FOR THE GISmore.
LICENSE AGREEMENT – Use of any computer programs or software supplied by JAVAD GNSS or
downloaded from a JAVAD GNSS website (the “Software”) in connection with the GISmore constitutes
acceptance of these Terms and Conditions in this Manual and an agreement to abide by these Terms and
Conditions. The user is granted a personal, non-exclusive, non-transferable license to use such Software
under the terms stated herein and in any case only with a single GISmore or single computer. You may
not assign or transfer the Software or this license without the express written consent of JAVAD GNSS.
This license is effective until terminated. You may terminate the license at any time by destroying the
Software and Manual. JAVAD GNSS may terminate the license if you fail to comply with any of the
Terms or Conditions. You agree to destroy the Software and manual upon termination of your use of the
GISmore. All ownership, copyright and other intellectual property rights in and to the Software belong to
JAVAD GNSS. If these license terms are not acceptable, return any unused software and manual.
CONFIDENTIALITY – This Manual, its contents and the Software (collectively, the “Confidential
Information”) are the confidential and proprietary information of JAVAD GNSS. You agree to treat JAVAD
GNSS' Confidential Information with a degree of care no less stringent that the degree of care you would use in
safeguarding your own most valuable trade secrets. Nothing in this paragraph shall restrict you from disclosing
Confidential Information to your employees as may be necessary or appropriate to operate or care for the
GISmore. Such employees must also keep the Confidentiality Information confidential. In the event you
become legally compelled to disclose any of the Confidential Information, you shall give JAVAD GNSS
immediate notice so that it may seek a protective order or other appropriate remedy.
WEBSITE; OTHER STATEMENTS – No statement contained at the JAVAD GNSS website (or any
other website) or in any other advertisements or JAVAD GNSS literature or made by an employee or
independent contractor of JAVAD GNSS modifies these Terms and Conditions (including the Software
license, warranty and limitation of liability).
SAFETY – Improper use of the GISmore can lead to injury to persons or property and/or malfunction of
the product. The GISmore should only be repaired by authorized JAVAD GNSS warranty service centers.
MISCELLANEOUS – The above Terms and Conditions may be amended, modified, superseded, or
canceled, at any time by JAVAD GNSS. The above Terms and Conditions will be governed by, and
construed in accordance with, the laws of the State of California, without reference to conflict of laws.
Regulatory Information
The following sections provide information on this product’s compliance with government regulations.
FCC Class B Compliance
This device complies with Part 15 of the FCC rules. Operation is subject to the following two conditions:
1. This device may not cause harmful interference, and
2. This device must accept any interference received, including interference that may cause unde-
sired operation.

Preface
Regulatory Information
Canadian Emissions Labeling Requirements
7www.javad.com
This equipment has been tested and found to comply with the limits for a Class B digital device, pursuant to
Part 15 of the FCC rules. These limits are designed to provide reasonable protection against harmful
interference in residential installations. This equipment generates, uses, and can radiate radio frequency energy,
and if not installed and used in accordance with the instructions, may cause harmful interference to radio
communications. However, there is no guarantee that interference will not occur in a particular installation.
If this equipment does cause interference to radio or television equipment reception, which can be
determined by turning the equipment off and on, the user is encouraged to try to correct the interference
by one or more of the following measures:
• Reorient or relocate the receiving antenna.
• Move the equipment away from the receiver.
• Plug the equipment into an outlet on a circuit different from that to which the receiver is powered.
• Consult the dealer or an experienced radio/television technician for additional suggestions.
Note: Any changes or modifications to the equipment not expressly approved by the party responsible for
compliance could void your authority to operate such equipment.
Canadian Emissions Labeling Requirements
This Class B digital apparatus meets all requirements of the Canadian Interference-Causing Equipment
Regulations.
Cet appareil numérique de la classe B respecte toutes les exigences du Réglement sur le matériel
brouilleur du Canada.
WEEE Directive
The following information is for EU-member states only: The use of the symbol indicates that this product
may not be treated as household waste. By ensuring this product is disposed of correctly, you will help prevent
potential negative consequences for the environment and human health, which could otherwise be caused by
inappropriate waste handling of this product. For more detailed information about the take-back and recycling
of this product, please contact your supplier where you purchased the product or consult.

Preface
Manual Conventions
WEEE Directive
8www.javad.com
Manual Conventions
This manual uses the following conventions:
Note: Supplementary information that can have an affect on system operation, system performance,
measurements, or personal safety.
C
AUTION
:
Notification that an action has the potential to adversely affect system operation, system performance,
data integrity, or personal health.
Warning:
Notification that an action will result in system damage, loss of data, loss of warranty, or personal injury.
D
ANGER
:
UNDER NO CIRCUMSTANCES SHOULD THIS ACTION BE PERFORMED.
Screen Captures
This manual includes sample screen captures. Your actual screen can look slightly different from the
sample screen due to the receiver you have connected, operating system used and settings you have
specified. This is normal and not a cause for concern.
Technical Assistance
If you have a problem and cannot find the information you need in the product documentation, contact
your local dealer. Alternatively, request technical support using the JAVAD GNSS World Wide Web site
at: www.javad.com
To contact JAVAD GNSS Customer Support use the QUESTIONS button available on the
www.javad.com.
Example Description
FileExit Click the File menu and click Exit
MinPad This format represents titles of dialog windows/boxes, names of
menu options, identifies program interface objects, such as
checkboxes, edit boxes, radio buttons, etc.
Temp
This format is used to enter various string information (e.g., file
and directory names) as well as operator commands.

Chapter 1
9www.javad.com
DESCRIPTION AND OPERATION
1. Principles of Operation
GISmore receiver is based on our TRIUMPH Technology implemented in our TRIUMPH Chip. For the
first time in the GNSS history we offer very powerful GIS field mapping receiver with up to 100 Hz RTK,
216 channels of single frequency GPS, Galileo and GLONASS in a small attractive, sturdy, and
watertight box.
Using its internal Bluetooth and GSM/GPRS connection the receiver can access local GNSS Reference
Station Network. As standard future the GISmore receiver provides access to the SBAS correction
services. In addition to post-processed DGPS capabilities, the GISmore utilizes external correction
services for real-time DGPS mapping and navigation applications.
All GNSS, GSM, and Bluetooth® antennas are conveniently hidden and protected (Figure 1).
Figure 1. GISmore Receiver
GISmore can receive and processes multiple signal types improving the accuracy and reliability of your
survey points and positions, especially under difficult jobsite conditions.
GISmore receiver can access the GPS (Global Positioning System) satellites of the United States, the
Galileo (an upcoming global positioning system maintained and operated by Galileo Industries),
increasing the number of satellites your receiver can detect, thus improving the accuracy of your
measuring points, increasing productivity, and reducing cost.
Several other features, including multipath mitigation and common tracking, provide under-canopy and
low signal strength reception. The GISmore receiver provides the functionality, accuracy, availability, and
integrity needed for fast and easy data collection.
The GISmore is a multi-function, multi-purpose receiver intended for precision markets. Precision
markets means markets for equipment, subsystems, components and software for surveying, construction,

Description and Operation
Principles of Operation
GNSS Overview
10 www.javad.com
commercial mapping, civil engineering, precision agriculture and land-based construction and agriculture
machine control, photogrammetry mapping, hydrographic and any use reasonably related to the
foregoing.
1.1. GNSS Overview
Currently, the following three global navigation satellite systems (GNSS) offer line-of-site radio
navigation and positioning, velocity, and time services on a global, all-weather scale to any user equipped
with a GNSS tracking receiver on or near the Earth’s surface:
• GPS – the Global Positioning System maintained and operated by the United States Department
of Defense. For information on the status of this system, visit the US Naval Observatory website
(http://tycho.usno.navy.mil/) or the US Coast Guard website (http://www.navcen.uscg.gov/).
• GLONASS – the Global Navigation Satellite System maintained and operated by the Russian
Federation Ministry of Defense. For information on the status of this system, visit the
Coordinational Scientific Information Center website (http://www.glonasscenter.ru/
frame_e.html).
• Galileo – an upcoming global positioning system maintained and operated by Galileo Industries, a
joint venture of several European space agencies/companies working closely with the European
Space Agency. Unlike GPS and GLONASS, this is a civil endeavor and is currently in the
development and validation stage. For information on the status of this system, visit the Galileo
Industries website (http://www.galileo-industries.net).
Despite numerous technical differences in the implementation of these systems, satellite positioning
systems have three essential components:
• Space – GPS, GLONASS, and Galileo satellites orbit approximately 12,000 nautical miles above
Earth and are equipped with a clock and radio. These satellites broadcast ranging signals and
various digital information (ephemerides, almanacs, time&frequency corrections, etc.).
• Control – Ground stations located around the Earth that monitor the satellites and upload data,
including clock corrections and new ephemerides (satellite positions as a function of time), to
ensure the satellites transmit data properly.
• User – The community and military that use GNSS receivers to calculate positions.
1.2. Calculating Absolute Positions
When calculating an absolute position, a stationary or moving receiver determines its three-dimensional
position with respect to the origin of an Earth-Center Earth-Fixed coordinate system. To calculate this
position, the receiver measures the distance (called pseudoranges) between it and at least four satellites.
The measured pseudoranges are corrected for clock differences (receiver and satellites) and signal
propagation delays due to atmospheric effects. The positions of the satellites are computed from the
ephemeris data transmitted to the receiver in navigation messages. When using a single satellite system,
the minimum number of satellites needed to compute a position is four. In a mixed satellite scenario
(GPS, GLONASS, Galileo), the receiver must lock onto five or more satellites to account for the different
time scales used in these systems and to obtain an absolute position.

Description and Operation
Principles of Operation
Calculating Differential Positions
11www.javad.com
1.3. Calculating Differential Positions
DGPS, or Differential GPS, is a relative positioning technique where the measurements from two or more
remote receivers are combined and processed using sophisticated algorithms to calculate the receivers’
relative coordinates with high accuracy.
DGPS accommodates various implementation techniques that can be classified according to the
following criteria:
• The type of GNSS measurements used, either code-phase differential measurements or carrier-
phase differential measurements
• If real-time or post-mission results required Real-time applications can be further divided
according to the source of differential data and communication link used.
With DGPS in its most traditional approach, one receiver is placed at a known, surveyed location and is
referred to as the reference receiver or base station. Another receiver is placed at an unknown location and
is referred to as the remote receiver or rover. The reference station collects the code-phase and carrier-
phase measurements from each GNSS satellite in view.
• For real-time applications, these measurements and the reference station coordinates are then built
up to the industry standard RTCM – or various proprietary standards established for transmitting
differential data – and broadcast to the remote receiver(s) using a data communication link. The
remote receiver applies the transmitted measurement information to its observed measurements of
the same satellites.
• For post-mission applications, the simultaneous measurements from reference and rover stations
are normally recorded to the receiver’s internal memory (not sent over communication link).
Later, the data are downloaded to computer, combined, and processed.
Using this technique, the spatially correlated errors – such as satellite orbital errors, ionospheric errors,
and tropospheric errors – can be significantly reduced, thus improving the position solution accuracy.
A number of differential positioning implementations exist, including post-processing measuring, real-
time kinematic measuring, maritime radio beacons, geostationary satellites, and satellite based
augmentation systems (WAAS, EGNOS, MSAS). The real-time kinematic (RTK) method is the most
precise method of real-time measuring. RTK requires at least two receivers collecting navigation data and
communication data link between the receivers. One of the receivers is usually at a known location (Base)
and the other is at an unknown location (Rover). The Base receiver collects carrier phase measurements,
generates RTK corrections, and sends this data to the Rover receiver. The Rover processes this
transmitted data with its own carrier phase observations to compute its relative position with high
accuracy, achieving an RTK accuracy of up to 1 cm horizontal and 1.5 cm vertical.

Description and Operation
Getting Acquainted
Bluetooth® Module
12 www.javad.com
2. Getting Acquainted
The GISmore is a 216-channel GNSS receiver with internal batteries, an internal GSM modem, and a
Bluetooth® wireless technology module. The GISmore is a receiver that has been configured for
surveying. The GISmore is built with internal memory for recording survey data, and recorded data can
be downloaded using the Bluetooth® wireless technology. The GISmore receiver’s advanced design
reduces the number of cable required for operation, allowing you to survey more reliably and efficiently.
The casing allocates space for a rechargeable battery, a Bluetooth® wireless technology module, a multi-
system receiver board, and a GSM/GPRS modem.
Figure 2. GISmore dimensions in mm
Table 1.
2.1. Bluetooth®Module
A combination of software and hardware technology that makes the GISmore mobile, wireless, GNSS
receiver that supports a point-to-point serial profile. As such, the GISmore can transfer and synchronize
files between the receiver and any other Bluetooth®wireless technology device that supports serial
profile, including portable handheld devices and external controllers, Bluetooth®adapters for PC-USB/
RS ports, mobile computers and phones, IPAQs, PCMCA-to-Bluetooth adapters, etc.
With Bluetooth®wireless technology, the receiver’s reception and transmission distance is 10 meters (32
feet) for interior projects and 30–50 meters (98–164 feet) for exterior projects. The Bluetooth®module’s
processor and firmware are independent of the receiver card and power board.
>@
>@
>@
>@
>@
0
GHSWKPP
KROHV

Description and Operation
Getting Acquainted
Modem
13www.javad.com
2.2. Modem
The GISmore receiver incorporates an internal Cellular GSM/GPRS Modem with Telit® Module (GE864
- QUAD) - GSM/GPRS single quad-band cell phone frequency modem (Europe: 900/1800 MHz; USA
and Canada: 850/1900 MHz).
Note: To comply with RF exposure requirements, maintain at least 20 cm between the user and the transceiver.
The Base station operator is responsible for complying with local regulations for radio operation. In the
US, the FCC regulates the use of radio transmitters, requiring a license. Broadcasting without a license
can result in severe penalties including the confiscation of your radio and GNSS equipment.
2.3. External Components
The GISmore casing includes a user interface, and a power port.
• The On/Off (power) button turns the receiver on and off.
•Status LED - the unit status indicator shows information on the network service availability and call status
Charger Charge % Period Time Count Color
position +
solution +
disconnected
50 - 100 steady Green
position +
solution - Yellow
position -
solution - Red
< 50 1 0.5 1 solution
low battery 1 0.1 2 solution
charging
connected
< 100% 3 0.5 1 solution
charge
complete = 100% 3 1.5 1 solution
charge
error error 3 0.25 2 solution
Sleep 10 0.25 1 Red
ON/OFF button
Status LED
Power port

Description and Operation
Option Authorization File (OAF)
External Components
14 www.javad.com
• The Power Supply unit charges the internal battery when connected to a grounded outlet. This unit
converts the alternating current (AC) normally supplied from an electrical outlet to a direct current
(DC) used to charge the batteries and/or power the receiver.
3. Option Authorization File (OAF)
JAVAD GNSS issues an Option Authorization File (OAF) to enable the specific options that customers
purchase. An Option Authorization File allows customers to customize and configure the GISmore
according to particular needs, thus only purchasing those options needed.
Typically, all GISmore receivers ship with a temporary OAF that allows the receiver to be used for a
predetermined period of time. When the receiver is purchased, a new OAF activates desired, purchased
options permanently. Receiver options remain intact when clearing the NVRAM or resetting the receiver.
The OAF enables the following kinds of functions. For a complete list of available options and details,
visit the JAVAD GNSS website (http://www.javad.com) or consult your dealer.
Standard Configuration: Optional Features:
•GPSL1
• GLONASS L1 (G3 only)
• Update Rate 1 Hz
•RAIM
• Internal GNSS Antenna
• Internal GSM/GPRS Module
• Bluetooth® Interface
• Internal Bluetooth/GSM Antenna
• Internal Rechargeable Li-Ion Battery
• Galileo E1
• Update Rate 5Hz, 10Hz, 20Hz, 50Hz, 100Hz
• RTK Rate 1 Hz, 5Hz, 10Hz, 20Hz, 50Hz, 100Hz
• Data Recording up to 256 MB
• Multi-Base Code Differential Rover
• Code Differential Base
• Advanced Multipath Reduction
• KFK WAAS/EGNOS (SBAS)

Description and Operation
Operation
Software Installation
15www.javad.com
4. Operation
GISmore receiver can be configured via Victor controller with Tracy software, or via new JAVAD GNSS
VICTOR-VS controller with Tracy software or TRIUMPH software. Refer to the Tracy Software Manual
for detailed description how to configure receiver using Tracy software. Refer to TRIUMPH-VS
Operator’s Manual for detailed description how to configure GISmore using TRIUMPH Software. These
manuals are available at www.javad.com.
Sections below describe how to configure the receiver using PC and NetView software.
4.1. Software Installation
Installing NetView
Use the NetView software program for configuring and maintaining the receiver. This software is
available on the JAVAD GNSS website. NetView™ is a comprehensive Windows® software product
designed for controlling GNSS receivers developed by JAVAD GNSS.
Note: Refer to the NetView Software Manual for full details on installing and using NetView Software.
1. If downloading the program from the website, extract the program files into a folder on your hard drive.
2. Navigate to the location of the NetView program and double-click the Setup.exe icon.
3. Follow the on-screen installation instructions. Click Install to continue. Keep the default
installation location or select a new location.
4. If desired, create a shortcut on the computer’s desktop for quick access to NetView.
Installing ModemVU
ModemVUTM is a Windows® application is a configuration program for the radio modem inside the
receiver. ModemVU is available from the JAVAD GNSS website.
Note: Refer to the ModemVU Software Manual for full details on installing and using ModemVU Software.
1. If downloading the program from the website, extract the program files into a folder on your hard drive.
2. Navigate to the location of the ModemVU program and double-click the Setup.exe icon.
3. Follow the on-screen installation instructions. Click Next to continue, Back to get back to previous
step, or Cancel to quit the installation.
4. Keep the default installation location or select a new location.
5. Click Finish to complete the installation.
6. If desired, create a shortcut on the computer’s desktop for quick access to ModemVU.

Description and Operation
Operation
Installing Optional SIM Card
16 www.javad.com
4.2. Installing Optional SIM Card
The SIM card provides telephony communication for data transfer between two GSM-capable receivers.
The SIM card can be purchased at your local cellular phone supply store. Once installed, the card
generally remains installed.
The SIM card must support Circuit Switched Data to communicate directly between receivers. The SIM
card must have GPRS support to communicate with a GPS Network IP address.
To install SIM card:
1. Ensure the receiver is turned off.
2. Open the bottom of the case screwing off 9 self taping screws (Figure 3).
Figure 3. SIM Card installation
3. Remove battery and open SIM holder.
4. Carefully insert the SIM into the SIM card holder and push it to LOCK to close it tightly.
Figure 4. SIM Card installation 2
SIM card Holder
Battery
Screw
1
2

Description and Operation
Operation
Charging the Battery
17www.javad.com
5. Ensure the cords are located so that will not be stepped on, tripped over, or otherwise subjected to damage
Figure 5. SIM Card installation 3
6. Close the case.
4.3. Charging the Battery
C
AUTION
:
Risk of explosion if battery is replaced by an incorrect type. Dispose of used battery according to the instruc-
tions.
Before beginning to work, fully charge the battery for maximum operating time. An approximately 6-
hour charge cycle will fully charge the battery. The battery can not be overcharged.
The Li-Ion batteries used in the battery should run at no less than 80% capacity after 500 charging cycles.
These batteries do not need to be drained before recharging.
Note: The batteries are shipped from the factory with 40% of power. Fully charge the batteries before measuring
and surveying.
D
ANGER
:
NEVER ATTEMPT TO OPEN THE CASING OF THE DETACHABLE BATTERIES! LITHIUM-ION BATTERIES
CAN BE DANGEROUS IF MISHANDLED!
D
ANGER
:
DONOT INCINERATE OR HEAT BATTERY PACK ABOVE 212 DEGREES FAHRENHEIT (100 DEGREES
CELSIUS). EXCESSIVE HEAT CAN CAUSE SERIOUS DAMAGE AND POSSIBLE EXPLOSION.
D
ANGER
:
THE BATTERIES (OR BATTERIES INSTALLED) SHALL NOT BE EXPOSED TO EXCESSIVE HEAT SUCH
AS SUNSHINE, FIRE OR THE LIKE.
Warning:
Do not attempt to open the battery pack.
Warning:
Do not disassemble the battery pack.
Warning:
Do not charge in conditions different than specified.
Warning:
Do not use other than the specified battery charger.
Warning:
Do not short circuit the battery pack.
Warning:
Do not crush or modify the battery pack.
WRONG RIGHT

Description and Operation
Operation
Turning On/Off the Receiver
18 www.javad.com
Power supply requirements
The socket-outlet shall be installed near the equipment and shall be easily accessible.
The external power supply needs to be Listed for US and Certified for EU countries, it needs also to be a
Limited Power Source and rated for Outdoor Use and have an output rated for +4.5 to + 14 volts DC, 3A.
This may not be the same range as other JAVAD GNSS products with which you are familiar.
C
AUTION
:
To avoid the introduction of hazards when operating and installing, before connecting of the equip-
ment to the supply, make sure that the supply meets local and national safety ordinances and
matches the equipment’s voltage and current requirements.
C
AUTION
:
Never attempt any maintenance or cleaning of the supply while plugged in. Always remove supply
from AC power before attempting service or cleaning.
Warning:
If the voltage supplied is below the minimum specification, the receiver will suspend operation. If the voltage
supplied is above the maximum specification, the receiver may be permanently damaged, voiding your warranty.
Make sure cords are located so that will not be stepped on, tripped over, or otherwise subjected to
damage or stress. Do not operate equipment with a damaged cord or plug – replace immediately.
To reduce the risk of damage to the equipment, pull by the plug body rather than the output cord
when disconnecting the equipment.
Do not operate the supply if it has received a sharp blow, been dropped, or otherwise damaged. Do
not disassemble the supply.
Warning:
Before connecting the external power source and the receiver, make sure that the power source matches the
receiver’s voltage and current requirements.
Powering the Receiver
To charge the receiver internal battery, take the following steps:
• Plug the connector into the power port of the receiver.
• Plug the other end of this cable into an AC outlet.
• Turn off the receiver by pressing and holding the power key for more than one and less than four seconds.
• Leave overnight.
4.4. Turning On/Off the Receiver
To turn ON the receiver, press and hold the power button. To turn OFF the receiver, press and hold the
power key for more than one and less than four seconds (until LED is off). This delay (about 1 second)
will prevent the receiver from being turned off by mistake.

Description and Operation
Operation
Connecting the Receiver and a Computer
19www.javad.com
4.5. Connecting the Receiver and a Computer
JAVAD GNSS NetView software provides an interface for various configuration, monitoring, and
management functions for the receiver. To configure, manage files, or maintain the receiver, connect the
receiver and a computer using Bluetooth and start NetView:
Once you have established a connection between the receiver and the computer/controller, you will be
able to configure the receiver and its components, send commands to the receiver, download files from
the receiver’s memory; as well as, upload new firmware, upload an OAF, and upload configuration files to
a receiver, using NetView.
The GISmore receiver contains Bluetooth®wireless technology that allows file transfer and
synchronization between the receiver and any other external device that supports Bluetooth®wireless
technology; for example, JAVAD GNSS Victor, an IPAQ, or a computer with USB-to-Bluetooth®adapter
or PCMCA-to-Bluetooth®adapter installed.
The GISmore and external device connection procedure varies slightly depending on the type of external
device used. In general, the connection procedure is as follows:
Note: Refer to your Bluetooth®-enabled external device documentation for more detailed connection
information.
1. Turn on a Bluetooth®-enabled external device and your receiver. The default external device
mode is Master; the receiver’s Bluetooth®module mode is Slave.
2. Instruct the external device (Master) to search for the receiver (Slave).
3. Once the Master device detects the receiver, use the procedure described in the external device’s
documentation to connect it with the receiver.
4. Start NetView, select SER as type of connection mode, and specify the port the receiver is
connected to.
Figure 6. NetView - Connection via Bluetooth

Description and Operation
GISmore Configuration
Configuring Receiver
20 www.javad.com
5. GISmore Configuration
5.1. Configuring Receiver
GISmore receiver can be configured according the desired survey type, for RTK DGPS or for post-
processing:
• A stand-alone L1 device for mapping.
• A static rover which collects observation data from the same satellites during the same time
interval as the static base station.
• An RTK DGPS rover which collects measurement information and accepts corrections from the
RTK DGPS Base station to compute its relative position.
• A rover acting as a repeater to re-transmit RTK Base station measurements to other rover
receivers, extending the range of a GPS system.
Note: Refer to the NetView Software Manual for full software description.
1. Connect the receiver and computer as described in “Connecting the Receiver and a Computer” on
page 19. Start NetView. Select the connection type (SER) and connect the receiver and PC.
2. Click ReceiverParameters on the left panel.
Note: Click Apply every time after the parameter was changed, otherwise the receiver won’t save the changes.
Click Refresh, to ensure the changed parameters and new configuration are saved.
3. In the General tab check the parameter Antenna Input is
Internal
(Figure 7).
Figure 7. General tab
4. Open the TriPad tab and set the following parameters (Table 2), click Apply (Figure 8 on
page 21).
Table of contents
Other Javad Receiver manuals

Javad
Javad OMEGA User manual

Javad
Javad TRIUMPH-VS User manual

Javad
Javad Beacon User manual

Javad
Javad DELTA-3 User manual

Javad
Javad DELTA-3N User manual

Javad
Javad TRIUMPH-1M User manual

Javad
Javad TRIUMPH-3 User manual

Javad
Javad UHFSSRx User manual

Javad
Javad TRIUMPH-VS User manual

Javad
Javad DELTA User manual

Javad
Javad SIGMA Quick guide

Javad
Javad TRIUMPH-1 Quick guide

Javad
Javad TRIUMPH-LS User manual

Javad
Javad TRIUMPH-1M User manual

Javad
Javad TriPad User manual

Javad
Javad TRIUMPH-2 User manual

Javad
Javad TRIUMPH-LS User manual

Javad
Javad TRIUMPH-2 Guide

Javad
Javad TRIUMPH-VS User manual

Javad
Javad ALPHA User manual