2
UNPACKING THE SYSTEM
Carefully unpack the system. If you suspect damage from transit,
report it immediately
to
your dealer and/
or
delivery service. Keep
the shipping carton and packing materials for future use. Open the
package and verify the following contents:
INCLUDED
2
JBL
Control One Outdoor speakers
2 x wall-mount, rotatable brackets
(includes bar wrench and backup cords)
1 x Owner's Manual
PLACING
THE
SPEAKERS
Determine where
to
place the speakers. The following figures show
two
possible applications.
Application 1: Adding surround speakers
to
a home theater system.
•
Left
Surround
Channel
0
Left
Front
Channel
II
TV
Center
Channel
C+h
0
Right
Front
Channel
II
Subwoofer
D
•
Right
Surround
.
Channel
Application 2: Adding speakers
to
remote locations
in
your home.
•
Left
Front
Channel
45
° :
•
Right
Front
Channel
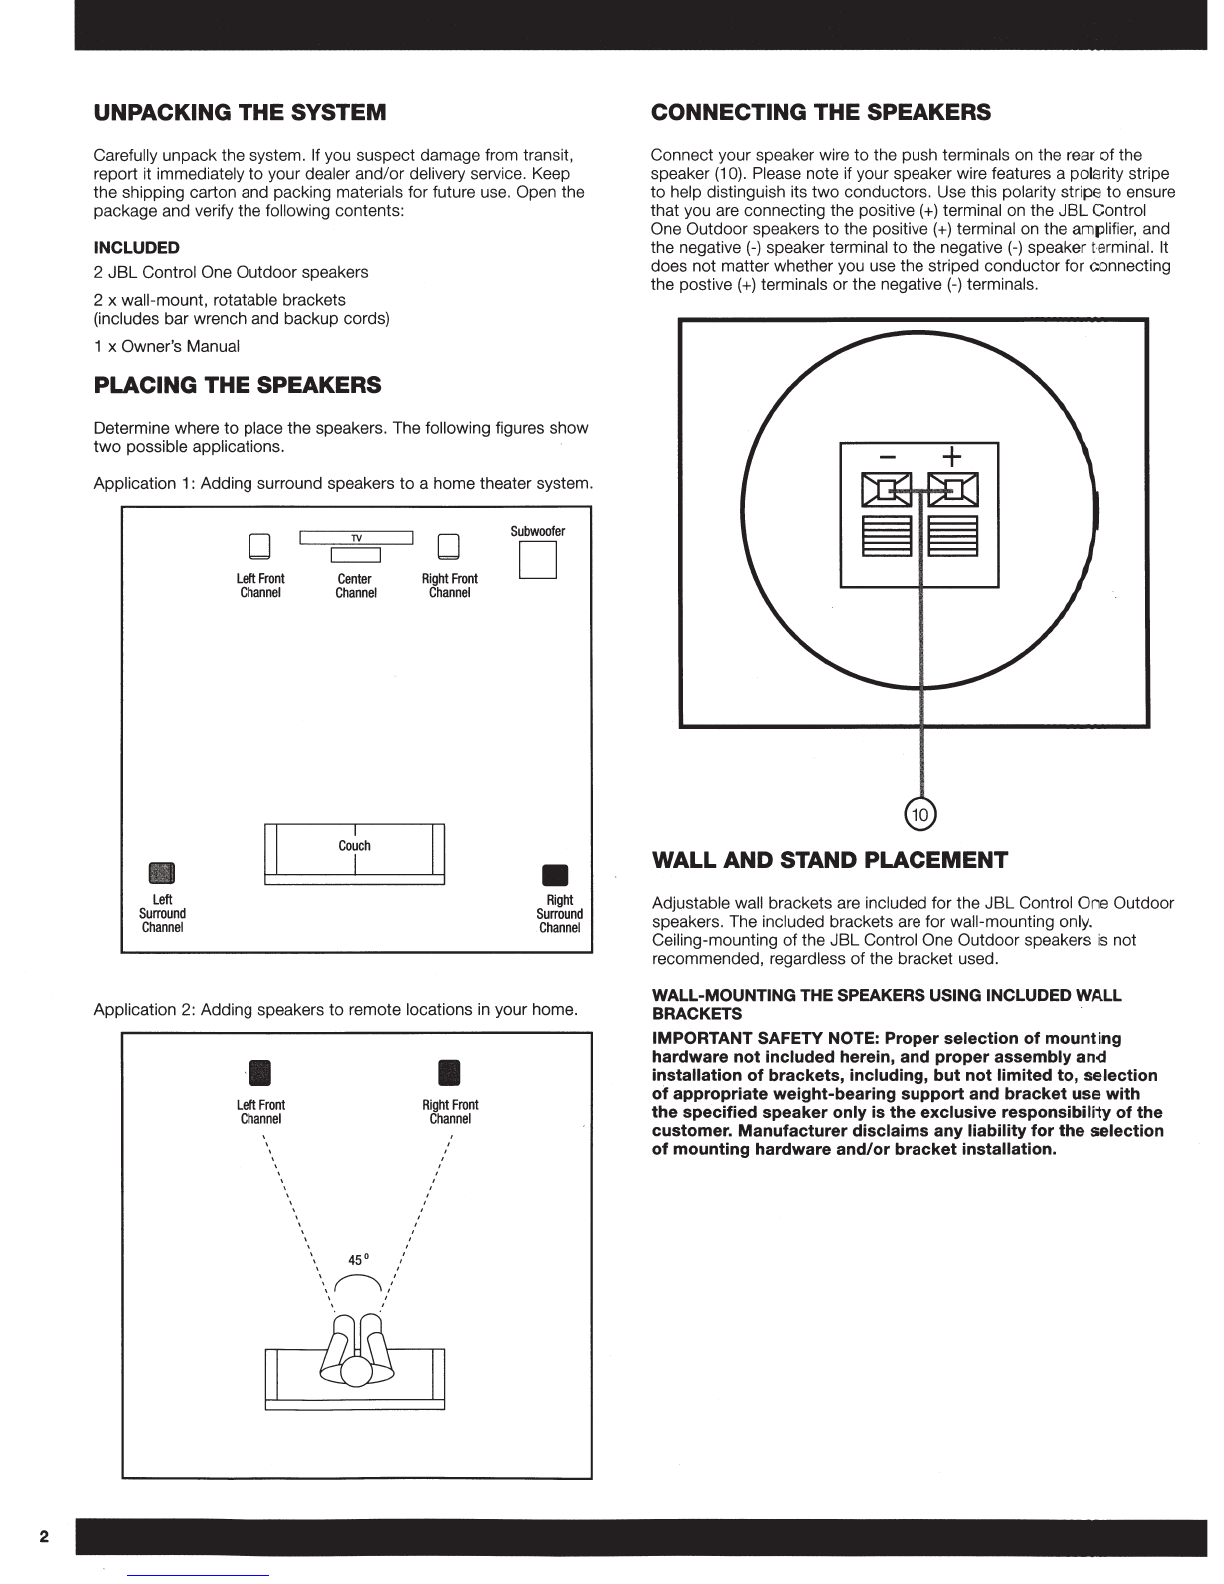
CONNECTING
THE
SPEAKERS
Connect your speaker wire to the push terminals on the rear
of
the
speaker (1
0).
Please note
if
your speaker wire features a polarity stripe
to
help distinguish its
two
conductors. Use this polarity stripe
to
ensure
that you are connecting the positive (+)terminal on the
JBL
Control
One Outdoor speakers to the positive
(+)
terminal on the amplifier, and
the negative(-) speaker terminal
to
the negative(-) speaker terminal. It
does not matter whether you use the striped conductor for connecting
the postive (+)terminals
or
the negative(-) terminals.
10
WALL AND STAND PLACEMENT
Adjustable wall brackets are included for the JBL Control One Outdoor
speaker
s.
The included brackets are for wall-mounting only.
Ceiling-mounting ofthe
JBL
Control One Outdoor speakers s not
recommended, regardless of the bracket used.
WALL-MOUNTING THE SPEAKERS USING INCLUDED WALL
BRACKETS
IMPORTANT SAFETY NOTE: Proper selection
of
mounting
hardware
not
included herein, and proper assembly
an<l
installation
of
brackets, Including, but
not
limited to, selection
of
appropriate weight-bearing support and bracket use with
the specified speaker only is the exclusive responsibiliiy of the
customer. Manufacturer disclaims any liability for the selection
of
mounting hardware and/or bracket installation.


