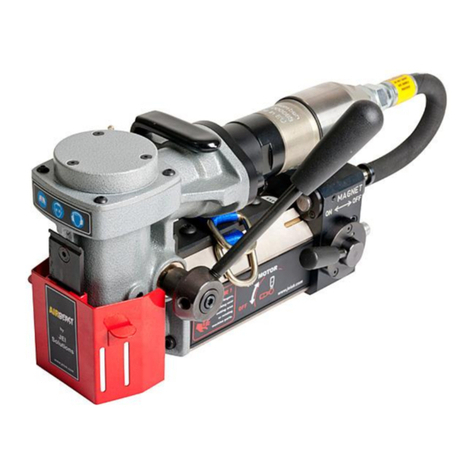
JEI MAGBEAST HM140T Operation and maintenance manual

1 | P a g e
SAFETY INSTRUCTIONS
AND OPERATORS MANUAL
FOR
DRILLING MACHINE
MAGBEAST HM140T
Unit 21 Empire Business Park, Enterprise Way, Burnley, Lancashire
England BB12 6LT UK
Tel. +44 (0)1706 229490 Fax. +44 (0)1706 507347

2 | P a g e
ELECTRO-MAGNETIC DRILLING MACHINES
C E
EC Declaration of conformity certificate No. EC/MT
We hereby certify that the machine described below:-
1. Type: Electromagnetic Drilling Machine
2. Model No: _____________________
3. Serial No: ______________________
4. Voltage: _______________________
Complies with: Machinery directive 89/392/EEC incorporating amendments-
91/368/EEC, 93/44EEC and 93/68/EEC. Low voltage directive 73/23/EEC and standard CE1/1EC
1029-L and with the essential health and safety requirements
PLEASE READ THESE INSTRUCTIONS CAREFULLY BEFORE USING
THE EQUIPMENT
MANUFACTURED BY:
JEI GROUP LTD
UNIT 21 EMPIRE BUINESS PARK, ENTERPRISE WAY
BURNLEY
LANCASHIRE
BB12 6LT
UNITED KINGDOM
TEL: 01706 229490 FAX: 01706 507347
PLEASE READ BEFORE OPERATING THE MACHINE

3 | P a g e
Remove the unit from its case along with the accessories included:
The box should contain, where appropriate:-
•HM140T Drilling Machine
•Oil Bottle
•Operating Instructions
Accessory pack containing:-
•Chain and Carabina Book
•Allen key and jib strip adjustment
•Allen key for arbour
•Drill drift
•Chuck & Key (Optional extra)
Please check that the unit is the correct voltage, see plate on motor unit.
Fit the correct power plug for the supply outlet.
Connect the wire coloured green & yellow to the terminal marled ‘E’ or ‘I’ or coloured green/yellow
Connect the wire coloured blue to the terminal marked ‘N’ or the coloured black.
Connect the wire coloured brown to the terminal marked ‘L’ or coloured red.
WARNING –THIS MACHINE MUST BE EARTHED
SAFETY INSTRUCTIONS
Please follow these simple instructions for your own protection:
1. Check cable and plug for any damage
2. Never use blunt cutters (send your cutters back to JEI for resharpening)
3. Always wear safety goggles and gloves
4. Secure the unit with the safety chain when working overhead or vertical.
5. Always disconnect from the power source before changing cutters or working on machines
itself.
6. Remove rings, watches, ties etc that could tangle in the moving machine parts
7. Keep the unit and the workplace as clear of dirt and swarf as possible –check out JEI
Magbrushes for quick and effective collection of swarf.
8. Do not attempt to change speed or reverse while the drill is operating and running.
9. Regular maintenance is essential, check nuts, screws and bolts for tightness.
10. Always use the safety guard where appropriate
IMPORTANT: THESE INSTRUCTIONS ARE FOR YOUR OWN SAFETY.

4 | P a g e
IMPORTANT SAFETY INFORMATION: SAFETY RULES FOR POWER TOOLS
WARNING:
When using electric tools, basic safety precautions should always be followed to reduce the risk of
fire, electric shock and personal injury.
READ ALL INSTRUCTIONS
1. KEEP WORK AREA CLEAN: Cluttered areas and benches invite injures
2. CONSIDER WORK AREA ENVIRIOMENT:
Don’t expose power tools to rain
Don’t use power tools in damp or wet locations
Keep work area well lit
Don’t use tool in presence of flammable liquids or gases
Power tools produce sparks during operation. They also spark when switching ON/OFF.
Never use power tools in dangerous sites containing lacquer, paint, benzene, thinner, gasoline,
and gases, adhesive materials which are combustible or explosive.
3. GUARD AGAINST ELECTRIC SHOCK. Prevent body contact with grounded surfaces.
For example: pipes, radiators, ranges, refrigerator encloses.
4. KEEP CHILDREN AWAY: Do not let visitors contact tool or extension cord. All visitors should
be kept away from work area.
5. STORE IDLE TOOLS: When not in use, tools should be stored in dry and high or locked up
place out of reach of children.
6. DONT FORCE TOOL: It will do the job better and safer at the rate for which it was intended.
7. USE RIGHT TOOL: Don’t force small tool or attachment to do the job of a heavy duty tool.
Don’t use tool for purposes not intended
8. DRESS PROPERLY: Do not use wear loose clothing. They can be caught in moving parts.
Rubber gloves and non skid footwear are recommended when working outdoors.
Wear protective hair covering to contain long hair.
9. USE SAFETY GLASES: All persons in the area where power tools are being operated should
also wear safety eye protectors and face or dust masks.
10. DONT ABUSE CORD: Never carry tool by cord or yank it to disconnect from receptacle. Keep
cord from heat, oil and sharp edges.
11. SECURE WORK: Use clamps or a vice to hold work. It’s safer that using your hand and it
frees both hands to operate tool.
12. DON’T OVEREACH: Keep proper footing and balance at all times
13. MAINTAIN TOOLS WITH CARE: Keep tools sharp and clean for better and safer
performance.
Follow instructions for lubricating and changing accessories
Inspect tool cords periodically and if damaged, have repaired by authorised service facility.

5 | P a g e
Keep handles dry, clean, and free from oil and grease.
14. DISCONNECT TOOLS: When not in use, before servicing and when changing accessories,
such as blades, bits and cutters.
15. REMOVE ADJUSTING KEYS AND WRENCHES: Form habit of checking to see that keys and
adjusting wrenches are removed from tool before turning it on.
16. AVOID UNINTENTIONAL STARTING: Don’t carry plugged in hand tool with finger on switch.
Be sure switch is off when plugging in.
17. OUTDOOR USE EXTENSION CORDS: When tool is used outdoors, use only extension cords
intended for outdoors and so marked.
18. STAY ALERT: Watch what you are doing, use common sense. Do not operate tool when you
are tired.
19. CHECK DAMAGED PARTS: Before further use of tool, a guard or other part that is damaged
should be carefully checked to determine that it will operate properly and perform its
intended function. Check for alignment of moving parts, binding of moving parts, breaking
of parts, mounting and any other conditions that may affect its operation. A guard or other
part that is damaged should be properly repaired or replaced by an authorised service
centre unless otherwise indicated elsewhere in this instruction manual.
Have defective switches replaced by authorised service centre.
Do not use tool if switch does not turn it on and off.
20. AVOID USING A POWERTOOL FOR APPLICATIONS OTHER THAN THOSE SPECIFED.
Never use a power tool for applications other than those specified in the instruction manual.
21. ENSURE SAFE OPERATION THROUGH CORRECT HANDLING. Secure safe operation through
correct handling by observing the instruction herein.
Do not employ accessories other than those specified herein; otherwise a hazardous condition
may be created.
Never allow a power tool to be used by persons not familiar with correct handling (such as
children) or those who cannot handle the tool correctly.
22. CONFIRM THAT NO ITEMS SUCH AS AN ELECTRIC CABLE OR CONDUIT ARE BURIED INSIDE:
In places where live wiring may be hidden behind a wall, floor, ceiling, etc. Do not hold or
contact any metal parts of the tool. In such cases metal parts could become electrically live
and present a serious shock hazard.
23. KEEP THE RIGHT PARTS IN THE RIGHT POSITIONS: Do not remove covers and screws which
have been factory mounted. They perform important retrospective roles. Keep them in the
right positions.
24. SHOULD THE PLASTIC HOUSING OR HANDLE OF A POWER TOOL BE CRACKED OR
DEFORMED. DO NOT USE IT: Since cracked or deformed parts may lead to an operator
receiving an electric shock, do not use such a power tool. Immediately have it repaired.
25. SECURELY MOUNT ACCESSORIES AND BLADES TO THE TOOL MAIN BODY: Extra care must
be taken when using tools on elevated locations (such as a roof, ladder, scaffold or such like)
to prevent injury to someone on a lower level in the event of the tool and or accessory
should drop.

6 | P a g e
26. ALWAYS KEEP THE MOTOR AIR VENT FULLY OPENED: A constantly open motor vent is
necessary to allow air to come in and out for cooling the motor. Do not allow it to become
clogged up, even if the dust is blown through it.
27. OPERATE POWERTOOLS AT THE RATED VOLTAGE: Operate power tools at voltages
specified on their nameplates.
28. NEVER TOUCH THE MOVING PARTS: Never touch the moving parts such as blades, bits,
cutters and others.
29. STOP OPERATION IMMEDIATLEY IF ANY ABNORMALITY IS DETECTED: Should a power
tool be detected as out of order or should other abnormalities be observed during
operation , stop using the tool immediately.
30. NEVER LEAVE TOOL RUNNING UNATTENDED. TURN POWER OFF: Don’t leave tool until it
comes to a complete stop.
31. CAREFULLY HANDLE POWERTOOLS: Should a power tool be dropped or struck hard against
hard materials inadvertently it may be deformed, cracked or damaged.
32. DO NOT WIPE PLASTIC PARTS WITH SOLVENT: Solvents such as gasoline, thinner, benzene,
carbon tetrachloride, and alcohol may damage and crack plastic parts. Do not wipe them
with solvents. Wipe plastic parts with a soft cloth lightly dampened with soapy water.
33. WHEN REPLACING A COMPONENT PART, ADOPT THE SAME TYPE: When replacing a
component part with a new one, adopt the same type of new part. Also never attempt to
repair a power tool yourself.
ENVIROMENTAL PROTECTION
Raw material recycling instead of waste disposal
In order to avoid damages on transportation, the power tool has to be delivered in sturdy packing.
The packing as well as the tool and its accessories are made of recyclable materials and can be
disposed accordingly.
The tools plastic components are marked accordingly to their material, which makes it possible to
remove environmental friendly and differentiated because of available collection facilities.
ONLY FOR EU COUNTRIES
Do not dispose of household tools together with household waste material, In
observance of European directive 2002/96/EC on waste electrical and electronic
equipment and its implementation in accordance with national law, electric tools
that have reached the end of their life must be collected separately and returned to
an environmentally compatible recycling facility.
NOISE EMISSION / VIBRATION

7 | P a g e
The indication of noise emission is measured according to DIN 45 635, part 21. Level of acoustic
pressure on the work place could exceed 85 dB (A) in this case protection measures must be taken.
WEAR EAR PROTECTORS!
The typical hand arm vibration is now below 2.5m/s 2
Measured values determined according to EN 50 144
The declared vibration emission level represents the main applications of the tool. However if the
tool is used for different applications with different accessories or poorly maintained the vibration
emission may differ. This may significantly increase the exposure level over the total working
period.
SAFETY CLUTCH
The safety clutch should absorb shock and excessive stress. It is an aid and not an absolute
protection. Therefore you have to handle and drill carefully.
To keep in good condition the clutch should slip for a very short time (max 2 seconds) in each case
only.
After excessive wearing the clutch has to be renewed by an authorised service shop.
Always ensure that the motor is fully stopped before attempting to change the speed of the
machine.
OPERATING THE MACHINE
a) Fitting the cutter or drills
Always unplug the power source to the machine before fitting or removing cutters or drills into
the arbour. To fit cutters loosen both screws to permit the cutter shank to fit fully into the
arbour ensuring the flats of the cutter are in line with set screws, then tighten the set screws
until the cutter is safely locked in to the arbour.
With a gloved hand or a brush clean any dirt or swarf from the base of the magnet and the work
piece and place unit in correct place for drilling.
Attach safety chain by looping it through the handle of the machine and around the work piece
or other suitable anchor point. Take up any slack on the chain and clip the hook through a
convenient link in the chain.

8 | P a g e
Plug the power cable in to a suitable power supply (using extension lead of the correct rating if
necessary) The use of an RCD is also highly recommended.
b) Drilling –Broaching
Energise the magnet by switching on the magnet switch
Check the magnet is holding to the work piece. Using the oil bottle add oil to the work piece. If
cutting in inverted position it is recommended an aerosol foam coolant or cutting paste is used.
Select the required speed. Do NOT attempt to change speed while the machine is drilling.
Start Motor
Please note that the motor will not run unless the magnet is energised.
If for any reason the power is interrupted the relay makes it necessary to restart the motor
again before cutting can continue.
Advance the cutter to the work piece using light and controlled pressure until the cutter has
broken the surface, then increase pressure until the motor is loaded. Maintain even pressure
right through the cut.
Too much pressure will NOT speed up the cut, it will reduce the life of the cutter and may cause
damage to the motor.
If the turnings become blue add more oil. At the end of the cut the slug will be ejected, check
before commencing next hole.
Stop motor, switch off magnet.
WARNING: Under no circumstances try to remove turnings or swarf from the cutter when
machine is in operation. NEVER introduce and body parts to moving parts of the machine when it is
switched on.
This document is issued for general information and instruction and as such does not constitute a
specification of the equipment.
Only use faultless and sharp drilling tools and avoid that the machine stops due to overload.
MOUNTING THE TOOL
DISCONNECT THE PLUG FROM THE MAINS BEFORE EVERY TOOL CHANGE!

9 | P a g e
Twist Drills:
Drills with MT3 connection can be directly fitted in the drill spindle.
For twist drills with MT2 connection use a reducing sleeve MT3 –MT2
For twist drills with parallel shank use a drill chuck B18 with appropriate taper mandrel MT3 –B18
Core Drills:
For working with core drills you need a mount MT3 –0 19 Weldon
Fit the ejector pin of suitable length in the core drill.
Place the core drill in the Weldon mount so that the two allen screws hit the two surfaces of the
shaft.
Tighten the allen screws equally.
Attention!!
Never press the tool into the tool connection with might and main!
Morse tapper and –cone have to be free of grease and dirt.
REMOVING THE TOOL
Put the drill drift in the opening of the gearbox collar.
If you cannot insert the drill drift through the work spindle, turn the work spindle slightly.
Remove the tool from the work spindle by a slight impact on the drill drift.

10 | P a g e
JEI Six (6) month limited warranty
JEI warrants the HM140T Drilling machine to be free of defects in material and workmanship under
normal use for a period of six months from date of purchase. This warranty does not cover
damage or wear which arise from misuse, accident, tampering or any other causes not related to
defects in workmanship or materials. This warranty is conditioned upon the prepaid return of the
HM100T Machine to JEI Group Ltd, Unit 21 Empire Business Park, Enterprise Way, Burnley, Lancs.
Or our International representative for our international customers for examination and verification
of the claimed defects. If defect is verified, JEI Group Ltd will replace, free of charge, any defective
parts. If inspection of the machine does not disclose any defect in workmanship or materials, the
original purchaser will be notified by JEI Group Ltd, or its representative, of the costs of necessary
repairs. If repairs are authorized, repairs will be made and the costs of repair and return
transportation will be billed through the customer’s distributor.
THIS WARRANTY IS EXCLUSIVE, AND IS IN LIEU OF ANY OTHER WARRANTIES (EXPRESSED OR
IMPLIED) INCLUDING WARRANTY OF MERCHANT ABILITY OR FITNESS FOR A PARTICULAR PURPOSE,
SPECIAL AND CONSEQUENTIAL ARE EXPRESSLY EXCLUDED AND DENIED.
MANUFACTURED BY:
JEI GROUP LTD
UNIT 21 EMPIRE BUSINESS PARK
ENTERPRISE WAY
BURNLEY, LANCASHIRE
BB12 6LT
TEL: 01706 229490 FAX: 01706 830496
EMAIL: [email protected] Website: www.jeiuk.com
Table of contents
Other JEI Drill manuals
