manuals.online logo
Brands
  1. Home
  2. •
  3. Brands
  4. •
  5. Jenn-Air
  6. •
  7. Cooktop
  8. •
  9. Jenn-Air CCGP2720P User manual

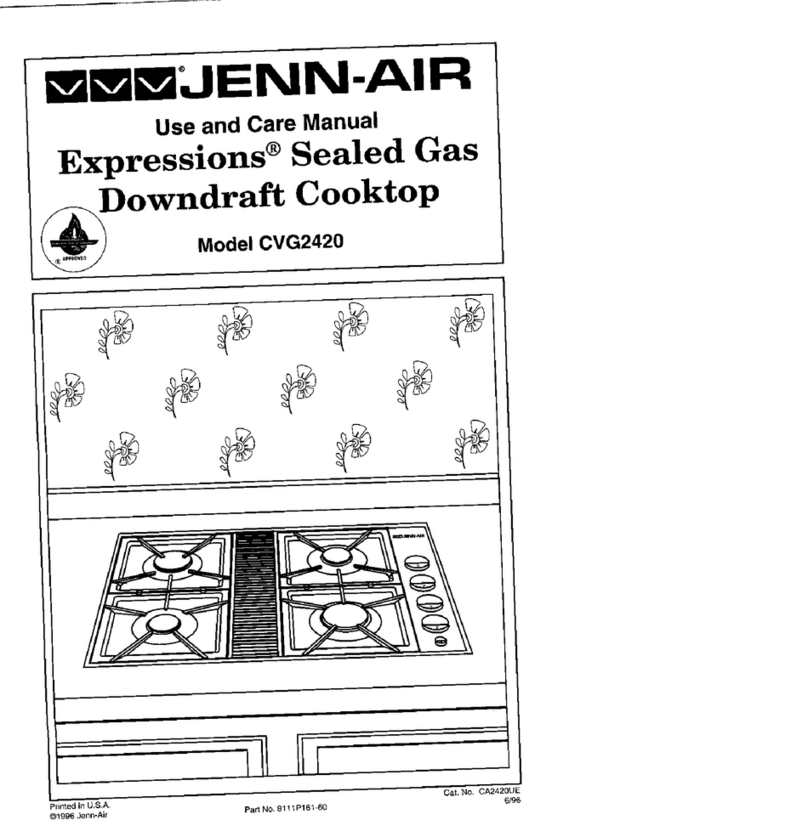
Jenn-Air CCGP2720P User manual

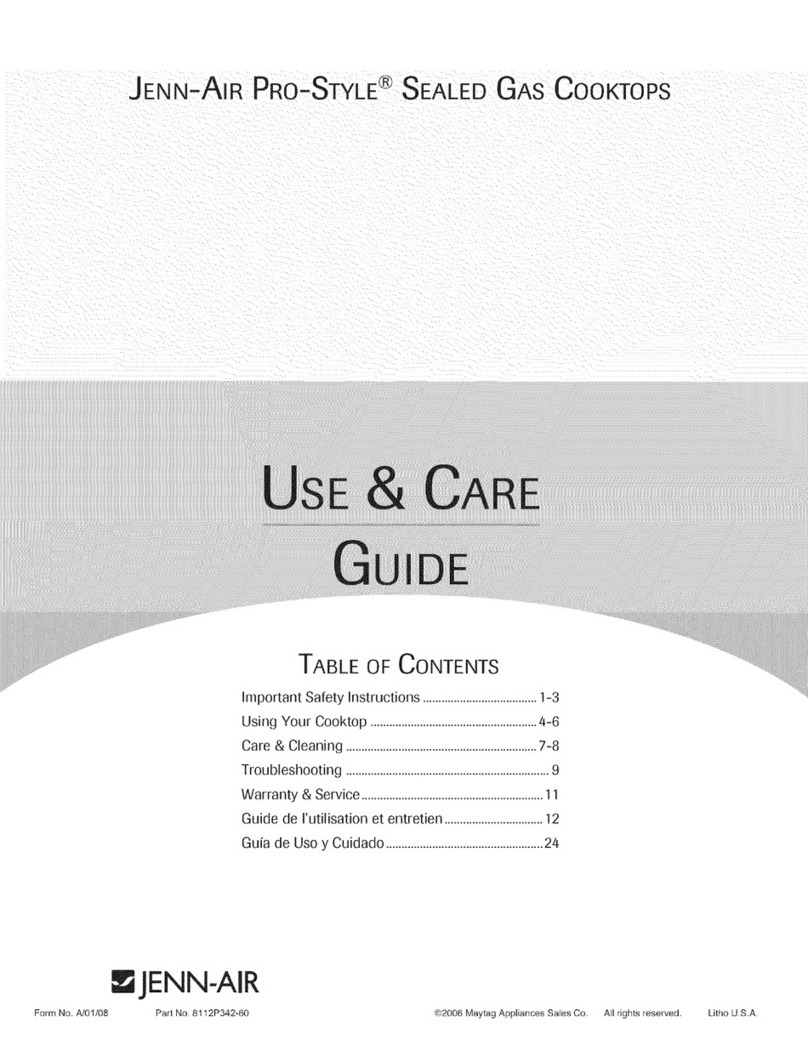
Models CCGP2420P, CCGP2720P, CCGP2820P
444444444444444444444444444444444444
Pro-Style
Sealed Gas
Cooktop Guide
WWEJENN-AIR
For Future Assistunce .............................. 1
Safety Instructions ...............................2-3
Using Your Cooktop .............................4-6
Cooktop at LIGlance
Setting the Controls
Heat Settings
Opera tins During Power Failure
Lo FIllme Adjustment
Using the Griddle (select models)
Care Lmd Cleaning. ............................... 7-8
Before You Call for Service ...................... 9
Wurun ty ... .... .......... ................ ,...... 11
4444444444444444
Congratulations on your choice of a Jenn-Air gas cooktop.
Your complete satisfaction is very important to us.
Read this user’s guide carefully. It is intended to help you
operate and maintain your new cooktop.
In addition, you will find abooklet entitled “Cooking Made
Simple.” It contains information on selecting cookware, pan
sizes and heat setting recommendations.
Savetime and money. Check the “Before You Call” section
ofthis guide. It lists causesof minor operating problems that
you can correct yourself.
However, should you need service, it is helpful to have the
model and serial numbers available. This information can be
found on the dataplate located on the bottom of the cooktop.
Theac numbers arealso on the Product Registration card that
camewith your appliance. Before sending in this card record
thcsc numbers along with the purchase date below.
Model Number
Serial Number
Date of Purchase
IMPORTANT: Keep this guide and the sales receipt in a
safeplace f3rfuture reference. Proof of originalpurchase
date is neededfor warranty service.
If you have any questions, write us (include your model
number and phone number) or call:
Jenn-Air Customer Service
Attn: CAIR”” Center
P.O. Box 2370
Cleveland, TN 37320-2370
l-800-688- 1100(USA and CANADA)
l-800-688-2080 (U.S. TTY for deaf, hearing
impaired or speech impaired)
(Mon. - Fri., 8 am-8 pm Eastern Time)
Internet: http://www.jennair.com
For service information, seepage 9.
NOTE: In our continuing effort to improve the quality
and pe$ormance
qf
our cooking products, it may be
necessary to make changes to the appliance without
revising this manual.
Do not store or use gasoline or other flammable ~
vapors and liquids in the vicinity of this or any
other appliance.
WHAT TO DO IF YOU SMELL GAS
+ Do not try to light any appliance.
+ Do not touch any electrical switch.
+ Do not use any phone in your building.
+ Immediately call your gas supplier from
a neighbor’s phone. Follow the gas
supplier’s instructions.
+ If you cannot reach your gas supplier,
call the fire department.
+ Extinguish any open flame.
Installation and service must be performed by ~
a qualified installer, service agency or the gas
supplier.
SAVE THESE INSTRUCTIONS I
I FOR FUTURE REFERENCE ~
IMPORTANT SAFETY INSTRUCTIONS t-i?
944e444
4a4**~4*44444+*6444444444444444444
All appliances - regardless of the manufacturer - have the
potential through improper or careless
use to
create safety
problems. Therefore the following safety precautions should
be observed:
1~ Besureyour appliance isproperly installed andgrounded
by a qualified technician.
’... Never use your appliance for warming or heating the
room, This warning is basedon safety considerations.
3. Children should not be left alone or unattended in area
where appliance is in use. They should never beallowed
to sit or stand on any part of the appliance.
-1. Wear proper apparel. Loose-fitting or hanging gar-
ments should never bevvorn while using the appliance.
3. Do not repair or replace any part of the appliance unless
specifically recommended in this manual. All other
servicing should be referred to an authorized Jenn-Air
Servicer.
:Y. Do not store combustible materials, gasoline or other
flammable vapors and liquid near cooktop.
Do not usewater on greasefires. Smother fire or flame
or
LISC
dry chemical or foam-type extinguisher.
ci Useonly dry potholders. Moist or damp potholders on
hot surfacesmay result in burns from steam. Do not use
a towel or other bulky cloth.
‘:- Never leave cooktop unattended at Hi heat settings.
Boilovercauses smoking andgreasy spillovers that may
ignite.
!tt. Select cookware large enough to properly contain food
and avoid boilovers or spillovers. This will save on
cleaning and prevent hazardous accumulations of food,
since heavy splattering or spillovcrs left on a cooktop
can ignite. Pan size is especially important in deep fat
frying.
: t Avoid pansthat areunstable andeasily tipped. Pansthat
arctoo heavy when filled with food canalso beahazard.
If panhandles twist and cannot be tightened, discard the
pan. Also, avoid using pans,especially small pans,with
heavy handles asthey could be unstable and easily tip.
17 Always turn pan handles to the side or back of the
-. cooktop -not out into the room where they areeasily hit.
COOKWARE HANDLES SHOULD BE TURNED
INWARD AND NOT EXTEND OVER ADJACENT
SURFACE BURNERS to minimize burns, ignition of
flammable materials, and spillage due to unintentional
contact with the cookware.
1.3. Only certain types of glass, glass-ceramic, ceramic,
earthenware, or other glazed cookware are suitable for
cooktop surface without breaking due to the sudden
change in temperature. Use only such cookware asyou
know has been approved for this purpose. Follow
manufacturer’s instructions when using glass.
l-1. CAUTION - Do not store items of interest to children
in cabinets above cooktop. Children climbing on the
cooktop to reach items could be seriously injured.
;3, Do not touch surface burner areas, griddle area or any
areasnearburners or griddle. During andafter use,these
areasmay be hot enough to causeburns. Avoid contact
with theseareasby clothing or other flammable materi-
als until they have had sufficient time to cool.
IO. Do not heat unopened food containers. Build-up of
pressure may cause container to burst and result in
injury.
7.
i Keep all controls “Off’ when unit is not in use.
1;. GREASE - Greaseis flammable and should behandled
carefully. Never leave any cooking operation unat-
tended. Let fat cool before attempting to handle it. Do
not allow greaseto collect around the cooktop or hood.
Wipe
LIP
spillovers immediately. Clean hood frequently
to prevent greasefrom accumulating on hood or filter.
When flaming foods under the hood turn the fan on.
19. If thecooktop is installed nearawindow, proper precau-
tions should be taken to prevent curtains from blowing
over burners creating a FIRE HAZARD.
2ha. Do not use aluminum foil to line burner drip pan.
Restriction of normal air flow may result in unsafe
operation.
2i L Clean only partslisted in this manual anduseprocedures
recommended.
72. Always allow hot pansto cool in asafeplace out of the
reach of small children.
s
IMPORTANT SAFETY
l +***************4*
23.
24.
25.
26.
27.
28.
29.
30.
31.
A faint gasodor may indicate a gas leak. If a gasodor
is detected, shut off the gassupply to the cooktop. Call
your installer or local gascompany to have the possible
leak checked. Never use a match or other flame to
locate a gas leak.
Flame size should be adjusted so it does not extend
beyond the edge of the cookware. This instruction is
basedon safety consideration.
This appliance has been tested for safe performance
using conventional cookware. Do not useany devices or
accessories that are not specifically recommended in
this manual. Do not use eyelid covers for the surface
burners or stovetop grills. The use of devices or acces-
soriesthat arenot expressly recommended in this manual
can create serious safety hazards, result in performance
problems and reduce the life of the components of the
appliance.
Before servicing shut off electrical power supply to
appliance.
Never cover control area with dishtowel, potholders,
etc., or aluminum foil which could obstruct cooling and
combustion air from entering the appliance at the con-
trol knob area.
Do not usealuminum foil to line griddle basin. Installa-
tion of aluminum foil may result in electric shock or fire
hazard.
Do not soak or immerse removable heating elements,
such asthe griddle, in water .
Do not operatewith damagedcooking element after any
product malfunction until proper repair hasbeen made.
Do not let cooking greaseor other flammable materials
accumulate in or near the appliance, hood or vent fan.
Clean hood frequently to prevent greasefrom accumu-
lating on hood or filter. When flaming foods under the
hood turn the fan on.
INSTRUCTIONS
4 4 4 4 4 4 4 4 4 4 4 4 4 4 4 4 4
WARNING
Electrical Grounding Instructions
The appliance is equipped with a three-
prong grounding plug for your protec-
tion against shock hazard and
should be plugged directly into a
properly grounded three-prong
receptacle. Do not cut or re-
movethegrounding prong from
this plug.
IMPORTANT SAFETY NOTICE
AND WARNING
The California SafeDrinking Water and Toxic Enforcement
Act of 1986 (Proposition 65) requires the Governor of Cali-
fornia to publish a list of substancesknown to the State of
California to causecancer or reproductive harm, andrequires
businessesto warn customers of potential exposures to such
substances.
Usersof this appliance arehereby warned that the burning of
gas can result in low-level exposure to some of the listed
substances, including benzene, formaldehyde and soot, due
primarily to the incomplete combustion of natural gas or
liquid petroleum (LP) fuels. Properly adjusted burners will
minimize incomplete combustion. Exposure to these sub-
stancescan beminimized by properly venting the cooktop to
the outdoors.
SAVE THESE INSTRUCTIONS FOR FUTURE REFERENCE
Cooktop at a Glance
There are three models included in this guide.
+ Model CCGP2820P is 48” and has six burners and a griddle. Optional backsplash Model A509S.
4 Model CCGP2720P is 36” and has four burners and a griddle. Optional backsplash Model JXT9027AAP.
+ Model CCGP2420P is 30” and has four burners. Optional backsplash Model JXT9024AAP.
MODEL CCGP2820P
1.
Left front burner (15,000 BTUs). This burner may be
usedto quickly bring water to a boil for large-quantity cooking.
2. Left rear burner (9,100 BTUs).
3. Center front burner (6,500 BTUs on Hi).
This burner is designed for cooking delicate items.
4. Center rear burner (10,500 BTUs).
5. Right front burner (15,000 BTUs). This burner may be
usedto quickly bring water to aboil for large-quantity cooking.
1
6.
Right rear burner (9,100 BTUs).
7. Electric griddle (1,300 Watts).
MODEL CCGP2720P
1.
Left front burner (6,500 BTUs on Hi).
This burner is designed for cooking delicate items.
2. Left rear burner (10,500 BTUs).
3. Right front burner (15,000 BTUs). This burner may be
usedto quickly bring water to a boil for large-quantity cooking.
4. Right rear burner (9,100 BTUs).
5. Electric griddle (1,300Watts).
MODEL CCGP2420P
1.
Left front burner (6,500 BTUs on Hi).
This burner is designed for cooking delicate items.
2. Left rear burner (10,500BTUs).
3. Right front burner (15,000 BTUs). This burner may be
usedto quickly bring water to aboil for large-quantity cooking.
4. Right rear burner (9,100 BTUs).
NOTE: BTU ratings will vary when using LP gas.
5
Using Your Cooktop
44444444444444444444444444444444444444444
Setting the Controls Burner Heat Settings
Your cooktop hassealedgasburners with automatic re-ignition. Thesizeandtype of cookware will affect theheatsetting. For
If the burner flame should go out, the system will automatically .
m
formation on cookware, refer to “Cooking Made Simple”
spark to reignite the burner. booklet.
1. Place apan on the burner grate. (To preserve the grate finish,
donot operatethe burners without apanon thegrateto absorb An infinite number of settings exist between Hi and Lo. Use
the heat from the burner flame.)
2. Push in knob and turn immediately
+ All ignitors will spark and click when any surface
burner knob is turned on. However, only the selected
burner will light.
+ A properly adjusted burner with clean ports will light
within afew seconds.The cone-shaped flame will be
clear blue in color with adeeperblue inner core; there
should be no trace of yellow in the flame. (With LP
gas, someyellow tips on the flames are acceptable.)
If the burner flame is yellow, lifts off the ports or is
noisy, the air/gas mixture may be incorrect. Contact
a service technician to adjust.
+ Match the pan size to the surface burner.
+ Do not let theburner flame extend beyond the edgeof
the pan.
the following chart asa guide.
Setting
Hi
Recommended Use
4 To start foods
b... ....d cooking.
--- + To bring liquids to
a boil.
Med 4 To fry most foods.
+ To maintain boil of
large amounts of
food.
+ To keep food warm.
+ To melt butter or
chocolate.
Operating During Power Failure
Hold a lighted match to the desired surface burner near the
burner ports. Push in and slowly turn the control knob
counterclockwise until the gas ignites.
NOTE: Do not leave the cooktop unattended when cook-
ing during a power failure. The automatic reignition
feature will not operate during a power failure.
Using Your Cooktop
6
44444444444444444444444444444444444444444
Lo Flame Adjustment
This appliance has been shipped from the factory with Lo
andMed flame settings adjusted for usewith natural gasand
average installations.
There is awide variety of conditions causedby altitude and
gasmixtures controlled by utility companies which will vary
and affect the gas flame and performance. Adjustments
should be made at time of installation.
If conditions change, follow the procedures outlined below
to adjust the Lo setting.
1. Light burner and setcontrol knob for low flame.
2. Remove control knob from
valve stem.
CAUTION: Never use a
metal blade to pry knob off.
3. Insert a slender, thin-blade
screwdriver into the recessat
center of valve stem and
engage blade with slot in
adjusting screw.
4. Turn center stemadjusting screw slightly to setflame size.
NOTE: Turn clockwise to reduce or counterclockwise to
increase flame size.
5. Replace control knob when adjustment is completed.
Proper adjustment will produce astable, steadyblue flame of
minimum size. The final adjustment should be checked by
turning knob from Hi to Lo several times without
extinguishing the flame.
Using the Griddle
(select models)
1. Before the first use, wash your new griddle in hot soapy
water. Do not immerse the terminal plug in water.
Rinse and dry. Then “condition” the surface by wiping on
a thin coating of cooking oil or shortening. Remove
excess oil or shortening by wiping again with a paper
towel.
2. Before installing griddle, be certain griddle control knob
is in the OFF position. The basin pan needs to be clean.
Slide the griddle towards the receptacle until the terminal
plug is completely engaged.The griddle should reston the
basin pan.
3. Preheat the griddle five minutes on Hi.
4. Use nonmetallic spatulas or utensils while cooking to
prevent damage to the griddle finish.
5. When cooking meats, use the range hood to capture
smoke.
6. Refer to the following chart for cooking settings and
times.
Griddle Guide
Preheat five minuteson HI.
1
FoodItems
SausagePatties
Bacon
HamSlice
Hamburgers
Fish Sticks
Hot Dogs
Buns
FrenchToast
Grilled Sandwiches
Pancakes
Eggs
t
I
-
Control Lpprox.Cooki
Setting 1stSide
Hi 4-5
Hi 3-5
Hi 4
Hi 5-6
Hi 5
10 5-6
Hi 2-3
10 3-4
10 4-5
10 2-3
6-7 2-3
gTime (min.)
2nd Side
2-4
2-3
4
5-6
4-5
4-5
2-3
3-4
l-2
(11
NOTE: Thesearesuggestedguidesfor control settingsandtimes.
Factors, suchas low voltage,sizeoffood andfood temperature,
mayaffectthe timesand control settingswhich provide the best
results.
7
4 4
Care and Cleaning
444444444444444444444444444444444444444
Be sure all controls are OFF and all cooktop parts are cool before cleaning.
Cleaning Chart
Parts
Control Knobs
Cleaning Procedure
+ Remove knobs in the OFF position by pulling each knob straight out. Never use a metal
blade to pry knob off.
+ Wash in dishwasher or in warm, soapy water. Do not soak or use abrasive cleaners such
as steel wool pads. Rinse and dry.
+ Replace knobs, matching the flat part of the knob opening with the flat part of the shaft.
Make sure knobs are in the OFF position.
. . . . . . . . . . . . . . . . . . . . . . . . . . . . . . . . . . . . . . . . . . . . . . . . . . . . . . . . . . . . . . . . .
Griddle NOTE: DO NOT IMMERSE THE TERMINAL PLUG IN WATER. SEE BOTTOM
OF GRIDDLE FOR FURTHER INSTRUCTIONS.
+ Once the griddle has cooled (DO NOT IMMERSE A HOT GRIDDLE IN COLD WATER),
wash with soapor detergent in hot water in the sink. Be sure to remove all food residue before
cooking on the griddle again.
+ Remove stubborn spots with a plastic pad. For best results, useonly those cleaning
products which statethey are recommended for use when cleaning nonstick surfaces.
Do not use steel wool or coarse scouring pads.
+ DO NOT wash in the dishwasher.
. . . . . . . . . . . . . . . . . . . . . . . . . . . . . . . . . . . . . . . . . . . . . . . . . . . . . . . . . . . . . . . . .
Griddle Basin + This areais located under the griddle and should be wiped out with soapand water or cleaners
Pan such asFantastik”.
. . . . . . . . . . . . . . . . . . . . . . . . . . . . . . . . . . . . . . . . . . . . . . . . . . . . . . . . . . . . . . . . .
Ignitors + Clean with a toothbrush and warm soapy water. Rinse and dry thoroughly.
DO NOT STRIKE or PRY the ignitor. (Refer to illustration on following page.)
. . . . . . . . . . . . . . . . . . . . . . . . . . . . . . . . . . . . . . . . . . . . . . . . . . . . . . . . . . . . . . . . .
Porcelain + Never wipe a warm or hot porcelain enamel surface with a damp cloth. For general
Burner Pans cleaning, wipe with soapy cloth, rinse and dry. To remove grease,spray with
cleaners such asFantastik or 409”. DO NOT use abrasive cleaning agents. They may
damage the surface.
+ If acid (vinegar, tomato, etc.) or sugary foods spill into pans, wipe up immediately with a dry
cloth. Porcelain is acid resistant, not acid proof.
. . . . . . . . . . . . . . . . . . . . . . . . . . . . . . . . . . . . . . . . . . . . . . . . . . . . . . . . . . . . . . . . .
Stainless
Steel Areas
(trim and
control panel)
DO NOT USE ANY CLEANING PRODUCT CONTAINING CHLORINE BLEACH.
ALWAYS WIPE WITH THE GRAIN WHEN CLEANING.
+ Daily Cleaning/Light Soil - wipe with one of the following - soapy water, white vinegar/
water solution, Formula 409 Glass and Surface Cleaner or a similar multi-surface cleaner -
using aspongeor soft cloth. Rinse and dry. To polish andhelp prevent fingerprints, follow with
Stainless Steel Magic Spray (Jenn-Air Model A912, Part No. 20000008).
+ Moderate/Heavy Soil - wipe with one of the following - Bon Ami, Smart Cleanser or Soft
Scrub - using adamp sponge or soft cloth. Rinse and dry. Stubborn soils may be removed with
a damp Scotch-Brite pad; rub evenly with the grain. Rinse and dry. To restore luster and
remove streaks, follow with Stainless Steel Magic Spray (Jenn-Air Model A9 12,Part No.
20000008).
+ Discoloration -using adamp spongeor soft cloth, wipe with Cameo Stainless Steel Cleaner.
Rinse immediately and dry. To remove streaks and restore luster, follow with
Stainless Steel Magic Spray (Jenn-Air Model A912, Part No. 20000008).
4444444444444444444444444
Care
and
Cleaning 8
4444
444
444444444
Cleaning Chart -- continued
Parts
Surface
Burner Grates
Cleaning Procedure
+ Light Soil - Wash them in hot, soapy water, rinse and dry.
+ Moderate Soil - Clean with a soap-filled, nonabrasive, plastic pad or Cooktop
Cleaning Creme* (Part # 20000001) and a sponge. If soil remains, reapply Cooktop Cleaniq
Creme. Cover with a damp paper towel and soak for 30 minutes. Scrub again, rinse and dry.
4 Burned on Soil - Remove grates, place on newspapers and carefully spray with commercia
oven cleaner. (Do not spray surrounding surfaces.) Place in plastic bags for several hours
or overnight. Wearing rubber gloves, remove from bags.Wash, rinse, dry and replace on cookto
+ The grates are made of porcelain on cast iron and are very durable, however, they may
gradually discolor. This is due to exposure to high temperatures from the gas flame.
. . . . . . . . . . . . . . . . . . . . . . . . . . . . . . . . . . . . . . . . . . . . . . . . . . . . . . . . . . . . . . . . .
Surface
Burner Heads + The surface burner heads are removable.
The cap portion of the head is porcelain
and the port areais aluminum. Wash
the burner heads in the sink with mild
detergent and a plastic scrubber.
BURNER HEAD
+ Check to be sure all ports are open. To
open clogged ports, insert a straight pin
directly into each port. Do not enlarge or
distort the port.
+ When replacing the burner heads, carefully
align the tab on the burner basewith the
indentation in the head. The two pins will
fit in the slots when the tab is aligned with
the indentation.
NOTE: When burner heads are removedfor
cleaning, do not spill liquids through the holes in
the burner base.
BURNERBASE
* Brand names are trademarks of the respective manufacturers.
9
Before You Call for Service
4444444444444444444 4444444444444444444444
Check the following list to be sure a service call is really
necessary.
If surface burner fails to light:
+ check to be sure unit is properly connected to power
supply.
+ check for a blown circuit fuse or a tripped main circuit
breaker.
+ check to be sureburner is correctly rated for your type of
gas.
* check to be sure burner ports or ignition ports are not
clogged.
+ check to be sureignitor is dry and clicking. Burner will
not light if ignitor is damaged, soiled or wet. If ignitor
doesn’t click, turn control knob OFF.
+ check to besurethe burner headis correctly seatedon the
burner base.
If the flame is uneven:
+ burner ports may be clogged.
+ flame setting may need to be adjusted.
If surface burner flame lifts off the ports:
+ contact an authorized Jenn-Air Servicer.
If surface burner flame is yellow in color:
+ contact an authorized Jenn-Air Servicer.
+ some yellow tips on the flames are acceptable when
using LP gas.
If You Need Service:
+ Call thedealerfrom whom your appliancewaspurchased
or call Maytag Appliances Sales Company, Jenn-Air
CustomerAssistanceat 1-800-688-l 100,or 1-423-472-
3333 to locate an authorized service company.
+ Be sure to retain proof of purchaseto verify warranty
status. Refer to WARRANTY (last page) for further
information onowner’s responsibilities for warranty ser-
vice.
+ If thedealeror servicecompanycannotresolvetheprob-
lem, write to Maytag Appliances SalesCompany,Attn:
CAIRSMCenter,P.O.Box 2370, Cleveland, TN 37320-
2370, or call l-800-688-1100 or l-423-472-3333.
U.S. customersusing TTY for deaf,hearing impaired or
speechimpaired, call l-800-688-2080.
NOTE:
When writing or calling about a service prob-
lem, pleaseinclude the following information:
a.Your name,addressand telephone number;
b. Model number and serial number;
c. Name and addressof your dealer or servicer;
d. A clear description of the problem you are
having;
e. Proof of purchase(salesreceipt).
+ User’s guides, service manuals and parts catalogs are
available from MaytagAppliances SalesCompany,Jenn-
Air CustomerAssistance.
All specifications subjectto changeby manufacturer with-
out notice.
Notes
f0
*4**4*4***4*44*444**444444444444444444444
ii
Warranty
44444444444444444444444444444444444444444
JENN-AIR COOKTOP WARRANTY
Full One Year Warranty - Parts and Labor
For one (1) year from the original retail purchase date, any part which fails in normal home use will be repaired or
replaced free of charge.
Limited Warranties - Parts Only
Second Year - After the first year from the original purchase date, parts which fail in normal home use will be
repaired or replaced free of charge for the part itself, with the owner paying all other costs, including labor, mileage
and transportation.
Third Through Fifth Year - From the original purchase date, parts listed below which fail in normal home usewill
be repaired or replaced free of charge for the part itself, with the owner paying all other costs, including labor,
mileage and transportation.
l
Electronic Controls
l
Glass-ceramic Cooktop: due to thermal breakage.
l
Electric Heating Elements: surface elements on electric cooking appliances.
Canadian Residents
The above warranties only cover an appliance installed in Canada that hasbeen certified or listed by appropriate test
agencies for compliance to a National Standard of Canada unless the appliance was brought into Canada due to
transfer of residence from the United Statesto Canada.
Limited Warranty Outside the United States and Canada - Parts Only
For two (2) years from the date of original retail purchase, any part which fails in normal home usewill be repaired
or replaced free of charge for the part itself, with the owner paying all other costs, including labor, mileage and
transportation.
The specific warranties expressedabove are the ONLY warranties provided by the manufacturer: Thesewarranties
give you spec$c legal rights, and you may also have other rights which vary from state to state.
What is Not Covered By These Warranties:
1. Conditions and damagesresulting from any of the
following:
a. Improper installation, delivery, or maintenance.
b. Any repair, modification, alteration, or adjustment not
authorized by the manufacturer or an authorized
servicer.
c. Misuse, abuse, accidents, or unreasonable use.
d. Incorrect electric current, voltage, or supply.
e. Improper setting of any control.
2. Warranties are void if the original serial numbers have
been removed, altered, or cannot be readily determined.
3. Light bulbs.
4. Products purchased for commercial or industrial use.
5. The cost of service or service call to:
a. Correct installation errors.
b. Instruct the user on the proper use of the product.
c. Transport the appliance to the servicer.
6. Consequential or incidental damages sustained by any
person asa result of any breach of these warranties.
Some statesdo not allow the exclusion or limitation of
consequential or incidental damages, so the above
exclusion may not apply.
403 WEST FOURTH STREET NORTH. PO BOX 39. NEWTON, IA 50208
Printed in U.S.A.
01996 Jam-Air Pari No 6111 P396-60 12/96/B

This manual suits for next models

2

Other Jenn-Air Cooktop manuals

Jenn-Air CVG 4380 User manual

Jenn-Air

Jenn-Air CVG 4380 User manual

Jenn-Air JGC8645 User manual

Jenn-Air

Jenn-Air JGC8645 User manual

Jenn-Air JGC9430BDB User manual

Jenn-Air

Jenn-Air JGC9430BDB User manual

Jenn-Air JEC9530BDB User manual

Jenn-Air

Jenn-Air JEC9530BDB User manual

Jenn-Air JIC4430XB00 User manual

Jenn-Air

Jenn-Air JIC4430XB00 User manual

Jenn-Air JEC0530ADB Assembly instructions

Jenn-Air

Jenn-Air JEC0530ADB Assembly instructions

Jenn-Air W10676382C User manual

Jenn-Air

Jenn-Air W10676382C User manual

Jenn-Air JGD3536WS00 Product information sheet

Jenn-Air

Jenn-Air JGD3536WS00 Product information sheet

Jenn-Air SCE30500B User manual

Jenn-Air

Jenn-Air SCE30500B User manual

Jenn-Air EXPRESSIONS CVGX2423B User manual

Jenn-Air

Jenn-Air EXPRESSIONS CVGX2423B User manual

Jenn-Air JGC2530EB00 User manual

Jenn-Air

Jenn-Air JGC2530EB00 User manual

Jenn-Air JGD8130ADS User manual

Jenn-Air

Jenn-Air JGD8130ADS User manual

Jenn-Air JGC8430CDB10 User manual

Jenn-Air

Jenn-Air JGC8430CDB10 User manual

Jenn-Air RADIANT COOKTOP CVE3401 User manual

Jenn-Air

Jenn-Air RADIANT COOKTOP CVE3401 User manual

Jenn-Air JEC4430KS User manual

Jenn-Air

Jenn-Air JEC4430KS User manual

Jenn-Air JGC7530B SERIES User manual

Jenn-Air

Jenn-Air JGC7530B SERIES User manual

Jenn-Air CG106 SERIES User manual

Jenn-Air

Jenn-Air CG106 SERIES User manual

Jenn-Air JID4436ES User manual

Jenn-Air

Jenn-Air JID4436ES User manual

Jenn-Air JEC8430 User manual

Jenn-Air

Jenn-Air JEC8430 User manual

Jenn-Air CCG456 User manual

Jenn-Air

Jenn-Air CCG456 User manual

Jenn-Air JGD3536GB User manual

Jenn-Air

Jenn-Air JGD3536GB User manual

Jenn-Air JGC1536ADB15 User manual

Jenn-Air

Jenn-Air JGC1536ADB15 User manual

Jenn-Air LANAI JED7430AAB Parts list manual

Jenn-Air

Jenn-Air LANAI JED7430AAB Parts list manual

Jenn-Air CVEX4100 Series User manual

Jenn-Air

Jenn-Air CVEX4100 Series User manual

Popular Cooktop manuals by other brands

GEAppliances JGP328 owner's manual

GEAppliances

GEAppliances JGP328 owner's manual

Küppersbusch EKI3920.1ED Instructions for use and installation

Küppersbusch

Küppersbusch EKI3920.1ED Instructions for use and installation

LG LCE3010SB owner's manual

LG

LG LCE3010SB owner's manual

Electrolux 5995447090E36GC76EPS Use and care guide

Electrolux

Electrolux 5995447090E36GC76EPS Use and care guide

Sencor SCP 2253WH Original manual

Sencor

Sencor SCP 2253WH Original manual

Bompani BO374AA/E User instructions

Bompani

Bompani BO374AA/E User instructions

Lacor 69562 Instructions for use and maintenance

Lacor

Lacor 69562 Instructions for use and maintenance

Thermador Traditional GGN30 Care and use manual

Thermador

Thermador Traditional GGN30 Care and use manual

Esatto ECGG905W quick start guide

Esatto

Esatto ECGG905W quick start guide

Smeg SR60GHU3 user manual

Smeg

Smeg SR60GHU3 user manual

Baumatic BC90ITB user manual

Baumatic

Baumatic BC90ITB user manual

Haier HCG604WFCG3 Quick reference guide

Haier

Haier HCG604WFCG3 Quick reference guide

Frigidaire FEC30S8HS Specifications

Frigidaire

Frigidaire FEC30S8HS Specifications

GE Profile PP942 Dimensions and installation information

GE

GE Profile PP942 Dimensions and installation information

better chef PCSS-4 manual

better chef

better chef PCSS-4 manual

Frigidaire GCCI3667AB user manual

Frigidaire

Frigidaire GCCI3667AB user manual

Miele KM 6350 Operating and installation instructions

Miele

Miele KM 6350 Operating and installation instructions

Hoover HV-C90CG quick start guide

Hoover

Hoover HV-C90CG quick start guide

manuals.online logo
manuals.online logoBrands
  • About & Mission
  • Contact us
  • Privacy Policy
  • Terms and Conditions

Copyright 2025 Manuals.Online. All Rights Reserved.