manuals.online logo
Brands
  1. Home
  2. •
  3. Brands
  4. •
  5. Jenn-Air
  6. •
  7. Range
  8. •
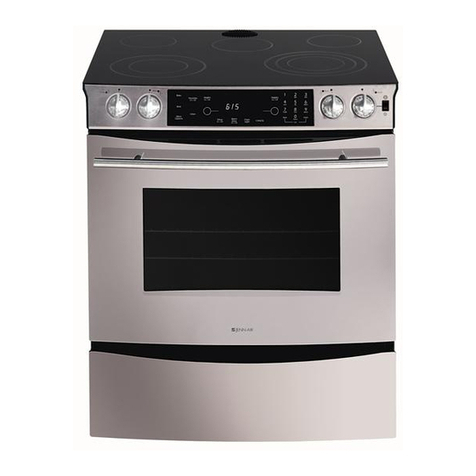
  9. Jenn-Air JES8750BAF16 User manual

Jenn-Air JES8750BAF16 User manual

This manual suits for next models

14

Other Jenn-Air Range manuals

Jenn-Air JES9750 User manual

Jenn-Air

Jenn-Air JES9750 User manual

Jenn-Air JDS8850BD User manual

Jenn-Air

Jenn-Air JDS8850BD User manual

Jenn-Air su110 User manual

Jenn-Air

Jenn-Air su110 User manual

Jenn-Air JDR8895 Series User manual

Jenn-Air

Jenn-Air JDR8895 Series User manual

Jenn-Air 8284756 User manual

Jenn-Air

Jenn-Air 8284756 User manual

Jenn-Air FCE10610 User manual

Jenn-Air

Jenn-Air FCE10610 User manual

Jenn-Air JDS9860BD User manual

Jenn-Air

Jenn-Air JDS9860BD User manual

Jenn-Air 8113P753-60 User manual

Jenn-Air

Jenn-Air 8113P753-60 User manual

Jenn-Air JGS8850CDB01 User manual

Jenn-Air

Jenn-Air JGS8850CDB01 User manual

Jenn-Air ProStyle JDS9861AAP User manual

Jenn-Air

Jenn-Air ProStyle JDS9861AAP User manual

Jenn-Air DUAL-FUEL DOUBLE OVEN RANGE User manual

Jenn-Air

Jenn-Air DUAL-FUEL DOUBLE OVEN RANGE User manual

Jenn-Air JDRP436WP01 User manual

Jenn-Air

Jenn-Air JDRP436WP01 User manual

Jenn-Air Pro-Style JGR8890ADP21 User manual

Jenn-Air

Jenn-Air Pro-Style JGR8890ADP21 User manual

Jenn-Air JGS8750BDB User manual

Jenn-Air

Jenn-Air JGS8750BDB User manual

Jenn-Air ELECTRIC DOWNDRAFT SLIDE-IN RANGE User manual

Jenn-Air

Jenn-Air ELECTRIC DOWNDRAFT SLIDE-IN RANGE User manual

Jenn-Air PRO-STYLE W10323791 User manual

Jenn-Air

Jenn-Air PRO-STYLE W10323791 User manual

Jenn-Air T2 User manual

Jenn-Air

Jenn-Air T2 User manual

Jenn-Air JDS8850BDB User manual

Jenn-Air

Jenn-Air JDS8850BDB User manual

Jenn-Air JGS9900CDS00 User manual

Jenn-Air

Jenn-Air JGS9900CDS00 User manual

Jenn-Air W30400P User manual

Jenn-Air

Jenn-Air W30400P User manual

Jenn-Air JER8885RAF User manual

Jenn-Air

Jenn-Air JER8885RAF User manual

Jenn-Air JES8750BAB User manual

Jenn-Air

Jenn-Air JES8750BAB User manual

Jenn-Air JDS9860AAW User manual

Jenn-Air

Jenn-Air JDS9860AAW User manual

Jenn-Air PRO-STYLE JGRP748HM User manual

Jenn-Air

Jenn-Air PRO-STYLE JGRP748HM User manual

Popular Range manuals by other brands

Maytag MGR5875QDW - 30 Inch Gas Range Use and care guide

Maytag

Maytag MGR5875QDW - 30 Inch Gas Range Use and care guide

Frigidaire FFGF3024SS use & care

Frigidaire

Frigidaire FFGF3024SS use & care

Capital Precision Series GCR484W Specifications

Capital

Capital Precision Series GCR484W Specifications

Officine Gullo GGS8P Installation and use instruction

Officine Gullo

Officine Gullo GGS8P Installation and use instruction

LG LSD4913 Series owner's manual

LG

LG LSD4913 Series owner's manual

Kenmore 4101 - Elite 30 in. Slide-In Electric Range installation instructions

Kenmore

Kenmore 4101 - Elite 30 in. Slide-In Electric Range installation instructions

Moffat Blue Seal Evolution G576 Technical data sheet

Moffat

Moffat Blue Seal Evolution G576 Technical data sheet

CornuFé C1NF user guide

CornuFé

CornuFé C1NF user guide

GE JGS650SEFSS Dimensions and installation information

GE

GE JGS650SEFSS Dimensions and installation information

LG LDG3015ST Manual De Propietario

LG

LG LDG3015ST Manual De Propietario

Whirlpool RF350PXP Use and care guide

Whirlpool

Whirlpool RF350PXP Use and care guide

Samsung FCQ321HTUW Service manual

Samsung

Samsung FCQ321HTUW Service manual

Kenmore 790.45712 Use & care guide

Kenmore

Kenmore 790.45712 Use & care guide

Wolf CHR CHSSR owner's manual

Wolf

Wolf CHR CHSSR owner's manual

Smeg Built-in Microwave Oven Instructions for the user

Smeg

Smeg Built-in Microwave Oven Instructions for the user

Zanussi ZCG054G user manual

Zanussi

Zanussi ZCG054G user manual

GE JCSS630 quick start guide

GE

GE JCSS630 quick start guide

Samsung NX58M9960P series installation manual

Samsung

Samsung NX58M9960P series installation manual

manuals.online logo
manuals.online logoBrands
  • About & Mission
  • Contact us
  • Privacy Policy
  • Terms and Conditions

Copyright 2025 Manuals.Online. All Rights Reserved.

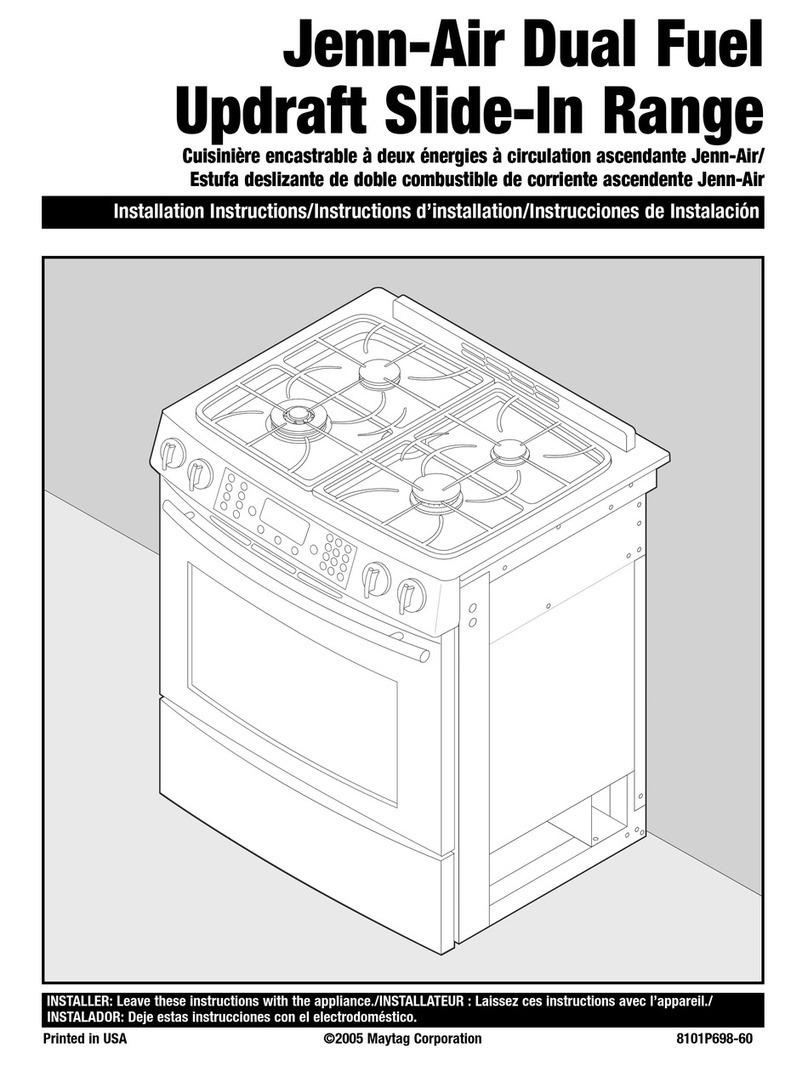
Jenn-AirElectric
UpdraftRange
Cuisini_re61ectriqueb circulationascendanteJenn-Air
Estufael6ctricade corrienteascendenteJenn-Air
Printed in USA ©2005 MaytagCorporation Rev0-10/05 8101P699-60
Jenn-AirElectricUpdraftRange
PLEASEKEEPTHIS MANUALFORFUTUREREFERENCE
This manual is intendedto assist in the initial installation andadjustments of the range.
•Onlyqualified personnelshould install or service this range.
• Read"SafetyInstructions" in Use&Care book beforeusing range.
• Improper installation, adjustment, alteration, service,maintenanceor use of range
can result in serious injury or property damage.
• Installer,take care not to damageflooring.
S
Donot lift or moverange by grasping door handles or main top.
This rangehasbeen designed in accordancewith the
requirementsof varioussafety agencies andcomplies with the
maximum allowable wood cabinettemperatures of 194°EIf this
rangeis installed with cabinets that havealower working
temperaturethan 194°F,discoloration, delamination or melting
mayoccur.
Placerange in a well lit area. Donotset range overholesinthe
floor or other locationswhere it may be subject to strong
drafts.Any opening in the wall behindthe range and in the
floor underthe range shouldbe sealed.Make sure the flow of
cooling/ventilation air is not obstructed below the range.Note:
A rangeshould NOTbe installed over kitchen carpeting.
'A,,RANGESCANANDCAUSE
_,_J INJURIES TOPERSONS.
INSTALL ANTI,TIP DEVICESPACKED
A risk of rangetip-over exists if the appliance is not installed in
accordancewith the providedinstallation instructions. Theproper use
ofthe ANTI-TIPdevice minimizesthe risk of TIP-OVER.In using this
devicethe consumer must still observethe safety precautions as
stated inthe USEand CAREMANUALand avoid using the ovendoors
asastep stool. Installation instructions are providedfor wood and
cement in either floor or wall. Anyother type ofconstruction may
require special installation techniquesas deemednecessaryto
provide adequatefastening of the ANTI-TIPbracket to the floor or wall.
The bracket must be installed to engagethe RIGHTor LEFTrear
leveling foot. Install the bracket asshown in step 9.
MOBILEHOMES
TheinstallationofarangedesignedformobilehomeinstallationmustconformwiththeManufacturedHomeConstructionandSafetyStandard,Title24CFR,
Part3280(formerlytheFederalStandardforMobileHomeConstructionandSafety,Title24 HUD,Part280)or,whensuchstandardisnotapplicable,the
StandardforManufacturedHomeInstallationsANSIA225.1/NFPA501A,orwithlocalcodes.InCanadatherangemustbe installedinaccordancewiththe
currentCSAStandardC22.1- CanadianElectricalCodePart1.
Iti; I=I;hl
The rangemust be installed in accordancewith Localand National
Electric Code(NEC)ANSI/NFPANo. 7O-latestedition, or Canadian
Electric CodeCSASTD.C221latest edition. Seerating plate for total
connected KWrating.
Yourlocal utility companywill tell you whether the presentelectric
service to your homeis adequate. It may be necessaryto increase the
size ofthe wiring to the house andservice switch to take careof the
electrical load demandedby the range.Thekilowatt rating for the
rangeis specified onthe rating plate. Seestep 8for locationof rating
plate.
Mostlocal BuildingRegulationsandCodesrequire that all electrical
wiring be donebylicensed electricians. All wiring should conform to
Localand National ElectricalCodes.This rangerequires asingle phase
three wire 120/240or a 120/208 volt, 60 Hz,ACcircuit. Wiringcodes
requirea separatecircuit berun from the main entrancepanelto the
rangeandthat it be equippedwith separate disconnectswitch and
fuses, either in the main entrance panel or in a separate switch and
fuse box.
Somemodels areshipped directfrom the factory with service cord
attached.Thereare no rangeconnectionsnecessaryonthese models.
Just plug into the wall outlet. Onmodelsnot providedwith a service
cord,connectionto the power supply is necessaryin accordancewith
local codes.Provisionsfor using either conduit or a flexible power cord
areprovided.When using a power supply cord, useonly a supply cord
with closed loopterminals rated either 240 volts, 40 ampsor 240 volts,
50 ampsthat is marked for use with nominal 1-3/8" (34.94mm)
diameter connectionopening and markedfor ranges.A 4-conductor
cord is to be used on new branch-circuit installations (1996 NEC),
mobile homes,recreationalvehicles and where localcodesprohibit
groundingthrough the neutral conductor.A 3-wire service may be used
when permitted by local codes.Whena powersupply cordis used,a
cord nolonger than 4 feet should be used.
Canada
Thismodelis shippeddirectfromthe factorywith the servicecord
attached.Therearenorangeconnectionsnecessary.
II; II V vJIII[11.'t:1LvA[llVj:11.'L'I[€t:11;[I] .'kvj[HI [€
Follow these procedures to remove appliance for servicing:
1. Sliderangeforward to disengagerangefrom the anti-tipbracket,
2, Disconnectelectricalsupply to appliance,if equipped.
3. Reverseprocedureto reinstall.
4.Topreventrangefrom accidentallytipping,rangemustbe secured
tothefloor by slidingrear levelingleg intothe anti-tipbracket. THE APPLIANCE.
Whenyour rangerequiresservice or replacement parts, contact yourdealer or authorizedservice agency.Pleasegivethe completemodel andserial
number of the range which is located onfront frame behind storagedrawer.
JYourrange may not beequipped with someof the features referredto in this manual. J
I
NOTE:Figure may not be representativeof actual unit.
CLEARANCEDIMENSIONS
Rangemay be installed with zeroinches clearanceadjacentto (against)combustible construction at the rear and on the sides below the cooktop. For
complete informationinregard to the installation of wall cabinetsabovethe rangeandclearancesto combustible wall abovethe cookingtop see the
installation drawings. For SAFETYCONSIDERATIONSdo not install a rangein any combustiblecabinetry which is not in accordwith the installation
drawings.
*NOTE:30 inch (76.2 cm) dimension between cookingtop and wall cabinet shown on illustration does not apply to ranges with an elevatedoven or
microwave.Theinstallation instructions of the elevatedovenwill specify the minimum acceptabledimensionbetween the cooktop and elevated oven.
The30 inch (76.2 cm) dimension may be reducedto not less than 24 inches(61 cm) when the wall cabinets in adomestic home areprotected with
fireproof materials in accordance with AmericanNational Standards- National FuelGasCodeor in mobile homes when they areprotectedwith
fireproof materials in accordance with the FederalStandardfor MobileHomeConstructionand Safety.
Toeliminate the risk of burns or fire by reachingover heated surface units, cabinet storagespace located abovethe surface units should be avoided.
If cabinet storageis to be provided,the risk can be reducedby installinga rangehoodthat projects horizontallya minimumof 5inches (13 cm)
beyondthe bottom ofthe cabinets
CuisiniGre61ectrique circulationascendanteJenn-Air
VEUILLEZCONSERVERCE MANUEL POURCONSULTATIONULTIERIEURE
Cemanuelest pr_vupourvousaider dansI'installationet les r_glagesde la cuisini_re.
•Seuldu personnelqualifi_dolt installerou faireI'entretien decette cuisini_re.
• Lisezles,,Instructionsdes_curit_,,dans leguided'utilisationetd'entretienavantd'utiliser la cuisini_re.
• Uneinstallation,desr_glages,desmodifications,une utilisation ouun entretien,effectu_sdefa§oninappropri_e,
peuvententrainerde gravesblessuresou desd_g&tsmat6riels.
• Installateur: Faitesattentionde ne pasendommagerle sol.
AT T EN
Nesoulevezpasetned_placezpaslacuisini_reenla prenantparles
poign_esdeporteouparledessus.
Cettecuisini_rea_t6 con§ueconform_mentauxexigencesde
diversesagencesconcern_espar las_curit_et respecteles
temperaturesmaximalespermisesde90 °C(194 °F)pourles
armoiresen bois.Si cettecuisini_reestinstall_eprosd'armoiresne
supportantqu'unetemperatureinf_rieure__90 °C(194°F),il y a
risquede d_coloration,d_laminationoufusion.
Placezla cuisini_redans un endroitbien_clair_. NeI'installezpas
au-dessusde trousdansleplancherou&dautresendroitso_ elle
risqued'etresoumise_deforts courantsd'air.Touteouverturedans
letour derrierelacuisini_reet danslesol souslacuisini_redeit _tre
ferrule herm_tiquement.Assurez-vousque la circulationde I'airde
refroidissement/ventilationn'estpasentrav_esousla cuisiniere.
REMARQUE:N'installezPASunecuisinieresur de lamoquettede
cuisine.
•TOUTESLESCUISINII:RESPEUVENTSE
i NSTA"EZOESO SPOSmFS
ANTIRENVERSEMENTFOURNISAVEC
_LA CUISINIERE,
• SUI#sEZT/LOULATIEoSN!ESINSTRUCTIONS
Unrisqueque la cuisini_rese renverseexistesi I'appareiln'est pas
install6conform6mentauxinstructionsd'installationfournies.L'utilisation
correctedudispositif ANTIRENMERSEMENTminimise le risquede
RENMERSEMENT.M_meaveccedispositif,le consommateurdolt toujours
observerles mesuresdes6curit_ pr_cis_esdans le MANUEL
D'UTILISATIONETD'ENTRETIENet _viterde montersur les portesdes
fours.Lesinstructions d'installationsont fourniespourdes endroits o_les
tourset les solssont en boisou enciment.Toutautretype de construction
peutn_cessiterdestechniquesd'installationsp_ciales,pourpermettre la
fixationdusupportANTIRENVERSEMENTau tour ouau sol. Labride dolt
_tre install_e pour enclencher le pied de nivellement arriere DROITou
GAUCHE.Installezla bride comme illustre a I'etape9.
MAISONS MOBILES
L'installationd'une cuisini_recon_uepourune maisonmobile dolt _treconformea la ManufacturedHomeConstructionandSafety Standard(normede
s_curit_etdeconstructiondesr_sidencespr_fabriqu_es),titre 24CFR,partie3280(ant_rieurement,la FederalStandardfor Mobile HomeConstructionand
Safety,titre 24 HUD,partie 280)ou,Iorsqu'unetelle normen'est pasapplicable,a la normepourles installationsde r_sidencespr_fabriqu_esANSI
A225.1/NFPA501A,ou conform_mentauxcodes Iocaux.Au Canada,lacuisini_redolt _treinstall_eselonla normecouranteCSAC22.1.
Lacuisini_redolt _tre Jnstall_econform_mentau NationalElectricalCode
(NEC)ANSI/NFPAno70 - _ditionla plus r_cente,ouconforme auCode
canadiende I'_lectricit_,normeCSAC22.1,_ditionla plusr_cente.Voyez
sur la plaquesignal_tiquela puissancenominaletotale en kW.
Votrecompagnied'_lectricit_ localevous indiquerasi I'alimentation
_lectriqueactuelledevotre r_sidenceestsuffisante.IIpourra_tre
n_cessaired'augmenterle calibredu c&blageetde I'interrupteursecteur
pour satisfairela consommationen _lectricit_de la cuisini_re.La
puissancenominaleenkilowatts de la cuisini_reest pr_cis_esur la
plaquesignal_tiquesitu_e sur uneplaqueescamotablea I'arriere,au
centre dudosseret. Voir I'_tape 8 pour connaffre remplacement de la
plaque signaletique.
Lamajorit_des codeset r_glementsIocauxde la constructionexigeque
le c&blage_lectriquesoit install_pardes _lectriciensagr_s. Toutle
c&blagedolt _treconforme auxcodes_lectriquesIocauxet nationaux.
Cettecuisini_ren_cessiteun circuit C.A.trifilaire, monophas_de 120/240
voltsou de 120/208volts,60 Hz.Lescodesde c_blagesp_cifient qu'un
circuit s_par_dolt_tre pr_vuentre le panneaudedistribution principalet
la cuisini_re etqu'il dolt _tre_quip_d'un disjoncteuret defusibles
ind_pendants,que cesoit auniveaudu panneauprincipalou dansune
boites_par_eavecfusibleset disjoncteui:
Certainsmodulessont livr_sdirectementde I'usine avecuncordon
d'alimentation.Aucunraccordementn'estn_cessairesur cesmodules.
II suffit de brancherle cordondansla prise murale.Sur les modelessans
cordon,le raccordementa I'alimentationest n_cessaireconform_mentaux
codesIocaux.II estpossibled'utiliser soitun conduitsoit uncordon
souple.Avecun cordonsouple,pour cuisini_res,ne I'utilisezqu'avecdes
cossesferrules pr_vuessoit pour240 volts,40A,soit pour240 volts, 50
A- ouverturede 34,94mm (1-3/8 po)de diam_tre.Uncordona4
conducteursdolt _treutilis_ sur les nouvellesinstallationsa circuit de
d_rivation(NEC1996),demaisonsmobiles,de v_hiculesr_cr_atifset la o_
les codesIocauxinterdisent la misea la terre parle neutre.Une
alimentationa 3fils peut_tre utilis_e la o_elle estautoris_epar les codes
Iocaux.Lorsqu'uncordond'alimentationest utilis_,celui-ci nedolt pas
d_passer1,20m (4 pieds)en Iongueui:
Canada
Cemoduleestlivr_ directementdeI'usine avecle cordon d'alimentation.
Aucunraccordementn'est n_cessaire.
Follow these procedures to remove appliance for servicing:
1, Faitesglisserlacuisiniereen avantpourla dbgagerdusupport
antirenversement.
2. O6branchezI'alimentation61ectriquede I'appareil,lecas6ch6ant.
3. Proc6dezinversementpourlar6installation.
4. Pouremp_cherla cuJsinJ_redeserenverser,flxez-laausol enfaisant
coulisserlepieddemisea niveauarri_redartsle supportantirenveisement.
PROCI_DERAL'ENTRETIENDECETAPPAREIL.
iIt1_F,,_:][__11iVil1_i I,"],,_llInI :i,"],,"]1ltvj[__1 i I n:!,111:[_:_
Lorsquedespi_cesde rechangeoude I'entretien/desr6pamtionssont n6cessairespourvotrecuisiniere,contactezvotred_taillantouagencede service
apr_s-vente.Veuillezfournir le num_rodemodeleet le num6rodes_rie aucomplet.IIs sontsitu6sa I'avantdu cadre,derriereletiroir derangement.
JVotrecuisini_repeutne pas_tre_quip_edecertaines caract_ristiquesmentionn_esdanscemanuel. I
I
I
REMARQUE:Lillustration peut ne pas pr6senter rappareil actuel,
DI_GAGEMENTS
La cuisiniere peut_tre installee avecun d_gagementnul contre des mat_riaux combustiblesa I'arriere et sur les cotes en dessousde la table de
cuisson.Pourdes renseignementscomplets concernantI'installation desarmoires au-dessusde la cuisiniere et les degagementsaux parois
combustibles au-dessusde la surface decuisson, consultezles schemassur I'installation. Pourdes RAISONSDESleCURITI_,n'installez pasune
cuisiniere dans des armoires en materiaux combustiblesnon conformesauxschemas de I'installation.
*REMARQUE:Ladimension de 76,2cm (30po) entre la surface de cuisson et les armoires muralespr_senteessur I'illustration neconcerne pas les
cuisini_res avec unfour surelev_ou un micro-ondes. Lesinstructions d'installation du four sureleve precisentla dimensionminimale acceptable
entre la surface de cuisson et le four sur_lev_.Ladimensionde 76,2 cm (30po)peut _tre reduite a pas moins de 61 cm (24po) Iorsqueles armoires
muralesd'une r_sidencesont protegeespar des materiaux ignifuges conform_mentaux normesde i'American NationalStandards- NationalFuel
GasCode(Codenational des combustiblesgazeux),ou Iorsqueles armoires muralesd'une maisonmobile sont protegeespar desmateriaux ignifuges
selon la norme federale : MobileHomeconstruction and Safety (norme desecurit_ et de construction des maisonsmobiles).
Poureliminer le risque de brOlureou d'incendie, en passantla main au-dessus deselements desurface chauffes, I'espacede rangementdarts les
armoires situees au-dessusdes_lements de surface dolt _tre evite. Siune armoire de rangementexiste, le risquepeut _tre reduit en installant une
hotte d'extraction qui depasse horizontalementd'un minimum de 13cm (5 po) de la partie inferieure des armoires.
Estufael6ctricadecorrienteascendenteJenn-Air
POR FAVORGUARDEESTEMANUALPARAREFERENCIAFUTURA
Estemanual esta disefiado para asistirlo en la iflstalaci6fl y ajustesiniciales de la estufa.
• Lainstalacion o reparaci6nde esta estufa debeser realizadaunicamentepor personalcalificado.
• Lealas instrucciones deseguridad en la guiade uso y cuidado antesde usar la estufa.
• Lainstalacion, ajuste,alteracion,servicio, mantenimiento ouso inapropiadosde la estufa puederesultar en
lesionesgraveso dafiosa la propiedad.
• Instalador:tenga ceidado de nodafiar el piso.
Nolevanteo muevalaestufaporlasmanijasdelapuertaoporla
cubierta. GQ
Estaestufaruedisefiadadeacuerdoconlos requerimientosde
variasagenclasde seguddady cumpleconla tempemtui_
maximaparaarmariosdemaderade194°F(90°C).Siesta
estufaseinstalaconarmarioscontemperaturasdetrabajo
menoresde 194°F(90°C),losmismos puedendescolorarse,
deslaminarseo derretirse.
Coloquela estufaen un__reabien iluminada.Nocoloquela
estufasobreagujerosenel pisooen otrasubicacionesdonde
est_ expuestaa r__fagasde vientofuertes. Cualquierabertura
en la pareddetr__sde la estufay en el pisodebajode la estufa
debensellarse.Aseg_resedeque el aim de enfriamiento/
ventilaci6nnose obstruyadebajodela estufa. Nota:NOse
debeinstalarunaestufasobreel alfombradode la cocina.
• TODASLAS ESTUFASSE PUEDEN
_,_j VOLCARY CAUSARLES!ONES
k_ _ ! PERSONALES.
INSTALELOSDISPOSITIVOS
ANTIVUELCOPRoVIsTOS CON LA
} ; ESTUFA'
SIGA TODASLAS INSTRUCCIONES
DEINSTALACION.
Si nose siguenlas instruccionesde instalaci6nprovistas,existeel riesgode
que la estufase vuelque.Elusocorrectodel dispositivoANTIMUELCO
minimizael riesgodeque la estufa SEVUELQUE.Cuandose utiliceeste
dispositivo,el consumidora0ndebeseguir lasadvertenciasdeseguridad
indicadasen la GUiADEUSOYCUlDAD0y evitarusarla puertadel homo
comopeldafio.Lasinstruccionesdeinstalaci6nsonespecificaspara
instalacionesde laestufaen paredeso pisosde maderay concreto.
Cualquierotrotipo de material de construccionrequerirael usodet6cnicas
especialesparafijar debidamenteel soporteANTIMUELCOal piso oa la
pared.Elsoportedebeinstalarse parafijar el tornillo niveladortmsero
DERECHOo IZQUlERDO.Instaleel soportecomo seindica enel paso9.
CASASRODANTES
Lainstalacionde unaestufadisefiadapainsuinstalacionen casasrodantesdebehacersede acuerdocon la NormadeConstrucci6ny SeguridaddeViviendas
Prefabricadas(ManufacturedHomeConstructionandSafetyStandard),Titulo24 CFR,Parte3280(anteriormentela NormaFederalde Construcci6ny
SeguridaddeViviendasPrefabricadas,Titulo24,Parle280)o,cuandodichanormanose aplique,conla NormadeInstalaci6nenViviendasPrefabricadas
(Standardfor ManufacturedHomeInstallations)ANSIA225/NFPA501Aocon losc6digoslocales.EnCanada,estaestufa debeinstalarsede acuerdoconla
NormaCSAvigenteC22.1del C6digoCanadiensede Electricidad,Parte1.
Laestufadebeser instaladade acuerdocon el C6digoLocaly Nacional
de Electricidad(NEC)ANSI/NFPANo.70,01timaedici6n,oel C6digode
ElectricidadCanadienseCSASTD.C221,01timaedicion.Yeala placade
informaci6n parala clasificaci6nde KWtotales conectados.
Sucompafiiade servicio local le podrainformarsi el servicioel_ctrico
actual desu vivienda esel adecuado.Esposiblequeseanecesario
aumentarel tamafio delcableadode lavivienda y del interruptorde
servicio parapodersoportar la carga el_ctricaque requierela estufa.La
clasificaci6nde kilowatts parala estufaesta especificadaenla placade
informaci6n ubicadaen la solapa quese encuentraenla partecentral
traseradel protectortrasero. Obtengala ubicaci6nde la placa de
informaci6n en el paso 8.
La mayoriadelos c6digosy normasde construcci6nrequierenquetodo
el cableadoel_ctricosea realizadoporun electricistalicenciado.Todoel
cableadodebecumplircon los c6digosel_ctricos nacionaly local.Esta
estufa requiereuncircuito trifilar de 120/240o 120/208voltios CA,1
fase,60 Hz.Losc6digosde cableadoel6ctricorequierenla presenciade
un circuitoseparadodesdeel panelel6ctrico principalde entradahasta
la estufay queel mismoest_equipadoconun interruptorde
desconexi6ny fusibles individuales,ya sea enel panelprincipal de
entradao enuna cajade fusibleso interruptorseparada.
Algunosmodelosvienenequipadosde la fabrica conun cord6nel6ctrico de
servicio instalado.Estosmodelosnorequierenconexionesel_ctricasala
estufa.Simplementeconecteel enchufeen untomacorrientemural. Paralos
modelosquenovienenprovistoscon un cord6nel_ctricode serviciose
requiereunaconexi6nal suministroel_ctricode acuerdocon los c6digos
locales.Seproporcionanprovisionespara usartanto un conductofijo oun
cord6nflexible parala conexi6ndela estufa.Cuandouseun cordonde
suministrodeelectricidad,s61ousecordonesconterminalesde bucle cerrados
clasificadospare240V,40Ampo para240V,50Ampmarcadosparasuusoen
estufasconuna aberturade conexionnominalde 1-3/8" (34,94mm) de
diametro.Sedebeusarun cord6ntetrafilar en la instalaci6ndecircuitos
nuevos(1996 NEC),en casasrodantes,en vehiculosrecreacionalesy dondelos
c6digoslocalesprohibanrealizar unaconexi6na tierra a tray,s del conductor
neutro.Sepuedeusar uncircuito trifilar cuando Iopermitanlos c6digos
locales.Cuandose usaun cord6nel6ctrico,nose debeusarun cord6nde mas
de4 pies(1,2m) de Iongitud.
Canad_
Estemodeloviene equipadode la fabrica conun cord6nel_ctricode servicio
instalado.Noesnecesariorealizarconexionesala estufa.
It]_]1__,_Jq:!Ir:l_[o]_It]:m!:1 _j iLIJ;I.,I:;:!.'!:lk_]:1..kvl[_[i
Siga lossiguientes procedimientos para desinstalar la estufa para
servicio:
1, Deslicelaestufahaciaadelanteparadesengancharladelsoporteantivuelco.
2. Oesconecteel suministroel_ctrico a la estufa si Iotiene.
3. Inviertael procesoparareinstalarla estufa.
4. Paraevitarquelaestufase vuelqueaccidentalmente,lamismadebe
asegurarseal pisodeslizandola eltornilloniveladortraseroenel soporteantivuelco.
DESCONECTEELSUMINISTRO
REPARARELELECTRODOMESTICO.
m n[oI,',n;t==hi+'l|ot:
Cuando su estufa requiera reparacion opiezas de repuesto, pongase en contacto con su distribuidor o agencia de servicio autorizado. Por favor indique el
nn_merode modelo completo y el nOmero de serie de la estufa que se encuentran en el marco delantero dett_s del caj6n de almacenamiento.
IESposible que esta estufa no venga equipada con todas las caracteristicas que se indican en este manual. I
NOTA:Lafigura puedeno ser exacta a la unidad.
DIMENSIONES DE LOS ESPACIOS DE DESPEJE
Esta estufa se puede instalar sin espacios de despeje contra superficies combustibles en la parte trasera y a los costados de la misma per debajo de la
cubierta. Para obtener informaci6n completa sobre la instalaci6n de los armarios sobre la cubierta y los espacios de despeje para las paredes combustibles
sobre la cubierta vea las figuras de instalaci6n. Por RAZONESDESEGURIDAD,no instale una estufa en ninguna ubicaci6n con armarios combustibles que no
concuerden con las figuras de instalaci6n.
*NOTA: El despeje de 30 pulgadas (76,2 cm) entre la cubierta de coccion y el armario que se muestra en la figura no se aplica alas estufas con hornos
elevados o a los microondas. Las instrucciones de instalaci6n del homo elevado especificaran el espacio minimo entre la cubierta y el homo elevado. El
despeje de 30 pulgadas (76,2 cm) puede ser reducido a no menos de 24 pulgadas (61 cm) cuando los armarios del hogar estan protegidos con materiales a
prueba de fuego de acuerdo con las Normas Nacionales de Estados Unidos (ANS)y el C6digo Nacional de Gaso en las casas rodantes cuando las mismas
estan protegidas con materiales a prueba de fuego de acuerdo con la Norma Federal de Construcci6n y Seguridad de Viviendas M6viles.
Para eliminar el riesgo de quemaduras o de incendios cuando se intenta alcanzar algun objeto sobre los elementos superiores, evite almacenar articulos en
los armarios que estan sobre la estufa. Si se instala un armario sobre la cubierta, se puede reducir el riesgo instalando una campana de ventilaci6n que se
proyecte horizontalmente en un minimo de 5 pulgadas (13 cm) mas alia de la base de los armarios.
II] Iii [_ i_.'][i] i_.'!'] I] Iii [_ i_.'][i] i_'!'] I] I ii [_ i_'] [i] i[_
If cabinet backsplechbehind unit is not present,
kit UXA9107AA(B= black, S=stainlsss,
W= white)may be ordered from deale_
S'il n'y apas de dooseretderdbre l'appareil, le
n#cessairede finitioo UXA9107AA
(B=no/r,S =acier inoxydable,W =blanc)peut
#tre commande aupr#sde votre detaillanL
Si el protector trasero detr#,sde la unidad no
:ecta presente,puedepedir el kit de relleno
', UXA9107AA(B=negro, S=Aceroinoxidable`
W=blanoo)a su distribuido_
NOTE: Forcounter tops with formed front
edge,shave raisedsection toclear top.
REMARQUE: Pour leehauts de comptoir
avec un rebordavant moul& rabotezla
section relev#epour d#gagerle haul
NOTA: Paralos mootradores
con bordedelanteroformado
cepillela secciSn elevadapara
quela pare superior calce,
CAUTION:
Some white Europeanstyle
cabinets are equipped with
delicate white vinyldrawer and
door fronts. Thevinyl may not
be designedto withstand the
heat produced bythe normal
safe operationof a self-clean
range.Discoloration or
delaminatioo mayoccur, To
avoid possibledamage, we
recommend increasing the 30"
cabinet openingto 31 1/4"
minimum and using heat shield
(CABKITI/),Thecountertopcut-out must
remain 30 ",
ATTENTION:
OeRainecarmoirss de couleur blancheet de style europ#en
soot #quip#esde facadesde pore et de tiroir en vinyleblanc
fragile. Le vinyle peut ne pas #tre coo_upour r#sister Dla
chaleur produite par un autonettoyage normal II peut se
produire une decotoratiooou unedestratificatioo. Pour #viter tout
risque de dommages,nous vous recommandonsd'agrandir
l'ouveRure de l'armoire dejusqu3 79,4 cm (31 po) au
minimum, et d'utiliser un ensembled'#cran thermiquepour
armoire I/L'ouveRure daneleplan de travaildolt toujours #tre
de 3g po (Tg,2 cm),
PRECAUCION:
Algunosarmarioo de sstilo europeo vienen equipadsscon
superficies delicadas de v/nile blanooen los cajooecy pueRas,
El v/nile puede no habersido disefiadopara sopoRar el calor
producido per una sstufa autolimpiante durante su uso normaly
seguro,Puedeocurrir decoloraciSno delaminaciSn,Para evitar
pssiblss dafoo, recomendamooaumentar la abeRura del
gabinetea un minimo de 31 1/4" (80 cm) y usar un protector
t#rmico paragabinetesI/El core de la encimera debe
permanecerde 30" (76,2 cm),
1-1/2"rain
1-1/2"rain Location of Electrical/
Emplacement de
I'alimentation 61eofriqne/
I'_r'_ I Ubicaci6n del snministro
el6cbico
Whenreplacing an existingunit, a maximum 0f23 1/2" is
acceptable.If thecut depth exceeds23 1/2", use filler kit
K71FILL(B= black, W=white, S= Stainless)may be
ordered from deale_
Si vous remplacezun apparel/existanL un maximum de
59,7 cm (23 po) est acceptable, Si la profoodoor excede
59,7 cm (23_po), utilisez le n#cessairede finitioo K71FILL
(B=no/r, W =blanc,S=acier inoxydable) peut #tre
commande aupresde votredetaillant,
Cuandoreemplaceuna unidadexistente, un m,_ximode 23
1/2" (59 cm) ssaceptable, Si la profundidad de core
exoodelas 23 1/2" (59 cm), use el kit de relleno K71FILL
(B=negro, Q=sinssmalte, W=blanco,S=Aceroinoxidable)a
su distdbuido_
If end cabinet is not present,side panel kit UXA1100AA
(B= black, W= white, S= Stainless)maybe orderedfrom
dealer,
S'iln 'ya pas d'armoire a l'extr#mit#,/'ensemblede
panneau lateraI UXAlOOOAA(B= ook: W= blanc,S =
acier inoxydable)peut #tre commandeaupres de votre
ddtaillanL
Sino hay un gabinetelateral, puede pedir el kit de panel
lateral UXAIOOOAA(B=negro, Q=sin ssmalte, W=blanco,
S=Aceroinoxidable)ass distdbuido_
120/240 Vor 120/208 V GroundedElectrical Outlet in the
hatchedarea. OutletMUSTbe flush. Nothing locatedin
hatchedarea can extendmore than 2" from wall or range will
not slide all the way back.
Prise #lectdquede mise #,la terre de 120/240 Vou de
120/208 Vdans la zonehachuree. Laprise DOIT#tre
encastree.Riende ce qui estsitu# dartsla zonehachuree ne
peut depasser de plusde 5,1 cm (2po) du mur- sinoo la
cuisini#re ne pourrapas #trepouss#ejusqu'au foocL
Tomacorrientede 120/240 V o 120/208 Vpuesto a tierra en el
#,teasombreada,El tomacordente DEBEsstaral ras de la
pare_ Ningunapieza quese encuentre en el area rayada
debeextenderss a masde 2" (5,08 cm) dssde la pared o la
estufa no se deslizar#,completamentehastaatr#,s,
Important: Becauseof continuing productimprovements,Maytag reservesthe right to changespecificationswithout notice, Dimensionalspecifications are providedfor planning purposesonly,
Important: En raisonde I'am_lioration continue de ses produits,Maytag se reserve le droit de changer les specifications sans preavis. Les dimensionsne sent fourniesqu'a titre indicatif,
Importante: Debidoalas mejorascontinuasdel producto,Maytagse reservael derechode cambiarsus especificacionessin avisoprevio.Las especificacionesdimensionalesse proporcionanparapropSsitosde
planificaei6nunicamente.
Included./Compris./Seincluye. Not Included./Noninclus./Nose incluye. ToolsNeeded./Ontils n_cessaires./
HerramientasNecesarias.
TurnOffpowersource.
CoupzeI'alimentation.
Apagueelsuminstro.
Illli] i[! [1Tilll]_'I1 [i] i!l'l]_'Ii [i] iIili] ! Iilli,li] i [! rlTll_lj ili_ [i] ii! i'_ ltli] i[! rrr_ (i
Note: Strain relief for servicecord or conduit MUSTbe attachedto the conduit plate./Remarque:Le r_ducteurde tension du c_ble ou de la
canalisation _lectrique DOlT_tre fixe a la plaquede la canalisation _lectrique./Nota: Elliberador de tensi6n para el cordon deservicio o para el
conducto DEBEestar fijado a la placa del conducto.
ge back panelon rear of range./Retirezles vis
dn grand panneansitu_ _I'arri_re de la cuisini_re./Retirelostomillos
del paneltraserogrande enla parle trasera de la estufa.
Lift offlarge backpanel./Sonlevezle grandpanneauarri_re./Levanteel
panel traserograndeparasacarlo.
Forconduituse,removescrewsandslideplatedown
andont./Dartslecasdeconduit,enlevezlesvisetabaissezla
plaquepourlasortir./Parausarelconducto,retirelostornillosydeslice
laplacahaciaabajoyhaciaafuera.
Position conduitplateas shown./PosiUonnezla plaque _conduit
comme il est illustr_./Coloquela placadel conductocomo semuestra.
m
i i I i i i i
la plaque dnconduitversle hautet remettezlesvis./Desh'cela
placa delconductohaciaarriba y coloquelostornillos.
Replacelarge backpanel./Replacezle grandpanneauarri_re./Vuelvaa
instalarel paneltraserogrande.
Replacescrewsfrom large back panelon rear of range./Replacezles
visdu grandpanneausitu__I arri_rede la cuisini_re./Vuelvaa instalar
lostornillos del paneltraserograndeen la partetrasera de la estufa.