manuals.online logo
Brands
  1. Home
  2. •
  3. Brands
  4. •
  5. Jenn-Air
  6. •
  7. Range
  8. •
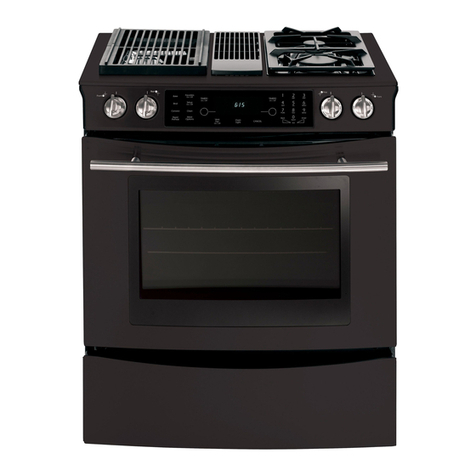
  9. Jenn-Air RS-1 User manual

Jenn-Air RS-1 User manual

Other manuals for RS-1

1

Other Jenn-Air Range manuals

Jenn-Air JENN-AIR User manual

Jenn-Air

Jenn-Air JENN-AIR User manual

Jenn-Air JIS1450DP0 User manual

Jenn-Air

Jenn-Air JIS1450DP0 User manual

Jenn-Air JGR8895BDS12 User manual

Jenn-Air

Jenn-Air JGR8895BDS12 User manual

Jenn-Air JDS98610 User manual

Jenn-Air

Jenn-Air JDS98610 User manual

Jenn-Air PRO-STYLE User manual

Jenn-Air

Jenn-Air PRO-STYLE User manual

Jenn-Air 8111P366-60 Installation instructions

Jenn-Air

Jenn-Air 8111P366-60 Installation instructions

Jenn-Air JGS8850CDB01 User manual

Jenn-Air

Jenn-Air JGS8850CDB01 User manual

Jenn-Air Pro Serires User manual

Jenn-Air

Jenn-Air Pro Serires User manual

Jenn-Air S136-C User manual

Jenn-Air

Jenn-Air S136-C User manual

Jenn-Air JER8885RAB User manual

Jenn-Air

Jenn-Air JER8885RAB User manual

Jenn-Air KSDB900E User manual

Jenn-Air

Jenn-Air KSDB900E User manual

Jenn-Air JES8850CAS02 User manual

Jenn-Air

Jenn-Air JES8850CAS02 User manual

Jenn-Air JDS9860 User manual

Jenn-Air

Jenn-Air JDS9860 User manual

Jenn-Air Pro-Style PRD3030 User manual

Jenn-Air

Jenn-Air Pro-Style PRD3030 User manual

Jenn-Air JGS8750BDS - Jenn-AirR Gas Slide-In Range User manual

Jenn-Air

Jenn-Air JGS8750BDS - Jenn-AirR Gas Slide-In Range User manual

Jenn-Air JDR8895BAB Instructions for use

Jenn-Air

Jenn-Air JDR8895BAB Instructions for use

Jenn-Air SEG196 User manual

Jenn-Air

Jenn-Air SEG196 User manual

Jenn-Air JDRP430WP User manual

Jenn-Air

Jenn-Air JDRP430WP User manual

Jenn-Air RISE JGS1450ML User manual

Jenn-Air

Jenn-Air RISE JGS1450ML User manual

Jenn-Air JGS8750BD Series User manual

Jenn-Air

Jenn-Air JGS8750BD Series User manual

Jenn-Air W10526082A User manual

Jenn-Air

Jenn-Air W10526082A User manual

Jenn-Air 30" (76.2 cm) Cooktop User manual

Jenn-Air

Jenn-Air 30" (76.2 cm) Cooktop User manual

Jenn-Air JES1450CDB User manual

Jenn-Air

Jenn-Air JES1450CDB User manual

Jenn-Air JES8750BAB User manual

Jenn-Air

Jenn-Air JES8750BAB User manual

Popular Range manuals by other brands

Maytag MGR5875QDW - 30 Inch Gas Range Use and care guide

Maytag

Maytag MGR5875QDW - 30 Inch Gas Range Use and care guide

Frigidaire FFGF3024SS use & care

Frigidaire

Frigidaire FFGF3024SS use & care

Capital Precision Series GCR484W Specifications

Capital

Capital Precision Series GCR484W Specifications

Officine Gullo GGS8P Installation and use instruction

Officine Gullo

Officine Gullo GGS8P Installation and use instruction

LG LSD4913 Series owner's manual

LG

LG LSD4913 Series owner's manual

Kenmore 4101 - Elite 30 in. Slide-In Electric Range installation instructions

Kenmore

Kenmore 4101 - Elite 30 in. Slide-In Electric Range installation instructions

Moffat Blue Seal Evolution G576 Technical data sheet

Moffat

Moffat Blue Seal Evolution G576 Technical data sheet

CornuFé C1NF user guide

CornuFé

CornuFé C1NF user guide

GE JGS650SEFSS Dimensions and installation information

GE

GE JGS650SEFSS Dimensions and installation information

LG LDG3015ST Manual De Propietario

LG

LG LDG3015ST Manual De Propietario

Whirlpool RF350PXP Use and care guide

Whirlpool

Whirlpool RF350PXP Use and care guide

Samsung FCQ321HTUW Service manual

Samsung

Samsung FCQ321HTUW Service manual

Kenmore 790.45712 Use & care guide

Kenmore

Kenmore 790.45712 Use & care guide

Wolf CHR CHSSR owner's manual

Wolf

Wolf CHR CHSSR owner's manual

Smeg Built-in Microwave Oven Instructions for the user

Smeg

Smeg Built-in Microwave Oven Instructions for the user

Zanussi ZCG054G user manual

Zanussi

Zanussi ZCG054G user manual

GE JCSS630 quick start guide

GE

GE JCSS630 quick start guide

Samsung NX58M9960P series installation manual

Samsung

Samsung NX58M9960P series installation manual

manuals.online logo
manuals.online logoBrands
  • About & Mission
  • Contact us
  • Privacy Policy
  • Terms and Conditions

Copyright 2025 Manuals.Online. All Rights Reserved.

GAs RANGERS-1
Us
GUIDE
Installer:Pleaseleavethismanualwith Ifyouhavequestions,call: ' [A
thisappliance, _./_BLE OF CONTENTS
Jenn-AirCustomerAssistance
Consumer:Pleasereadandkeepthis 1-800-688-1100USAandCanadaSafetyInstructions....................................1-3
manualforfuturereference.Keepsales 1-800-688-2080(U.S.TTYfor SurfaceCooking......................................4-5
receiptand/orcancelledcheckasproofof hearingorspeechimpaired)
purchase.(Mon.-Fri.,8am-8pmEasternTime) OvenCooking........................................6-11
ModelNumber Internet:http://www.jennair.com Care&Cleaning..................................12-16
Forserviceinformation,seepage19. BeforeYouCallforService..................17-18
Warranty....................................................19
SerialNumber GuidedeI'utilisateur..................................20
......................... GuiadelUsuario........................................42
InourcontJnuJngeffortto ira-
DateofPurchase provethe qualityand perfor-
manceofourcookingproducts,
it maybenecessaryto make
changestotheappliancewith-
JENN-AIR ,°utrevisingthisguide....
FormNo A/04/01 PartNo.8113P310-60 74006043 LithoU.S,A
IMPORTANTSAFETYIFISTIUCTIOFIS
Read and follow all instructions technicianshowyou the locationof the Keepareaaroundapplianceclearand
beforeusing this appliance toprevent gasshutoffvalveandhowto shutitoff freefromcombustiblemateriats,gaso-
the potentialriskof fire, electricshock,in anemergency, line,and otherflammablevapors and
personalinjuryor damageto the appli- materials.
ance as a resultof improperusageof Always disconnectpower to appliance Ifapplianceisinstalledneara window,
the appliance.Useapplianceonlyfor its beforeservicing. properprecautionsshouldbetakento
intendedpurposeas describedin this prevent curtains from blowing over
guide GENERALINSTRUCTIONSburners.
NEVERleaveanyitemsonthecook-
top. The hot air from the vent may
IF THE INFORMATION IN THIS igniteflammable items and may
MANUAL IS NOT FOLLOWED >- ALL RANGES _ increasepressureinclosedcontainers
EXACTLY, A FIREOR EXPLO- CAN TIP AND _ whichmaycausethemto burst.
SlON MAY RESULT CAUSING CAUSE Manyaerosol-typespraycansareEX-
PROPERTY DAMAGE, PERSON- INJURIES TO PLOSIVEwhenexposedto heat and
AL INJURYOR DEATH. PERSONS may be highlyflammable.Avoidtheir
>DONOTSTOREOR USEGASO- > INSTALL _ useorstoragenearanappliance.
LINE OR OTHER FLAMMABLE ANTI-TIP (_ Manyplasticsare vulnerableto heat.
VAPORSANDLIQUIDS IN THE DEVICE Keepplasticsawayfrom partsof the
VACINITY OF THIS OR ANY PACKEDappliancethat may becomewarm or
APPLIANCE. WITH RANGEhot. Do not leaveplasticitemson the
>WHAT TO DO IF YOU SMELL >FOLLOW ALL INSTALLA-cooktopas they may meltor softenif
GAS: TION INSTRUCTIONS left too closeto the vent or a lighted
surfaceburner.
-Do not tryto light any appli- WARNING: To reduceriskof To eliminatethe hazard of reaching
ante.tipping ofthe appliance from overhotsurfaceburners,cabinetstor-
-Do not touchany electricalabnormal usage or by exces-age should not beprovided directly
switch, sire loadingof theoven door, abovea unit. If storageis provided,it
- Do not use any phonein your theappliancemust be se- shouldbe limitedto itemswhicharc
building,cured by a properlyinstalled usedinfrequentlyandwhicharesafel_
-Immediately call your gas anti-tip device, stored in an area subjectedto hen
supplier from a neighbor's from anappliance.Temperaturesmat
phone. Followthe gas sup- Tocheckifdeviceis properlyinstalled, be unsafefor some items, such a._
plier'sinstructions, removestoragedrawerorbroilercorn- volatile liquids, cleaners or aeroso
- If you cannot reach yourgaspartmentand look underneathrange sprays.
supplier, call the fire depart- with a flashlightto make sureone of
rnent, the rear leveling legs is properly
INSTALLATIONANDSERVICE engagedin the bracketslot.Theanti- IN(AS[0FfIRE
MUSTBE PERFORMED BY A tipdevicesecuresthe rearlevelingleg
to the floor when properlyengaged. Turnoffapplianceandventilatinghooc
QUALIFIEDTECHNICIAN,SER- Youshould check this anytime theto avoid spreading the flame
VICE AGENCY OR THEGAS rangehasbeenmoved. Extinguishflame,thenturnonhoodtc
SUPPLIER. removesmokeandodor.
COOKTOP:Smotherfireor flamein
Toensureproperand safeoperation: TOPREVENTfiR[pan with a lid or cookiesheet.Neve
Appliancemustbeproperlyinstalledand usewaterona greasefire.
groundedby a quatifiedtechnician.Do SMOKEDAM.G[notattempttoadjust,repair,service,or OR OVENDOOR:If fire is in the oven c
replace any part of your appliance broiler pan, smotherby closingove,
unlessit is specificallyrecommendedin Be sure all packing materials are door.
this guide.All otherservicingshouldbe removed from the appliance before Neverattemptto pick up or move
referredto a qualifiedservicer.Havethe operatingit. flaming pan. Do not use water ot
1
greasefires,usebakingsodaor a dry oven vent, surfaces near the vent Alwaysletquantitiesof hotfatusedfor
chemicalor foam-typeextinguisherto opening,ovendoorand areasaround deepfatfryingcool beforeattempting
smotherfire orflame,doorandwindow, to moveor handle.
WARNING: NEVER use appliance Do not let cooking grease or other
(HI[D S,_f[ff door,or drawer,ifequipped,as a step flammablematerialsaccumulatein or
stoolor seatas thismayresultin pos- nearthe appliance,hoodor ventfan.
NEVERleavechildrenaloneor unsu- sibletippingof theappliance,damage Clean hood frequently to prevent
pervisedneartheappliancewhenit is tothe appliance,andseriousinjuries, greasefromaccumulatingonhoodor
in useor isstillhot.Donottoucha hotovenlightbulbwith filter. When flamingfoods under the
hood,turnthefan on.
NEVERallow childrento sit or stand a dampclothasthe bulbcouldbreak.
on any part of the applianceas they Should the bulb break, disconnect NEVERweargarmentsmadeof flare-
couldbeinjuredorburned, powerto theappliancebeforeremov- mablematerialorloose-fittingor long-
ingbulbto avoidelectricalshock, sleevedapparelwhilecooking.Cloth-
Childrenmustbetaughtthattheappli- ingmayigniteorcatchutensilhandles.
anceandutensilsin it canbehot. Let
hotutensilscoolin a safeplace,outof (00KIN6 S,_f[ff Alwaysplaceovenracksinthedesired
reach of small children.Children positions while oven is cool. Slide
shouldbetaughtthat an applianceis Alwaysplacea panon a surfaceburn- oven rackout to addor removefood,
not a toy.Children should not be er beforeturning it on. Be sure you usingdry, sturdypot holders.Always
allowedto playwith controlsor other knowwhich knobcontrolswhich sur- avoidreachingintotheovento addor
partsofthe unit. face burner. Make sure the correct removefood.Ifa rackmustbe moved
burneristurnedonand thattheburn- whilehot,usea drypotholder.Always
CAUTION:NEVERstore itemsof in- er hasignited.Whencookingis corn- turntheovenoffat theendofcooking.
terestto childrenincabinetsabovean pleted,turnburneroffbeforeremoving Usecarewhenopeningtheovendoor.
applianceoronbackguardofa range, pan to prevent exposure to burner Let hot air or steam escape before
Children climbing on the appliance flame, movingor replacingfood.
doorto reachitemscouldbe seriously
injured. Alwaysadjustsurfaceburnerflameso PREPAREDFOOD WARNING:Fol-
thatitdoesnotextendbeyondthebot- lowfoodmanufacturer'sinstructions.If
_BOUT fOUR _,IPP[IAN([ tom edge of the pan.An excessive a plasticfrozenfoodcontainerand/or
flame is hazardous,wastes energy its cover distorts,warps,or is other-
and may damagethe appliance,pan wisedamagedduringcooking,imme-
NEVER use appliance as a space orcabinetsabovetheappliance, diatelydiscardthe food and its con-
heaterto heatorwarma roomto pre-
ventpotentialhazardto the userand NEVERleavea surface-cookingoper- tainer.Thefood couldbe contaminat-
damagetothe appliance.Also,donot ation unattended, especially when ed.
usethe cooktoporovenas a storage usingahighheatsettingorwhendeep NEVERusealuminumfoil to coveran
areaforfoodorcookingutensils,fat frying.Boiloverscause smoking oven rack or oven bottom. Misuse
and greasy spillovers may ignite, could result in risk of electricshock,
Donotobstructtheflowofcombustion Cleanupgreasyspillsassoonaspos- fire, ordamageto the appliance.Use
andventilationairbyblockingtheoven sible.Donot usehighheatfor extend- foilonlyasdirectedinthis guide.
vent or air intakes.Restrictionof air edcookingoperations.
flowtothe burnerpreventsproperper-
formanceand increasescarbonmen- NEVERheatan unopenedcontainer Uf[NSI[ S,_f[ff
oxideemissionto unsafelevels,on the surfaceburneror in theoven.
Pressurebuildupmaycausecontain-
Avoid touchingoven vent area while er toburst,resultingin seriousperson- Use pans with flat bottomsand han-
dlesthat are easilygraspedand stay
oven is on and for several minutes al injuryor damageto theappliance.
afterovenisturnedoff. Somepartsof cool. Avoid using unstable, warped,
theventandsurroundingareabecome Usedry,sturdypotholders.Damppot easily tippedor loose-handledpans.
holdersmaycauseburnsfromsteam. Also avoid using pans, especially
hotenoughto causeburns.Afteroven Dishtowelsorothersubstitutesshould small pans, with heavy handlesas
is turned off, do not touchthe oven
vent or surroundingareas until they neverbeusedaspot holdersbecause theycouldbe unstableand easilytip.
havehadsufficienttimetocool. theycantrailacrosshotsurfaceburn- Pans that are heavy to move when
ers and ignite or getcaught onappli- filled with food may also be hazard-
Otherpotentiallyhotsurfacesinclude ancepads. ous.
cooktop, areas facing the cooktop, J
IMPORTANTSAFETYINSTRUCTIONS,CONT.
Besureutensi,is,argeenoughto (LEAFIIFIGSAFETY IMPORTAHTSAFETYNOTICE
properly contain foodand avoid
boilovers.Pan size is particularlyim- Turnoff allcontrolsandwaitfor appli- AHD WARHIHG
portantin deepfat frying.Besurepan ance partstocoolbeforetouchingor
will accommodatethe volumeof food cleaningthem.Donottouchthe bum-
thatistobeaddedaswellasthe bub- The California Safe Drinking Water
er grates or surroundingareas untiland Toxic EnforcementAct of 1986
bleactionoffat. theyhavehadsufficienttimetocool. (Proposition65)requirestheGovernor
Tominimizeburns,ignitionofflamma- Clean appliance with caution. Use of Californiatopublisha list of sub-
blematerialsandspillageduetounin- care toavoid steam burns if awet stancesknowntothe Stateof Califor-
tentionalcontactwith the utensil,dospongear clothis usedto wipe spills nia to causecancerorreproductive
notextendhandlesoveradjacentsur- on a hot surface.Somecleanerscan harm,andrequiresbusinessestowarn
faceburners.Alwaysturnpanhandles producenoxiousfumesifappliedto a customersof potential exposuresto
towardthe side or back of the appli- hotsurface, suchsubstances.
ance,notoutintothe roomwherethey
areeasilyhit or reachedby smallchil- Users of this appliance are hereby
dren. ,_I[L[1_.LL,/Arq(lrlr'_"|rA_lOVEHwarned that the burning of gas can
resultin low-levelexposuretosomeof
Neverleta panboildry as this could the listedsubstances,includingben-
damagethe utensilandtheappliance. Cleanonlypartslistedinthisguide.Do zene,formaldehydeandsoot,duepri-
notclean door gasket.Thedoorgas- marilytothe incompletecombustiono
Followthe manufacturer'sdirections ketis essentialfor a goodseal.Care natural gas or liquid petroleum(LP
whenusingovencookingbags. shouldbetakennotto rub,damageor fuels. Properlyadjusted burners wil
Onlycertaintypes of glass,glass/ce- removethe gasket.Do not useoven minimizeincompletecombustion.Ex
ramic,ceramicor glazedutensilsare cleanersof any kindin or aroundany posureto these substancescan als(
suitable for cooktop or oven usage partoftheself-cleanoven. be minimizedby properlyventingthe
without breakingdue tothe sudden Beforeself-cleaningtheoven,remove burnerstotheoutdoors.
changein temperature.Followmanu- broilerpan,ovenracksandotheruten- Users of this appliance are hereb_
facturer's instructions when using sils and wipe up excessivespillovers
glass, topreventexcessivesmokeor flare- warnedthatwhenengagedintheself
clean cycle, there may be Iow-leve
This appliance has been tested for ups. exposuretosome of the listed sub.
safe performanceusing conventional CAUTION:Donotleavefoodor cook- stances,includingcarbon monoxide
cookware.Do not useany devicesor ingutensils,etc.,in theoven during Exposurecanbeminimizedbyproper
accessoriesthat are not specifically theself-cleancycle, ly ventingthe oven tothe outdoor,,
recommendedin this guide. Do not duringthe self-cleancycleto openin(
useeyelidcoversforthesurfaceunits,It is normal for the cooktopof the awindow and/or door in the roorr
stovetopgrills,oradd-onovenconvec- range tobecome hot during aself- wheretheapplianceis located.
tion systems.The use of devicesorclean cycle. Therefore,touching the
accessoriesthatarenotexpresslyrec- cooktopduringacleancycleshouldbe IMPORTANTNOTICE REGARDIN(
ommendedin this manualcancreate avoided.PET BIRDS:Neverkeeppet birds i
serioussafety hazards,resultin per- the kitchen or in rooms where th
formanceproblems,and reducethe fumes from the kitchencould reac}
life of the componentsof the appli- Birdshavea verysensitiverespirator
ance. system. Fumes released during a
ovenself-cleaningcyclemaybeharrr
ful or fatal to birds. Fumes release
due to overheatedcooking oil, fa
margarineand overheatednon-stic
cookwaremaybeequallyharmful.
SAVETHESEIFISTRUCTIOHSFORFUTUREREFEFlEHCE
SURFACE(OOKIFIG
SURFACE(OFITROLS SURFACEcOntROL SUGGESTED
KNOBS HEATSETTINGS
Use to turn on _ Thesizeandtype ofcookwarewillaf-
thesurfaceburn- __ fecttheflamesetting.For informationIf flame shouldgo out duringaers. An infinite /_ _"I • )'}_.\ on cookwareandother factorsaffect-
cookingoperation,turntheburn- choice of heat[_// II II _/ ingflame settings,referto "Cooking
er off. If a strong gas odor is settingsis avail-/_// IIII MadeSimple".
detected,open a window and able from LOW \_..% [[ )1 / /
wait five minutesbeforerelight- to HIGH.At the _e _oj SettingUses
ingthe burner. HIGHsetting a _ ° y
> Be sureall surfacecontrolsare detent or notch HIGHUseto bringliquidto aboil,
or reach pressure in a
set in the OFF positionpriorto maybefelt. The knobscanbeseton pressure cooker. Always
supplyinggastothe range, orbetweenanyof thesettings. ) reducesetting to a lower
> Nevertouchcooktopuntilit has _ heatwhenliquidsbeginto
cooled.Expectsomepartsofthe Graphicsnearthe knob identifywhich boilorfoodsbegintocook.
cooktop, especially around the burnerthe knobcontrols.For i,
burners,to becomewarmor hot example,this graphicshowsg-:
duringcooking.Use potholders the rightrearburnerlocation. __ _f Anintermediateflamesize
is used to continuecook-
to protectyourhands. SETTING THE CONTROLS ing. Foodwill notcookany
fasterwhena higherflame
PILOTLESSIGNITION 1.Placea panontheburnergrate,settingis usedthan need-
Pilotlessignitioneliminatesthe needfor > The burnerflame may lift off or LOW ed to maintain a gentle
a constant standing pilot light. Each appearseparatedfromtheportif s_-_,_. boil. Water boils at the
sealedburnerhasa sparkignitor.When a panisnot placedonthegrate. ,_, sametemperaturewhether
cleaningaroundthesurfaceburneruse _._
L_ _ boilinggentlyorvigorously.
care. If cleaningclothshouldcatchthe 2. Pushin andturn the knobcounter- _
ignitor,itcoulddamageitpreventingig- clockwisetothe LIGHTsetting. Usetosimmerfoods,keep
nition. >Aclicking (spark)soundwill be foods warm and melt
heard and the burner will light. ___ chocolateor butter.
If the surface burner does not light, (All ignitorswill sparkwhenany
checkif ignitoris broken,soiledor wet. surfaceburnerknobis turnedto
If clogged,cleanthesmallportbeneath theLIGHTposition.) OPERATINGDURING
the ignitor usinga straightpin or soft
bristlebrush. 3.Aftertheburnerlights,turnthe knob APOWERFAILURE
tothedesiredflamesize.
c_,, 1.Holda lightedmatchtothe desired
>-The ignitorwill continueto spark surfaceburnerhead.
untilthe knob isturnedpast the
LIGHTposition. 2. Push in and turn the control knob
_o._ slowlyto LIGHT.
IGNITOR
,_o._o.,._.,_o. 3. Adjust the flame to the desired
level.
> When lightingthe surface burn-
ers,besureallofthecontrolsare
in the OFF position.Strike the
matchfirstand holdit in position
before turning the knob to
START.
4
SURFACECOOKIHG,corn,
(OOKTOP HIGHPERFORMANCE
BURNER(12,000BTU*)
TOPREVENTTHECOOKTOP
FROMDISCOLORINGORThis rangefeaturesa/ High _ A properly adjustedburner with
high speed burner,,_l--- Pe,_o_,oe
STAINING: located in the right I • Front clean portswilllightwithina few
seconds.If usingnaturalgasthe
> Cleancooktopaftereachuse. front position.This high-performance flamewill be blue with a deeper
burner offers higher speed cooking blueinnercone.
> Wipeacidicorsugaryspillsas thatcanbeusedtoquicklybringwater
soonasthecooktophascooled toa benandfor large-quantitycooking. Ifthe burnerflameis yellowor is
asthesespillsmaydiscolorthe *BTU ratingswillvary whenusingLP noisythe air/gasmixturemaybe
porcelain, gas. incorrect.Contacta servicetech-
nicianto adjust.(Adjustmentsare
Unlikearangewithstandardgasburn- notcoveredbythewarranty.)
ers,thiscooktopdoesnotlift-upnoris SIMMERBURNER
it removable.Do not attempt to lift WithLPgas, someyellowtipson
the cooktop for any reason. Thisburner is locatedin the left rear theflamesareacceptable.Thisis
position.The simmerburneroffers a normalandadjustmentisnotnec-
lowerBTUflamefordelicatesaucesor essary.
meltingchocolate. > Withsometypesofgas,youmay
heara "popping"soundwhenthe
surfaceburner isturnedoff. This
BURNERGRATES isanormaloperatingsoundofthe
burner.
SEALEDBURNERSThe grates must be properly posi-
tioned beforecooking. Improperin- >-If the controlknob isturnedvery
Thesealedburnersofyourrangearese- stallationof the grates may result in quicklyfrom HIGH to LOW,the
curedtothecooktopandarenotdesigned chippingofthecooktop, flame may go out, particularlyif
to be removed.Sincethe burnersare Do not operate thetheburneriscold. If this occurs,
sealedintothecooktop,boiloversorspills burners without apan turnthe knobto the Off position,
willnotseepunderneaththecooktop, on the grate. Thewait severalsecondsand relight
However,the burnerheadsshouldbe grate's porcelain fin- the burner.
cleanedaftereachuse.(Seepage14for ish maychip without a
cleaningdirections.) panto absorb the heat > Theflameshouldbeadjustedso
from the burner flame, it does not extend beyond the
edgeof thepan.
Although the burner
gratesaredurable,they
will graduaNylose their shine and/or
discolor,dueto the hightemperatures
ofthegasflame.
S
OVEN(OOKiN6
[ECTROHICCLOCKAHDOV[HCOHTROL
BROILPAD
I1 Usefor top browningandbroiling.
"= i ii
Bakei More+TimerC,ockt.PressBroi,pad
2.PressMore+or Less- padfor HI
SetCIock or LObroil.
ID ll ll OvenOn ll I1 Seepage10foradditionalinformation.
Broil Self ll Preheat Less-Cook Stop
Clean Time Time
II Lock CLEANPAD
Useto setself-cleancycle.
fUNCTIONPADS _ The indicatorlight on the first1.CloseandIockovendoor.
padwill"dim"slightlyandthein- 2. PressCleanpad."3:00"willappear
dicatorlighton thepad youjust inthe display.
> Press,orpressand hold,
these padsto enter time, More+ pressedwillbe"fullon."Thislets 3. Ovenwillautomaticallycleanfor 3
youknowthatyou havesetthe hours or press More+or Less-
oventemperatureor tose- SetClock controlfor twooperations, padto select2 to 4 hoursof clean-
lect HI or LO broil. No
beep will sound when Less- ing.
thesepadsarepressed. For example: If you set "O_M"
theovento bakeat 350°F Seepages12-13foradditionalinformation.
> Pressthis pad to cancel andthensetat/ruingoper- Bake
all operationsexceptthe .: at/on,the indicatorlighton COOKTIME/
TimerandClock. the Bake pad will "dim"
and the indicatorlight on "FULL-ON" STOPTIME PADS
> Functionpadsare theBake,Broil,theTimerpad will be "full ll Useto programthe oven to startand
Clean,Timer, Clock, CookTime, on." stopautomatically.
StopTime and Cancel pads. A The displaywillshowthe Bake 1. Press Cook Time pad and enter
beepwill sound when these pads operationfor the padwith thedesiredcookingtime.
arepressed, the "full on" indicatorlight.Pressthe 2. PresstheBakepadandenteroven
>- Allfunctionpadsexceptthe functionpad with the "dim"indicator temperature.
Cancelpadfeatureanindi- lightto recallthatoperation.
catorlight. Bake 3. Todelaythe startofcooking,press
NOTE: If more than 30 seconds theStop Timepad and enterthe
> WhenBakeor Broilpadis II elapsebetween pressing a function timeyouwishthe oventoturnoff.
pressed,the indicatorlight pad and a More+ or Less-pad, the Seepage11foradditionalinformation.
willturnonto letyouknow Bake program will be canceled and the
that theoven issetfor this display will return to the previous
operation, display.
Indicator lights on Clean, Timer,
Clock,CookTime and Stop TimeBAKE PAD
pads will flash when the pad is Usefor bakingorroasting.
pressed.These indicatorlightswill 1. PressBake pad.
stopflashingbutwill remainlitonce 2. PressMore+or Less-paduntilthe
thefunctionstarts. correctoven temperatureappears
>-Ifanindicatorlightonafunctionpad inthe display.
islitandyousetasecondoperation: Seepage8for additionalinformation.
- Eitherthe controlwill not accept
theoperationor
OVEHCOOKIHG,CONT.
SETTING THE CLOCK COHTROLOPTIONSTO RESTORE:Pressthe Clock and
Cancel padsat the same timeand
1. PressClockpad. hold for three seconds. Thetime of
2.Pressor pressandhold More+or CLOCKCONTROLLEDdaywill reappearinthe display.
Less- paduntilthe correcttimeof
dayappearsinthedisplay. OVEN COOKINGBEEPS
The displaywillflash when electrical Option1.(defaultoption)Fourbeeps AUTOMATICOVENTURN
powerisfirstsuppliedtothe rangeor if at the end of cooking,then, one OFF/SABBATHMODE
therehasbeena powerfailure, beep every 30 secondsfor the The oven will automaticallyturn off
Torecallthetimeof daywhenanother next five minutes or until the after 12 hours, if you accidentally
functionisdisplayed,presstheClock Cancelpadispressed, leaveit on. You can deactivatethis
pad. Option 2. Four beepsat the end of feature,if desired.
Clocktime cannotbe changedwhen cooking,then,nootherbeeps. TOELIMINATE12HOURTURN
the oven has been programmedfor Option 3.Four beeps at the end of OFF:
clockcontrolledcooking,self-cleanor cooking, then, one beep every
delayedself-clean, minute for the next 12 hours or 1. Pressthe Clockpad and holdfor
untiltheCancelpadispressed, threeseconds.
SETTINGTHETIMER 2. PressandholdtheMore+orLess-
Thetimercanbesetfromoneminute SETTINGCLOCKCONTROLLED pad until8:88 appearsin the dis-
(0:01)up to 9 hoursand 50 minutes OVENCOOKINGBEEPS: play.Currenttimeofdaywillreap-
pear in the displayafter four sec-
(9:50). 1. PressCookTimeandClockpads onds.
The timercanbe usedindependently atthesametimeandholdforthree
ofanyotherovenactivityanditcanbe seconds. TORESTORE:Repeatsteps1and2.
setwhileanotherovenfunctionisop- 12:00will appearbrieflyin the display
erating.THE TIMER DOES NOT > A singlebeepwill sound, followedby thecurrenttimeof day.
CONTROLTHEOVEN. > Displaywillshowcurrentoption.
1.PresstheTimerpad. 2. Pressthe More+or Less- padto CONTROLLOCK-OUT
selecttheoptionnumberyouwish. TheControlLock-Outfeatureprevents
2. Pressor pressandholdtheMore+ The currenttime of day will reap-
orLess- paduntilthecorrecttime pear in thedisplay afterfour sec- the ovenfrombeingturnedon.
appearsin thedisplay, onds.
> Thetimerwillstartautomatical- TOSETCONTROLLOCK-OUT:
ly.The TIMER indicatoronthe
Timerpad will light whenever CANCELCLOCKDISPLAY 1.Press and hold both Stop Time
and Cancel pads for three sec-
thetimeris inuse. ifyoupreferthatthetimeof daynotbe onds.
> Onelongbeepand"End"will be displayed:
briefly displayedto signal the 2. "OFF" will appear in the display
endofthetimeroperation. TO SET: Press Clockand Cancel whenthisfeatureisactivated.Only
pads at the same time and hold for the clock and timer functionswill
TOCANCELTIMER: Pressand hold threeseconds, operate when Control Lock-Out
Timer padfor threeseconds.Timeof When clock display is not shown, featureisactivated.
daywill reappearinthe display, press Clock pad to briefly recallthe
timeofday,if desired. Repeatstep1to deactivate.
7
OVEN TEMPERATURE BJKIHGJ HDROASTING.EAT indicatorwilllight.Theprese-
lected temperaturewill remain in
ADJUSTMENTOPTION the display.
Youmay adjustthe oventemperature
ifyouthinktheovenisnotbakingcor- 4. Allow 8-15minutesfor theovento
rectly.Todecidehowmuchto change > Youmay find that the cooking preheat.A singlebeep will indicate
the temperature,set the temperature times and temperaturesvary that the oven has preheated.The
25 degreeshigheror lowerthan your slightlyfromyouroldoven.This OVENON indicatorwill remainlit
reciperecommends,then bake.The is normal.Everyoven has its while the PREHEATindicatorwill
resultsofthe "test"shouldgiveyouan owncharacteristics,turnoff.
ideaofhowmuchtoadjustthetemper-
ature. > During some extended oven 5. Placefoodin theoven.
cooking operations,you may > The oven temperaturecan be
TOADJUSTTHE hear a "popping"soundwhen changedatanytimebypressing
OVENTEMPERATURE: theoven burnercycles.Thisis the More+or Less- padfor the
normal, desiredtemperature.If another
1.Pressthe Bakepad.functionis displayed,pressthe
> See roastingchartin "Cooking Bake pad, then press the
2. Enter550°by pressingMore+pad.Made Simple"bookletfor rec- More+ or Lees- pad to select
3.Pressand holdthe Bake padfor ommendedroasting tempera- newtemperature.
threesecondsuntil00° appearsin turesandtimesandbakingand
thedisplay,roastingtips. 6. Checkcookingprogressatthemin-
> Ifthe oventemperaturewaspre- imumcookingtimeandcooklonger
viouslyadjusted,the changewill PILOTLESSIGNITION if needed.
bedisplayed.Forexample,ifthe
oven temperaturewas reduced Your range is equiped with pilotless 7. PressCancelpadandremovefood
by15°,thedisplaywillshow-15°. ignition.Withthistype of ignitionsys- fromtheoven.TheBAKEindicator
tern,the gas automaticallyshuts off on the Bakepad will turn off. The
4. PressandholdtheMore+or Less- andtheoven will not operateduring OVENONindicatorwillturnoffand
pad to change the temperature, a power failure, the time of daywill reappearin the
Eachtime a pad is pressed,the A lighted match will not light the display.
temperaturechangesby5°. oven burner. No attempt should be > Ifyouforgettoturnoffthe oven,
>-The oven temperaturecan be made to operate the oven during a it will automaticallyturn off at
increasedor decreasedby 5 ° power failure, theendof 12hours.Ifyouwish
to 35o.to deactivatethis feature,see
SETTINGTHECONTROLSpage7.
5. Thetime of day will automatically FORBAKINGAND
reappearin thedisplay.ROASTING OV[NVENT
Itisnotnecessaryto readjusttheoven
temperatureifthereis a powerfailure 1. PressBakepad. TheBAKEindica-
or interruption.Broilingand cleaning tor on the Bake pad will light, and theWhenventtheopening.°Venis in use,never block
000will lightin display.
temperaturescannotbeadjusted. Theovenventislocatedatthebaseof
2. Pressor pressand holdthe More+ the backguard.Whenthe oven is in
or Less- pad to select oven tern- use,thisareamaybecomehotenough
perature, to causeburns. Do not place plastics
>- 350°willlightwheneitherpadis neartheventopeningas heatfromthe
pressed.Theoventemperature vent coulddistortor meltthe plastic.
canbesetfrom170°to 550°.
3. Therewill be a four seconddelay 0V[N [16HT
before oven turns on. When the Push the switch on the
oventurnsontheOVENONindica- controlpanelto turnthe IUUI
tot will light, and then the PRE- ovenlighton andoff.ov_NLIGHT
I
OYENCOOKING,cons,
OVENRACKSRACKPOSITIONSROASTINGPOSITION:
Usedfor roastingtallercutsofmeat
!_-.-_ | or turkey. Placeboth oven racks,
_,_ one abovethe other,on the raised
f_,_ _ _ ____ --5 sidesof theovenbottom.
> Do notattemptto changethe !_ --4
hot.rackpositionwhentheovenis _, -- _ ,_--2_1 l_i = = [_
Yourovenhastworacks.Theyarede-
signedwitha lock-stopedge. RACK5: =_
Usedfor toastingbreador broiling
TO REMOVE: Pull rackstraightout thinnon-fattyfoods.
untilit stopsat the lock-stopposition;
lift uponthe frontofthe rackand pull RACK4: MULTIPLERACKCOOKING:
out. Used for most broilingand some
two-rackbaking. Tworack:
Userackpositions2 and4,or 1and
Usedfor most baked goodson a
_%\\',_ i_./_,1 cookiesheetor jelly roll pan,layer NOTE: Neverplacepans directlyon
!_'_l_ cakes, fruit pies, or frozen conve-the ovenbottom.
Ii:if¢I] niencefoods.HALFRACKACCESSORY
Used for roasting small cuts of Ahalf rack,to increaseoven capacity,is
meat,casseroles,bakingloavesof availableasanaccessory.Itfitsintheleft,
bread,bundtcakes,custardpiesor upperportionof the ovenand provides
TOREPLACE:Placerackontherack two-rackbaking, spacefora vegetabledishwhena large
roasterisonthelowerrack.Contactyour
supportintheoven;tiltthefrontendup RACK1: Jenn-Airdealerfor the "HALFRACK"Ac-
slightly;slide rackbackuntil it clears Usedforroastinglargecutsof meat cessoryKitorcall1-800-688-8408toorder.
the lock-stopposition;lowerfrontand and poultry, frozen pies, dessert
slidebackintotheoven.souffles,angel food cake, or two-
Donot coveranentirerack withalu- rackbaking.
minumfoil or place foil on the oven
bottom.Baking results will be af-
fected and damage may occur to
the oven bottom.