manuals.online logo
Brands
  1. Home
  2. •
  3. Brands
  4. •
  5. Jenn-Air
  6. •
  7. Range
  8. •
  9. Jenn-Air SEG196 User manual

Jenn-Air SEG196 User manual

M_mJENN.AIR
Use and Care Manual
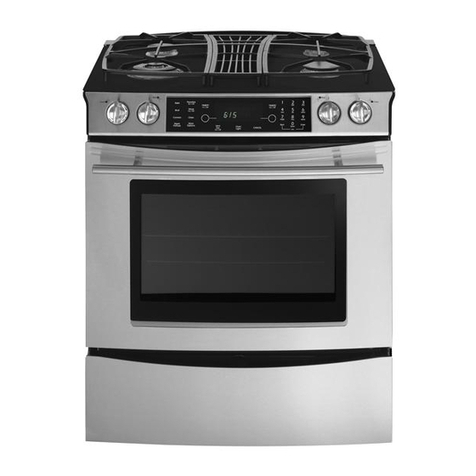
Gas-Electric Grill-Range
Model SEG196
WARNING: Ifthe informationinthismanualisnot
followed exactly,a fire or explosion may result
causing property damage, personal injury or
death.
-Donotstore oruse gasolineorotherflammable
vapors and liquids in the vicinity of this or any
other appliance.
-WHATTO DO IFYOU SMELLGAS
• Do not try to light any appliance.
•Donottouch any electricalswitch; do notuse
any phone inyour building.
•Immediately call your gas supplier from a
neighbor's phone. Followthe gas supplier's
instructions.
•Ifyoucannot reachyour gas supplier,callthe
fire department.
• Extinguishany openflame.
Installationand service must be performedby
a qualified installer,service agency or the gas
supplier.
- SAVE THESE INSTRUCTIONS FOR FUTURE REFERENCE-
Congratulations on your choiceof a Jenn-Air range,The indoor gd//ing of
meats, fish or fowl isone of the most attractive and succulent methods of
preparing these foods ... a uniqueflexibility made possible by Jenn-Air's
patented integral ventilation system.
YourJenn-Airself-cleaningovencombines thebestoftwocookingmethods,
convectionand radiantbake(conventional)bakingor roasting.
The Jenn-Airconvectionovenisactuallya conventionaloventhatcirculates
heatedairwithinthe oven. Asbothbakeandbroilheatingelementscycleon
and offwiththe thermostat,a fan keepstheheatedaircirculatingaroundthe
food. Theconstantlyrecirculatingheated air in the convectionoven strips
awaythe layerofcooler airthatsurroundsfood. Consequently,manyfoods
cook more quickly. Distributedheat makesmultiplerackcookingpossible.
Convectionroastedmeats retaintheir naturalflavor and juicinesswith less
shrinkagethan radiantbake roasting.
In additiontothemanyexclusivebenefitsofconvectioncooking,yourJenn-
Air ovenis alsoa finefullfeatured bake and broiloven.
Youcan cookyour "oldfavorite"recipesasyouhave inthe past. The radiant
bake oven also gives you the flexibilityofpreparingvarious foods when
convectioncookingmaynot beas beneficial, as whencookingfoods in
coveredcasseroles or clay pots. Thebroilelement isconvenientfor top
browningandovenbroilingoffoods.The timebakefeaturecanbe usedwith
eitherthe convectionor radiantbake oven.
Beforeyou begincookingwithyournewrange,pleasetakeafew minutesto
readand becomefamiliarwiththe instructionsinthisbook. Onthe following
pagesyouwillfindawealth of informationregarding allaspects of usingyour
new range. Byfollowingtheinstructionscarefully,you willbe able to fully
enjoyandpropeflymaintainyourrangeandachieveexcellentresultswiththe
foodyouprepare.
Shouldyouhaveanyquestionsabout usingyourJenn-Airrange,writetous.
Be sureto providethe modelnumber.
Jenn-Air Customer Assistance
c/o Maytag Customer Service
P.O. Box2370
Cleveland,TN 37320-2370
3
i'_i:_;I!_!$_i:_::i_i:i:_:__ii:_i:li_:_!_i:i_;_:!i:i_!:!_ !_:_!_ _i_;__ ii_:_ _'%%_i _i:i:_:_ _i:_:_ _!$ _ ::_"_ _11_ :_ __:_ i:_ _ _i_¸ :__ii_ii_i_!__ __ii_+_
_ _,_,_!_,_i_ __ _: :_- _ _ : _::_ ::_ , _- . _ _ _ "_::" • _:_ ,_:_::_
Appliance Usage
CleaningOther PartsofyourRange............................................................................. 22-23
OtherHintsonCaringfor yourRange
AccessDoor.............................................................................................................. 45
Oven LightBulbReplacement................................................................................... 48
OvenTemperatureKnobAdjustment......................................................................... 47
RemovingRange ....................................................................................................... 45
SafetyPrecautions........................................................................................................ 2,5-8
ServiceInformation...................................................................................................... 50-51
Ueing the Cooktop and Grill
Accessories....................................................................................................................... 48
CleaningOtherParts ofYourRange ............................................................................ 22-23
CooktopandGrillOperations............................................................................................ 12
Cool(wareSelection........................................................................................................... 15
DuctingInformation........................................................................................................... 47
GrillCleaning ..................................................................................................................... 21
GrillingGuide.............................................................................................................. 19
GrillingTips ................................................................................................................ 20
Installing,Removing................................................................................................... 17
Usage ......................................................................................................................... 18
Howa SurfaceBurnerWorks .............................................................................................. 9
Howto Operate inthe Event ofa PowerFailure.......................................................... 9
AirShutterAdjustment............................................................................................... 10
LowFlameAdjustment ......................................................................................... 10-11
SurfaceBumerModule...................................................................................................... 16
SurfaceControls................................................................................................................ 14
VentilationSystem............................................................................................................. 13
Using the Oven
Baking
BakingCharts ............................................................................................................ 31
ConvectionBaking................................................................................................ 32.34
FrozenConvenienceFoods....................................................................................... 33
GeneralRecommendations....................................................................................... 30
Broiling......................................................................................................................... 38-39
OvenCleaning
Auto-Clean................................................................................................................. 41
Self-CleaningProcess .......................................................................................... 40.45
OvenOperation
ClockControls........................................................................................................... 26
ClockControlledBakingorRoasting .................................................................... 28-29
ClockSetting ............................................................................................................. 26
MinuteTimer .............................................................................................................. 27
Oven Controls............................................................................................................ 24
RackPositions........................................................................................................... 25
Roasting
General Recommendations....................................................................................... 35
ConvectionRoasting............................................................................................. 36-37
Read before operating your range
All appliances-regardless ofthe manufacturer - havethe potential
through improper or careless use to create safety problems.Therefore
thefollowing safety precautions should be observed:
1. Besure your appliance is properly installed and grounded by a
qualified technician.
2. Neveruseyour appliance for warmingor heating theroom. This
warning is based on safety considerations.
3, Children should not be left aloneor unattended in area where
applianceis in use. They should never be allowed to sit or stand
on any part ofthe appliance.
4.Wear proper apparel. Loose-fitting or hanging garments should
never beworn whileusing theappliance.
5. Do not repair or replace any part ofthe appliance unless specifi-
cally recommended in this manual,All other servicing shouldbe
referred to an authorized Jenn-Air Service Contractor.
6. Do not store combustible materials, gasoline or other flammable
vapors and liquidnear range. This also applies to aerosol sprays
and aerosol spray cans.
7. Do not use water ongreasefires.Smotherfire or flameor usedry
chemicalor foam-type extinguisher.
8. Useonly dry potholders. Moist or damp potholders on hot
surfaces may result in burns from steam. Donot usea towelor
other bulky cloth.
9. Select cookware largeenough to properly containfood and avoid
boil overs or spillovers,This will saveon cleaning and prevent
hazardous accumulations of food, sinceheavysplattering or
spilloversleftona cook'topcanignite. Pan sizeis especially
important in deepfat frying.
10. Never leave cooktop unattendedat Hiheat settings. Boil over
causes smoking and greasy spillovers that may ignite,
11. TYPE OF COOKWARE - Avoidpans that are unstable and easily
tipped,inchoosing pans,lookfor easily-grasped handles that will
staycool. Pans that are too heavy whenfilled with food can also
bea hazard. Ifpanhandlestwistandcannotbetightened, discard
the pan.5
12. HANDLES - Always turn pan handles to theside or back of the
cooktop - not out into the room where they areeasily hit. COOK-
WARE HANDLES SHOULD BE TURNED INWARD AND NOT
EXTEND OVER ADJACENT SURFACE BURNERS to minimize
burns, ignition of flammablematerials, and spillagedue to uninten-
tional contact with the cookware.
13. CAUTION - Do not store items of interest to children in cabinets
above range-children climbing on the rangeto reach items could
be seriously injured.
14. Do not touch grill and surface burner areas or perimeter trim
around cooktop or interior surfaces of oven. During and after use,
theseareas may behot enough to causeburns. Avoid contact with
these areas by clothing or other flammable materials until they
havehad sufficient time to cool. Other surfaces may become hot
enough to cause burns - among thesesurfaces are the upper door
frameand door, oven vent opening and surfaces near the opening,
and the top edge of thecontrol panel.
15. Keep all controls "OFF" when units is not in use.
16. Keep vent ducts unobstructed.
17. GREASE - Grease is flammableand should be handled carefully.
Never leave any cooking operation unattended. Let fat cool before
attempting to handle it. Do not allow grease to collect around the
cooktop or in the vents. Wipe up spillovers immediately.
18. If the range is installed near a window, proper precautions should
be taken to prevent curtainsfrom blowing over burners creating a
FIRE HAZARD.
19. Do not use aluminum foil toline aeration tray or burner basin.
Restriction of normal air flow may result in unsafe operation.
20. Do not use cookwareon the grill section of this appliance.
21. Before servicing your appliance, disconnect power to therange at
themain fuse or circuit breaker panel and at theelectrical recep-
tacle.
22. Always allow hot pans to cool in a safe place out of the reach of
small children.
23. A faint gas odor may indicate a gas leak.If a gas odor is detected,
cut off the gas supply to the range. Call your installer or local gas
company tohavethepossible leakchecked.Never use amatch
or other flame to locate a gas leak.
24. Glazed cookware- only certaintypesofglass, glass-ceramic,
ceramic,earthenware,or otherglazedcookwareare suitablefor
cooktopsurfacewithoutbreakingdue to the suddenchange in
temperature. Useonly suchcookware as you knowhas been
approvedforthis purpose.
25. Keepall switches"OFF" whenunitis notin use.
26. Avoidplacingthe rangein a main "trafficpath"or in anisolated
locationwithnocounterspacenearby.Visualizetheovenin use
beforeselectinga location.Rememberthatopenovendoorsmay
blocka passagewayandcreatea hazard.
27. Use carewhenopeningovendoor. Lethotairor steamescape
beforeremovingor replacingfood.
28.Donotheat unopenedfoodcontainers.Build-upofpressuremay
causecontainertoburst and resultin injury.
29. Alwaysplaceovenracksindesiredlocationwhileoven iscool.If
rackmustbe movedwhileovenishot,donotletpotholdercontact
hotheatingelementin oven.
30. Donotcleandoorgasket,Thedoorgasketisessentialfora good
seal. Care shouldbetaken not to rub, damage, or movethe
gasket.
31. Do notuseovencleaners. Nocommercialovencleaneroroven
linerprotectivecoatingofanykindshouldbeusedinoraroundany
partofthe oven,
32.Cleanonly partslistedinthismanualanduseproceduresrecom-
mended.
33. CAUTION: BEFORE SELF-CLEANINGTHE OVEN,REMOVE
FOOD, BROILERPAN AND OTHER UTENSILS.
34.Listenforfan. A fan noiseshouldbe heard duringthe broiland
cleaningcycles.If not, callaservicemanbefore self-cleaning
again.
35.Alwaysremovesoiledbroilerpan fromthe broilercompartment
aftercookingforgrease left inthepan may becomehot enough
to ignite.
36.Do notuseovenfor storagespace.
37. Do not allowaluminumfoilto contactheatingelement.
38. WARNING:To reducetheriskoftippingtheappliance,the
appliancemustbe secured by properlyinstalledanti-tipdevices.
To checkff devicesare installedproperly,removetheaccess
panel and verifythatthe anti-tip devices are engaged,
' ._ .l .t
39. PREPARED FOODWARNING: Follow food manufacturer's in-
structions.If a plastic frozen food container and/or its film cover
distorts, warps or is otherwise damaged during cooking, immedi-
ately discard the food and its container. The food could be
contaminated.
40. This appliance has been tested for safe performance using con-
ventionalcookware. Donotuse any devicesoraccessoriesthat
are not specifically recommended inthismanual Do not useeyelid
covers for thesurface units,stovetop grills, or add-on convection
systems. Theuseofdevices or accessoriesthat arenot expressly
recommended in this manual can create serious safety hazards,
result in performance problems, and reducethe life of the
components of theappliance
41. Flame size should be adjustedso it doesnot extend beyond the
edge ofthe cookware. Thisinstructionisbasedonsafetyconsid-
eration.
IMPORTANT SAFETY NOTICE AND WARNING
The CaliforniaSafeDrinkingWater and ToxicEnforcementAct of 1986
(Proposition65) requiresthe GovernorofCaliforniato publishalistof
substancesknownto the State Californiato causecancer or reproduc-
tive harm, and requires businessesto warn customersof potential
exposures to suchsubstances.Users ofthis appliance are hereby
warnedthat when therange is engaged in the self-cleancycle, there
may be some low level exposureto some ofthe listedsubstances,
includingCarbonMonoxide. Additionally,usersare alsoherebywarned
thatthe burningofgas can resultinlow- levelexposureto someof the
listed substances, includingbenzene,formaldehyde and soot, due
primarilytotheincompletecombustionofnaturalgasorliquidpetroleum
(LP)fuels. Properlyadjustedburnerswillminimizeincompletecombus-
tion. Exposure to thesesubstances can beminimized by properly
ventingthe range to the outdoors.
Your new cooktopburnershavebeen presetfor an "average"set ofconditions. Re-
gionalvariances in gaspressure and atmosphericconditionssuch asheightabove
sea level may affect yourinitialflame performance,
Whenthe controlknob is turned ON, gasenters the mixer tubeandmixeswith air,
This air endgasmixtureflowstotheburner headandislighted by a spark from the
solidstateigniter.
A propedy adjusted burner withcleanpods will lightwithina few seconds. Thecone-
shaped flamew_llbeclear blue in colorwith a ¢leadydefined innercone. There should
be no trace of yellowin the flame. A yellow flameindicatesanimproper mixtureof air
and gas. If your flame does notresemble the"correct" flameas described above,
follow theair shutteradjustment instructionsbelow.
The(nfinitesurfacecontrolsprovide flexibility in heatsetting selection.
Note:The grillcan bereplacedwith anoptionalsurfaceburner module, ModelAG202.
Surface Burners
Incase ofprolongedpowerfailure,youcanmanually lightthesurfaceburnerby
holdinga lightedmatch near theburner portsandslowlyturningthecontrolknob
counterclockwise(afterdepressing)untilthegas ignites.There isno fan so smoke
and condensation can gather.
Grill
IN CASE OFPOWER FAILURE,DONOT USEGRILL, VENTILATION SYSTEM WILL
NOT OPERATE,
IF THE VENTILATION SYSTEM ISINOPERABLE FOR ANY REASON, DO NOT
OPERATE GRILL.
9
To adjust surface burner air shutters (some models)
Loosenfasteningscrewwitha phillipsscrew SURFACEBURNERROTA3_AIR
AIR SHUTTER SHUTTER ON
driverand rotate air shutterto increaseor MIXERHEADTO
SCREW MAKE AIR
decreasethesizeoftheairopening.Asthe "x",_ 2_ _STMEm
shutteris turned observe change in flame_._ _'AIAIRSHUTFER
appearance.Adjustmentissatisfactorywhen Q _..O_
AIR OPEMNG"_O_j=l_TO
a clearly defined,even blueflame resultsat AIROPEMN CLOSE
theHiflamesetting. Afteradjustment,tighten
screw.
TO adjust grill burner air shutters and surface burner air shutters
(somemodels)
Thelefthandairshuttercontrolstherearhalfofthegrillburnerortherearsurfaceburner.
Therighthandshuttercontrolsthefronthalfofthegrillburnerorthefrontsurfaceburner.
Slideairshutterbackwardor forward to in- __GRILLBURNERAIRSHUTFER
creaseordecreasethesizeoftheairopening. _'_ _ 'q_,.
Air shuttersfit snuglyon theburner, so a
screwdriverblade may berequiredto makeAIROPENING_
this adjustment. Observe changein flameA_RSHUWER__.,_'=
INSERT SCREWDRIVER BLADE
appearance astheairshutterismoved. Ad- _NSLO'rANDrA'ISTWITH
SLIGP;3"PRESSURE TO ALLOW
justment is satisfactorywhen a clearly de- AIRSHt/TI3ERTOSLIDEEASIL%
fined, evenblueflameresultsat theHI flame
setting.Thesnugfit oftheairshutterassures
itwillremainpositionedcorrectly.
On anyburner,closingtheairshuttertoo far willcausetheflametobecomesoftand
yellowtipped. Openingtheair shuttertoo widewill causetheflameto blowaway from
theburnerports. Properadjustmentwillproducea sharp,clearlydefined,even,blue
flame.
This appliancehas been shippedfrom the factory with Lo and Med flamesettings
adjustedfor usewithnaturalgasand averageinstallations.Thereisa widevarietyof
conditionscausedbyaltitudeandgasmixturescontrolledbyutilitycompanies,whichwill
vary andaffect thegasflame and performance. Adjustmentsshouldbemadeat time
ofinstallation. If conditionschange,followtheproceduresoutlinedto adjustthe Lo
setting.
10
To adjust theLo setting:
1.Lightburner and set controlknobforlowflame.
2. Remove control knobfrom valvestem.
CAUTION: Never usea metalbladeto
pryknoboff. Ifknobcannot be easily
removed, tuck the folds of acloth --'---------.__
dishtowelundertheknobskirtand pull_OCKW_SE
TO REDUCE
the towelupward with steady,even_FIJ_MESlZE
pressure.
3.Inserta slender,thin-b_adescrewdriver
intothe recessat centerofvalvestern
and engagebladewithslotin adjustingCOU_rn:RCLOC_,SE
screw, TOINCREASE FI.._ME
SIZE
4. Tumcenterstemadjustingscrewsfightly
tosetflamesize. Note: Turnclockwise
to reduceor counterclockwiseto in-
creaseflame size.
5. Replacecontrolknobwhenadjustment
iscompleted.
Properadjustmentwillproducea stable,steadyblueflame ofminimumsize. The final
adjustmentshouldbe checkedbyturningknobfrom Hi to Lo severaltimeswithout
extinguishingthe flame.
This adjustment,at the Lo setting,willautomaticallyprovidethe properflamesize at
Med setting.
11
The built-inventilationsystemremovescookingvapors,odors andsmokefromfoods
preparedonthe cooktop,grilland grillaccessories.
Regularuseofthissystemwillinsurea morecomfortab(eandless humidkitchenwhich
isfree ofheavycookingodorsand fumes that normallycreateafrequent needfor
cleaningand redecorating.
\
Too rateventatosysmanuypuste
three position VENTILATION AND OVEN LIGHT
SWITCH locatedinfrontoftheair grilletowardthefan
symbol To turn the fan off, pushtheswitchto the
middleposition.If theswitchispushed towardthelight
symbol,theoven lightwillbeturnedon.
• The ventilationsystemwilloperateautomatically whenthegrillburnerisin use.
•The fan canbe usedto removestrongodorsfromthe kitchenas whenchopping
onionsnearthe fan.
Air Grille: The airgrilleliftsoffeasily.Wipe cleanorwashinsinkwith mildhousehold
detergents, Maybecleaned indishwasher.Note; Theovenventislocatedunderthe
grille. Whenusingor cleaningtheoven,hot andmoistair maybenoticedin thisarea.
Be carefulnottospillanythingintothisvent.
Filter: Turnoffventilationsystembefore removing. The fiiterts a
permanenttypeandshouldbecleanedwhensoiJed.Cleaninsink_=l_lJ _
withwarmwaterandliquiddishwashingdetergentorindishwasher,
Important: Filtershouldalwaysbeplacedatanangle. Asyouface
the front oftherange,thetop ofthefiltershouldrest againstthe
leftsideoftheventopeningandthe bottomofthefiltershouldrest
againstthe rightsideoftheventilationchamberatthebottom.DO
NOT OPERATE SYSTEM WITHOUT FILTER.
Ventilation Chamber: This area, whichhousesthefilter, shouldbecleanedin the
eventof spillsor wheneverit becomescoatedwitha filmof grease. Maybecleaned
withpapertowel,damp cloth,or spongeand mildhouseholddetergent.
13
• Since thecontrolsare apush-turntype,theymustbepusheddownbeforeturning.
To set (fromthe OFF position),pushdownon controlknoband immediatelyturn
counterclockwisetotheLITE positionuntilburnerignites.Afterignition,turnknob
clockwiseto desiredsetting.
•IgniterwillcontinuetosparkuntilknobisturnedclockwisebacktoorpastHI position
on knob.
I INLt
", \ / I
1. 2. 3. 4.
Control Locations Note: When using an AG200 surface
1. Left rear surfaceburneror grill burnerassemblywithcontrollocations#1
2.Left frontsurfaceburneror grill and #2,thecontrolknobmaybe turnedto
3. Rightrear surfaceburner a positionlowerthanthe Lo setting.(The
4. Rightfrontsurfaceburner Lo settingisset for thegrillburner.)
The size and typeofcookwareandtheamountand typeof food beingcooked will
influencethe settingneededfor bestresults.The settingindicatedshouldserveas a
guidewhileyou becomefamiliarwithyourcooktop.
UsetheHiflamesettingtoquicklybringfoodstoaboil _,_
orto beginacookingoperation. Then reduceto a _
lowersettingtocontinuecooking. Never leave food _.._._.__
unattended over a Hi flame setting.
Med settingisusedtocontinuea cookingoperation.
Foodwill not cook anyfasterwhen a higherflame
settingis usedthanthat neededto maintainagentle
boil. Remember,water boilsat the sametempera-
turewhetherboilinggentlyor vigorously. ©
UseLo settingto keepfoodat servingtemperatures_
withoutfurther cooking.You may find that some
cookingmaytakeplaceifthecookwareis covered.
14
Surface Controls
To Set Controls
• Since the controls are a push-turn type, they must be pushed down before
turning. To set (from the OFF position), push down on control knob and imme-
diately turn counterclockwise to the MTEposition until burner ignites. After
ignition, turn knob clockwise to desired setting.
• Igniter will continue to spark until knob is turned clockwise back to or past
Hi position on knob.
Control Locations NOTE: When using an AG200 surface
burner assembly with control
1. Left rear surface burner or grill locations #1 and #2, the control
2. Left front surface burner or grill knob may be turned to a
3. Right rear surface burner position lower than the Lo
4. Right front surface burner setting. (The I.o detent is set
for the grill burner.)
1. 2. 3. 4.
Suggested Control Settings
for Surface Burners
The size and type of cookware and the amount and type of food being cooke
will influence the setting needed for best cooking results. The setting indicate(z--
should serve as a guide while you become familiar with your cooktop.
Use the Hi flame setting to quickly bring __
foods to a boil or to begin a cooking opera- _,(_t_)_.,_(_(fi_)
tion. Then reduce to a lower setting to con- _._.v,,._,_._"
tinue cooking. Never leave food unattended
over a Hi flamesetting.
Med setting is used to continue a cooking
operation. Food will not cook any faster f _
when a Hiflame setting is used than that _,,,_
needed to maintain a gentle boil. Remember,
water boils at the same temperature whether
boiling gently or vigorously.
Use Lo setting to keep food at serving
temperatures without further cooking. You _ _
may find that some cooking may take place
if the cookware is covered. _.__
14
To achieveoptimumcookingperformance,usecookpotswithfiat bottoms,tightfitting
covers,and sizedfor the surfaceburner.
Flame size shouldbe adjusted so it doesnot extend beyond the edge of the cookware.
Thisinstructionisbasedonsafetyconsiderations.Adjustingthesizeoftheflametofit
thesize ofthecookwarealso helpsto save fuel
Important: Leave a minimumof1-1/2"between sideof ¢ookpotand surrounding
surfaces,suchascountertopbacksplashor sidewalls,toallowheattoescapetoavoid
possibledamagetothese areas,
•Aluminumcookware heatsevenlyandquickly. A slighflylargerflamesizecanbe
used. Theflamecan beadjustedsoitcomestotheedgeofthecookware.However,
theflameshouldNEVER beadjustedsothatitextendsbeyondthe bottomofthe
cookware.
•Stainlesssteelcookwarewith copperor aluminumcores heat evenly andfairly
quickly.Theflamesizeshouldbeadjustedtoextendonlyhalfwaybetween center
end edgeofthecookwarebottomfor best results.
•Cast ironcookwareheatsslowly.
• Checkmanufacturer'srecommendationsbeforeusingpomelainonsteel,porcelain
oncast iron,glass,glaas/ceramic,earthenware,or otherglazedcookpots.
Ifthe cookwareiscovered,lessfuelwillbe needed;therefore,alowerflame sizecan
be used.
Note: Foodwillnot cookanyfasterwhen more thanthe amountof heat neededto
maintaina gentleboilisused.
15
1. Be surecontrol knobsare turnedoff.
2.Ifthegrill burnerand grill gratesare inplace, removebefore installingasurface
burner module. Clean burnerbasinofanygrease accumulation.(See page 21
for cleaning recommendations.)
3. Positiontheburnerassembly withthemixer tubeopeningstowardtheorifices.
Slidetheburnerassemblytowardtheorifices untilopeningfor igniterisoverthe
igniter. Lowerintoplaceuntilsideopeningsarerestingontheburner supports
and igniter is centered between thetwo flash tubes.
4. installthe aeration trayby inserting theprongat the end of the pan Intothe
openingin the end ofthe burnerbasin,Lowerthe oppositeendintotherange
top.Note: Before first use, read the Surface BurnerGrates Careinstructions
foundon p. 22.
1. Control knobs should be in theOFF positionand the rangetop should be cool.
2. Removetheaeration tray by lifting up thefront end on the right side(back end
on theleft side)until thetop clearsthe opening of therangetop by about 5
inches.
3. Hold aeration tray by thesides and slide away to removetheprong from the
opening and clear thesurface burners.
4. Lift up on thesides of thesurface burner assembly bracket about 2 inches. Slide
away from the orifices.
5. A storagetray,ModelAG350, isavailable andcan be used for stodng a surface
burner module.
NOTE: Optional surface burnerassembly, Model AG20O, can replace thegdll
burner assembly,Model AG200 air shuttershave been adjusted for
compatibility on the left side.
NOTE: Do not disassemblethesurface burner assembly.
16
Thegrillaccessoryconsistsoftwoblackgrillgrates,and a grill burner.
Note: Only install the grill on the left sideof your range.
1. Beforeinstallinggdllcomponents,becertaincontrolknobsareinthe OFFposition.
2. Positionthe grill burnerwithmixertube openingstowardstheorifices.Slidethe
burnertowardstheorificesuntiltheignitorisinbetweenfrontandreargrillsections.
Lowerintoplaaeuntilside openingsarerestingon the burner support pins.
3, Placethegrillgrateson thetop ofthe rangetop.
JNOTE=Beforeusingthegrillforthefirsttime,heattheE-yen Heat_grillburnerto
removetheprotectiveshippingcoating. Heat thegrillonHifor 10 minutes
and usethe ventsystemto removeanyadditionalsmokeduringcooling.
L
1.Removegrillcomponentsoncetheyarecool. Be surecontrolknobsareintheOFF
position.
2. Removegrfll grates,
3. Removegrillburner,
17
• Beforethefirstuse, washyournewgrillgratesinhotsoapywater, rinse and dry.
Then"season"thesurfaceby wipingon athin coatingofcookingoil. Remove
excess oilby wipingagainwithanotherpaper towel. Thisprocedureshouldbe
repeatedwheneither:a) cleaning in thedishwashersincethe detergent may
removeseasoning,or b)anytimea sugar-basedmarinade(forexample,barbecue
sauce)isgoingto beused.
• Preheat thegrill on HI for5 minutes. Preheating improves theflavor and
appearanceofmeatsand quicklysearsthe meat tohelp retainthejuices.
•Use nonmetallic spatulas or utensils toprevent damaging theExcalibur ®nonstick
gd// grate finish.
•Excessive amounts of fat should be tdmmed from meats. Onlya normalamount
isnecessary to producethe smokeneededfor that smoked,"outdoor"flavor.
Excessivefat can createcleaningand flare-upproblems.
•Allowing excessive amounts of grease or drippings to constantly flame voids the
warrantyon thegd//grates. Excessivetiara-upsindicatethateitherthegrillinterior
needsto becleanedorthatexcessiveamountsoffat arein themeat orthemeat
was not properlytrimmed.
• Greasedrippingswilloccasionallyigniteto produceharmlesspuffsof flame fora
secondortwo,Thisisa normalpart ofthecookingprocess.
• Never leave grill unattended during grill operation.
Should excess grease cause sustained flare-up:
1. Turn on FAN manually.
2. Immediatelyturngrillcontrolknobsto OFF position.
3. Removemeatfromgrill.
IMPORTANT
• Do not usealuminumfoil insidethe grillarea.
• Do not usecharcoalorwoodchipsinthegrillarea.
• Do notallowburnerbasintobecomeoverloadedwithgrease.Clean aftereach
use.
•Donotcovergratescompletelywithmeat. Leaveairspacebetweeneachsteak,
etc.to allow properventilationas wellas preventflare-ups.
18
PreheatgrillonHI, 5 minutes,for bestflavor.
i I_ii
i/!_i!i
19
With your Jenn-Air grilland accessories,literallyany foodyou've considered"at its
best"whenpreparedoutdoorscan nowbepreparedindoorswithlessfussand great
flavor.
The followingsuggestionsaregoodrulestofollowand willincreaseyourenjoyment
ofthe equipment.
• Besureto followdirectionsonpage 18 for using the grill.
• Suggestedcookingtimesand contrelsettingsareappreximateduetovariations
in meats. Experience will quickly indicatecooking times as well as which
settings work best.
•Forbestresults,buytopgrademeat. Meatthatisat least3/4 inchwillgrillbetter
than thinner cuts.
•Scorefat on edges ofsteak, but do not cut into meat, to preventcurlingwhile
cooking.
•Fortheattractive"branded"lookonsteaks, besuregrillispreheated. Allowone
sideofmeat to cook to desired doneness, or until juices appear on the top
surface,before turning. Turn steaks and hamburgersjustonce.Manipulating
food causes loss ofjuices.
•When basting meats or applying sauces to foods, remember that excessive
amounts windup insideyour grill and do not improve thefood flavor. Apply
saucesduringthe last15 to20 minutesofcookingtimeunlessrecipespecifies
otherwise. Plus,anytimeasugar-based marinade (for examplebarbecue
sauce) isgoingto beused,the gratesshouldbe "seasoned"priorto preheating
(sea page 18).
• There are many meat marinadeswhichwill helptenderize lessexpensivecuts
ofmeatfor cooking on the grill.
•Certainfoods,suchas poultryandnon-oilyfish,mayneed someextrafat. Brush
with oilor melted butteroccasionallywhilegrilling.
•Use tongswith longhandlesor spatulasforturningmeats. Do not useforksas
these piercethe meat, allowing juices to be lost.
•To help retainmeat juices, saltafter cookingiscompleted.
Besure the grillis cool andcontrolsare OFF.
Grill Grates: Theseare madefrom cast aluminum and arecoated with the
Excalibur_ nonstick finish.
• After the grill grates have cooled, wipe off grateswith a paper towel. Wash cool
grates(DO NOT IMMERSE HOT GRILL GRATES IN WATER) with soap or
detergent in hot water in the sink or wash them in the dishwasher. Be sure to
remove all food residue beforecooking on the grill gratesagain.
20

Other manuals for SEG196

1

Other Jenn-Air Range manuals

Jenn-Air Jenn Air Range Stove Oven JES8750AAB User manual

Jenn-Air

Jenn-Air Jenn Air Range Stove Oven JES8750AAB User manual

Jenn-Air JGRP548WP User instructions

Jenn-Air

Jenn-Air JGRP548WP User instructions

Jenn-Air Pro-Style PRD3030 User manual

Jenn-Air

Jenn-Air Pro-Style PRD3030 User manual

Jenn-Air Electric Range User manual

Jenn-Air

Jenn-Air Electric Range User manual

Jenn-Air PRG4810NP User manual

Jenn-Air

Jenn-Air PRG4810NP User manual

Jenn-Air D156 User manual

Jenn-Air

Jenn-Air D156 User manual

Jenn-Air JGS8750CDS00 User manual

Jenn-Air

Jenn-Air JGS8750CDS00 User manual

Jenn-Air JDRP548WP02 User manual

Jenn-Air

Jenn-Air JDRP548WP02 User manual

Jenn-Air JDRP548WP02 User manual

Jenn-Air

Jenn-Air JDRP548WP02 User manual

Jenn-Air Oven User manual

Jenn-Air

Jenn-Air Oven User manual

Jenn-Air 8111P366-60 Installation instructions

Jenn-Air

Jenn-Air 8111P366-60 Installation instructions

Jenn-Air Slide-In Electric Ranges User manual

Jenn-Air

Jenn-Air Slide-In Electric Ranges User manual

Jenn-Air W10253464B User manual

Jenn-Air

Jenn-Air W10253464B User manual

Jenn-Air JES9900BAS User manual

Jenn-Air

Jenn-Air JES9900BAS User manual

Jenn-Air PRO-STYLE JGRP430WP01 User manual

Jenn-Air

Jenn-Air PRO-STYLE JGRP430WP01 User manual

Jenn-Air JGR8890 Series User manual

Jenn-Air

Jenn-Air JGR8890 Series User manual

Jenn-Air JDRP430WP00 User manual

Jenn-Air

Jenn-Air JDRP430WP00 User manual

Jenn-Air SVE47100 User manual

Jenn-Air

Jenn-Air SVE47100 User manual

Jenn-Air SCE4320 User manual

Jenn-Air

Jenn-Air SCE4320 User manual

Jenn-Air JDR8895BAW13 User manual

Jenn-Air

Jenn-Air JDR8895BAW13 User manual

Jenn-Air FCG20600 User manual

Jenn-Air

Jenn-Air FCG20600 User manual

Jenn-Air JES1750FS0 User manual

Jenn-Air

Jenn-Air JES1750FS0 User manual

Jenn-Air PRO-STYLE JDRP430 User manual

Jenn-Air

Jenn-Air PRO-STYLE JDRP430 User manual

Jenn-Air 8113P753-60 User manual

Jenn-Air

Jenn-Air 8113P753-60 User manual

Popular Range manuals by other brands

Frigidaire FGFL87DSC Use & care manual

Frigidaire

Frigidaire FGFL87DSC Use & care manual

GE Cafe CGS700P owner's manual

GE

GE Cafe CGS700P owner's manual

Frigidaire FGIF3036TD use & care

Frigidaire

Frigidaire FGIF3036TD use & care

Electrolux EW30IS65JS Specifications

Electrolux

Electrolux EW30IS65JS Specifications

Frigidaire FFGF3012TW Use & care manual

Frigidaire

Frigidaire FFGF3012TW Use & care manual

Town E Series Routine Maintenance Guide

Town

Town E Series Routine Maintenance Guide

Crosley CRGE3455TSA Use & care guide

Crosley

Crosley CRGE3455TSA Use & care guide

Whirlpool SF331PSR Use & care guide

Whirlpool

Whirlpool SF331PSR Use & care guide

Cosmo COS-GRP304 Install, Use, & Care Guide

Cosmo

Cosmo COS-GRP304 Install, Use, & Care Guide

GE JBP28DR Dimensions and installation information

GE

GE JBP28DR Dimensions and installation information

KitchenAid KFGG500ESS user manual

KitchenAid

KitchenAid KFGG500ESS user manual

Frigidaire CFGF366FCE Use & care manual

Frigidaire

Frigidaire CFGF366FCE Use & care manual

Maytag MGR5705BDH user guide

Maytag

Maytag MGR5705BDH user guide

GE PROFILE PGS960 owner's manual

GE

GE PROFILE PGS960 owner's manual

Broil King BR-5B Use & care manual

Broil King

Broil King BR-5B Use & care manual

Dacor Epicure ER30DSCH use and care manual

Dacor

Dacor Epicure ER30DSCH use and care manual

Frigidaire LGGF3046TF Use & care guide

Frigidaire

Frigidaire LGGF3046TF Use & care guide

Signature UPSE3024ST installation guide

Signature

Signature UPSE3024ST installation guide

manuals.online logo
manuals.online logoBrands
  • About & Mission
  • Contact us
  • Privacy Policy
  • Terms and Conditions

Copyright 2025 Manuals.Online. All Rights Reserved.