Jensen JBS-300 User manual

Wall Mountable Bluetooth Music
System with CD
USER MANUAL
JBS-300
LIMITED EDITION COLOR
PLEASE READ THIS USER MANUAL COMPLETELY BEFORE OPERATING
THIS UNIT AND RETAIN THIS BOOKLET FOR FUTURE FEFERENCE

E-1
WARNING
TO PREVENT FIRE OR SHOCK HAZARD, DO NOT USE THIS PLUG WITH AN
EXTENSION CORD, RECEPTACLE OR OTHER OUTLET UNLESS THE BLADES CAN BE
FULLY INSERTED TO PREVENT BLADE EXPOSURE. TO PREVENT FIRE OR SHOCK
HAZARD, DO NOT EXPOSE THIS APPLIANCE TO RAIN OR MOISTURE.
The Caution Marking is located at the back enclosure of the apparatus.
IMPORTANT SAFETY INSTRUCTIONS
1. Read these instructions.
2. Keep these instructions.
3. Heed all warnings.
4. Follow all instructions.
5. Do not use this apparatus near water.
6. Cleaning-Unplug this product from the wall outlet before cleaning. Do not use liquid cleaners
or aerosol cleaners. Clean only with dry cloth.
7. Do not block any ventilation openings. Install in accordance with the manufacturer’s
instructions.
8. Do not place this product on an unstable cart, stand, tripod, bracket, or
table. The product may fall, causing serious injury to a child or adult,
and serious damage to the product. Use only with a cart, stand, tripod,
bracket, or table recommended by the manufacturer, or sold with the
product. Any mounting of the product should follow the manufacturer’s
instructions, and should use a mounting accessory recommended by
the manufacturer. A product and cart combination should be moved with care-quick stops,
excessive force and uneven surfaces may cause the product and cart combination to
overturn.
9. Do not install near any heat sources such as radiators, heat registers, stoves, or other
apparatus (including amplifiers) that product heat.
10. Do not defeat the safety purpose of the polarized or grounding-type plug. A polarized plug
has two blades with one wider than the other. A grounding type plug has two blades and a
third grounding prong. The wide blade or the third prong is provided for your safety. If the
provided plug does not fit into your outlet, consult an electrician for replacement of the
obsolete outlet.
11. Protect the power adaptor from being walked on or pinched particularly at plugs,
convenience receptacles, and the point where they exit from the apparatus.
12. Only use attachments/accessories specified by the manufacturer.
13. Unplug this apparatus during lightning storms or when unused for a long periods of time.

E-2
14. Refer all servicing to qualified service personnel. Servicing is required when the apparatus
has been damaged in any way, such as power-supply adaptor or plug is damaged, liquid has
been spilled or objects have fallen into the apparatus, the apparatus has been exposed to
rain or moisture, does not operate normally, or has been dropped.
15. This appliance shall not be exposed to dripping or splashing water and that no object filled
with liquids such as vases shall be placed on the apparatus.
16. Do not overload wall outlet. Use only power source as indicated.
17. Use replacement part as specified by the manufacturer.
18. Upon completion of any service or repairs to this product, ask the service technician to
perform safety checks.
19. Power Sources - This product should be operated only from the type of power source
indicated on the marking label. If you are not sure of the type of power supply to your home,
consult your product dealer or local power company. For products intended to operate from
battery power, or other sources, refer to the operating instruction.
20. Object and Liquid Entry - Never push objects of any kind into this product through openings
as they may touch dangerous voltage points or short-out parts that could result in a fire or
electric shock. Never spill liquid of any kind on the product.
21. Damage Requiring Service - Unplug this product from the wall outlet and refer servicing to
qualified service personnel under the following conditions:
a) When the power-supply adaptor or plug is damaged,
b) If liquid has been spilled, or objects have fallen into the product,
c) If the product has been exposed to rain or water,
d) If the product does not operate normally by following the operating instructions. Adjust
only those controls that are covered by the operating instructions as an improper
adjustment of other controls may result in damage and will often require extensive work
by a qualified technician to restore the product to its normal operation.
e) If the product has been dropped or damaged in any way, and
f) When the product exhibits a distinct change in performance - this indicates a need for
service.
SAVE THESE INSTRUCTIONS

E-3
CAUTION
Follow the advice below for safe operations.
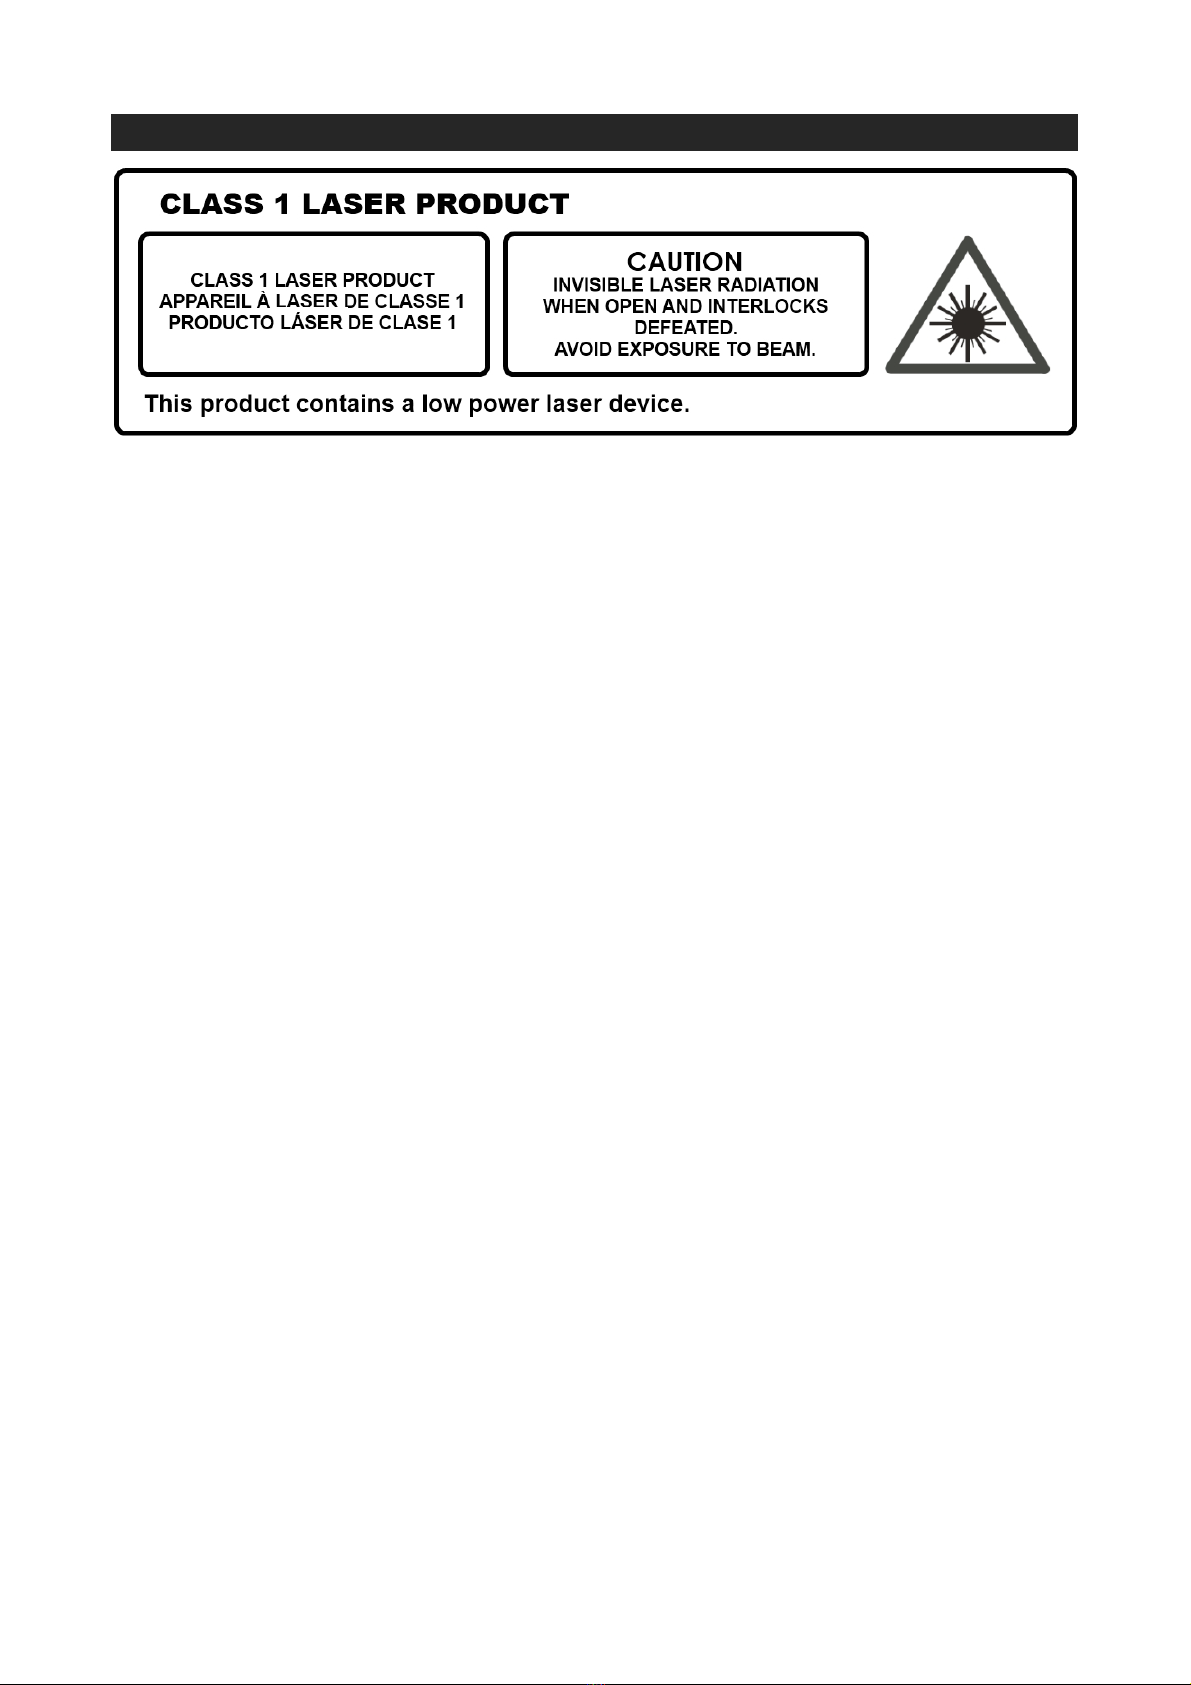
ON PROTECTION AGAINST LASER ENERGY EXPOSURE
oAs the laser beam used in this compact disc player is harmful to the eyes, do not
attempt to disassemble the casing.
oStop operation immediately if any liquid or solid object should fall into the cabinet.
oDo not touch the lens or poke at it. If you do, you may damage the lens and the player
may not operate properly.
oDo not put anything in the safety slot. If you do, the laser diode will be ON when the CD
door is still open.
oThis unit employs a laser. The use of controls or adjustment or performance of
procedures other than those specified here may result in exposure to hazardous
radiation.
ON SAFETY
Risk of electric shock!
Risk of injury from electric shock due to live parts.
Only connect the device to a properly installed earthed mains socket (120 V ~ 60 Hz) that is
easy to reach and close to the place where you have set up the device. Always keep the power
socket free of obstructions so that the plug can be pulled out easily. Even when the device is
switched off, some components are live.
In order to disconnect the power to your device or to completely isolate the device from voltage
sources unplug the mains adapter from the socket.
When disconnecting the connection cable from the mains supply, always grip the AC adaptor
plastic case rather than on the cable.
• In an emergency, for example, if you see smoke coming out of the device, or if it makes unusual
noises, remove the connection cable and/or batteries.
• The mains adapter must always be easy to reach in an emergency. For this reason, it is
important that the power socket is always easily accessible.
• The device uses a small amount of electricity, even when it is switched off. To completely switch
off the device, unplug the mains adapter from the mains.
Mains Power Adapter
• Use only the mains power adapter supplied with the product.
• If the housing of the mains adapter or the connection cable is damaged, the mains adapter must
be disposed of and replaced with a new mains adapter of the same type.
• The mains adapter must only be used in dry rooms.
ON CONDENSATION
When left in a heated room where it is warm and damp, water droplets or condensation may
form inside the CD player.
When there is condensation inside the unit, the unit may not function normally.
Let it stand for 1 to 2 hours before turning the power on, or gradually heat the room up and dry
the unit before use.

E-4
COMPLIANCE WITH FCC REGULATIONS
FCC ID: 2A38HJBS-300
This device complies with Part 15 of the FCC Rules. Operation is subject to the following two
conditions:
(1) This device may not cause harmful interference, and
(2) This device must accept any interference received, including interference that may cause
undesired operation.
This equipment has been tested and found to comply with the limits for a Class B Digital Device,
pursuant to Part 15 of the FCC Rules. These limits are designed to provide reasonable protection
against harmful interference in a residential installation. This equipment generates, uses and can
radiate radio frequency energy and, if not installed and used in accordance with the instructions,
may cause harmful interference to radio communications. However, there is no guarantee that
interference will not occur in a particular installation. If this equipment does cause harmful
interference to radio or television reception, which can be determined by turning the equipment off
and on, the user is encouraged to try to correct the interference by one or more of the following
measures:
- Reorient or relocate the receiving antenna.
- Increase the separation between the equipment and receiver.
- Connect the equipment into an outlet on a circuit different from that to which the receiver is
connected.
- Consult the dealer or an experienced radio/TV technician for help.
CAUTION: Changes or modifications not expressly approved by the party responsible for
compliance could void the user’s authority to operate the equipment.
PROTECT YOUR FURNITURE
This product is equipped with non-skid rubber 'feet' to prevent the product from moving when you
operate the controls. These 'feet' are made from non-migrating rubber material specially
formulated to avoid leaving any marks or stains on your furniture. However certain types of oil
based furniture polishes, wood preservatives, or cleaning sprays may cause the rubber 'feet' to
soften, and leave marks or a rubber residue on the furniture. To prevent any damage to your
furniture we strongly recommend that you purchase small self-adhesive felt pads, available at
hardware stores and home improvement centers everywhere, and apply these pads to the bottom
of the rubber 'feet' before you place the product on fine wooden furniture.

E-5
DEAR JENSEN® CUSTOMER
Selecting fine audio equipment such as the unit you've just purchased is only the start of your
musical enjoyment. Now it's time to consider how you can maximize the fun and excitement your
equipment offers. This manufacturer and the Electronic Industries Association's Consumer
Electronics Group want you to get the most out of your equipment by playing it at a safe level.
One that lets the sound come through loud and clear without annoying blaring or distortion and,
most importantly, without affecting your sensitive hearing.
Sound can be deceiving. Over time your hearing "comfort level" adapts to higher volumes of
sound. So what sounds "normal" can actually be loud and harmful to your hearing. Guard
against this by setting your equipment at a safe level BEFORE your hearing adapts.
To establish a safe level:
Start your volume control at a low setting.
Slowly increase the sound until you can hear it comfortably and clearly, and without
distortion.
Once you have established a comfortable sound level:
Set the dial and leave it there.
Taking a minute to do this now will help to prevent hearing damage or loss in the future. After all,
we want you listening for a lifetime.
We Want You Listening For a Lifetime
Used wisely, your new sound equipment will provide a lifetime of
fun and enjoyment. Since hearing damage from loud noise is
often undetectable until it is too late, this manufacturer and the
Electronic Industries Association's Consumer Electronics Group
recommend you avoid prolonged exposure to excessive noise.
Customer's Record:
The serial number of this product is found on its back cover. You should note the serial number
of this unit in the space provided as a permanent record of your purchase to aid in identification
in the event of theft of loss.
Model Number: JBS-300 Serial Number: ____________________

E-6
INSTALLATION OPTIONS
ATTACHING THE STAND (See Illustration Below)
A. Turn the unit over as shown below, and align the top portion of the stand with the mounting
area located on the bottom of the main unit. Make sure the LOCKING TAB is facing out when
inserting the stand. Once in place, slide the stand forward towards the front of the unit until it
locks in place. A loud “Click” sound will be heard when it’s securely locked. Check that the
stand is locked firmly in place and does not come off.
B. Remove the stand by lifting the LOCKING TAB upward to unlock it from the main unit. At the
same time, pull the stand out and away from the main unit as shown below.
FOR WALL MOUNTING (STAND MUST BE REMOVED)
It’s important to be sure there are no electric, gas or water lines located behind the wall where you
are attaching the unit. We recommend having this speaker professionally installed. Use the
included wall mounting accessories and template to attach the sound bar to the wall.
1. Use the supplied wall mounting instruction sheet to make marks on the wall for the plastic
anchors. Make sure the marks are level before drilling.
2. Drill 1/4” holes on the marks.
3. Insert the included plastic anchors into the holes until they are flush with the wall.
4. Screwing the 2 included flat head screws into the plastic anchor holes and tighten the screws.
5. When the screws are tightened, the screw heads should be about ¼” away from the mounting
wall. Line up the keyhole slots located on the back of the main unit with screws in the wall.
6. Hang the unit onto the screws.

E-7
LOCATION OF CONTROLS
MAIN UNIT

E-8
1 REMOTE SENSOR 12 HEADPHONE JAC
K
2 RIGHT SPEAKER 13 POWER /STANDBY BUTTON
3 CD DOOR 14 FUNCTION BUTTON
4 LCD DISPLA
Y
15 CD/BLUETOOTH SKIP PREVIOUS / FM
TUNE- BUTTON
5 LEFT SPEAKER 16 CD/BLUETOOTH SKIP NEXT / FM
TUNE+ BUTTON
6 DETACHABLE STAND 17 CD/BLUETOOTH
PLAY/PAUSE BUTTON
7 WALL MOUNTING KEYHOLES 18 CD STOP BUTTON/
BLUETOOTH PAIR BUTTON
8 FM WIRE
A
NTENN
A
19 PROG /MEMORY/TIME SET BUTTON
9 DC IN JAC
K
20 VOLUME DOWN (-) BUTTON
10
A
U
X
IN JAC
K
21 VOLUME UP (+) BUTTON
11 USB PORT
REMOTE CONTROL

E-9
GETTING STARTED
ACCESSORIES INCLUDED
Carefully remove the unit and all accessories from the package.
Please verify that you have all the following accessories before recycling the gift box.
Main Unit and Stand
User Manual
AC/DC adapter
Remote control
Wall mounting instruction sheet
Wall mounting kit (2 screws and 2 plastic anchors)
POWER SOURCE
This unit operates on AC 120V ~ 60Hz AC-DC adaptor household current and requires two “AAA”
(UM-4) batteries (not included) for the remote control. Do not attempt to operate the unit from any
other power source. You could cause damage to the unit and void your warranty.
AC Power Connection
Plug the AC-DC adaptor into an available 120V~ 60Hz AC Outlet. Make sure the plug is securely
inserted into the AC outlet.
1. SNOOZE BUTTON 14. POWER /STANDBYBUTTON
2. CD/BLUETOOTH SKIP PREVIOUS
BUTTON
15. CD/BLUETOOTH SKIP NEXT
BUTTON
3. PLAY/PAUSE BUTTON 16. CD STOP BUTTON
4. CD PLAY MODE BUTTON 17. ALARM BUTTON
5. SLEEP BUTTON 18. TIME SET BUTTON
6. CD/USB FUNCTION BUTTON 19. BLUETOOTH FUNCTION/
BLUETOOTH PAIR BUTTON
7. AUX IN FUNCTION BUTTON 20. AM/FM FUNCTION BUTTON
8. EQ BUTTON 21. TUNE+ BUTTON
9. MUTE BUTTON 22. TUNER PRESET UP ( ) BUTTON
FOLDR UP BUTTON
10. VOLUME DOWN (-) BUTTON 23. VOLUME UP (+) BUTTON
11. X-BASS BUTTON 24. TUNER PRESET DOWN ( ) BUTTON
FOLDER DOWN BUTTON
12. CD TRACK DIRECT ACCESS BUTTON 25. TUNE- BUTTON
13. FM MONO/STEREO BUTTON 26. PROGRAM /MEMORY BUTTON

E-10
NOTE ON NON-MAGNETICALLY SHIELDED SPEAKERS
This unit is not magnetically shielded and may cause color distortion on the screen of some TVs or
video monitors. To avoid this, you may need to move the unit further away from the TV or monitor
if unnatural color shifts or image distortion occurs.
REMOTE CONTROL BATTERY INSTALLATION
1.) Open the battery compartment cover.
2.) Insert two "AAA" (UM-4) batteries (not included) and
observe the polarity as indicated inside the battery
compartment when installing.
3.) Replace the cover.
STANDBY MODE
Standby Mode is when the unit is first plugged into an AC power source (display flashes and
shows 12:00) or after all the settings have been made and the time is showing on the display.
Standby mode is also enabled when the Button is pressed and all functions
(Bluetooth/Radio/AUX) are off, no buttons are pressed and no alarms are sounding.
TURNING THE UNIT POWER ON/OFF
The LCD DISPLAY will flash 12:00 when the unit is plugged in for the first time. The unit is now in standby
mode.
Turning the unit ON:
In Off (standby) mode, press the POWER/ STANDBY BUTTON on top of the main unit or
on the remote control to turn the unit ON. The last selected source icon will show on LCD
DISPLAY.
Turning the unit OFF:
To turn the unit OFF (standby mode), press the POWER/ STANDBY BUTTON on top of the
main unit or on the remote control to turn the unit OFF. The LCD DISPLAY will dim and show
the current time.
Battery Precautions
Replacement of batteries must be done by an adult.
Do not mix old and new batteries.
Do not mix alkaline, standard (carbon-zinc) or rechargeable (nickel-cadmium) batteries.
If the batteries in the device have expired or the device is not to be used for a long period of
time, remove the battery to prevent damage or injury from possible battery leakage.
The supply terminals are not to be short-circuited.
Non-rechargeable batteries are not to be recharged.
Exhausted batteries are to be removed.
Only batteries of the equivalent type are to be used.
Batteries are to be inserted with the correct polarity.
Dispose of batteries properly. Do not dispose of batteries in fire or leave in direct sunlight.
The batteries may explode or leak.
Clean the contacts of the batteries and the contacts in the device prior to battery installation.

E-11
SETTING THE CLOCK
The LCD DISPLAY will flash 12:00 when the unit is plugged in for the first time. The unit is now in standby
mode.
Setting the Time:
1. In standby mode, press and hold the PROG. button on top of the main unit or the TIME SET
Button on the remote control. The unit defaults to 12 HOUR format and “12 - H” shows on the
display.
2. Tap the or Button on either the main unit or remote control to change between 12
Hour mode “12-H” and 24 Hour mode “24-H” if needed.
3. When “12-H” is showing on the LED Display, press the PROG. button on top of the main unit or
the TIME SET Button on the remote control to select 12 Hour clock format. The LED display
will change to the time and the Hour digit will begin flashing.
4. Tap the or Button on either the main unit or remote control to adjust the hour. Press
and hold the or buttons for fast advance / reverse setting. Make sure the correct AM or
PM time is selected when setting the hour.
Note: The PM INDICATOR “PM” is located to the left of the Hour digits.
The PM INDICATOR “PM” will light when the Hour digits selected are for PM time. The PM
INDICATOR “PM” will be off when the hour digits selected are for AM time.
5. Press the PROG. button on top of the main unit or the TIME SET Button on the remote control
to confirm the hour setting, the minute digits will begin flashing.
6. Tap the or Button on either the main unit or remote control to adjust the minutes.
Press and hold the or buttons for fast advance / reverse setting.
7. Press the PROG. button on top of the main unit or the TIME SET Button on the remote control
to complete the time setting.
NOTE: The clock will need to be reset if the power is interrupted or in the event of a power outage.
“12:00” will appear and start blinking on the LCD display to notify you that the power was
interrupted and the clock will need to be reset. Please follow steps 1-7 above to reset the
clock.
CHECKING THE CLOCK (REMOTE CONTROL ONLY)
The unit will show current time in standby mode. To check the current time in Power ON mode, tap
the TIME SET Button on remote control, the current time will show for 5 seconds and then return
to the previous screen.
ALARM OPERATION (REMOTE CONTROL ONLY)
SETTING THE ALARM CLOCK
This feature allows the system to turn on automatically and wake you using a beeping alarm, the
CD ,USB or the RADIO.
1. In standby mode, press and hold the ALARM Button on remote control, display will show “oN”
for 10 seconds and then alarm time 12:00 will appear in display. Hour digits of alarm clock start
flashing. You can also tap the ALARM Button to direct enter alarm time setting mode without
waiting.
2. Press the / Button to set the hour and then press the ALARM Button again to confirm,
Minute digits will be flashing.
Note: The PM INDICATOR “PM” is located to the left of the Hour digits.
The PM INDICATOR “PM” will light when the Hour digits selected are for PM time. The PM
INDICATOR “PM” will be off when the hour digits selected are for AM time.
3. Press the / Button to set the minutes and then press the ALARM Button again to
confirm, “Off” digits will be flashing.
4. Press the ALARM Button again to confirm and then alarm off time 1:00 will appear in display.
Hour digits of alarm off time start flashing.
5. Press the / Button to set the hour and then press the ALARM Button again to confirm,
Minute digits will be flashing.

E-12
6. Press the / Button to set the minute and then press the ALARM Button again to
confirm, alarm wake up source will appear in display.
7. Press the / Button to select wake to CD, USB, Radio (Tu) or Beep (bu) and then press
the ALARM Button again to confirm, alarm volume level will be flashing.
Note: Alarm volume level setting is not available in beeping alarm setting.
8. Press the / Button to preset the wake up alarm volume level and then press the
ALARM Button to finish alarm setup.
NOTE:
1.) If “Wake to CD/USB” is selected but a CD/USB thumb drive is not inserted, the alarm will
default to the Beeping Alarm automatically when the alarm wake time is reached.
2.) For ‘Wake to Radio”, the system will default to the last radio station listened to before switching
off.
ACTIVE/DE-ACTIVE ALARM FUNCTION
1. To active ALARM, tap the “ALARM” Button once, the alarm icon “ ” will shown on LCD
display.
2. To cancel ALARM function by tap again the “ALARM” Button until the alarm icon “ ” goes
off.
Wake to Radio, CD, USB or Beeping Alarm
When the alarm time is reached, the CD, USB, radio or beeping alarm will sound for the
time you set then shut off and reset itself for the following day.
To stop the alarm immediately after it sounds, press the Button on main unit or
Button on remote control once. It resets itself for the following day.
To cancel the following day alarm, tap the ALARM Button once, ALARM icon“ ” goes off.
RADIO OPERATION
1. In Off (standby) mode, press the POWER/ STANDBY BUTTON on top of the main unit or
on the remote control to turn the unit ON.
2. Tap the FUNCTION Button on main unit or AM/FM Button on the remote control repeatedly
to select AM or FM Radio mode. The “AM” or “FM” indicator will turn on to the left of the
channel frequency shown on the LCD Display to confirm what mode you are in.
3. To manually tune to a specific radio station, tap the or Button on main unit or
TUNE+/TUNE- Buttons on the remote control repeatedly. Use the manual tuning method to
tune in weaker stations that are bypassed during Automatic Tuning.
4. To automatically tune to the next available radio station, press and hold the or Button
on main unit or TUNE+/TUNE- Buttons on the remote control for 1-2 seconds until frequency
readout on the display begins to scan and then release the button. The tuner will stop
scanning when it receives the next broadcasting station of adequate signal strength.
5. Press the volume control VOLUME+/– Button on main unit or remote control to adjust the
volume control to the desired volume level.
FM & FM-Stereo reception
-When listening to the FM radio, press the FM ST./MONO Button on remote control to switch
between stereo mode and mono mode. The FM stereo icon “ST” will appear on the display if
unit is in stereo mode. It is preferable to receive the program in mono when you are receiving a
weak station.
HINTS FOR BEST RECEPTION:
AM - The AM antenna is located inside the cabinet of the unit. If AM reception is weak,
change the position of unit until the internal antenna picks up the strongest signal.
FM - For best FM reception, the FM lead wire antenna located on the back of the unit
should be fully unwrapped and extended.
NOTE: Automatic tuning depends on the signal strength of the broadcasting station, so weak
stations may be skipped. You can manually tune to find the weak stations if a station gets skipped.

E-13
With strong signals, the tuner may stop before it reaches the actual broadcast frequency, so you
may need to manually tune for the best reception.
PRESET RADIO STATIONS
1. Press the POWER/ STANDBY BUTTON on top of the main unit or on the remote control to
turn on the unit.
2. If it is not in AM or FM radio mode, tap the FUNCTION Button on main unit or AM/FM Button
on remote control repeatedly to select AM or FM radio mode.
3. Tune to the desired radio station either by “manually” or “automatically” tuning method.
4. Tap the PROG. Button on main unit or PROGRAM/MEMORY Button on remote control,
display will show memory preset number “P01” and memory icon “MEM” will be flashing in the
LCD display.
5. Tap the PRESET or Button on remote control to select the preset number you want to
assign the station to.
6. Tap the PROGRAM/MEMORY Button on remote control to confirm the setting.
7. Repeat above steps 4 - 6 to preset up to 20 FM and 20 AM stations.
RECALLING PRESET MEMORY CHANNELS (REMOTE CONTROL ONLY)
In radio mode, recall the pre-set channels by pressing the PRESET or Button on remote
control repeatedly.
CD/MP3 CD OPERATION
PLEASE READ THIS IMPORTANT INFORMATION:
CD mechanisms used in devices like this are designed to read all commercial CDs. It will also read
self-compiled CD-R/CD-RW discs, but it may take up to 10 seconds for the actual playback to
begin. If playback does not start, it is likely due to the quality of the CD-R/RW disc and/or the
compatibility of the CD compilation software. The manufacturer is not responsible for the playback
quality of CD-R/RW discs.
-Do not attach a label or seal to either side of the CD-R/RW disc. It may cause a malfunction.
-Due to the numerous different file systems and file formats, connected USB memory sticks
cannot be guaranteed to function.
-Supported file systems is FAT32. The supported file format is MP3.
FOR WINDOWS USERS:
-When using the “Burn a CD” feature to create an MP3 CD in Windows, you must select the
-“With a CD/DVD player” option when it asks “How do you want to use the disc?” The MP3 CD will not
play on this unit if you select the “Like a USB flash drive” option or if the MP3 CD is not finalized.
PLAYING A CD
1. In Off (standby) mode, press the POWER/ STANDBY BUTTON on top of the main unit or
on the remote control to turn the unit ON.
2. Tap the FUNCTION Button on main unit or CD/USB Button on remote control repeatedly to
select CD mode and then press the OPEN/CLOSE switch on CD door.
3. Place an audio CD on t he center spindle with its label side facing out towards the
CD DOOR. Close the CD door.
4. Unit starts to read the disc, “- -” shows in display. After few seconds, the total number of tracks
show one second and then total time of the CD will be shown on the LCD DISPLAY.
Note: MP3 CD will only show total tracks after disc loaded.
5. Press the PLAY/PAUSE Button on main unit or remote control, PLAY indicator shows in
display, the CD will start playing from first track.
6. Press the volume control VOLUME+/- Button on main unit or remote control to adjust to the
desired volume level.
7. To pause playback, press the PLAY/PAUSE Button on main unit or remote control. The
elapsed timer will be paused and the pause icon will be shown on the display. To resume playing,
press the CD PLAY/PAUSE Button again.

E-14
8. You can choose to play your favorite track directly by pressing either the SKIP NEXT
Button or SKIP PREVIOUS Button. The LCD Display will indicate the correct track number
selected.
9. To locate a particular section within a track, press and hold the or Button until the
section is found. Release the button to continue playing your selection.
10. To stop playing, press the STOP Button.
11. Turn off the JBS-300 when you have finished listening.
SKIP AND SEARCH MODE
1. During Play or Pause mode, tap the SKIP NEXT or SKIP PREVIOUS Button to go
to the next track or go back to the beginning of the current track.
2. During playback, press and hold the or Button to search within the current track with
audible high speed playback.
FOLDER SELECTION
If you are playing an MP3 CD, press the FOLDER or on remote control to select MP3
songs store in different folders.
CD/MP3 TRACK DIRECT ACCESS BUTTON (CD OR USB MODE ONLY)
By using the direct track access button, the desired track number on the current disc can be
played.
1. In CD play or pause mode, press the direct access button on the re-mote control to select the
desired track, the number you pressed will show on
LCD display for 2 seconds and then changed to show
track number and start to play automatically.
2. The direct access button allows you to select up to
track number 9 by one press. To select track number
10 or higher, use two or three buttons method.
For example, to choose track 13 in the disc,
a.) Press the “1” button once.
b.) Press the “3” button within 2 seconds.
To choose track 130 in the disc,
a.)Press the “1” button once.
b.)And then press the “3” button.
c.)Finally press the “0” button. All 3 buttons must be pressed within 2 seconds.
Notes:
1. A track number higher than the number of tracks on the disc cannot be selected.
2. Direct access function is not available in Random play mode and CD stop mode.
DIFFERENT CD PLAY MODES (REMOTE CONTROL ONLY)
Press the PLAY MODE Button on remote control repeatedly to select different of play modes
when CD or MP3 CD is playing.
When playing CD, the play modes are shown as below.
Repeat 1 Repeat All Random Normal
REPEAT 1 - the track being played and will repeat continuously. Repeat one icon shows in
display.
REPEAT ALL - all tracks will repeat continuously. Repeat All icon shows in display.

E-15
RANDOM – the tracks in the disc will be played in random sequence. Random icon “RDM” shows
in display.
For MP3 CD
Repeat 1 Repeat Folder Repeat All Random Normal
REPEAT FOLDER- Folder tracks will repeat continuously. Repeat Folder icon FOLDER
shows in display.
CD PLAYBACK PROGRAMMING
This function allows the tracks to be played in a programmed sequence.
NOTE: Program can only be set in STOP mode.
1. Tap the PROG. Button on main unit or PROGRAM/MEMORY Button on remote control,
display will show program track number “P01” and memory icon “MEM” will be flashing in the
LCD display.
2. Use the or Button on main unit or remote control to select the desired track. The
track number will be shown in display.
3. Tap the PROG. Button on main unit or PROGRAM/MEMORY Button on remote control to
store the selected track in the memory, the next program number will advance one (i.e.“P02”)
in LCD display.
4. Repeat steps 2 to 3 to store more tracks in the memory. You can store up to 32 tracks.
Display will show “FULL” after 32 tracks have been programmed.
5. Tap the Button on main unit or remote control to start playing the CD or MP3 CD in the
programmed sequence.
6. Press the PLAY MODE Button on remote control to select Repeat 1/All if necessary.
7. To stop playing, press the STOP Button on main unit or remote control.
8. To cancel the program play, press the STOP Button on main unit or remote control twice,
“MEM” icon disappears from display.
USB OPERATION
PLAYBACK OF MP3 SONGS VIA THE USB THUMB DRIVE
NOTE: Inserting the USB drive upside down or backwards could damage the audio system or the
storage media (USB thumb drive). Check to be sure the direction is correct before connection.
1. Make sure the unit is off or in USB mode, plug-in the USB thumb drive and make sure it is fully
inserted.
2. Turn on unit again if it is power off to select USB mode. The unit will start reading MP3 songs
stored on the thumb drive automatically after connecting, and LCD display will show the total
tracks of MP3 files being detected.
3. Press the Play/Pause button to start playback.
4. Operating the same playback procedures of Play/Pause, Repeat, Random, Program tracks as
playing MP3 CD disc which mentioned in “CD OPERATION” section above.
Notes:
- The unit will only detect and read files in MP3 format. No other file formats are supported.
- If connecting the system to an MP3 player via the USB port, some MP3 player formats may not
be playable due to variances in the MP3 encoding format. This is not a malfunction of the unit.
- The USB port does not support connection with USB extension cable and is not designed for
communication with computer or external hard drive directly.

E-16
BLUETOOTH OPERATION
In Off (standby) mode, press the POWER/ STANDBY BUTTON on top of the main unit or on
the remote control to turn the unit ON and follow the directions below to connect via Bluetooth.
PAIRING (Linking) a BLUETOOTH ENABLED cell phone OR OTHER BLUETOOTH
ENABLED DEVICE to the JBS-300
If the JBS-300 has never been paired with a Bluetooth device before, you need to follow the
pairing instructions below to link the JBS-300 with your Bluetooth device.
1. In Off (standby) mode, press the POWER/ STANDBY BUTTON on top of the main unit or
on the remote control to turn the unit ON.
2. Tap the FUNCTION Button on main unit repeatedly or Button on the remote control to
select Bluetooth mode, “No CoNN” message running and Bluetooth icon appear in LCD
display. JBS-300 is in search mode
3. If the JBS-300 has never been paired with a Bluetooth device before or cannot find the last
paired device, the running message “No CoNN” on LCD will indicate the JBS-300 is in search
mode. You need to follow the pairing instructions below to link the JBS-300 with your
Bluetooth device.
Turn on the Bluetooth function of your Bluetooth device and enable the search or scan
function to find the JBS-300.
Select "JBS-300" from the device list when it appears on your device screen. If required,
enter the pass code “0000” to pair (link) the JBS-300 with your device.
4. After successfully pairing (linking), display will change to show “CoNN” steadily, the Bluetooth
icon also will show in display. You can begin playing music from your Bluetooth device
wirelessly to the speaker.
5. After selecting your favorite song, press PLAY/PAUSE Button on the unit or remote
control to play or pause the song.
6. Press the volume control on main unit or remote control to adjust to the desired volume level.
7. Press or Button on main unit or remote control to skip to previous or next song.
8. If you want to pair the JBS-300 with another Bluetooth enabled device, press and hold the
Button for 2 seconds or turn off the Bluetooth function of device currently paired with JBS-300
then repeat step 3 above.
Notes:
1.) Refer to the manual of your cell phone, tablet PC, computer or other Bluetooth enabled
devices for Bluetooth operation since it may vary from model to model.
2.) If your Bluetooth enabled device does not support A2DP profile, it will not play the music
through the speaker, even if paired (linked).
3.) If you are pairing (linking) your computer to the unit using Bluetooth, you may need to set the
speaker as your computer’s default sound device.
AUXILIARY INPUT OPERATION
This unit features an auxiliary audio signal input jack for connecting external audio devices like
MP3 players, Digital Audio Device and listen to them through the speakers of this unit.
1. Use an audio cable (not included) with one 3.5 mm stereo plug on each end of the cable.
2. Plug one end into the AUDIO IN JACK on main unit and the other end of the cable into the
Line-out Jack or Headphone Jack of your external audio device.
3. Turn on the unit and external audio device.
4. Tap the FUNCTION Button on main repeatedly or AUX IN Button on the remote control to
select AUX mode, “AUDIO IN” icon turns on, display shows the current time.
5. The volume level can now be controlled through the main unit. Operate all other functions on
the auxiliary device as usual.
Note:
If you connect this unit to the Line-Out Jack of your external device then you only need to
adjust the volume control of this unit. If you connect the Headphone Jack of your external
device then you may need to adjust both the volume controls of your external device and this
unit to obtain the desirable volume setting.

E-17
Press the POWER/ STANDBY BUTTON on top of the main unit or on the remote control to
turn the unit OFF the unit when you have finished listening. Don't forget to switch off the power
of your external device as well.
PRESET EQ (REMOTE CONTROL ONLY)
This unit provides 4 different EQ modes to enhance your listening experience. You can select the
desired effect by pressing the EQ Button on remote control repeatedly at following sequence:
ROCK CLASSIC POPS JAZZ OFF
MUTE BUTTON (REMOTE CONTROL ONLY)
Press the MUTE Button on remote control to mute the sound output from the speaker
temporarily. The “MUTE” icon will appear in display.
Press the MUTE Button again or VOLUME+/- Button to resume to normal speaker playback.
X-BASS BUTTON (REMOTE CONTROL ONLY)
Press the X-BASS button on remote control if you want to enhance the bass when listening to the
system, “X-BASS” icon will appear in display. Press the button again to turn off extra bass effect;
“X-BASS” icon will disappear in display.
SLEEP OPERATIONS (REMOTE CONTROL ONLY)
The sleep timer allows you to turn the unit off after a designated time is reached.
1. To activate the sleep timer, turn the unit on and tap the FUNCTION button on main unit
repeatedly or direct function mode buttons on the remote control to select AM, FM radio, CD,
USB, Bluetooth or listening to music via AUDIO IN
2. Tap the SLEEP button on remote control, the sleep time icon appears on the display.
3. Repeatedly tap the SLEEP button to select a sleep time. The unit will turn off after 10, 20, 30,
40, 50, 60, 70, 80 or 90 minutes. Wait for 3 seconds after your selection for the unit to confirm
the selection, the unit will play for the selected length of time then automatically turn off.
4. To cancel the sleep timer, tap the SLEEP button repeatedly until timer shows “00”, the sleep
time icon disappears on the display
5. To turn the unit off before the selected length of time, press the STANDBY-ON button at any
time.
Notes:
1.) To check the remaining sleep time, tap the SLEEP button once.
2.) If you are falling asleep to music from an external device connected to the AUX input, the
sleep timer will shut off the power to this system but it will not turn off the external device.
SNOOZE OPERATIONS (REMOTE CONTROL ONLY)
SNOOZE FUNCTION
1. Should you wish to delay the alarm for 9 minutes you can activate the SNOOZE function.
2. When the alarm sounds, press the SNOOZE button to delay the alarm for 9 minutes.
3. After alarm off , the SNOOZE function will no longer operate.
RESETTING
If the system does not respond or has erratic operation, you may have experienced an
electrostatic discharge (ESD) or a power surge that triggered the internal computer to shut down

E-18
automatically. If this occurs, unplug the AC cord from power source, wait for 60 seconds, then plug
the AC cord to power source again. The unit will be reset, “12:00” flashing in the LCD display, you
need to setup the clock and alarm.
CARE AND MAINTENANCE
1. Do not subject the unit to excessive force, shock, dust or extreme temperature.
2. Do not tamper the internal components of the unit.
3. Clean your unit with a dry cloth. Solvent or detergent should never be used.
4. Avoid leaving your unit in direct sunlight or in hot, humid or dusty places.
5. Keep your unit away from heating appliances and sources of electrical noise such as
fluorescent lamps or motors.
6. If drop-outs or interruptions occur in the music during CD play, or if
the CD fails to play at all, its bottom surface may require cleaning.
Before playing, wipe the disc from the center outwards with a good
soft cleaning cloth.
CLEANING THE UNIT
To prevent fire or shock hazard, disconnect your unit from the AC power source when
cleaning.
The finish on the unit may be cleaned with a dust cloth and cared for as other furniture, Use
caution when cleaning and wiping the plastic parts.
If the cabinet becomes dusty wipe it with a soft dry dust cloth. Do not use any wax or polish
sprays on the cabinet.
If the front panel becomes dirty or smudged with fingerprints it may be cleaned with a soft
cloth slightly dampened with a mild soap and water solution. Never use abrasive cloths or
polishes as these will damage the finish of your unit.
CAUTION: Never allow any water or other liquids to get inside the unit while cleaning.
TROUBLESHOOTING GUIDE
If you experience difficulties in the use of this music system, please check the following or
call 1-800-777-5331 for Customer Service.
S
y
m
p
t
o
m
Possible Ca
u
s
e S
o
l
u
t
i
on
The unit does not
respond (no power)
Power adaptor connect unstable
Reconnect adaptor
The AC outlet has not power. Try the unit on another outlet.
Unit is ON but there is
low or no volume
Volume set too low. Press the VOLUME+ Button
on main unit or remote control
to turn the sound level up.
No Sound Bluetooth speaker is not linked with
the cell phone
Go through “Bluetooth
Operations” process to link the
speakers.
Speaker placement out of range Relocate the speaker within
Bluetooth operating range
AM band is too noisy. The reception for the station is weak. Slightly rotate the unit for the best
reception.
Noise or sound
distorted on FM
broadcast
Station not tuned properly.
FM wire antenna is not fully
extended.
Fine tune the FM broadcast
station.
Fully extend the FM wire
antenna.

E-19
CD player will not
play
Unit not in CD function mode. CD
is installed incorrectly.
If the CD is self-compiled, the
media used may not be compatible
with the
p
la
y
e
r
.
Select CD function mode. Insert
CD with label facing to the CD
door.
Use better quality blank
media and retest.
CD skips while
playing
Disc is dirty or scratched. Wipe CD with clean cloth or
use another disc.
Intermittent sound
from CD Player
Dirty or defective disc.
Dirty pick up lens.
Player is subject to excessive
shock or vibration.
Clean or replace the
defective disc.
Use a CD-lens cleaning disc
to clean the lens.
Relocate the player away
from shock or vibration.
Sound is distorted Volume level is set
too high.
Decrease the volume.
Sound source is distorted. Try a different sound
source.
If you are using an external
sound source like older
generation of iPod, try
reducing the output volume
on the device itself. Also try
turning bass boost OFF or
change the EQ setting.
Unit gets warm
after extended
play at high
volume
This is normal. Turn the unit off for a period
of time or lower volume
SPECIFICATIONS
Power requirement:
Power AC Adaptor:
Input AC 100-240V ~
Output: DC 9V
2.5A
Remote control: 2 x AAA (UM-4) Batteries
Frequency Range
Radio Band: FM 87.5 ~ 108 MHz
AM 520 – 1710 KHz
Bluetooth: Version 5.0
USB PORT Support FAT 32 format, up to 128GB USB thumb drives.
The Bluetooth® word mark and logos are registered trademarks owned by Bluetooth SIG, Inc. and
any use of such marks by Spectra Merchandising Intl, Inc. is under license. Other trademarks and
trade names are those of their respective owners.
Table of contents
Other Jensen Stereo System manuals

Jensen
Jensen JMS32 User manual

Jensen
Jensen CD-485 User manual

Jensen
Jensen CD-565 User manual

Jensen
Jensen SMPS-628 User manual

Jensen
Jensen JWM6A User manual

Jensen
Jensen Heavy Duty JHD40BT User manual

Jensen
Jensen AWM914 User manual

Jensen
Jensen Heavy Duty JHD40BT User manual

Jensen
Jensen MS3ABK User manual

Jensen
Jensen JWM6A User manual

Jensen
Jensen AWM965 User manual

Jensen
Jensen JCR-390 User manual

Jensen
Jensen MS3A User manual

Jensen
Jensen Media PRO 5000 User manual

Jensen
Jensen SMPS-750 User manual

Jensen
Jensen JBS-350 Installation instructions

Jensen
Jensen JMC-1100 User manual

Jensen
Jensen JBS-230 User manual

Jensen
Jensen JWM20 Installation instructions

Jensen
Jensen JDH910BT User manual