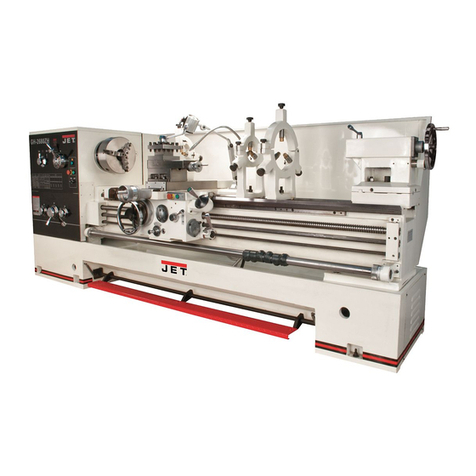
Jet E-1440VS Service manual

1

2
CE-Conformity Declaration
CE-Konformitätserklärung
Déclaration de Conformité CE
Product / Produkt / Produit:
Metal Lathe
Metalldrehbank
Tour à métaux
E-1440VS
Brand / Marke / Marque:
JET ELITE
Manufacturer / Hersteller / Fabricant:
JPW (Tool) AG, Tämperlistrasse 5, CH-8117 Fällanden
Schweiz / Suisse / Switzerland
We hereby declare that this product complies with the regulations
Wir erklären hiermit, dass dieses Produkt der folgenden Richtlinie entspricht
Par la présente, nous déclarons que ce produit correspond aux directives suivantes
2006/42/EC
Machinery Directive
Maschinenrichtlinie
Directive Machines
2014/30/EU
electromagnetic compatibility
elektromagnetische Verträglichkeit
compatibilité électromagnétique
designed in consideration of the standards
und entsprechend folgender zusätzlicher Normen entwickelt wurde
et été développé dans le respect des normes complémentaires suivantes
EN ISO 12100:2010
EN ISO 2315:2010/A1 :2012
EN 60204‐1:2006/AC:2010
EN 61000‐6‐2 :2005
EN 6100‐6‐4 :2007
Responsible for the Documentation / Dokumentations-Verantwortung / Résponsabilité de Documentation:
Hansjörg Meier
Head Product-Mgmt. / Leiter Produkt-Mgmt. / Resp. Gestion des Produits
JPW (Tool) AG
2017-05-03 Alain Schmid, General Manager
JPW (Tool) AG, Tämperlistrasse 5, CH-8117 Fällanden Schweiz / Suisse / Switzerland

3
Operating Instructions and Parts Manual
Metal-Lathe
JET-ELITE E-1440VS

4

5
2.0 TABLE OF CONTENTS
1.0 WARRANTY AND SERVICE ...................................................................................................................... 2
2.0 TABLE OF CONTENTS.............................................................................................................................. 5
3.0 SAFETY PRECAUTIONS............................................................................................................................ 6
4.0 INTRODUCTION...................................................................................................................................... 8
5.1 SPECIFICATION AND ACCESSORIES......................................................................................................... 9
5.2 GENERAL LAYOUT OF LATHE .................................................................................................................. 9
5.3 DIMENSIONS .................................................................................................................................... 10
5.4 FOUNDATION PLAN.......................................................................................................................... 10
5.5 SPECIFICATIONS AND ACCESSORIES................................................................................................. 11
6.1 INSTALLATION ............................................................................................................................................... 12
6.2 LIFTING ............................................................................................................................................. 12
6.3 CLEANING......................................................................................................................................... 12
6.4 INSTALLING....................................................................................................................................... 12
6.5 LUBRICATION CHECKS ...................................................................................................................... 13
6.6 CHUCKS AND CHUCK MOUNTING .................................................................................................... 13
7.1 OPERATION ............................................................................................................................................ 14
7.2 LATHE CONTROL............................................................................................................................... 14
7.3 ELECTRICAL CONTROLS ........................................................................................................................... 14
7.4 SPINDLE SPEED SELECTORS..................................................................................................................... 15
7.5 THREADS AND FEEDS............................................................................................................................... 15
7.6 THREADING DIAL INDICATOR.................................................................................................................. 16
7.7 APRON CONTROLS (LEVER TYPE) ............................................................................................................ 16
7.8 CROSS SLIDE AND TOP SLIDE................................................................................................................... 16
7.9 TAIL STOCK............................................................................................................................................... 17
8.1 SERVICING AND MAINTENANCE ............................................................................................................ 17
8.2 LATHE ALIGNMENT (PART1)............................................................................................................. 17
8.3 LATHE ALIGNMENT (PART 2)................................................................................................................... 17
8.4 END GEAR TRAIN ..................................................................................................................................... 18
8.5 DRIVING BELTS......................................................................................................................................... 18
8.6 SLIDE WAYS ATTENTION.......................................................................................................................... 18
8.7 CROSS-SLIDE NUT .................................................................................................................................... 18
8.8 LUBRICATION (PART 1)............................................................................................................................ 19
8.9 LUBRICATION (PART 2)............................................................................................................................ 19
8.10 LUBRICATION DIAGRAM ......................................................................................................................... 20
9.0 RECOMMENDED CUTTING SPEED OF LATHE.............................................................................................. 21
10.0 REPLACEMENT PARTS.......................................................................................................................................... 23
11.0 WIRING DIAGRAMS ................................................................................................................................ 71

6
3.0 SAFETY PRECAUTIONS
1. Read and understand the entire owner’s manual before attempting assembly or operation.
2. Read and understand the warnings posted on the machine and in this manual. Failure to comply
with all of these warnings may cause serious injury.
3. Replace the warning labels if they become obscured or removed.
4. This lathe is designed and intended for use by properly trained and experienced personnel only. If you
are not familiar with the proper and safe operation of a lathe, do not use until proper training and
knowledge have been obtained.
5. Do not use this lathe for other than its intended use. If used for other purposes, JET®, disclaims any
real or implied warranty and holds itself harmless from any injury that may result from that use.
6. Always wear approved safety glasses/face shields while using this lathe. Everyday eyeglasses only
have impact resistant lenses; they are not safety glasses.
7. Before operating this lathe, remove tie, rings, watches and other jewelry, and roll sleeves up past the
elbows. Remove all loose clothing and confine long hair. Non-slip footwear or anti-skid floor strips are
recommended. Do not wear gloves.
8. Wear ear protectors (plugs or muffs) during extended periods of operation.
9. Some dust created by power sanding, sawing, grinding, drilling and other construction activities
contain chemicals known to the state of California to cause cancer, birth defects or other
reproductive harm. Some examples of these chemicals are:
•Lead from lead based paint.
•Crystalline silica from bricks, cement and other masonry products.
•Arsenic and chromium from chemically treated lumber.
Your risk of exposure varies, depending on how often you do this type of work. Toreduce your exposure
to these chemicals, work in a well-ventilated area and work with approved safety equipment, such as
face or dust masks that are specifically designed to filter out microscopic particles.
10. Do not operate this machine while tired or under the influence of drugs, alcohol or any medication.
11. Make certain the switch is in the OFF position before connecting the machine to the power supply.
12. Make certain the machine is properly grounded.
13. Make all machine adjustments or maintenance with the machine unplugged from the power source.
14. Remove adjusting keys and wrenches. Form a habit of checking to see that keys and adjusting
wrenches are removed from the machine before turning it on.
15. Keep safety guards in place at all times when the machine is in use. If removed for maintenance
purposes, use extreme caution and replace the guards immediately after maintenance is
complete.
16. Check damaged parts. Before further use of the machine, a guard or other part that is damaged
should be carefully checked to determine that it will operate properly and perform its intended
function. Check for alignment of moving parts, binding of moving parts, breakage of parts, mounting
and any other conditions that may affect its operation. A guard or other part that is damaged should
be properly repaired or replaced.
17. Do not use power tools in damp/wet locations or other dangerous environments. Do not expose
them to rain. Keep work area well lighted. Provide for adequate space surrounding work area and
non-glare, overhead lighting.
18. Keep the floor around the machine clean and free of scrap material, oil and grease.
19. Keep visitors a safe distance from the work area. Keep children away.
20. Make your workshop child proof with padlocks, master switches or by removing starter keys

7
21. Give your work undivided attention. Looking around, carrying on a conversation and “horse-play”
are careless acts that can result in serious injury.
22. Maintain a balanced stance at all times so that you do not fall or lean against moving parts. Do not
overreach or use excessive force to perform any machine operation. Never force the cutting action.
23. Do not operate the lathe in flammable or explosive environments. Do not use in a damp
environment or expose to rain.
24. Use the right tool at the correct speed and feed rate. Do not force a tool or attachment to do a job for
which it was not designed. The right tool will do the job better and more safely.
25. Use recommended accessories; improper accessories may be hazardous.
26. Maintain tools with care. Keep cutting tools sharp and clean for the best and safest performance.
Follow instructions for lubricating and changing accessories.
27. Do not attempt to adjust or remove tools during operation. Disconnect tools before
servicing; when changing accessories, such as blades, bits, cutters, and the like.
28. Never stop a rotating chuck or workpiece with your hands.
29. Choose a low spindle speed when working unbalanced workpieces, and for threading and tapping
operations.
30. Do not exceed the maximum speed of the workholding device.
31. Do not exceed the clamping capacity of the chuck.
32. Secure work. For safety and use of both hands, use clamps or a vise to hold work when practical.
33. Workpieces longer than 3 times the chucking diameter must be supported by the tailstock or a steady
rest.
34. Avoid small chuck diameters with large turning diameters.
35. Avoid short chucking lengths and small chucking contact.
36. Turn off the machine and disconnect from power before cleaning. Use a brush to remove shavings or
debris —do not use your hands.
37. Do not stand on the machine. Serious injury could occur if the machine tips over.
38. Never leave the machine running unattended. Turn the power off and do not leave the machine
until moving parts come to a complete stop.
39. Remove loose items and unnecessary work pieces from the area before starting the machine.
40. Direction of feed —feed work into a blade or cutter against the direction of rotation of the blade or
cutter only.
41. Installation work and electrical wiring must be done by qualified electrician in accordance with all
applicable codes and standards.
42. Tighten all locks before operating.
43. Rotate workpiece by hand before applying power.
44. Rough out workpiece before installing on faceplate.
45. Use lowest speed when starting new workpiece

8
Familiarize yourself with the following safety notices used in this manual:
4.0 INTRODUCTION
This manual is provided by JET® covering the safe operation and maintenance procedures for a JET Model E-
1440VS.
This manual contains instructions on installation, safety precautions, general operating procedures,
maintenance instructions and parts breakdown.
Your machine has been designed and constructed to provide years of trouble-free operation if used in
accordance with the instructions as set forth in this document.
!
This means that if precautions are not heeded, it
may result in minor injury and/or possible
machine damage.
!
This means that if precautions are not heeded,
it may result in serious or even fatal injury.
WARNING
CAUTION

9
5.1 SPECIFICATION AND ACCESSORIES
5.2 GENERAL LAYOUT OF LATHE
1) Headstock
2) Spindle
3) Top slide
4) Saddle and
5) cross-slide
6) Splash guard
7) Tailstock
8) Bed
9) Tail-end plinth
10) Mounting feet
11) Lead screw
12) Chip pan
13) Apron
14) Foot brake
15) Head—end plinth
16) Gear box
17) End cover
18) Electrical box
17
2
1
16
3
4
5
15
6
14
7
8
9
13
12
11 10
9
Fig. 1

10
For pump removal
SPACE
RECOMMENDED
FOR
MACHINE
INSTALLATION
WITH
ACCESS
FOR
MAINTENANCE
500
For motor removal
—16mm Hole
—1/2” - 12NC Adjust Screw
Splash guard outline
Tray outline
Center line
Center line
Tray outline
50
50
50
90
140
410
1550
320
205
210
1360mm
2530mm
460
Fig. 4
5.3 DIMENSIONS
Model
A
FB
C
D
E
E-1440VS
1000
1800
1920
1295
1067
5.4 FOUNDATION PLAN
Fig. 3
Unit: mm
Fig. 2
Fig. 2
1022
620
402
For
tailstock
removal
162
480
380
620
350
402
215
”
215
”
For
endcover
removal

11
5.5 SPECIFICATIONS AND ACCESSORIES
MODEL
E-1440VS
NOMINAL SIZE
Swing over Bed
356mm
Swing over Cross Slide
220mm
Height of Center
178mm
Distance between Centers
1000mm
BED
Width of Bedways
206mm
Total Length of Bed
1680mm
Gap Type
Swing over Gap
515mm
Length of Gap
240mm
Width in front of face plate
146mm
SPINDLE
Spindle nose mounting
D1-4 Camlock
Spindle bore
38mm
Taper of spindle bore
MT 5
Number of spindle speeds
2x Variable speed change
Range of spindle speeds
Low=30-405 RPM , High=165-2200 RPM
TOOL SLIDE
Total travel of cross slide
165mm
Total travel of top slide
100mm
Max. size cutting tool
22mm
TAIL STOCK
Total travel of tailstock barrel
120mm
Taper in tailstock barrel
MT 3
Diameter of barrel
45mm
THREADS
Lead screw diameter & pitch
Dia. 25mm Pitch 6mm
Number of Inch threads
28
Range of Inch threads
2 - 28 T.P.I
Number of Metric pitches
37
Range of Metric pitches
0.5 - 7.0 mm
FEEDS
Feed rod diameter
Dia. 19mm
Number of feed change
42
Range of Longitudinal feeds
0.034 - 0.41 mm/rev.
Range of Cross feeds
0.017 - 0.2 mm/rev
MOTOR
Main spindle motor
2.2 kW
Coolant pump motor
0.17 kW
Machine net weight
750 kg

12
6.1 INSTALLATION
6.2 LIFTING
Use the sling-chain to sling lathe as shown in Figure
5 position the saddle and tailstock along the bed to
obtain balance.
Note: Do not use slings around bed as leadscrew
and feedshaft may be bent.
6.3 CLEANING
Before operating any controls, use white spirit or
kerosene to remove the anticorrosion coating from
all slideways and the endgear train.
Do not use cellulose solvents for cleaning as they
will dam- age the paint finish.
Machine surface becomes bright immediately after
cleaning using machine oil or slideway lubricant.
Use heavy oil or grease on the end gears.
6.4 INSTALLING
Place the machine on a solid foundation, allowing
sufficient area all around for easy working and
maintenance (see Foundation Plan). The lathe may
be used free-standing or bolted to the foundation.
Free-standing: Position the lathe on foundation
and adjust each of the six mounting feet to take
equal share of the load. Then using an engineers
precision level on the bed- ways (as in Figure 7)
adjust the feet to level up machine. Periodically
check bed level to ensure continued Lathe
accuracy.
Fixed installation: Position lathe over six bolts
( M12), set into the foundation to correspond with
holes in the mounting feet. Accurately level the
machine as in Figure, then tighten hold-down bolts
and recheck bed level.
Eyebolt
Clamping plate
Bed
Nut
Fig. 6
Fig. 5
Fig. 5
Headstock
Bedways
Saddle and Cross-slide
Engineer's Precision Level
Fig. 7
Tailstock

13
6.5 LUBRICATION CHECKS
Before operating the machine make the following
important checks:
1. That the headstock is filled to level marked
on oil sight window with Shell Tellus Oil 27 ,
Mobil DTE Oil Light (DIN 51517-2 CL ISO VG
32 ) or equivalent.
2. That the gearbox is filled to level marked on
oil sight window with Shell Tellus Oil 27 ,
Mobil DTE Oil Light (DIN 51517-2 CL ISO VG
32 ) or equivalent.
3. That the carriage apron is filled to level
mark on oil sight window with Shell Tellus
Oil 33, Mobil DTE Oil Heavy Medium (DIN
51517-2 CL ISO VG 68) or equivalent.
4. In addition, apply an oil can to the points
shown on lubrication diagram which require
daily oiling. Use light machine oil or way
lubricant Shell Tonna 33, Mobil Vectra 2
(DIN 51502 CG ISO VG 68) or equivalent.
6.6 CHUCKS AND CHUCK MOUNTING
When mounting chucks or faceplate, first, ensure
that spindle and chuck tapers are thoroughly
cleaned and that all cams lock in the correct
positions, see figure. It may be necessary when
mounting a new chuck to reset the
camlock studs (A). To do this, remove the caphead
locking screws (B) and set each stud so that the
scribed ring (C) is flush with the rear face of the
chuck - with the slot lining up with the locking
screw hole (see Fig 10).
Now mount the chuck or faceplate on the spindle
nose and tighten the three cams in turn. When
fully tightened, the cam lock line on each cam
should be between the two V marks on the spindle
nose.
If any of the cams do not tighten fully within these
limit marks, remove the chuck or faceplate and
readjust the stud as indicated in the illustration. Fit
and tighten the locking screw (B) at each stud
before remounting the chuck for work.
This will assist subsequent remounting.
Note: Do not interchange chucks or faceplates
between lathes without checking for correct cam
locking beforehand.
Note: Take careful note of speed limitation when
using faceplate; the 300mm faceplate should not
be run at speeds greater than 770 RPM.
Mounting
feet
Mounting
feet
Mounting feet
Fig. 8
1
4
4
2
3
Fig. 9
!
Grey-iron chucks must not be fitted on this high-
speed lathe. Use only ductile iron chucks.
WARNING

14
7.1 OPERATION
7.2 LATHE CONTROL
1. Spindle speed digital readout. (for V-speed)
2. Spindle speed selector (HIGH or LOWER
step).
3. Spindle speed adjusting knob. (for V-speed)
4. Gearbox, threads and feeds.
5. Apron, surfacing or sliding feeds.
6. Main motor rotation (forward and reverse).
7. Footbrake
7.3 ELECTRICAL CONTROLS
The main power switch is located on the electrical
box behind the lathe (head - end).
All electrical controls are fitted to the front face of
the head- stock and the top of electrical box on the
top of headstock.
(1) POWER SWITCH: when the main power switch
(1) on the electrical cover is turned on, the pilot
lamp (2) glows and the electricity is on. (See
Figure 13).
(2) POWER INDICATOR LIGHT: When the power is
on, the indicator light glows.
(3) EMERGENCY STOP SWITCH: press the RED
mush- room - head button to stop electric
power, to stop the main motor and coolant
pump.
(4) JOG BUTTON: Press the GREEN button to move
spindle slightly, it will make spindle speed
selection very easy. (While the spindle roation
lever is set in the neutral position).
(5) VARIABLE SPEED SELECTORS: adjusting spindle
speed.
(6) Spindle speed chart.
(7) Coolant pump ON/OFF switch.
(8) End cover switch: While operating open end
cover door for adjustment or maintenance, it
will stop automatically all rotation movements.
Reference mark on spindle nose and chuck
Turn stud out one turn
A
C
Cam release
datum
B
Turn stud in one turn
Fig. 10
Detail of camlock
stud ass’y
Cam lock line between arrows
1
2
3
4
5
6
7
Fig. 11
2
6
8
4
7
3
5
Fig. 12

15
7.4 SPINDLE SPEED SELECTORS
Main spindle is variable from 30-2200 RPM,
divided into two groups, low and high speed. Low
speed ranges from 30 - 405 RPM, and High speed
ranges from 165 - 2200 RPM.
First, put the upper right-hand handle (A) on the
Headstock to needed speed range.
Note: Don’t change handle’s position with spindle
in motion. Spindle must be motionless when
changing the handle’s position.
Then, adjust Variable Speed Selector (B) to needed
spindle speed. Selectors (B) can change speed
while spindle is rotating.
Spindle Speed Chart (C) equipped on the face of
the Head- stock shows the RPM (rev/min) while
spindle is rotating.
HIGH SPEED (165-2200 RPM)
LOWER SPEED (30-405 RPM)
7.5 THREADS AND FEEDS
All the threads and feeds directly available from
the gear box are shown in the data plate fitted on
the front of the gearbox. The setting of control
levers is shown below.
The B position of lever (Y) can provide a range of
fine threads; the A position a coarse thread range.
Do not select the range (A position) at spindle
speeds higher than 770 RPM.
Fig. 13
1
Fig. 13
C
A
B
Fig. 14
C
B
Fig. 15
C
Fig. 15
B
A

16
Threads available:
•37 Metric threads - 0.5 to 7.0mm pitch
•28 Inch threads –2 to 28 TPI
The endgear train should be arranged as in the
diagrams shown on the data plate to suit threading
requirements.
Feed rates: The Cross feed rate is 50% of
Longitudinal feed that is shown on headstock.
Feeds: longitudinal feeds per spindle revolution
range from 0.034 –0.41 mm/rev.
Cross feeds per spindle revolution range from
0.017 –0.2 mm/rev.
7.6 THREADING DIAL INDICATOR
Metric threads
Located on the right hand side of the apron.
Engage the indicator pinion with the leadscrew and
tighten the handnut to retain indicator in
engagement. To cut metric threads, close the
leadscrew nut at any NUMBERED line.
Inch threads
This dial cannot be used to cut Inch threads. For
these the lead- screw nut must be kept closed and
the machine reversed by use of the changeover
switch, after each cutting pass and tool withdrawal.
7.7 APRON CONTROLS (LEVER TYPE)
In addition to handwheel traverse, the carriage can
be power-operated through controls on the front
of the apron, see Figure 16 knob (A). Automatic
feed lever (A) if moved upwards, the carriage will
do longitudinal-feed operation. If the lever (A) is
placed in middle position, it will perform manual
operation. If the lever (A) is moved downward, it
will perform the cross-feed operation.
Lever (B) is pressed downward to engage the
leadscrew nut for threading. To avoid undue wear,
release the nut except when threading.
7.8 CROSS SLIDE AND TOP SLIDE
A solid topslide is fitted as standard to the cross-
slide. Carried on a rotatable base the cross-slide is
marked 45-0-45 degrees for accurate indexing.
Handwheel dials are graduated in metric division
to suit the operating screw and nut fitted.
40
5
220
0
L
H
3
0
16
5
Y
A
B
STOP
LATHE
TO
CHANGE
SPEED
TOGGLE
RP
M
3
2
FG
E H
4
1
C
D
T
.
P
.I
C1 C2 C3 D1 D2 D3
C4 D4
127
50
127
50
127
45
m
m
50
AH 4 4.5 5 5.5 5.75
6 6.5 7
127
120
120
120
40
50
60
50
G.029 4 .026 1 .02 35 .02 14 .0 205 .01 96 . 0181 .0 168
AH 8 9 10 11 11.5 12 13 14
G.0147 . 013 1 .0117 .01 07 .010 2 .00 98 .00 90 .00 84 C1 C3 D3
C3 C1 C2 C3
30
BH16 18 20 22 23 24 26 28 AH 7.5 6.0
5.0 4.8 4.5 4.0
G.0073 . 006 5 .005 8 .00 53 .005 1 .00 49 .00 45 .004 2
1
2
7
AF32 36 40 44 46 48 52 56 BH 3.75 3.0 2.5
2.4 2.25 2.0 1.8
60
E.0042 .0 038 .0 034 . 0031 . 003 0 .002 8 .002 6 .002 4 AF 1.5
1.25 1.2 1.0 0.9
E.002 1 .001 9 .001 7 .00 15 .00 15 .00 14 .00 13 .00 12 BF .75
0.6 0.5 0.45
BF 64 72 80 88 92 96
104 112
Fig. 16
Fig. 17
Handnut
Threading dial indicator
Fig. 17
A
B
Fig. 18

17
The cross-slide can be power operated by pulling
out the hand knob (A), at one-third feed per
spindle revolution, or it can be hand-operated
using the large-diameter dial graduated in metric
divisions to suit the operating screw and nut fitted.
7.9 TAIL STOCK
Can be freed for movement along the bed by
unlocking the clamp lever (A). The tailstock barrel
is locked by lever (B).
The tailstock can be offset for production of
shallow tapers or for re-alignment. Release the
clamping lever (A) and adjust screws (S) at each
side of the base to move tailstock laterally across
the base. An indication of the offset is given by the
datum mark (C) at the tailstock end face, as shown
in Figure 18. Apply clamp lever after adjustment of
set-over.
8.1 SERVICING AND
MAINTENANCE
8.2 LATHE ALIGNMENT (PART 1)
With the lathe installed and running, we
recommend a beginning check of the machine
alignment before work. Check leveling and
machine alignment at regular periods to ensure
continued lathe accuracy.
Headstock check: Take a light cut with a sharp tool
over 150 mm length on a 50mm diameter steel bar
gripped in the chuck but not supported at the free
end. Micrometer readings at each end of the
turned length (See Figure 22) should be the same.
To correct a difference in readings, loosen the four
head- stock hold-down screws (J) shown in Figure
21 and adjust the set-over pad (K) beneath the
headstock. Then tighten all screws. After
adjustment, repeat the test-cut/micrometer
reading until micrometer readings are identical so
that machine cutting will be absolutely parallel.
8.3 LATHE ALIGNMENT (PART 2)
B. Tailstock check
Using a 300 mm ground steel bar fitted between
headstock and tailstock centers, check the
alignment by fitting a dial-test indicator to the
topslide and traversing the center line of the bar.
To correct error, release the tailstock clamp lever
and adjust the two set-over screws provided.
Continue with checking and correction until the
alignment is perfect.
AFig. 19
Fig. 19
B
A
S
B
A
S
S
Fig. 20
Headstock
Fig. 21
J
K

18
8.4 END GEAR TRAIN
Drive from headstock to gearbox is transmitted
through a gear train enclosed by the headstock
end-guard. Intermediate gears are carried on an
adjustable swing frame (M).
Gears must be thoroughly cleaned before fitting
and backlash maintained at approximately 0.1mm.
Lubricate gears regularly with non-slinging grease,
e.g. BP L2, Mobilgrease Special, or equivalent.
8.5 DRIVING BELTS
To alter belt tension, remove the coverplate in
back of the headstock and adjust the two screws (X)
on the hinged motor platform. Ensure that the
motor is correctly aligned with the lathe axis.
Light finger pressure at a point midway between
motor and headstock pulleys about 20mm
movement of each belt when under correct
tension.
8.6 SLIDE WAYS ATTENTION
Tapered gib strips are fitted to slideways of saddle
crosslide and top (compound) slides so that any
slack which may develop can be justified.
Ensure that slideways are thoroughly cleaned and
lubricated before attempting adjustment. Then
reset the gibs by loosening the rear gib screw and
tightening the front screw. Check constantly for
smooth action throughout full slide travel; avoid
overadjustment which can result in increased
wear-rate and stiff or jerky action.
8.7 CROSS-SLIDE NUT
This is adjustable for elimination of slack which
may develop in service. Reduce backlash by the
cap-head screw in the rear of the nut, then make
only small adjustments by the cap-head screw.
Before operating the cross-slide, check several
times by hand to ensure smooth operation
throughout travel.
Tailstock
Headstock
Tailstock clamp lever
Topslide
Set-over screws
Fig. 22
300mm
M
Hexagon
nut
(by
22mm
spanner
)
Hexagon socket head
bolt
(by 6mm allen
wrench)
Fig. 23
Belt
P
r
e
s
s
M
o
t
o
r
P
u
l
l
e
y
X
Fig. 24
Pulley
P
r
e
s
s
M
o
t
o
r
P
u
l
l
e
y
X
Fig. 24
Motor
P
r
e
s
s
M
o
t
o
r
P
u
l
l
e
y
X
Fig. 24
Pulley
P
r
e
s
s
M
o
t
o
r
P
u
l
l
e
y
X
Fig. 24
Press
P
r
e
s
s
M
o
t
o
r
P
u
l
l
e
y
X
Fig. 24
X
P
r
e
s
s
M
o
t
o
r
P
u
l
l
e
y
X
Fig. 24
Fig. 24
Fig. 25
Fig. 25
Gib adjusters

19
8.8 LUBRICATION (PART 1)
The headstock and gearbox are splash-lubricated
from an internal reservoir of oil (Shell Tellus 27).
Check the oil level constantly to the mark on the oil
sight window in the front end face of the
headstock and gearbox. A weekly check is
recommended. The oil should be changed every
year. Add oil through a filler cap in the top of the
headstock and gear- box is covered by the end-
guard. Drain from a drain plug in the bottom of the
headstock and gearbox.
The apron is lubricated from an internal reservoir
of oil. The oil sight window is in the front of the
apron. A filler cap is in the top of the saddle. Refill
the reservoir to the level of the oilsight with oil
(Shell Tonna oil 33). The apron can be drained by
unscrewing a hexheaded drain plug in the bottom.
8.9 LUBRICATION (PART 2)
In addition, an oil gun is provided for the saddle,
cross- slide, cross-slide nut and top-slide
(compound slide) to oil. Leadscrew using an oil gun
can be oiled with light machine oil or way lubricant.
On the tailstock, oil points are provided for daily
attention from a standard oil can.
It is recommended that all slideways, leadscrew
and feed shaft are cleaned off (a bristle paint brush
is useful for this) and lightly oiled after each period
of work.
Note: Using incorrect grade of oil can cause
damage.
Nut
Cap-head screw
Fig. 26
Apron
Drain
plug
Drain plug
Gearbox
Fig. 27
Filler cap
Headstock
Oiler points
O
Oiler points
O
Oiler points
O
Fig. 28

20
8.10 LUBRICATION DIAGRAM
Part to be lubricated
1. Headstock
2. Gearbox
3. Apron
4. Slide and Tailstock
Recommendable lubricant
SHELL; TELLUS OIL
27
SHELL; TELLUS OIL
27
SHELL; TELLUS
OIL 33
SHELL; TONNA
OIL 33 - 41
Equivalent
Mobil DTE Oil Light
Mobil DTE Oil Light
Mobil DTE Oil Heavy
Medium
Mobil Vectra 2
Viscosity class
ISO VG 32
ISO VG32
ISO VG68
ISO VG68
Filling method
OIL JUG
OIL JUG
OIL JUG
OIL GUN
Initial charge quantity
4.5 liter
1.5 liter
0.9 liter
—
Make up
Interval
3 Month
3 Month
1 Month
1 Day
Quantity
0.5 Liter
0.5 Liter
0.2 Liter
A little
Exchange
Interval
1 Year
1 Year
1 Year
—
Quantity
4.5 Liter
1.5 Liter
0.9 Liter
—
Other manuals for E-1440VS
1
Table of contents
Languages:
Other Jet Lathe manuals

Jet
Jet BP-1248H Service manual

Jet
Jet GH-1340W User manual

Jet
Jet Elite E-1236VS Service manual

Jet
Jet GH-2040 ZH User manual

Jet
Jet JWL-1220VS User manual

Jet
Jet BD-920W Service manual

Jet
Jet JWL-1442VS Service manual

Jet
Jet GH-1640ZK Troubleshooting guide

Jet
Jet BD-920W User manual

Jet
Jet JWL-1440VS User manual