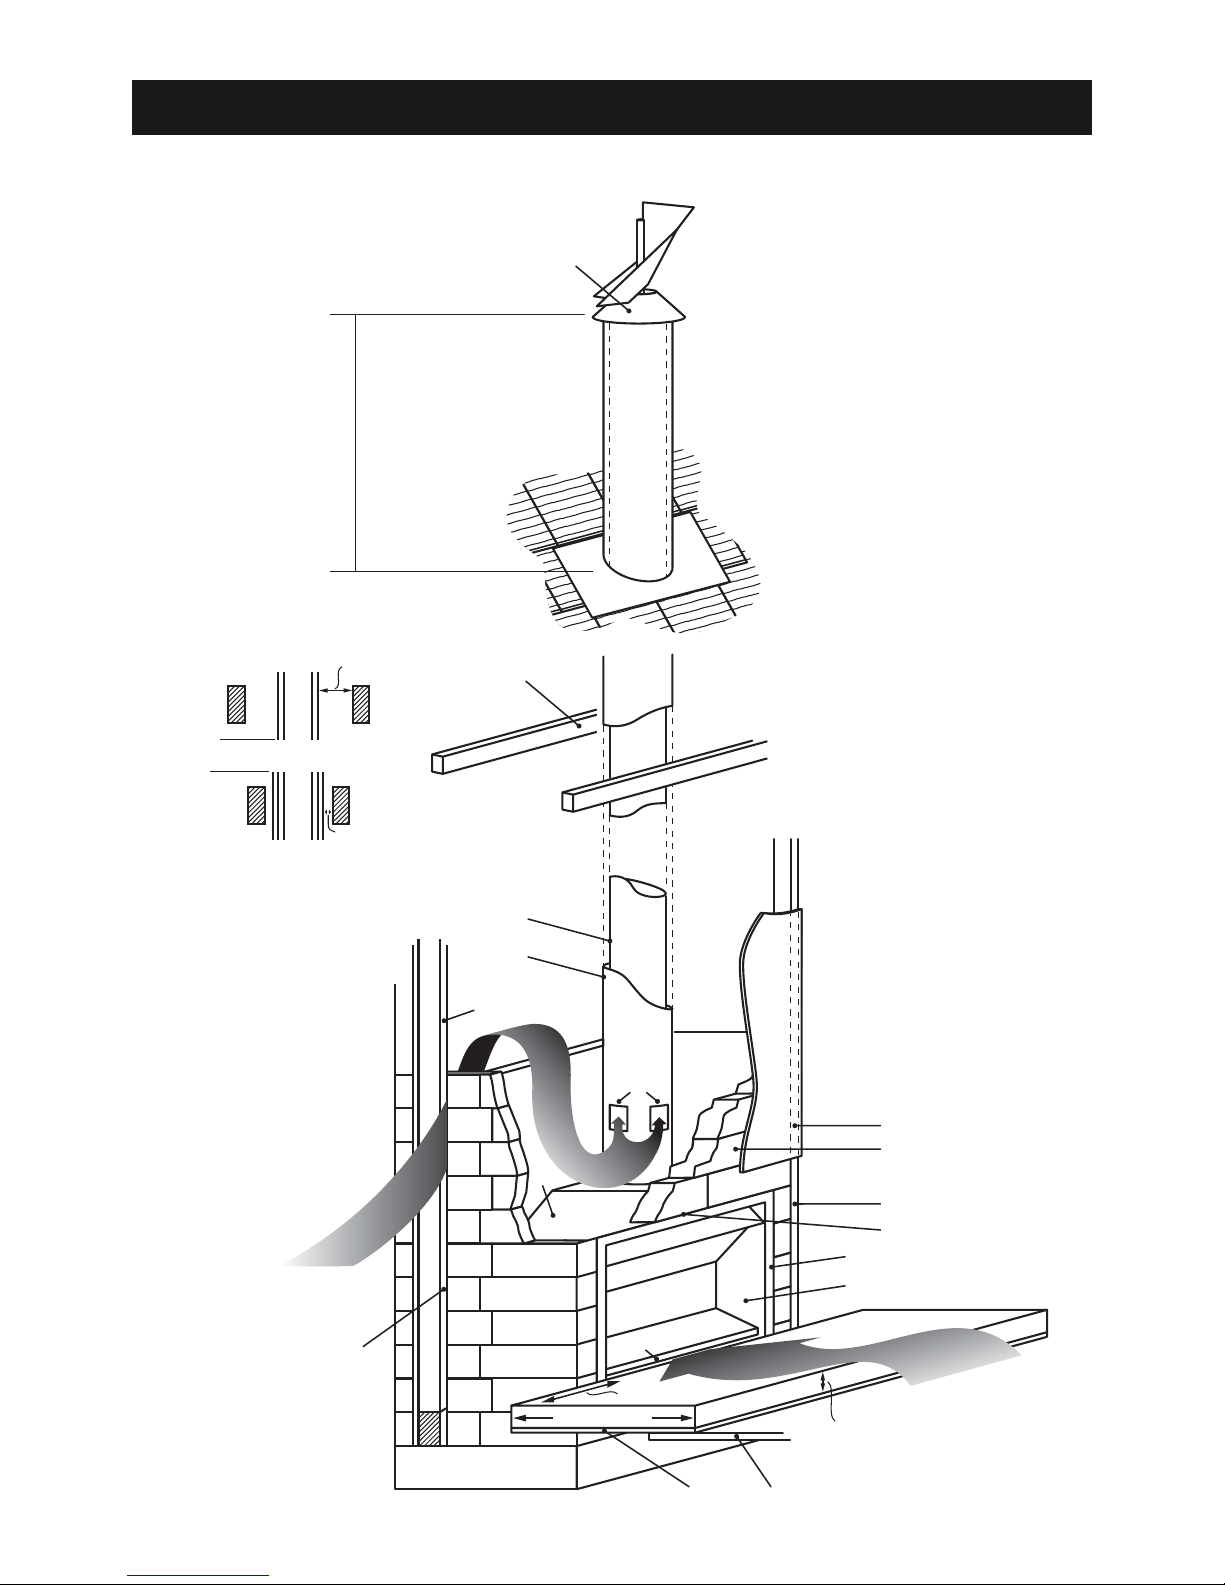
Installation With Full Brick Chimney
Step by step check list
Warning! Please read these instructions carefully. Failure to
adequately follow the instructions can result in serious injury
or death.
1. Position firebox on a non-combustible hearth-see diagram
1 page 7 (summary of minimum installation specs.)
2. Bolt gather to firebox.
3. Insulate entire firebox and gather where painted red with
the insulation provided.
4. If using a Jetmaster lintel, bolt lintel to firebox. If using an
angle bar as a lintel you can use the side Hebel or brickwork
to support the lintel - insulate between lintel and firebox.You
can lay your Hebel or brickwork directly onto the top of the
firebox between the gather and front flange of the firebox.
However it is important to insulate between the brickwork
and firebox.
5. Ensure air intake area at bottom of unit is not obstructed
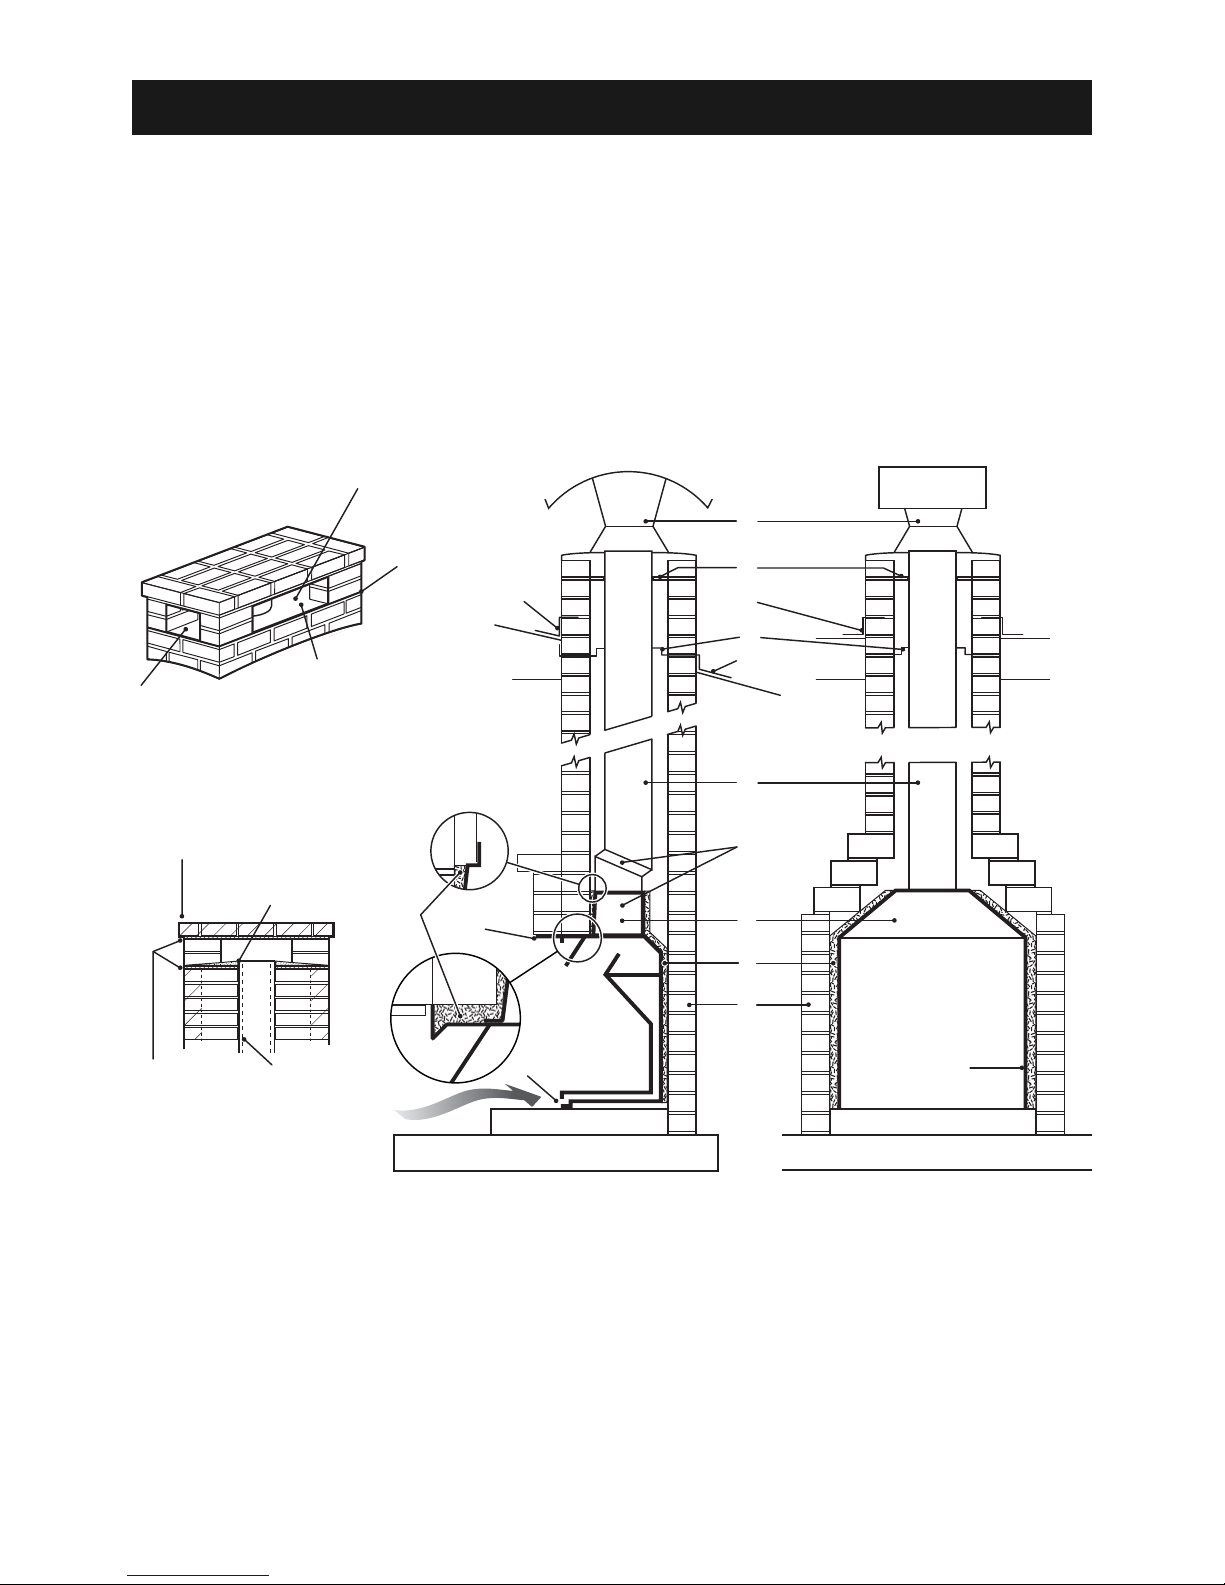
6. Brick around firebox
7. Do not recess the firebox by more than 110mm.A greater
dimension could result in compromise in convected heat.
8. Rivet inner active flue with uncrimped end facing down to
collar of gather at three places.
Rivet active flues together at crimped joins.
Encase the flue with brickwork and it is suggested that a piece
of 9mm fibre cement sheeting with a circular cut out to
accommodate the flue be positioned on the chimney opening,
one course of brickwork from the top of the chimney. Slope
mortar outward from the flue which should protrude through
the cement sheet by 50mm (see diagram page 7 alternative
brick chimney termination.
9. Fit a recommended Jetmaster flue cowl to the top of
chimney.
10. Gas burning - A ½ inch BSP inlet on right hand side is
required. Drill at 100mm from base and rear of firebox from
outside of firebox. Avoid penetrating the firebox from the
rear.
Installation with full brick
chimney
1. Re-inforced concrete foundation.
Suspended floors will require supports and footings.
2. Hearth.
3.Air inlet. DO NOT BLOCK.
4. Firebox.
5. Gather.
6. Optional lintel, as firebox supports brick wall. (If other than
the Jetmaster lintel used, a 100 x 10 angle bar is needed and
allow at least 2 mm for expansion.
7. Insulation.
8. 115 minimum brickwork.
9. Gap between stainless steel flue and brickwork may
(optional) be filled with mortar (8 sand, 3 lime, 1 cement).
10.Approved Flashing.
11. Drip tray.
12. Jetmaster stationary cowl, rotating cowl, (also see diagram
alternative brick termination-this page) A.G.A gas approved
cowl when using gas.
13. Optional 45 degree bends or offset gather available.
14. Fibre cement sheet under last course of bricks with hole
cut to restrain flue. Provide outer sleeve to allow for
expansion and contraction of active flue and base cowl when
filling with mortar.
15. For burning gas: 1/2-inch B.S.P. inlet on right hand side of
firebox is recommended. Drill at 100 mm from base and rear
of the firebox measuring on outside of firebox.
Important points
• Do not block air inlet. Cover all surfaces of fireplace,
including, gather, with insulation provided.
• Build the brickwork at the back and sides of the fireplace
against insulation. Seal any gaps between gather and firebox
with the fire cement or insulation provided.
PAGE 9