manuals.online logo
Brands
  1. Home
  2. •
  3. Brands
  4. •
  5. JH Industries
  6. •
  7. Lifting System
  8. •
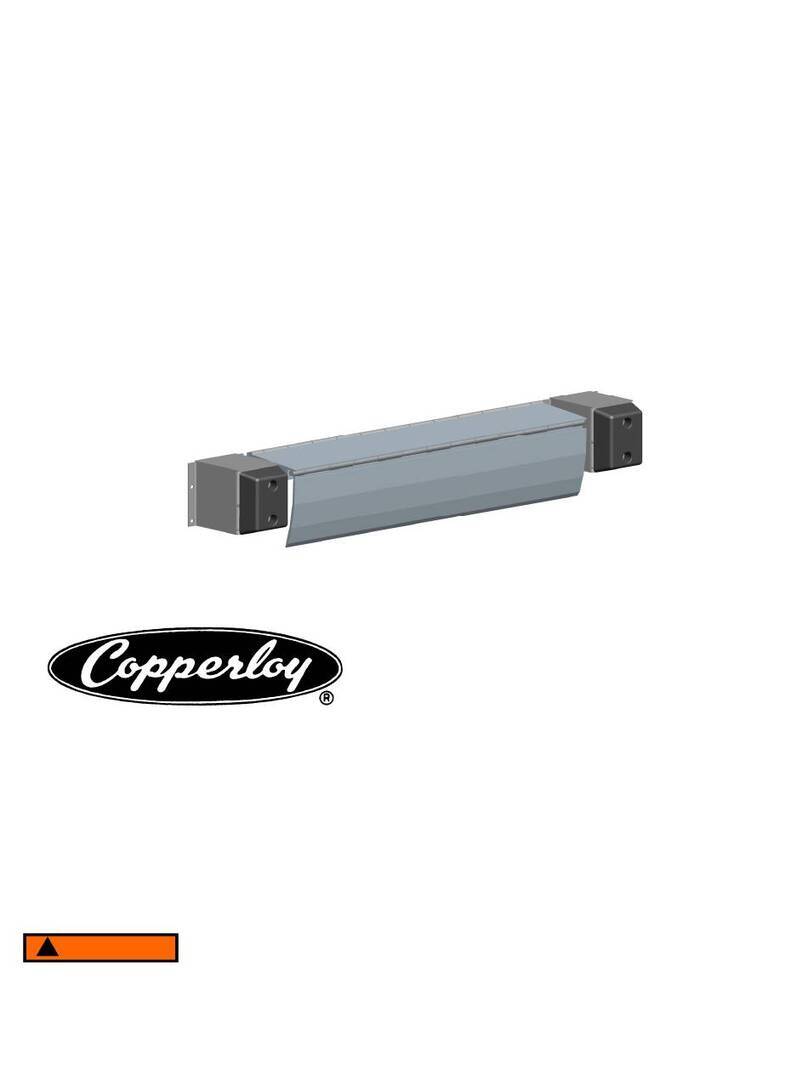
  9. JH Industries Copperloy Operating instructions

JH Industries Copperloy Operating instructions

by
JH
I N D U S T R I E S , I N C .
1981 E. Aurora, Rd.
Twinsburg, Ohio 44087
(330) 963-410 (Phone)
1-800-321-4968 (Toll Free)
www.copperloy.com
Do not install, operate or service this product unless you have read and understand the Safety
Practices, Warnings, Installation and Operating Instructions contained in this manual. Failure to
do so could result in serious injury or death.
Model #__________________________
Serial #__________________________
Date: __________________________
Dock ift
Installation
&
Owner’s Manual
WARNING
!
A WARRANTY C AIMS MUST HAVE PRE-APPROVED RATES, TIMES AND AUTHORIZATION NUMBERS PRIOR TO ANY FIELD WORK,
IN ORDER TO BE ACCEPTED BY JH INDUSTRIES, INC.
J H Industries, Inc. expressly warrants that any PIT MOUNT OCK LIFT sold by it will be free from defects in material and workmanship under
normal use for a period of one (1) year on all structural parts and six (6) months on all electrical and hydraulic parts from the earlier of, 1) sixty (60)
days after the date of shipment, or 2) the date of installation of the PIT MOUNT OCK LIFT by the original purchaser, provided the purchaser main-
tains and operates the PIT MOUNT OCK LIFT in accordance with the Owners Manual.
In the event that the PIT MOUNT OCK LIFT proves to be defective in materials or manufacturing workmanship within the applicable period, J H
Industries, Inc. will, at its option:
1. Replace the PIT MOUNT OCK LIFT or the defective portion thereof without charge to the purchaser, or
2. Alter or repair the PIT MOUNT OCK LIFT, on site or elsewhere, without charge to the purchaser.
This warranty IS EXCLUSIVE AN IS IN LIEU OF ALL GUARANTEES AN WARRANTIES, EXPRESSE OR IMPLIE BY ANYONE OTHER
THAN J H Industries, Inc. sole warranty obligation shall be as set forth above. JH Industries, Inc. reserves the right at any time and only with prior
written notification to change or alter the warranties expressed and provided.
The warranty does not cover any failure caused by improper installation, abuse, misapplication, overloading, negligence, or failure to lubricate and
adjust the E GE-OF- OCK properly. Parts requiring replacement due to damage resulting from vehicle impact, abuse, improper operation or lack of
proper protection are not covered by this warranty. Seller assumes no responsibility or liability for (1) consequential damages of any kind which
result from the use or misuse of the PIT MOUNT OCK LIFT; (2) damage or failure resulting from the use of unauthorized replacement parts or
modification to the PIT MOUNT OCK LIFT; (3) damage resulting from the misuse of the PIT MOUNT OCK LIFT. THERE ARE NO
WARRANTIES, EXPRESSE OR IMPLIE , WHICH EXTEN BEYON THE ESCRIPTION ABOVE. THERE IS NO WARRANTY OF
MERCHANTABILITY OR OF FITNESS FOR A PARTICULAR PURPOSE.
J H Industries, Inc. warranties extend only to the product itself.
J H Industries, Inc. DISC AIMS all liability arising out of the workmanship, methods and materials used by the installer.
J H Industries, Inc. DISC AIMS all liability for premature wear, product failure, property damage or bodily injury arising from improper
installation or maintenance.
WARRANTIES, whether expressed or implied, relating to workmanship and materials used in connection with the installation of
J H Industries, Inc. products are specifically DISC AIMED.
1
Verify that this is the most current Installation, O eration and Service Manuals.
To obtain an u dated version lease contact:
JH Industries Inc.
1981 E. Aurora Rd.
Twinsburg, Ohio 44087
(330) 963-4105 (Phone) or 1-800-321-4968 (toll free)
Or visit our website under EOD SEL to download and rint an u to date
version.
INTRO UCTION
Welcome, and thank you for purchasing your Pit Mount ock Lift from Copperloy by JH Industries, Inc. It is
designed to give you many years of trouble-free operation.
This manual contains information that is needed to operate and maintain the Pit Mount ock Lift safely. Each
dock lift can be modified or designed to fit each customer’s needs, there are many options and accessories that can be
added. JH Industries, Inc. cannot anticipate all possible applications and therefore all warnings, instructions and
information expressed in this manual are not all-inclusive.
This manual also contains a complete parts list and information about ordering replacement parts. JH
Industries, Inc. has selected components for best fit and function for each of our products, therefore replacement parts
should be identical to original equipment or have written approval for non-original equipment. JH Industries, Inc. will
not e responsi le for equipment failures due to incorrect or non-approved replacement parts.
WARRANTY
JH INDUSTIRES INC.
2
DANGER
WARNING
CAUTION
!
Indicates an imminently hazardous situation which, if not avoided, will result in death or serious
injury. This signal word is to be limited to the most extreme situations.
Indicates a potentially hazardous situation which, if not avoided, could result in death or serious
injury.
Indicates a potentially hazardous situation which, if not avoided, may result in minor or moderate
injury. It may also be used to alert against unsafe practices.
A product safety sign or label should alert persons to a specific hazard, the degree or level of hazard
seriousness, the probable consequence of involvement with the hazard, and how the hazard can be
avoided. SIGNA WORD is a word or words that designate a degree or level of hazard seriousness. The
signal words for product safety signs are “DANGER, WARNING, CAUTION” and “NOTICE”. Below is
each of these signal words along with their definitions as directly referenced from ANSI Z535.4-1998.
SAFETY
“NOTICE” is the preferred signal word to address practices not related to personal injury. The safety alert
symbol shall not be used with this signal word. As an alternative to “NOTICE”, the word “CAUTION” without
the safety alert symbol may be used to indicate a message not related to personal injury.
NOTICE!
WARRANTY……………………..
INTRO UCTION………………..
TABLE OF CONTENTS………..
SAFETY………………………….
SAFETY PRACTICES………….
GRA E CHART…………………
CAPACITY……………………….
OWNER’S RESPONSIBILITIES…
INSTALLATION………………….
GENERAL INSTALLATION…….
HY RAULIC INSTALLATION…..
OPERATION…………………….
MAINTENANCE………………...
STAN AR PARTS LIST……...
INBOAR HAN LE PARTS LIST…....
STAN AR BUMPER PARTS…
1
1
2
2
3-4
4
5
6
6-10
11-12
13-15
16-19
20-22
23
24
25
!
!
25
26
27
28-31
32
33
34
35
36-37
OPTIONAL BUMPER PARTS…..
LABEL PARTS LIST……………..
HY RAULIC SCHEMATIC……..
SINGLE PHASE ELECTRICAL
SCHEMATIC……………………
PARTS 1-PHASE INSTALLE
ASSEMBLY……………………….
3-PHASE ELECTRICAL
SCHEMATIC……………………..
PARTS 3-PHASE ENCLOSURE
ASSEMBLY……………………….
PARTS 3-PHASE INSTALLE
ASSEMBLY……………………….
NOTES……………………………
TABLE OF CONTENTS
JH INDUSTIRES INC.
SAFETY PRACTICES
3
JH INDUSTIRES INC.
Read and follow all safety practices, manuals,
and instructions before installing, operating or
servicing Pit Mount Dock ifts. Failure to follow
these safety practices and instructions could
result in property damage, equipment damage or
serious injury or death.
READ AND FO OW THE OPERATING
INSTRUCTIONS CONTAINED IN THIS MANUA
BEFORE OPERATING THE IFT TAB E. If you
do not understand the instructions or safety
practices ask your supervisor or consult the
factory for assistance.
This equipment should be used and maintained
only by qualified personnel.
Before doing any maintenance or repair on the
Dock ift SECURE WITH SUPP IED
MAINTENANCE BARS. See Figure on page .
Failure to do any of the above could result in
serious injury or death.
FOR A MODE S
Never exceed the rated capacity of the dock lift.
Never exceed the rated end or side load capacity.
o not operate the dock lift while under the
influence of drugs or alcohol.
o not operate the dock lift with equipment,
material, or people around or under the dock lift.
Always be aware of your surrounding while
operating and keep the dock lift in your sight.
Stay clear of the dock lift when it is moving, keep
hands and feet clear of moving parts at all times.
o not place any body part under the dock lift
without the maintenance bar properly secured.
Consult the factory if there is a need to maintain
the safety of people or debris from entering the
underside of the dock lift. Optional side skirts are
available.
The dock lift is not designed to carry personnel or
other material handling equipment without the
supplied handrail and safety chains installed.
Maintain equipment to safe working condition at all
times during service. See maintenance section for
servicing schedule.
o not use the dock lift it is looks damaged or does
not seem to work properly. Tell your supervisor if it
needs repair right away.
o not use this unit for anything other than it’s
intended design use.
o not attempt to lift the dock lift by any means
other than that described in the operating
procedures contained in this manual. Never use
fork trucks or other material handling equipment to
raise the lift. If the dock lift does not operate
correctly when following the operating procedures
contained in this manual, O NOT USE THE OCK
LIFT.
If you have any problems or questions using or
operating the dock lift, contact your supervisor for
assistance.
o not operate the lift table if operation causes
undue physical strain or if physical impairments
could lead to undue strain in back, muscles, limbs,
or joints.
Loads should be kept uniform as possible to insure
safe operation and maintain even wear on all
moving parts.
Keep area around dock lift free of oil, obstructions,
and debris that could cause slipping or stumbling
into equipment.
Never disconnect any hydraulic or electrical lines, or
remove any part of the dock lift unless the
maintenance bar is engaged and the electrical
power supply is turned off and locked out.
o not modify or change the design of this
equipment without written consent from JH
Industries, Inc.
Never install a dock lift in a pit unless it is supplied
with the toe guard option on the table top. If this is
required and not installed call factory for details.
WARNING
!
4
SAFETY PRACTICES,
continued
JH INDUSTIRES INC.
INSTA ATION, MAINTENANCE AND SERVICE
Place barricades on the floor around and in the
driveway in front of the dock lift’s final location while
installing, maintaining or repairing the dock lift.
PUT THE MAINTENANCE BARS IN PLACE
before doing any maintenance or repair under the
dock lift. (See Maintenance pages 21-23)
When working on any electrical components, after
raising, disconnect the power and properly tag or
lock out before doing any maintenance or repair.
All electrical troubleshooting or repair must be done
by a qualified electrician and must meet applicable
codes.
If it is necessary to make troubleshooting checks
inside the control box with the power on, USE
EXTREME CARE!
Do not place fingers or un-insulated tools inside
the control box. Touching wires or other parts
inside the control box could result in electrical
shock, death or serious injury.
PREPARATION
WARNING
Read and follow this instruction manual. Failure
to do so could result in serious injury or death.
READ AND FO OW THE INSTA ATION
INSTRUCTIONS CONTAINED IN THIS MANUA
BEFORE INSTA ING THE DOCK IFT. If you
have any questions concerning this manual or
it’s contents please contact your dealer or JH
Industries, Inc.
Permanent installation of lift table may be subject to
local code, rules and regulations. Check local
codes and regulations first. It is the owners or
installers responsibility to obtain any necessary
permits and inspections.
During storage and shipping protect the power
unit from weather and moisture. Moisture in or
around the power unit could cause electrical
shock. Prior to installation verify there is no
water or moisture present, failure to do so could
cause personal injury or death.
The electrical motor or power pack can give off
sparks and does not qualify as an explosion
proof unit unless ordered otherwise. Verify the
area where the motor will be installed is free
from flammable gasses. Explosions or fires
could result causing property damage, personal
injury or death.
For all pit installations check the pit for square and
size before installing. Measure the actual length of
width of the dock lift and the length and width of
your pit. Make sure there is 1” min. clearance
between the dock lift and pit on all four sides.
Measure from corner to corner diagonally to verify
the pit is within 1/2” square. With a contractors
square check that the vertical walls of the pit are
within 1/4” square.
Requirements for Installation:
•
Crane or fork truck with capacity to safely lift the
dock lift assembly
•
Masonry drill with bits to install lag bolts
•
Shims, lag bolts and grout
•
isconnect located near the location of the
power unit (See FIGUR # )
•
Check with local codes and regulations for any
permits or other documentation that may be
required
•
Hydraulic oil for refilling or topping off the power
unit (See FIGUR # )
•
2’-0” to 4’-0” long level and contractor’s square
•
3/4”-10 x 6”LG. Forge Eye Bolts & 3/4”-10 Hex
Nuts (Optional)
•
Spreader Bar and Chains for lifting ock Lift
Do not install dock lift if damage has occurred.
The dock lift could malfunction or fail causing
personal injury or death.
!
WARNING
!
WARNING
!
WARNING
!
5
1. Read all installation and maintenance
instructions and manuals. Read and understand
all warnings if there are any questions please
contact the manufacturer.
2. Unskid and remove all shipping material from
the dock lift. Make sure that there was no
damage to the lift during shipping. If damage
has occurred contact the owner and/or
manufacturer. o not install dock lift if damage
has occurred.
4. The dock lift can be either surface mounted or
pit mounted with the use of anchors to secure to
foundation to help maintain stability. (See
FIGUR #1, pg. 5)
FIGURE #1— ock lift possible applications
5. The dock lift can be moved with a lift truck or
slings placed around the base frame. The frame
is also equipped with threaded brackets to allow
for eyebolts to be installed. (See FIGUR #4)
Caution should be used not to deform the frame or
platform. Do not attach slings or use the top of the
table to move the lift, this could damage the dock lift.
6. When positioning the dock lift in a pit, position
the lift and align the frame carefully so a 1”
clearance is maintained around the deck or
platform. Level the unit and place solid shims
and grout under the base frame as required.
(See FIGUR #2)
FIGURE #2—Eyebolts for lifting
Mount the dock lift on a stable flat surface, grout
and add shims as needed. If not mounted
properly the dock lift could be unstable and tip
over during use which could cause serious
injury or death.
FIGURE #3—Pit Mount ock Lift Installation
Note: Above diagram is to be used as a general guide
line. Consult anchor manufacturer for specific
installation instructions.
INSTALLATION
JH INDUSTIRES INC.
ON TOP OF GRA E IN FRONT OF HIGH OCK
FLUSH WITH GRA E IN FRONT OF LOW OCK
CAUTION
!
Optional
Ramp
ock
ock
MOVE OFF AN ON
ROLLER EN
SHIM AN GROUT UN ER
ENTIRE BASE FRAME
FIXE
EN
1”
WARNING
!
ock Lift Base
3/4”-10 Captive
Hex Nut
3/4”-10 x 6”LG
Eye Bolt
Use chain spreader
bar between eye
bolts to lift dock lift
into place
Note: All lifting chains should pull vertically, do not use chains if lifting on an
angle. It is the responsibility of the operator, owner or contractor to make
sure the lifting procedure is done safely.
INSTALLATION,
continued
6
WARNING
!
WARNING
!
WARNING
JH INDUSTIRES INC.
FIGURE #4—Lag and Anchor Bolts
All anchor bolts must be installed in accordance
with the manufacturer’s instructions and local
codes and regulations. Improper installation
may result in serious injury or death.
Do not install anchor bolts in cracks or
expansion joints in concrete. Anchors may
come loose or pull out and the dock lift would
become unstable and may result in serious
injury or death.
7. rill anchor hole to diameter and depth per the
manufacturers specifications. Use a min. of 3/4”
diameter anchor bolts. All anchor bolt lengths
must suit local codes and conditions. Type and
depth of concrete will determine type and length
of anchor bolts required. (See FIGUR #3)
8. With the nut and washer in place, insert the
anchor bolt and tap into position. Tighten to
manufacturers specifications.
Keep all hydraulic oil and lines free of dirt, moisture
and any type of contamination. Be sure to flush all
hydraulic lines before connecting xternal Power
lines as they could have become contaminated
during shipping or installation. Dirt or moisture can
damage the pump or valves in the hydraulic system
or cause other problems in the hydraulic system.
9. Install the power unit in its desired location.
External power units are shipped standard with
mounting brackets to install to the floor. The
brackets can either be bolted through, welded to
a steel floor or anchor bolted into a concrete
floor. Optional wall mount brackets are
available.
10. Connect all hydraulic lines as required. Make
sure to blow out all lines prior to connection with
compressed air or flush with hydraulic fluid.
Use correct hydraulic fluid as stated in this manual.
(See FIGUR # ) If incompatible hydraulic oil is
used damage to the hydraulic system could occur.
Make sure that all hydraulic lines are free of the
dock lift during operation. A pinched or cut
hydraulic line could cause the lift table to lower
suddenly causing serious injury or death.
Never place any body part near the hydraulic
system to test or look for damaged or leaking
hydraulic lines or equipment. Exposure to high
pressure hydraulic fluid will pierce through skin
and enter the blood stream causing death.
Only qualified electricians are to work with any
electrical parts. The dock lift power supplies
can be up to 460 Volts AC, this voltage will
cause death.
Fusing requirements are shown in FIGURE #5,
all fuse sizes are calculated to work safely per
NEC specifications. Failure to fuse properly
could result in fire or electrical shock. Serious
injury or death could occur.
11. See fusing table (FIGUR #5) for correct fuse
sizing. Always use the correct fuse and wire
size for connections.
12. Follow all wiring diagrams located in this manual
to make permanent electrical connections.
13. Always verify that in 3-phase motors the motor is
turning in the correct direction as shown on the
motor housing or pump. If the motor is not
turning in the correct direction STOP, do not
operate. Change any two of the three-phase
leads to change motor direction. If this does not
!
CAUTION
!
CAUTION
!
DANGER
!
DANGER
!
7
INSTALLATION,
CONTINUE
JH INDUSTIRES INC.
Voltage Phase HP GPM Full oad
Amps
Overload
Setting
Fused
Disconnect
ifting
Time
owering
Time
120/208/230 1 1 1/2 16/8.8/8 16/9/8 25/15/15 159 sec. 20 sec.
208/230/460 3 2 2 7.5/6.8/3.4 8/7/4 15/15/15 40 sec. 20 sec.
208-230/460 3 5 3.1 11.3/5.65 12/6 25/15 26 sec. 20 sec.
PSI
3000
3000
3000
OCK LIFT EXTERNAL POWER PACK INFORMATION
NOTE: All lift times are calculated for a dock lift that requires (2) total cylinders. Lifting and lowering times will increase with the number
of cylinders required. Please consult factory for actual lift times for specific applications.
FIGURE #5
solve the issue see the trouble shooting section or
contact the factory.
If the motor is rotating in the incorrect directions this
could cause damage to the pump. Never let the
motor run longer than 3 seconds in the incorrect
direction. Always verify that the motor is turning in
the correct direction after installation.
14. Raise the dock lift to it’s full raised height.
15. Insert both maintenance bars as directed in the
maintenance section of this manual.
16. Lower the dock lift onto the maintenance bars.
(For single-acting cylinders only) continue to
depress the down button for 10 seconds to
relieve all pressure in the hydraulic system.
17. Clean up and clear the entire area around the
dock lift. Remove any material that is not
necessary for the use or function of the dock lift.
Make sure to remove all hydraulic oil from the
area. Hydraulic oil can cause unsafe work areas
and can be a fire hazard.
Any material or foreign objects in the area of the
dock lift could interfere with the movement of
the lift and cause damage. Because of pinch
points and geometry foreign objects that get
caught in the table could become projectiles and
cause personal injury or death.
Clean all hydraulic oil that is not contained in
the system. Failure to do so could result in fire
or unsafe working conditions which could cause
personal injury or death.
18. Raise the lift table to it’s full raised position.
19. Warn all personnel the lift table will be in use.
Raise the dock lift to it’s full raised height.
20. Remove both maintenance bars and place in a
safe place where it will not interfere with the use
of the dock lift.
21. Lower the dock lift to the fully lowered height.
Check the hydraulic oil level on the sight on the
side of the power unit. Fill as needed see the
maintenance section of this manual for
instructions.
22. Raise and lower the lift a few times making sure
to go from the fully raised height to the fully
lowered height. At the lowered height depress
the down button for 5-10 extra seconds to
relieve the system of it’s pressure. Verify that all
air is purged from the system. Make sure the
motor is running smoothly and quietly. The lift
should raise and lower smoothly.
23. Once the lift table has been tested fill in the se-
rial number, model number and date on the front
cover of this manual. On the back cover fill in
your company information, date installed and
contact number. By doing this you are agreeing
that the lift was installed as per the instructions
manual’s directions and per local codes and
regulations.
CAUTION
!
WARNING
!
INSTALLATION,
continued
6
JH INDUSTIRES INC.
(WI TH) + 2”
(LENGTH) + 2”
PIT RAIN
3”X3”X1/4’ MIN. CURB
ANGLE WITH ANCHOR
STRAPS (BY OTHERS)
ELECTRICAL POWER
SUPPLY LOCATION TO BE
ETERMINE BY CUSTOMER
POWER PACK
20”
2-1/2” MIN. CON UIT
WITH 14” MIN. RA IUS
20”
EPTH = LOWERE HEIGHT + 1/2”
PIT FLOOR MUST BE LEVEL
SUPPLIE BY OTHERS
FIGURE #6—Three Sided Pit Diagram
FIGURE #7—Standard Pit Diagram
(BRI GE WI TH) + 2”
(PLATFORM LENGTH) + 6-1/2”
7” 8” IA. BUMPER POST
(2) REQUIRE (BY
OTHERS)
3”X3”X1/4’ MIN. CURB
ANGLE WITH ANCHOR
STRAPS (BY OTHERS)
60”
60”
20”
20”
2-1/2” MIN. CON UIT
WITH 14” MIN. RA IUS
EPTH = LOWERE HEIGHT + 1/2”
POWER PACK
1/2” EEP
BRI GE RECESS
(BRI GE
LENGTH) - 3-1/2”
8
WARNING
!
CAPACITY
JH INDUSTIRES INC.
The load capacity rating as specified on the
serial tag of your dock lift designates the gross
capacity, assuming uniformly distributed loads.
This capacity must never be exceeded, as
permanent damage may result. The relief valve has
been preset to raise the indicated capacity plus an
overload. In the case where special tops, gravity roll
sections, etc. are installed on the lift after leaving
our factor, deduct the weight of these from the load
rating (gross capacity) to obtain the net capacity.
The maximum rollover capacity in fully
lowered position is to be the maximum rated lifting
capacity. Applying loads exceeding the rated
capacity can result in excessive wear or damage to
the lift and injury to personnel.
For end and side loading, reduce the end
and side loading capacity by 2% for every inch
added to the standard minimum length or width.
i.e. : (4,000# 24”x48” = 4,000# gross capacity)
4,000# 24”x60” = 3,040# end load, 4,000# side load
4,000# 48”x72” = 2,080# end load, 2,080# side load
Never exceed dock lift capacity. Over loading
could result in damage to lift, property damage,
serious injury or death.
OWNER and USER RESPONSIBLITIES
Owners/users shall apply sound principles of safety,
training, inspection, maintenance, and expected
operating environment.
It shall be the responsibility of the owner/user to
advise the dealer or manufacturer where deflection
may be critical to the application.
Owners/users shall keep and maintain a copy of the
operating and maintenance manual(s) and ensure
its availability to operating and maintenance
personnel.
It shall be the responsibility of the users to inspect
and maintain the dock lift as required to ensure
proper operation. The frequency of inspection and
maintenance shall be based upon the
manufacturer’s recommendations and be
compatible with operating conditions and the
severity of the operating environment. ock lifts
that are not in proper operating condition shall be
immediately removed from service until repaired.
Maintenance and repairs shall be made by a
qualified person and the repairs shall be in
co nf o rm a nce wi th th e ma n uf ac t ure r ’s
recommendations.
Before adjustments are started on a dock lift, the
following precautions shall be taken as
applicable:
•
Remove the load from the platform.
•
Lower platform to the full down position, if
possible or secure by maintenance device
and/or blocking as described by the
manufacturer to prevent unintended platform
movement.
•
Relieve system pressure from all circuits
before loosening or removing any
components.
•
All controls in the “off” position and all
operating features secured from inadvertent
motion by brakes, blocks or other means.
•
isconnect power and follow established
owner/user lockout/tagout policies.
•
Follow precautions and directions as
specified by the manufacturer.
When parts or components are replaced, they shall
be replaced with parts or components approved by
JH Industries, Inc.
The user shall ensure only qualified personnel
inspect and maintain the industrial scissors lift in
accordance with this section (Owner and User
Responsibilities) and with the manufacturer’s
recommendations as described in this manual.
An owner/user who directs or authorizes an
individual to operate a dock lift, shall ensure that the
individual has been:
•
Trained in accordance with the manufacturer’s
operating manual.
•
Made aware of the responsibilities of operators
as outlined in this manual.
•
Retrained, if necessary, based on the owners/
user’s observation and evaluation of the
operator.
9
WARNING
!
CAUTION
!
OWNER and USER RESPONSIBLITIES
JH INDUSTIRES INC.
Modifications and additions shall not be performed
without the manufacturer’s prior written approval.
Where such authorization is granted, capacity,
operation, and maintenance instruction plates, tags,
or decals shall be changed accordingly.
OPERATION
Before operating the dock lift, read and follow
safety practices on page #4 of this manual and
this entire section. Use by untrained people
could result in serious injury or death. DO NOT
USE THE DOCK IFT IF IT OOKS DAMAGED
OR DOES NOT SEEM TO WORK PROPER Y.
Tell your supervisor it needs repair.
Always use common sense and take
responsibility for the safety of everyone near the
dock lift. The operator is in direct control of the
dock lift and therefore it is his or her
responsibility to conform with good safety
practices. The operators safety as well as the
safety of other personnel on or near the lift is
dependent on the decisions he or she makes
while operating the lift. Failure to operate the lift
safely could cause serious injury or death.
Keep all body parts clear of any moving parts
and travel path of the scissor arms while raising
or lowering the dock lift. Never go under a dock
lift without maintenance bars properly
positioned and secured. Pinch points are
created when the dock lift moves up and down.
Keep away from any “pinch point” (See Figure
#6) Part of your body or article of clothing could
become caught serious injury or death could
occur.
To avoid damage to load and dock lift do not
operate unit if any obstructions or debris may
interfere with the safe operation of the dock lift.
Damage to the lift could occur or the load could
become unstable, serious injury or death could
occur.
Be sure that all personnel in the area are a safe
distance away from the lift and aware that you
are about to move it. Failure to follow these and
other provided warnings could result in serious
injury or death.
FIGURE #8—Pinch Points
Placards, warning labels and decals are to warn,
inform or provide information to safely use the dock
lift. Verify all provided placards, warning labels and
decals are legible. Replace any missing or
damaged labels or placards. (See Figure # )
The function of a dock lift is to raise, lower or
position loads and equipment within the specified
capacity to a desired height or position. Lifting or
positioning is provided through hydraulic cylinders.
Upon application of hydraulic power, the cylinder
extends or retracts uniformly, either lifting or
lowering the platform.
Hydraulic power is supplied through a combination
pump motor assembly. The power unit incorporates
a pressure relief valve, load holding check valve,
lowering valve, and oil reservoir.
Pinch Point is created
when the bridge is
flipped down onto the
dock or truck
10
WARNING
!
OPERATION,
CONTINUE
JH INDUSTIRES INC.
CAUTION
!
Prestart Inspeciton:
Always follow the prestart inspections before
use of the dock lift. Failure to follow these
instructions could result in serious injury or
death.
1. Before operating inspect the area around the
dock lift. Make sure there is nothing that will
interfere or impact the dock lift while raising or
lowering. Inspect for the following:
•
Bumps, floor obstructions and uneven
surfaces
•
Electrical hazards
•
Overhead obstructions
•
Presence of unauthorized persons
•
Any unsafe conditions as noted in this
manual
2. Visually inspect the hydraulic power pack,
cylinders and hydraulic hoses for leaks, damage
or wear.
3. Visually inspect the electrical lines that are
exposed for damage, missing insulation, or
loose connections.
4. Visually inspect the dock lift for loose or missing
parts. Verify all bolts look properly tightened.
Look for any damage or excessive wear on all
parts.
5. Be sure that the load is within the capacity of the
dock lift. This includes all equipment, product
and people that will be riding on the lift.
6. The dock lift was designed to be used with the
handrails and safety chains in place at all times.
Make sure the handrail and safety chains are
installed before use. Visually inspect the
handrail and chain for missing or damaged
parts. (See Figure #7)
7. All loads and equipment need to be centered on
the platform of the dock lift. The load needs to
be secured and kept from shifting or moving
during raising or lowering of the lift.
Operation of the Dock ift:
1. Once the load and personnel are situated and
ready to be raised or lowered attach the safety
chain and lift and fasten the bridge plate. (See
FIGUR #7)
FIGURE #9—Safety Chains
2. The hand pendant has two functions:
•
Raise the lift which is marked with “UP”. By
depressing this button the dock lift will raise.
Once the lift is at the top of it’s travel release
the up button.
•
Lower the dock lift which is marked with
“ OWN”. By depressing the “ OWN” button
the dock lift will lower.
Once the buttons are depressed the lift will move
immediately and will continue to move as long
as the button remains depressed. Once the
button is released the dock lift will stop moving
and hold it’s position.
If the lift does not operate within 2 or 3 seconds turn
it off and call a qualified technician. Continuing to
run the lift could cause damage or personnel injury.
3. Once the lift is at it’s desired height the bridge
can be flipped down onto the dock floor or floor
of the truck. The bridge has to overlap the edge
by a min. of 4”. (See Figure #8)
When bridges are
up attach chain to
middle connector to
hold in up position,
keep chain taught
Flip bridges to the up
position before raising or
lowering the lift.
Attach both safety chains as
shown before raising or lowering
CAUTION
!
11
WARNING
!
OPERATION,
CONTINUE
JH INDUSTIRES INC.
FIGURE #10 - Bridge Overlap
4. Un-fasten the safety chain only from the side of
the dock lift being loaded or unloaded. Clasp
the chain onto the handrail to keep slack from
interfering with the loading or unloading.
5. With a controlled steady movement unload or
load the dock lift. Keep speed to a minimum
and refrain from sudden stops or starts.
6. Repeat previous steps to raise or lower the dock
lift as needed.
4” Min.
Truck or ock
MAINTENANCE
Only trained and qualified personnel should
maintain this equipment. Failure to do so could
result in property damage, serious injury or
death.
READ AND FO OW THE OPERATING
INSTRUCTIONS CONTAINED IN THIS MANU
BEFORE OPERATING THE IFT TAB E. If you
have any questions concerning this manual or
it’s contents please contact your dealer or the
factory. Failure to do so could cause serious
injury or death.
Do not use the maintenance bars to support any
load other than the dock lift. Remove all loads
prior to engaging the maintenance devices.
Failure to follow these instruction will result in
permanent damage to the dock lift and could
result in serious injury or death.
Always use common sense and take responsibility
for the safety of everyone near the lift table.
The flowing are the only factory-approved practices
for working under the dock lift. At A times while
working under the dock lift these instructions need
to be followed.
If any of the safety or maintenance devices seem to
be damaged or missing, STOP immediately and
contact your dealer or the factory for assistance.
Your failure to use the approved and provided
procedures and maintenance devices is not the
liability of the manufacturer.
HIGH VO TAGE! - Prior to any maintenance or
installation disconnect power source and/or
lock-out to prevent lift operation. Verify that all
power sources are removed and no stored
power source exists. Failure to do so will result
in shock or arc-flash that would cause death.
1. Raise the dock lift to it’s full raised position.
2. Remove the maintenance bars from storage
(customer to specify area to store maintenance
bars). Place bars in front of rollers inside the
base against the side wall, one on each side.
(See Figure #9)
3. Lower the dock lift onto the maintenance bar.
(For single-acting cylinders only) Continue to
depress the down button for 10 seconds to
relieve all pressure in the hydraulic system.
DANGER
!
12
MAINTENANCE,
CONTINUE
JH INDUSTIRES INC.
FIGURE #11—Maintenance Bars
4. isconnect power source and follow OSHA
electrical lock-out/ tag-out to prevent lift
operation.
5. Once all work is complete, reconnect the power
source and remove the lock-out/ tag-out. Let
your supervisor know that the lift has power
before raising.
6. Raise the dock lift to it’s full raised position.
7. Remove the maintenance bars from the dock lift
and secure in designated storage area.
8. See Prestart in the OPERATION section of this
manual. o all inspections as specified.
9. Lower the lift to its stored position.
Routine periodic maintenance should be performed
per FIGUR #10. Failure to do so could result in
damage, premature failure or wear of the dock lift.
Install
maintenance bars
in both sides
Push up against
wall as shown
Push forward
between base wall
and support tab
Every (1) Month or 50 Hrs. of
use (whichever comes first)
• Verify you have the most up to date Manual, visit www.copperloy.com
• Visually inspect the entire lift.
• Verify that all welds are structural sound and free from damage or cracks.
• Check all pins and bearings for excessive wear or damage. (See Figure #11)
• Inspect the structure of the lift for any damage or wear.
• Inspect the level of the hydraulic fluid, fill as necessary using the correct oil (See
Figure #12).
• Inspect for hydraulic leaks or damaged hydraulic components.
• Visually inspect the safety chain, verify nothing is missing and there is no damage.
• Verify all safety labels are legible and installed (See Figure # )
Every (6) Months or 500 Hrs. of
use (whichever comes first)
• Clean hinges on bridge, wash or blow out with compressed air. Lubricate as
needed by applying grease between hinge spools.
• Touch up paint as necessary to prevent rust (Contact JH Industries, Inc. for paint
color)
• Check all hydraulic fittings and hoses, fittings can become loose from the
vibrations of the power unit and use.
• Check all bolts and nuts make sure they are tight and have not become loose.
• Replace the hydraulic fluid, see maintenance instructions in Maintenance Section.
• Inspect the rollers at the end of the scissor arms for excess wear or damage. (See
Figure #11)
FIGURE #12—Routine Periodic Maintenance Schedule
CAUTION
!
WARNING
!
JH INDUSTIRES INC.
13
FIGURE #12—Pin and Roller Locations
FIGURE #13—Acceptable Hydraulic Oils
Note: Most petroleum based anti-ware hydraulic fluids with a 32,
46 o 68 ISO viscosity grade will work with this system. Verify
with JH Industries, Inc. before using anything other than what is
listed in the table above.
Do not use brake fluid or any other fluids not
approved by the manufacturer. Use of fluids not
approved by the manufacturer may attack the
hydraulic systems seals and hoses.
For extreme cold applications we recommend an oil
immersion heater.
For extreme warm temperature ranges of +20 to
+140 Fahrenheit, you may switch to 10W30 motor
oil. If ambient temperatures are expected above
140 Fahrenheit, consult factory.
Hydraulic Fluid:
Hydraulic fluid under high pressure can cause
personal injury. Before any maintenance is
commenced release all pressure from the
hydraulic system. High pressure fluid can
pierce skin and enter the blood system which
could cause serious injury or death.
The relief valve is designed to protect the
operator, personnel near the lift during usage
and the hydraulic system in the dock lift. The
relief valve is factory set for a specific pressure,
never change the settings of this valve, the
system could build up extreme pressures which
would cause hydraulic components to fail and
serious injury or death may occur.
Changing Hydraulic Fluid:
1. The hydraulic reservoir is located attached to the
hydraulic pump.
2. Lower the dock lift and depress the down button
for 10 seconds after lowering to relieve the
system of all pressure.
3. Raise the hydraulic pump and tank off of the
ground so a pan or bucket can be placed under
the tank. On the side of the unit at the base is a
drain plug (See FIGUR #13). Place the pan or
Bridge hinge
Center Pins
Lower Roller
Upper Roller
Scissor Arm
Attachment
Pins
Cylinder Pins
Amoco Oil Co.
Rycon Oil No. 32 or 46
Amoco AW 32 or 46
Cities Service
Oil Co.
Citgo AW Hyd. Oil 32 or 46
Citgo All Temp. Hyd. Oil
Chevron USA Chevron EP Hyd. Oil 32 or 46
Fina Oil Co. Fina AW 32 or 46
Gulf Oil
Company
Gulf Harmony 32 AW or 46 AW
Mobil Oil
Corporation
TE 32 or TE 46
Shell Oil Co. Tellus Hyd. Oil 32 or 46
Tellus “T” Hyd. Oil 32 or 46
Texaco Inc. Rando Oil Hd-32 or Hd-46
Union 76 Xcel AW 46 (200)
MAINTENANCE,
CONTINUE
CAUTION
!
NOTICE!
14
JH INDUSTIRES INC.
bucket under the tank and remove the drain
plug. Allow the entire contents of the tank to
drain into the bucket.
4. Refer to FIGUR #12 for correct hydraulic oil.
Replace the drain plug and fill the hydraulic tank
with oil.
5. Remove all lock-out, tag-out and cycle the dock
lift 3-4 times to remove all air from the hydraulic
system. Bring the dock lift to its lowered position
and check the level of the hydraulic oil. Make
sure the oil is to the top of the sight on the side
of the tank.
Hydraulic Seals:
Generally, the seals are Buna-N-Nitrile and
poly-urethane. The hoses are braided wire type.
Always consult factory regarding special fluids
rather than make assumptions on your own.
Hydraulic Cylinder Maintenance:
CY INDER REMOVA
1. Raise the lift table to full raised position.
2. Follow instructions to prepare dock lift for main-
tenance (see pg. 11-12 this manual) .
3. isconnect the hydraulic hoses from the cylinder
and cap the hose ends to prevent
contamination.
4. At the upper cylinder pin location a keeper plate
held on with two 3/8”-16 socket head bolts
needs to be removed first. (See FIGUR #14)
Next slide the chrome rod out (do not damage
chrome finish) while supporting the cylinder in
place. o the same to the lower cylinder pin
location (if applicable).
5. Remove the cylinder from the lift, being careful
not to damage the surface finish of the cylinder
rod.
6. Place the hose connection end of the cylinder in
a container or bucket and force the cylinder
closed to remove all hydraulic fluid from cylinder.
If the dock lift is equipped with multiple cylinders it is
recommended to rebuild all cylinders at the same
time. Seals generally wear at the same rate, if you
only rebuild one cylinder, you may have to pull the
lift out of service soon thereafter to do the others.
FIGURE #14- Cylinder Pin Removal
CY INDER DISASSEMB Y
1. Secure the cylinder on a work bench. ( o not
use a vise or clamp on the cylinder housing, this
could damage the housing.
2. Remove the snap ring retaining the cylinder
gland. (See FIGUR # )
3. Carefully pull out the entire rod, gland and piston
assembly.
4. Remove the hex lock nut retaining the piston,
then slide the piston off the rod. (Be sure
components are placed on a clean surface to
avoid contamination.)
5.
Carefully inspect the entire housing with a
flashlight, looking for any evidence of rust,
scratches or surface blemishes. Small
blemishes may be removed with fine emery
cloth and larger faults will require the use of a
hone. Thoroughly clean the housing before
reassembling to avoid contamination.
6. Remove all old seals and wear rings. Clean the
piston, rod and gland. Inspect for any possible
damage and replace if necessary.
CY INDER REASSEMB Y
1. Reinstall new seals and wear rings, use some
lubricant to aid in ease of assembly. See
FIGUR # for correct seal placement and
direction.
MAINTENANCE,
CONTINUE
NOTICE!
Cylinder
rod
Keeper Plate
Socket Head
Cap Screw
Upper Cylinder Pin
15
JH INDUSTIRES INC.
HY RAULIC INSTALLATION,
CONTINUE
CAUTION
!
To avoid damage to the new seals and wear rings
do not use any sharp or pointy tools that may rip or
damage any of the new seals or wear rings.
2. Assemble the piston and gland back on and
secure with a new lock nut.
3. Liberally lubricate the outside of the new seals
and inside of the cylinder housing, align the
piston carefully and slide the entire assembly
back into the housing.
4. Install the snap ring back in place, being sure
that it is fully seated in it’s groove.
CY INDER REINSTA ATION
1. Remount cylinder in lift and reinstall all cylinder
pins and keeper plates (See FIGUR #14).
2. Reattach all hydraulic hoses.
3. Clean up any spilled oil so as not to misinterpret
later as a new leak.
4. Bring the table back out of maintenance and
cycle the dock lift 3-4 times to get all air out of
the hydraulic system. Check the oil and top off
as needed (See FIGUR #12)
5. The lift is now ready to go back into service.
VENT PLUG
BREATHER
WIPER
U BEARING
SNAP RING
GLAN RO
O-RING
OIL-IMPREGNATE
BRASS BEARING
GROOVE
PISTON SEAL
METAL
LOCK NUT PISTON
GLASS FILLE
NYLON WEAR
RING
HOUSING
FIGURE #15 – Hydraulic Cylinder Cutaway
17
HY RAULIC INSTALLATION ,
CONTINUE
JH INDUSTIRES INC.
WARNING
!
HY RAULIC
CYLIN ERS
PRESSURE
COMPENSATE
FLOW CONTROL
VALVE
IRECTIONAL
VALVE CHECK VALVE
HY RAULIC
PUMP
PRESSURE
RELIEF VALVE
SUCTION
STRAINER
RESERVOIR
Before servicing the dock lift, read and follow
this entire manual, any warnings, labels or
placards.
Always be certain the lift is in the raised
position, SECURED WITH THE MAINTENANCE
BAR (See FIGURE #9) before doing any
maintenance or repairs under the dock lift.
Failure to do so could result in serious injury or
death.
Be sure the hydraulic system is not under
pressure before loosening or doing any
maintenance to the hydraulic system.
Pressurized hydraulic fluid can pierce skin and
enter the blood stream causing serious injury or
death.
FIGURE #16 – Hydraulic Schematic
18
WARNING
!
ELECTRICAL SCHEMATIC
JH INDUSTIRES INC.
Before doing any electrical work, make certain
the power is disconnected and properly tagged
or locked off. All electrical work must be done
by a qualified technician and meet all applicable
codes. If it s necessary to make trouble
shooting checks inside the control box with the
power on, USE EXTREME CAUTION. Do not
place your fingers or un-insulated tools inside
the control box. Touching wires or other parts
inside the control box could result in electrical
shock, death or serious injury.
FIGURE #17 – lectrical Schematic

Other JH Industries Lifting System manuals

JH Industries Copperloy EDGE-OF-DOCK SEL Series Operating instructions

JH Industries

JH Industries Copperloy EDGE-OF-DOCK SEL Series Operating instructions

Popular Lifting System manuals by other brands

rav KPX315WK Translation of the original instructions

rav

rav KPX315WK Translation of the original instructions

Happ 40 Installation and operation manual

Happ

Happ 40 Installation and operation manual

Bishamon X Series Operation and service manual

Bishamon

Bishamon X Series Operation and service manual

stellar labs Slider65 owner's manual

stellar labs

stellar labs Slider65 owner's manual

Oxford Stature User instruction manual

Oxford

Oxford Stature User instruction manual

IXOLIFT DataLift 250 operating manual

IXOLIFT

IXOLIFT DataLift 250 operating manual

RGC HL7000 instructions

RGC

RGC HL7000 instructions

Fenix NEMESIS PRO instructions

Fenix

Fenix NEMESIS PRO instructions

Blue Giant BG1 Operator's manual

Blue Giant

Blue Giant BG1 Operator's manual

Genie GC-1530 Service manual

Genie

Genie GC-1530 Service manual

Rev-A-Shelf RAS-ML Series installation instructions

Rev-A-Shelf

Rev-A-Shelf RAS-ML Series installation instructions

Rockler 69191 operating instructions

Rockler

Rockler 69191 operating instructions

Vestil WL-100 manual

Vestil

Vestil WL-100 manual

Oshkosh Corporation JLG 830P Operation and safety manual

Oshkosh Corporation

Oshkosh Corporation JLG 830P Operation and safety manual

WOOD'S POWR-GRIP P1 COMPACT Series instructions

WOOD'S POWR-GRIP

WOOD'S POWR-GRIP P1 COMPACT Series instructions

Tommy Gate Original TG-67 Mounting instructions

Tommy Gate

Tommy Gate Original TG-67 Mounting instructions

AMSAN AM-FPL9 manual

AMSAN

AMSAN AM-FPL9 manual

Böcker LMX 500 Operating and maintenance instructions

Böcker

Böcker LMX 500 Operating and maintenance instructions

manuals.online logo
manuals.online logoBrands
  • About & Mission
  • Contact us
  • Privacy Policy
  • Terms and Conditions

Copyright 2025 Manuals.Online. All Rights Reserved.