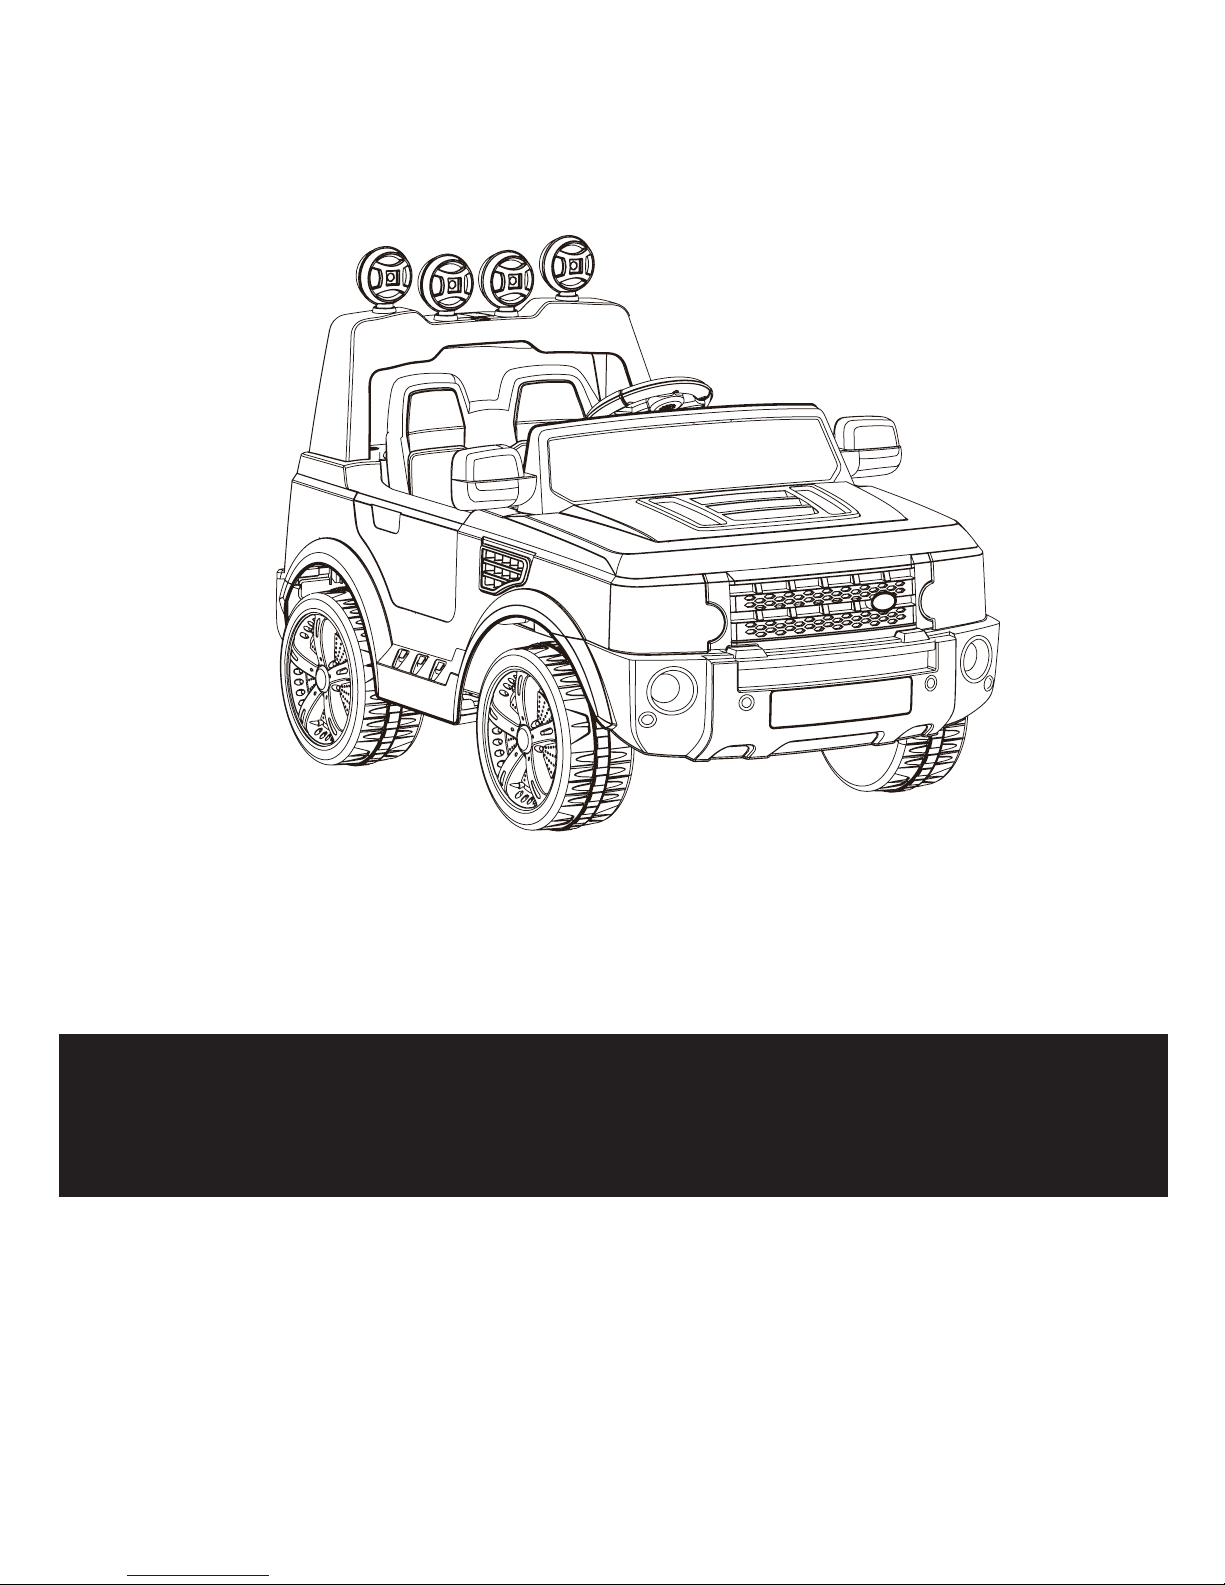
L
Assembly Steps
• Your new vehicle requires adult assembly. Please set aside at least 40 minutes for
assembly. Children can be harmed by small parts, sharp edges and sharp points in the
vehicle's unassembled state. Care should be taken in unpacking and assembly of the
vehicle. Children should not handle parts, or help in assembly of the vehicle.
• Please identify all parts before assembly and save all packaging material until assembly
is complete to ensure that no parts are discarded.
• Assembly tool for need: screwdriver(provide for oneself) and spanner.
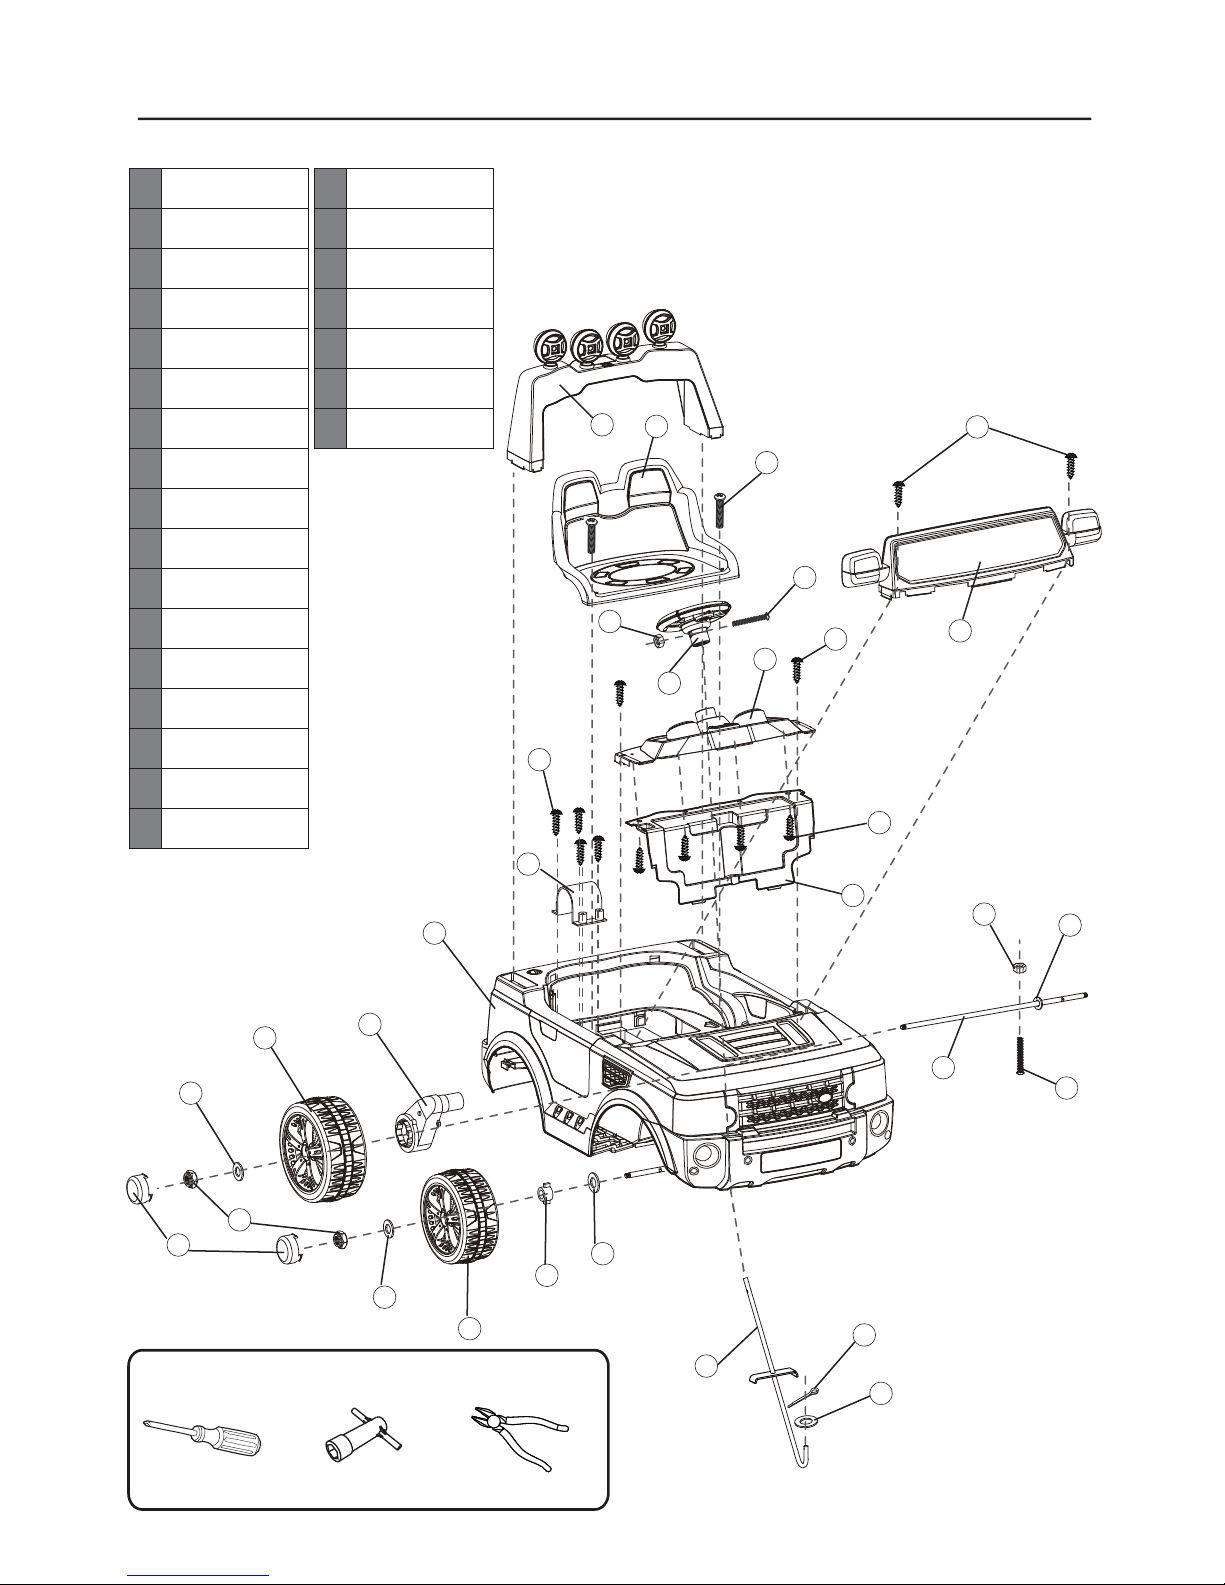
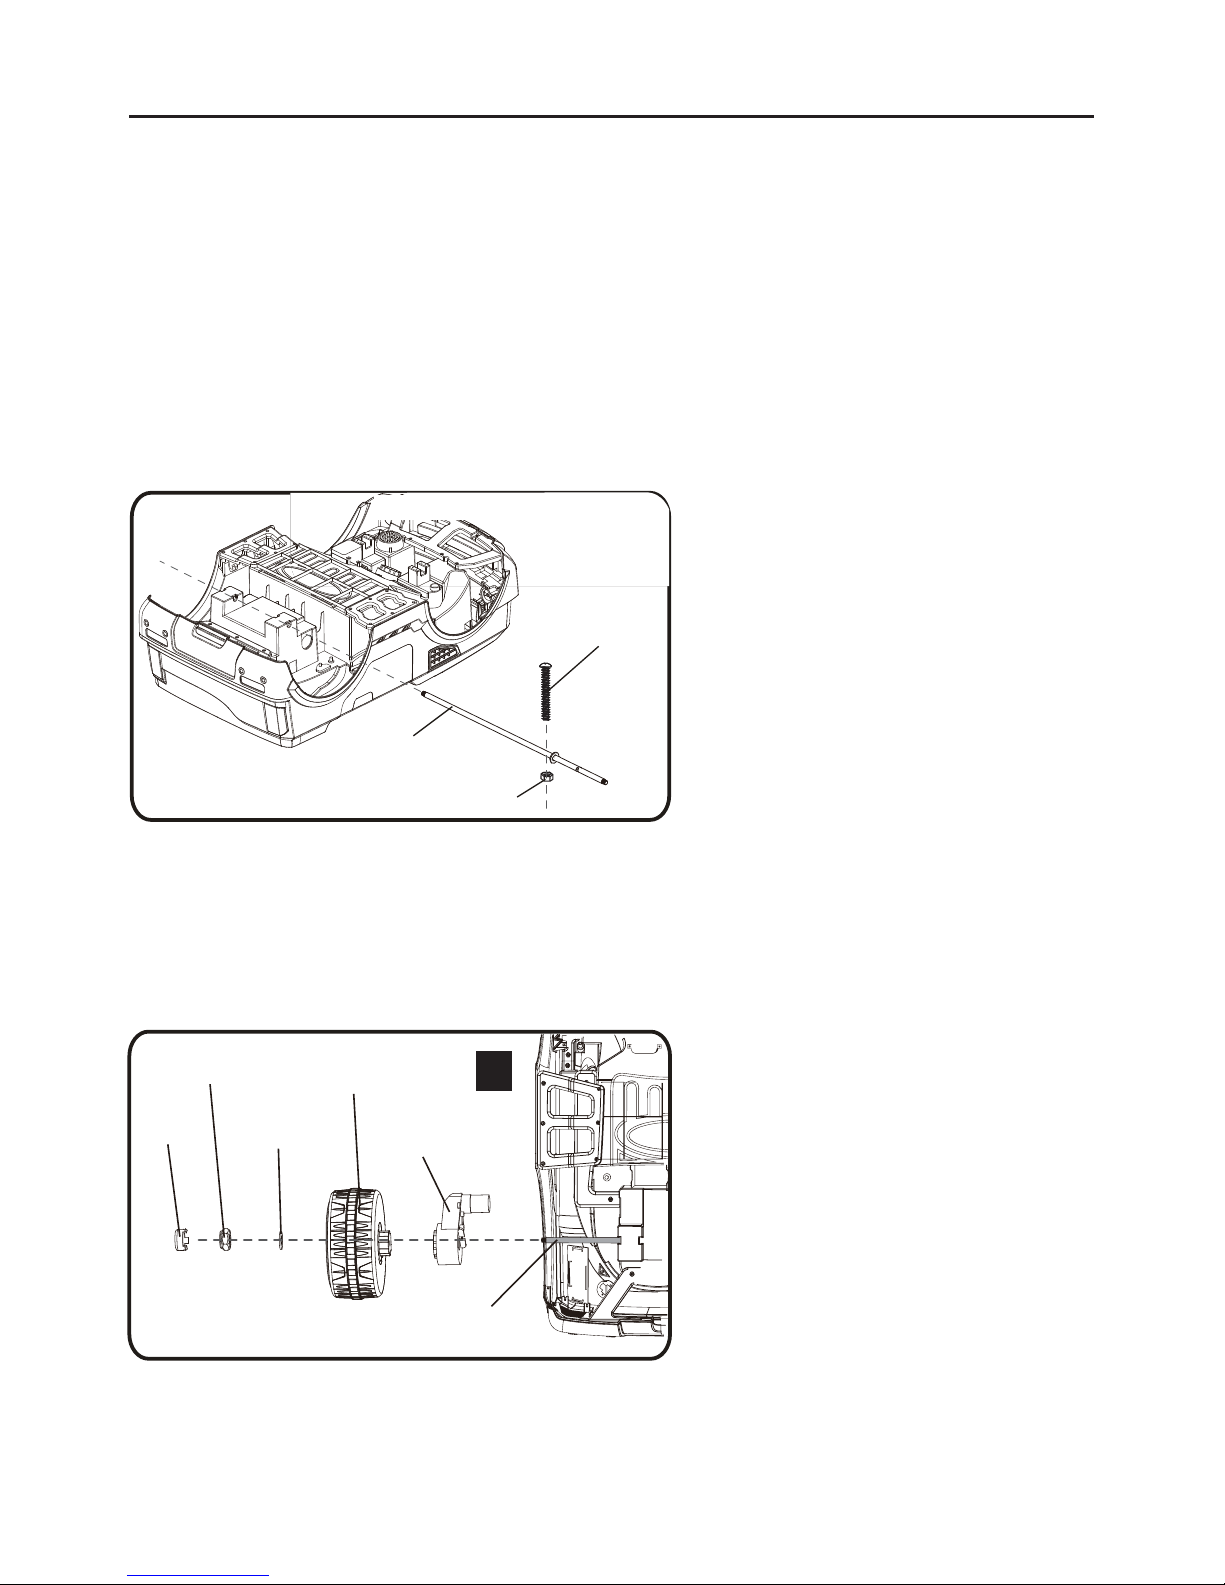
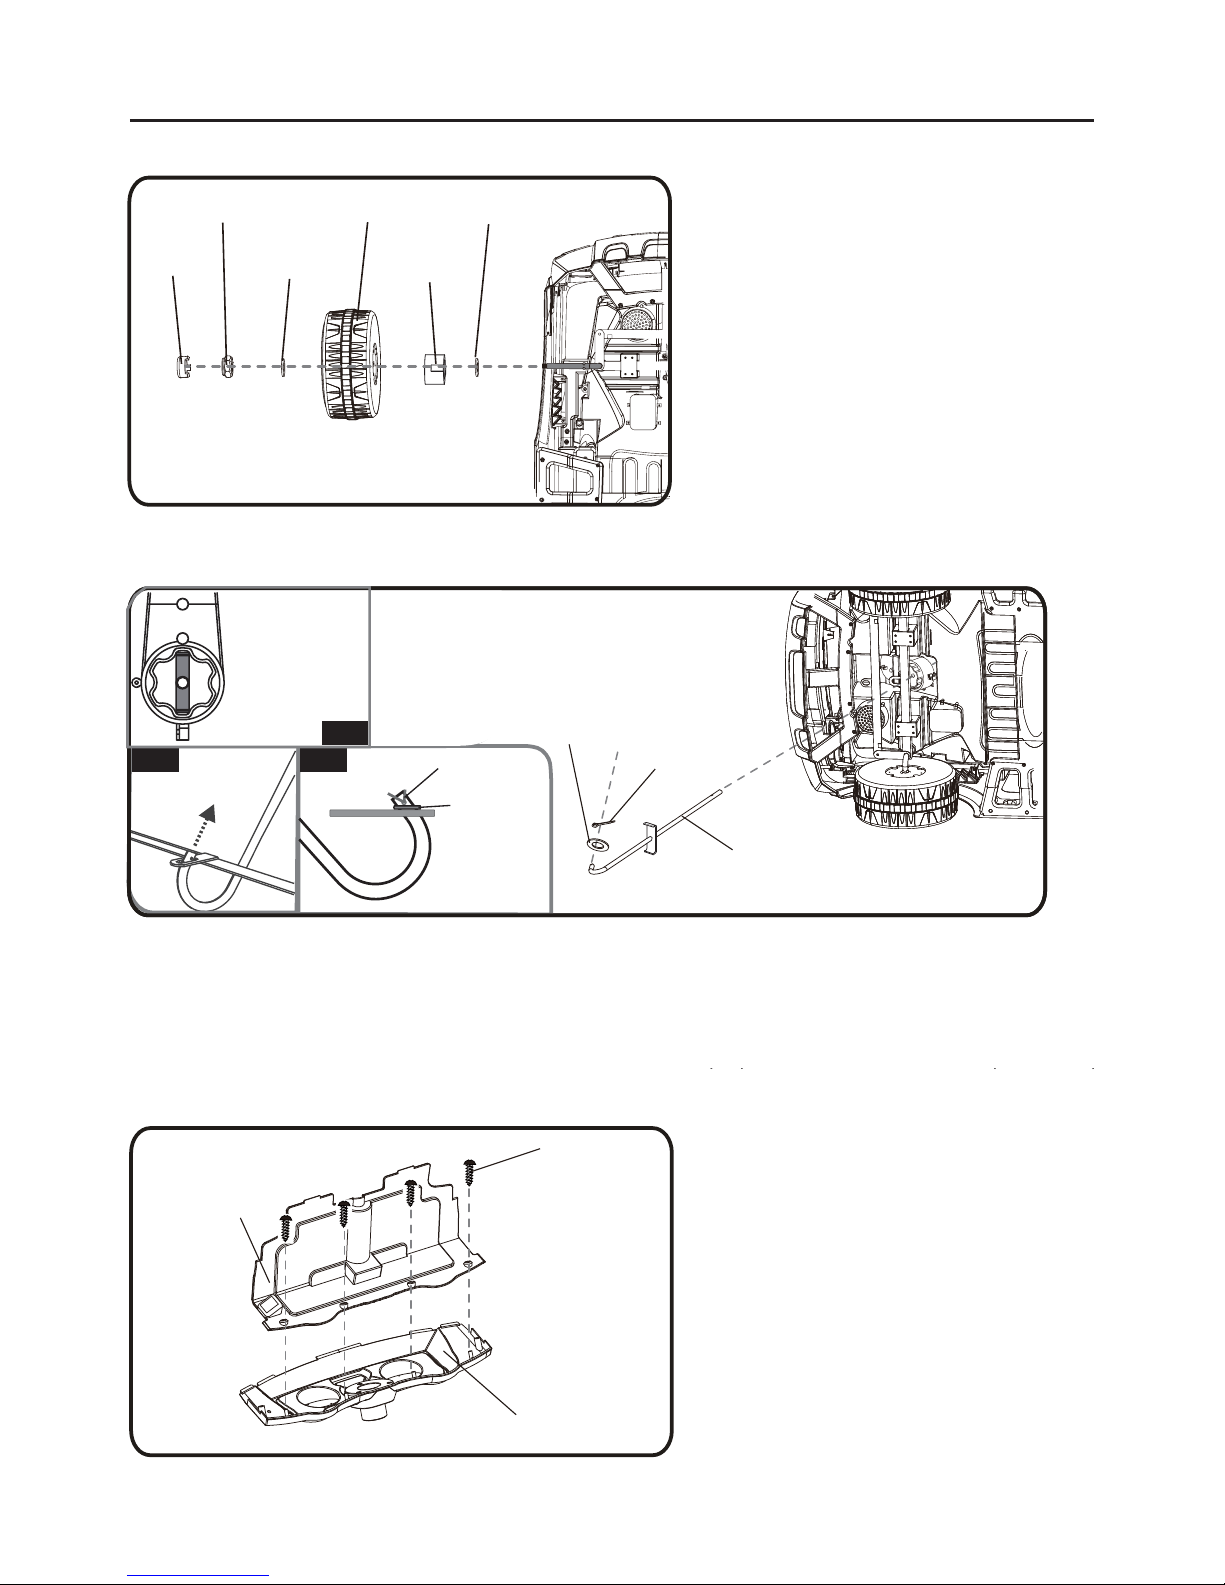
1. Rear Axle assembly
Ø12 washer
Ø5 nut
hole
Rear axle
M5x20
machine screw
●Turn the vehicle body downside up.
●
Remove all the parts from the rear axle.
●
Slide a Ø12washer onto the rear axle
from the end there is a hole.
●
Insert the rear axle into the hole at the
rear of the vehicle body.
●
Line up the hole in the vehicle body with
the hole in the rear axle. Insert the M5x40
machine screw and Ø5 nut back in the
same location and tighten with a
screwdriver.
Cap nut Gear box
2. Driving Wheel assembly
Ø12
Washer
Rear axle
Driving wheel
Ø10 Locknut
●Slide the gear box onto the rear axle
from the left side of vehicle body(standing
at rear of vehicle).
●Slide the driving wheel on to rear axle,
make it match to the gear box.
●Slide a
Ø
12 washer.
●Tighten the
Ø
10 locknut with a
spanner.(Do not over tighten)
●Insert the cap nut.
●Turn the vehicle body downside up.
●
Remove all the parts from the rear axle.
●
Insert the rear axle into the hole at the
rear of the vehicle body.
●
Line up the hole in the vehicle body with
the hole in the rear axle. Insert the M5x40
machine screw and Ø5 nut back in the
same location and tighten with a
screwdriver.
●Slide the gear box onto the rear axle
(The gear box marked “L” should be fit to
the “L” side ; The gear box marked” R”
should be fit to the “R” side).
●Slide the driving wheel on to rear axle,
make it match to the gear box.
●Slide a
Ø
12 washer.
●Tighten the
Ø
10 locknut with a
spanner.(Do not over tighten)
●Insert the cap nut.
NOTE: REMEMBER TO FOLLOW THE
SAME STEPS FOR THE OTHER
DRIVING WHEEL.