Jigsaw provide the solution piece by piece Feel the Future of Heating. Step out of the Shade and into the Sun
10 11
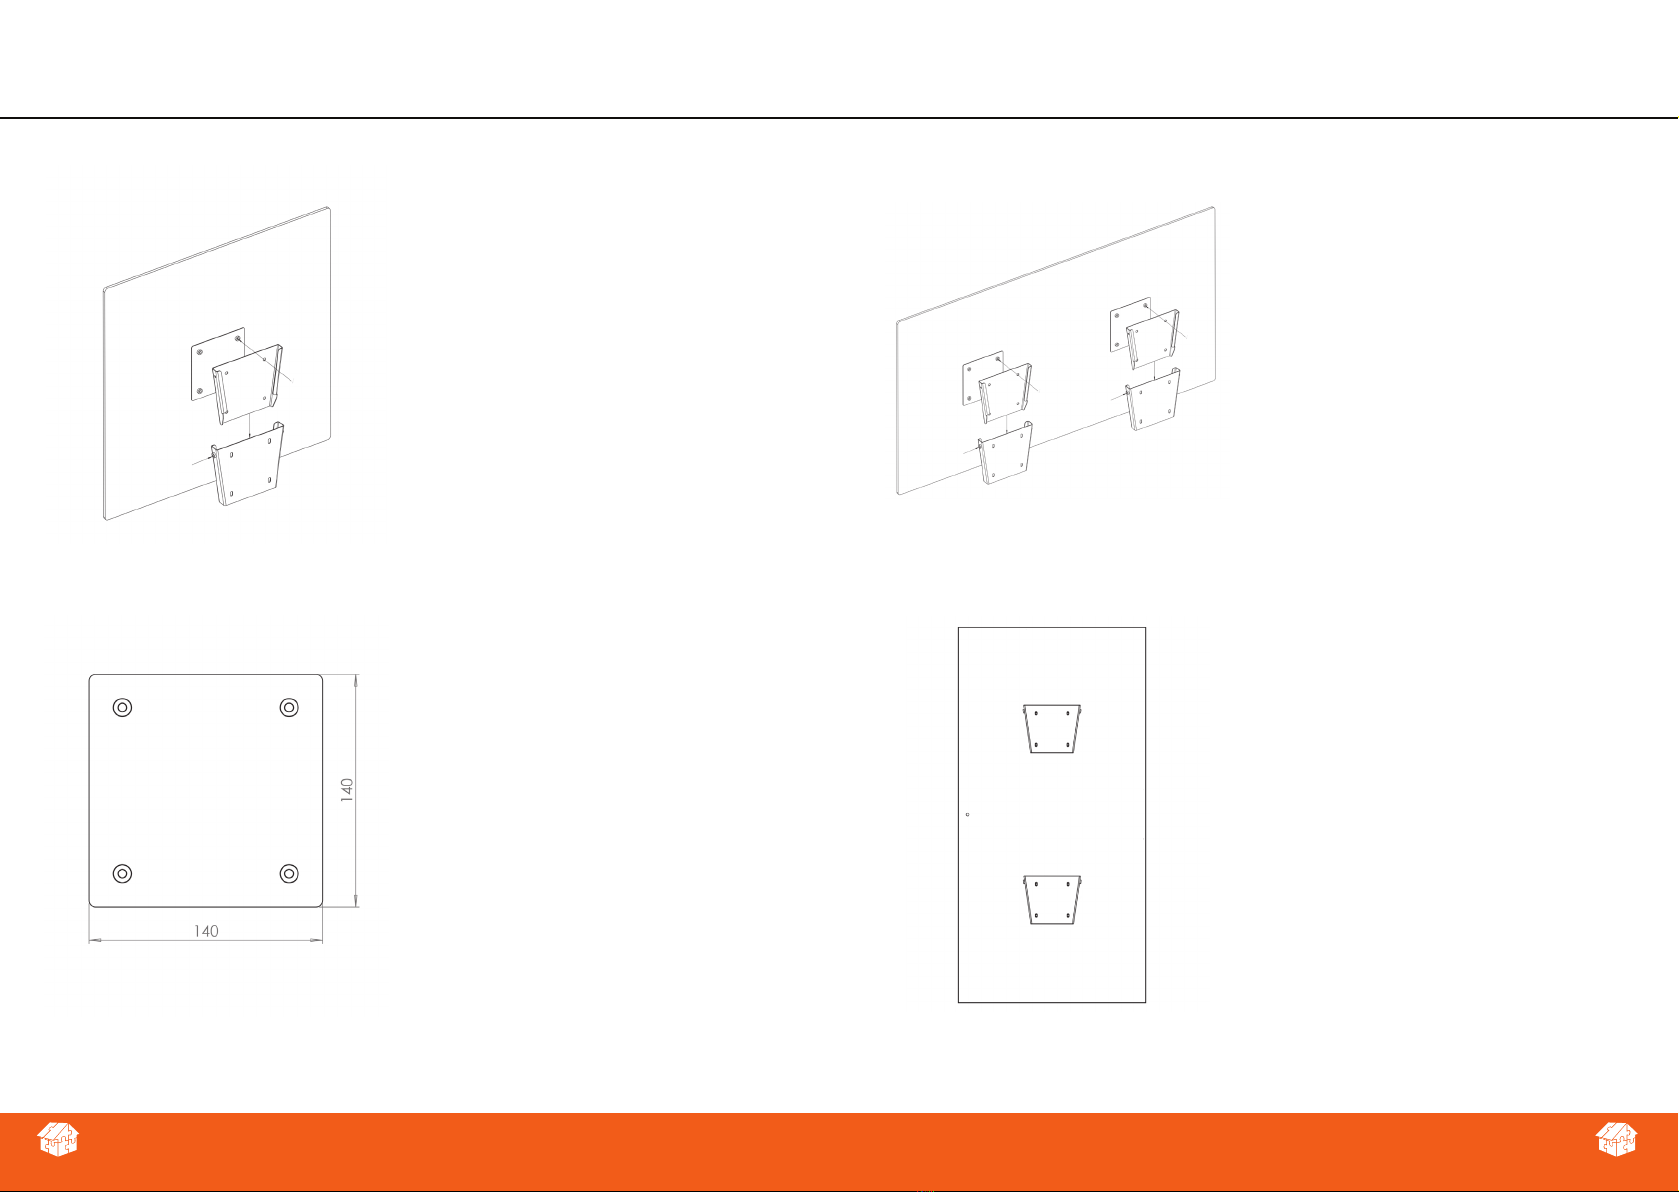
400W WALL INSTALLATION 800W - 1500W INSTALLATION
Heater Bracket (B) into heater
Glass Adaptor Plate
Horizontal bracket positions for 800w & 1000w
One grub screw to be used in each bracket in the
outer left and right fixing.
Vertical bracket positions for 800w & 1000w
All four grub screws to be used on top and
bottom brackets
400w heaters - One mounting
bracket must be used per
installation (Supplied)
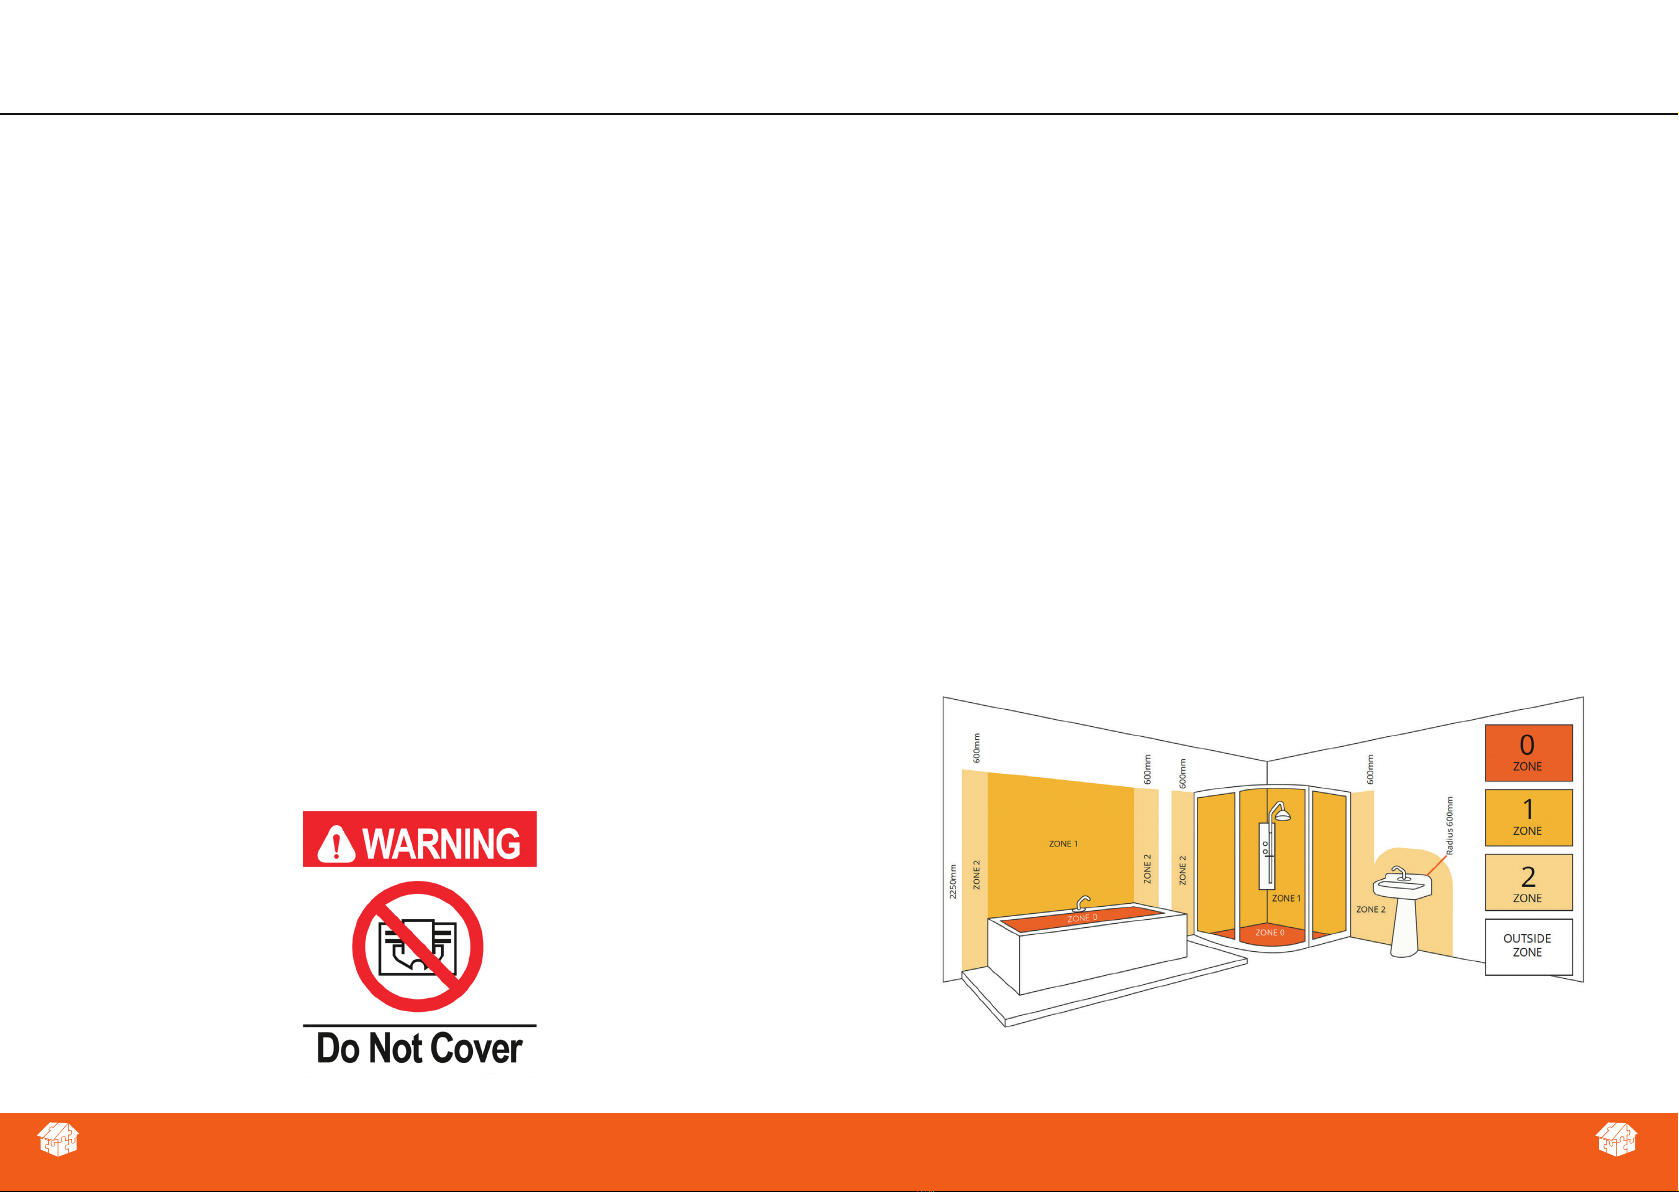
The brackets on the glass and
mirror heaters are suitable for wall
mounting only.
1, Attach the panel bracket (B) to the
rear of the heater with the four 10mm
spacers and 15mm screws. Ensure
that they are tight.
2, The wall bracket (A) is attached to
the wall on 4 corners. This must be
done at a suitable height and position
with the correct fixings for the
construction of wall. Use a spirit level
to ensure that the bracket is straight.
3, Insert the grub screws into the wall
bracket ensuring that the screw is
only 2-3mm in to the bracket.
4, The heater, with bracket (B)
attached to the heater, can then be
slid into the wall bracket (A).
5, Both retaining grub screws must
be tightened to ensure that the
heater is safely xed to the wall
(C). Use supplied 350mm screwdriver
(retail customers)
800w & 1500w heaters - Two
mounting brackets must be
used per installation (Supplied)
The brackets on the glass and
mirror heaters are suitable for
wall mounting only.
1, and 2, as per 400w installation
but with two brackets.
3, Insert the grub screws into
the wall brackets ensuring that
the screw is only 2-3mm in to
the bracket. Horizontal - Two
retaining grub screws must be
used. Vertical - All retaining grub
screws must be used.
4, The panel, with brackets (B)
attached to the heater, can then
be slid into the wall bracket (A).
5, Tighten the grub screw to
ensure that the heater is safely
fixed to the wall (C). Use supplied
350mm screwdriver (retail
customers)