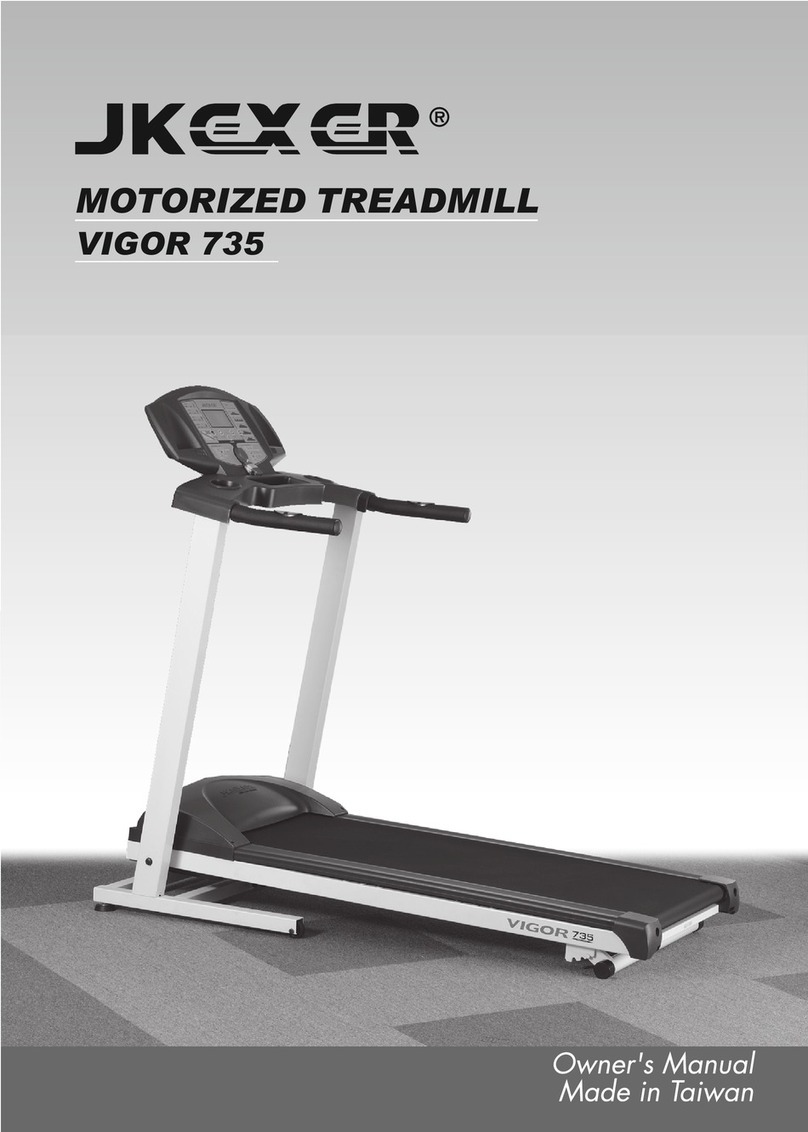
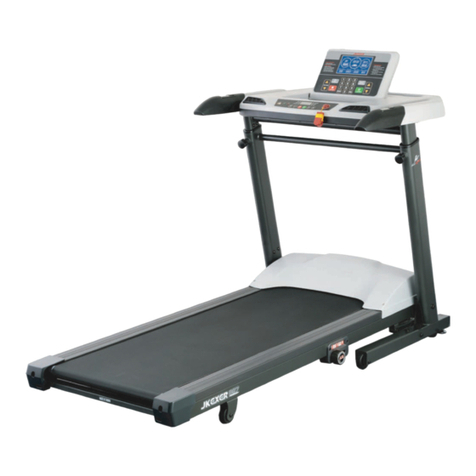
JKEXER 8010A User manual

Owner's Manual
Made in Taiwan
MOTORIZED TREADMILL
Focus Series (8010A, 8020A, 8030A & 8050A)
Modern 7950


TABLE OF CONTENTS
IMPORTANT SAFETY INSTRUCTIONS P 1
ELECTRICAL GROUNDING INSTRUCTIONS P 2
ASSEMBLY PARTS LIST P 3~4
ASSEMBLY INSTRUCTIONS P 5~6
TREADMILL OPERATION P 7
BASIC INFORMATION P 7
HOW TO OPERATE P 8~12
COMPUTER INSTRUCTIONS P 13~14
ERROR MESSAGE & TROUBLE SHOOTING P 15
HOW TO ADJUST INCLINE p 15
HOW TO FOLD UP FOR STORAGE P 15
HOW TO FOLD DOWN FOR EXERCISE P 15
HOW TO MAINTAIN RUNNING BOARD P 17
HOW TO MAINTAIN RUNNING BOARD BY LIQUID SILICONE P 17
ALIGNING THE RUNNING BELT P 18
ADJUSTING THE RUNNING BELT TENSION P 18
CLEANING AND INSPECTING THE RUNNING BELT
P 19
CLEANING P 19
INSPECT FASTENERS AND WIRING P 19
HOW TO MOVE p 19
STORAGE P 20
HOW TO WORK OUT SAFELY AND EFFICIENTLY P 20
EXPLODED DRAWING P 21-22
PARTS LIST (B O M ) P 23-24
We reserve the right to make change at any time without notice,
in colors, parts and materials.

IMPORTANT SAFETY INSTRUCTIONS
Please read the following basic precautions prior to use of the treadmill:
* Never operate the treadmill with the air openings blocked. Keep air openings
free of lint, hair, and the like.
WARNING
* This treadmill requires a dedicated circuit as 110V/220V 15/10AMP separately that is not
shared by any other electrical appliances. Failure to do so can damage the electronics
and the motor, and will void the warranty.
* To reduce the risk of electric shock, always unplug the power cord from electrical outlet
immediately after using and before cleaning, assembling or servicing.
*Never leave the treadmill unattended when plugged in. Disconnect by turning off the
master power switch and unplugging from outlet.
* Always keep hands and feet off the treadmill while others are using it.
* Never place hands or feet under the treadmill.
* Do not allow children on or around treadmill .
CAUTIONS
* Never operate the treadmill if it has been dropped or damaged, or exposed to water.
Contact with your distributor for service recommendations.
* Before starting any exercise program, it is recommended that you consult your
physician.
* Stop using this appliance if you feel dizziness or discomfort.
* Medical approval and close supervision is necessary when appliance is used by or near
handicapped individuals.
* Use the treadmill only for its intended use as described in this manual.
* Do not pull the treadmill by the power cord or use it as a handle.
* Keep power cord away from heated surfaces and oven flame.
* Do not use or store outdoors.
* Do not operate where aerosol products are being used or where oxygen is being
administered.
* While turning on the power, please stand beside the treadmill, not on the treadmill.
* The weight limit is 300LBS /135KGS (#8030A & 8050A), 265LBS /120KGS (#8010A , 8020A &
7950).
* Do not operate in a wet or moist condition.
* Do not use the treadmill on a carpet that is greater than 1/2 inch in height.
* Do not operate under a blanket. Excessive heating can occur and cause fire, electrical
shock, or injury to persons.
* Never insert any object into any opening on the treadmill.
* Keep the treadmill on a solid, level surface with sides at least two feet from any wall.
Be sure the area around the treadmill remains clear during use and has adequate
clearance, see illustration below.

* Do not walk or jog barefoot or without
shoes.
* Do not walk or jog in loose shoes or slippers.
Athletic shoes are always recommended
while using this treadmill.
* Never walk or jog while wearing loose
fitting, long garments such as slacks
pajamas or dresses.
* When walking or jogging always stay on the
forward part of the treadmill.
* Never jog or walk faster than is comfortable
for you.
* Do not jump up on the treadmill from side
to side.
* Do not place any liquids on any parts of the
treadmill.
If it will not fit your outlet, have a properly
grounded outlet installed by a qualified
electrician.
This unit must be plugged into a nominal 110
volt 60 hz, 15 amp or 220 Volt , 50Hz 10AMP
circuit, which has a grounding plug. Outlets
that service multiple appliances,
or have fluctuating voltage of more than
5%, may result in erratic performance or
cause damage to the treadmill electronics.
Using electrical power other than that which
has been specified will ultimately void any
warranty, implied or otherwise.
Never remove or bypass the electrical
ground contained in the treadmill's three-lug
with an adapter.
The difference in the RPM of motor is +/- 10%
This product must be grounded. If it should
malfunction or break down, grounding
provides a path of least resistance for the
electric current,reducing the risk of electric
shock. This treadmill is equipped with a
cord having an equipment grounding
connector and a grounding plug. The plug
must be plugged into an appropriate outlet
that is properly installed and grounded
in accordance with all local codes and
ordinances.
DANGER
Improper connection of the treadmill
grounding can result in the risk of electric
shock. Check with a qualified electrician if
you are in doubt as to whether the product
is properly grounded. Do not modify the plug
provided with the treadmill.
ELECTRICAL GROUNDING INSTRUCTIONS
* Do not plug into the same outlet with any
other electrical appliance while using this
treadmill.

• Easy assembly by one person
• No cable connection
• Sturdy frame
• Attractive appearance

A
ASSEMBLY PARTS LIST
1. MAIN FRAME .................................. 1
2. SIDE COVER & SCREW
. .......................... 4+4
3. POWER CABLE
................................. 1
A. BOLT & WASHER
. ................................ 6+6
B. BOLT & WASHER
. ............................... 4+4
C. TOOLS ........................................ 2
BC

ASSEMBLY INSTRUCTIONS
STEP 1.:
Fold up the front post. TEP 2:
S
Screw on the bolts &
washers(A) onto the
bottom of the front post.

STEP 3:
Screw on the bolts &
washers(B) onto the back
of the handlebar. TEP 4:
S
Put the side cover onto
the bottom of the front
post, then use the screw
to fix it.
There are balancers at
the front bottom. Adjust
these balancers to make
sure main frame is stably
positioned on the ground
for exercise.

TREADMILL OPERATION
CAUTION:
Before beginning a workout session make sure the safety key is properly placed onto the
computer console and the safety clip is securely attached to an article of your clothing.
Always start the treadmill while standing on the side rails but not on the running belt.
Allow the treadmill to reach a speed of at least 1.0 KPH before walking on the running belt.
Before operating read this page first for familiarization of the treadmill computer console and
other important features.
WARNING
Temperature generates when motor runs. The longer time it runs, the higher temperature it will
generate. Especially when it runs with heavy loading for some time, the temperature will be much
higher. Therefore, in order to lengthen the life of motor, please do remember that every time
after using, let the treadmill run without loading in maximum speed for 5 minutes to blow out high
temperature.
BASIC INFORMATION
1. When safety key is removed:
There is no figure shown on LCD.
2. When safety key is positioned:
It is in MANUAL mode, and all the functions ready for manual operation. You may also press FAST
or SLOW (or UP, DOWN) key to choose P1, P2, P3, P4, P5, ….., P12, U1, U2, H1, H2, H3.
When pressing FAST key, the sequence is P0 (Manual) - P1 – P2 -… - P12 – U1 – … – H3 – P0.
When pressing SLOW key, the sequence is P0 - H3 – H2 - ….. – U1 – P12 – P11 – ….. –P1- P0

HOW TO OPERATE
OPERATION IN QUICK START MODE
STEP 1. POWER UP
Press the Master Power Switch located at the front of the frame (see MASTER POWER SWITCH
LOCATION) to "ON" position, and insert SAFETY KEY, 0 is shown on all functions in the window.
STEP 2. BEGIN WORKOUT
First option: Press START button to begin operating. TIME, DISTANCE, & CALORIES will count up.
Second option: Press ENTER button, 0.00 starts flashing. Press FAST, SLOW (UP, DOWN) button to
set desired time (10 – 99). Then press START button to begin operating. You may also press ENTER
button again and press FAST, SLOW button to set distance (1 – 20km) or press ENTER, FAST, SLOW
button to set CALORIES (10 – 990KCAL). Count down operation will follow the last preset function
you choose. You can choose only one function for counting down operation.
You may always press FAST/ SLOW, UP/DOWN button to adjust speed & incline.
OPERATION IN PROGRAM P1 ~ P12
STEP 1. POWER UP
Press the Master Power Switch located at the front of the frame (see MASTER POWER SWITCH
LOCATION) to "ON" position, and insert SAFETY KEY, 0 is shown on all functions in the window.
STEP 2.
Press FAST, SLOW button to choose P1 ~ P12.
Then you may press START button to begin operating followed by STANDARD PRESET time (48
minutes) or follow next step.
STEP 3.
Press ENTER button, then press FAST, SLOW (UP/DOWN) button to choose LEVEL (1 – 3), then press
ENTER, FAST, SLOW (UP/DOWN) button again to set TIME (10 – 99)
STEP 4.
Press START button to begin operating.
You may always press FAST/ SLOW, UP/DOWN button to adjust speed & incline.
OPERATION IN USERS AND HRC PROGRAM
USER PROGRAM
STEP 1:
Choose U1 or U2 by pressing FAST or SLOW button.
STEP 2:
Press ENTER button, S-1, 1st range of profile, appears on LEVEL window, incline at 0%, speed at 0.8
will be flashing.
STEP 3:
Press INCLINE UP, DOWN button and SPEED FAST, SLOW button to set incline and speed for S-1.
STEP 4:
Press ENTER button to enter and jump to S-2. Repeat above procedures to set all 16 ranges to S 16.

STEP 5:
Press ENTER button, time flashes, press SPEED FAST, SLOW button to set time (10 – 99)
STEP 6:
Press START button to start exercising.
HEART RATE CONTROL (HRC) PROGRAM
STEP 1:
Choose H1 (H2 or H3) by pressing SPEED FAST or SLOW button.
STEP 2:
Press ENTER, AGE: 30 is flashing, 114 appears on PULSE window. Press FAST, SLOW button to set your
age from 13– 70 years old. Figure on the PULSE window will be changed following by the figure of
age. For example, if you set age at 20, then pulse is 150. (220-20) by 75% = 150.
STEP 3:
Press ENTER button to set target heart rate. Figure on pulse window flashes, press UP, DOWN or FAST,
SLOW button to set your desired target heart rate.
STEP 4:
Press ENTER and UP, DOWN or FAST, SLOW button to set desired work out time.
STEP 5:
Press START button to start exercising.
NOTE:
• Computer will automatically check user’s heart rate and compare with the Target Heart
rate you set in every 20 seconds. For user’s safety and reference, when start running,
if Actual Heart Rate is lower than Target Heart Rate, the incline of the machine will be
adjusted up automatically. If it reaches to the tallest 12%, but the actual heart rate is still
lower than target heart rate, then incline will keep on the top till you finish running.
• If user’s Actual Heart Rate is 20 beats more than Target Heart beat for continuous 30
seconds, machine will be forced to stop and E3 will appear on the window.
• Please refer to page "HOW TO WORK OUT SAFELY AND EFFICIENTLY?"
IN SUMMARY
TIME, DISTANCE, and CALORIES are preset for count down on manual operation.
1. P1 – P4 are for speed presetting.
2. P5 – P8 are for incline presetting.
3. P9 – P12 are for speed & incline presetting
4. Below are speed & incline profiles in different presetting programs in
different levels for reference.

0
SPEED
LEVEL 1 P1 P2 P3 P4
Interval 1 2.0 KPH 2.0 KPH 3.0 KPH 3.0 KPH
Interval 2 3.0 KPH 4.0 KPH 6.0 KPH 3.0 KPH
Interval 3 4.0 KPH 6.0 KPH 8.0 KPH 5.0 KPH
Interval 4 5.0 KPH 2.0 KPH 8.0 KPH 6.0 KPH
Interval 5 2.0 KPH 4.0 KPH 3.0 KPH 7.0 KPH
Interval 6 3.0 KPH 6.0 KPH 6.0 KPH 8.0 KPH
Interval 7 4.0 KPH 2.0 KPH 8.0 KPH 6.0 KPH
Interval 8 5.0 KPH 4.0 KPH 8.0 KPH 4.0 KPH
Interval 9 3.0 KPH 6.0 KPH 3.0 KPH 3.0 KPH
Interval 10 2.0 KPH 2.0 KPH 6.0 KPH 3.0 KPH
Interval 11 3.0 KPH 4.0 KPH 8.0 KPH 5.0 KPH
Interval 12 4.0 KPH 6.0 KPH 3.0 KPH 6.0 KPH
Interval 13 5.0 KPH 2.0 KPH 6.0 KPH 7.0 KPH
Interval 14 2.0 KPH 4.0 KPH 8.0 KPH 8.0 KPH
Interval 15 3.0 KPH 6.0 KPH 3.0 KPH 6.0 KPH
Interval 16 4.0 KPH 2.0 KPH 3.0 KPH 4.0 KPH
SPEED
LEVEL 2 P1 P2 P3 P4
Interval 1 4.0 KPH 4.0 KPH 5.0 KPH 5.0 KPH
Interval 2 5.0 KPH 6.0 KPH 8.0 KPH 5.0 KPH
Interval 3 6.0 KPH 8.0 KPH 10.0 KPH 7.0 KPH
Interval 4 7.0 KPH 4.0 KPH 10.0 KPH 8.0 KPH
Interval 5 4.0 KPH 6.0 KPH 5.0 KPH 9.0 KPH
Interval 6 5.0 KPH 8.0 KPH 8.0 KPH 10.0 KPH
Interval 7 6.0 KPH 4.0 KPH 10.0 KPH 8.0 KPH
Interval 8 7.0 KPH 6.0 KPH 10.0 KPH 6.0 KPH
Interval 9 5.0 KPH 8.0 KPH 5.0 KPH 5.0 KPH
Interval 10 4.0 KPH 4.0 KPH 8.0 KPH 5.0 KPH
Interval 11 5.0 KPH 6.0 KPH 10.0 KPH 7.0 KPH
Interval 12 6.0 KPH 8.0 KPH 5.0 KPH 8.0 KPH
Interval 13 7.0 KPH 4.0 KPH 8.0 KPH 9.0 KPH
Interval 14 4.0 KPH 6.0 KPH 10.0 KPH 10.0 KPH
Interval 15 5.0 KPH 8.0 KPH 5.0 KPH 8.0 KPH
Interval 16 6.0 KPH 4.0 KPH 5.0 KPH 6.0 KPH
SPEED
LEVEL 3 P1 P2 P3 P4
Interval 1 6.0 KPH 6.0 KPH 7.0 KPH 7.0 KPH
Interval 2 7.0 KPH 8.0 KPH 10.0 KPH 7.0 KPH
Interval 3 8.0 KPH 10.0 KPH 12.0 KPH 9.0 KPH
Interval 4 9.0 KPH 6.0 KPH 12.0 KPH 10.0 KPH
Interval 5 6.0 KPH 8.0 KPH 7.0 KPH 11.0 KPH
Interval 6 7.0 KPH 10.0 KPH 10.0 KPH 12.0 KPH
Interval 7 8.0 KPH 6.0 KPH 12.0 KPH 10.0 KPH
Interval 8 9.0 KPH 8.0 KPH 12.0 KPH 8.0 KPH
Interval 9 7.0 KPH 10.0 KPH 7.0 KPH 7.0 KPH
Interval 10 6.0 KPH 6.0 KPH 10.0 KPH 7.0 KPH
Interval 11 7.0 KPH 8.0 KPH 12.0 KPH 9.0 KPH
Interval 12 8.0 KPH 10.0 KPH 7.0 KPH 10.0 KPH
Interval 13 9.0 KPH 6.0 KPH 10.0 KPH 11.0 KPH
Interval 14 6.0 KPH 8.0 KPH 12.0 KPH 12.0 KPH
Interval 15 7.0 KPH 10.0 KPH 7.0 KPH 10.0 KPH
Interval 16 8.0 KPH 6.0 KPH 7.0 KPH 8.0 KPH

SPEED
LEVEL 1 P5 P6 P7 P8
Interval 1 2% 2% 2% 3%
Interval 2 4% 3% 4% 6%
Interval 3 6% 4% 6% 6%
Interval 4 8% 5% 2% 8%
Interval 5 8% 2% 4% 8%
Interval 6 10% 3% 6% 3%
Interval 7 6% 4% 2% 6%
Interval 8 4% 5% 4% 6%
Interval 9 2% 7% 6% 8%
Interval 10 2% 8% 2% 8%
Interval 11 4% 2% 4% 6%
Interval 12 6% 3% 6% 6%
Interval 13 8% 4% 2% 8%
Interval 14 8% 5% 4% 8%
Interval 15 6% 7% 6% 3%
Interval 16 4% 8% 2% 6%
SPEED
LEVEL 2 P5 P6 P7 P8
Interval 1 4% 4% 4% 5%
Interval 2 6% 5% 6% 8%
Interval 3 8% 6% 8% 8%
Interval 4 10% 7% 4% 10%
Interval 5 10% 4% 6% 10%
Interval 6 12% 5% 8% 5%
Interval 7 8% 6% 4% 8%
Interval 8 6% 7% 6% 8%
Interval 9 4% 9% 8% 10%
Interval 10 4% 10% 4% 10%
Interval 11 6% 4% 6% 8%
Interval 12 8% 5% 8% 8%
Interval 13 10% 6% 4% 10%
Interval 14 10% 7% 6% 10%
Interval 15 8% 4% 8% 5%
Interval 16 6% 5% 4% 8%
SPEED
LEVEL 3 P5 P6 P7 P8
Interval 1 6% 6% 6% 7%
Interval 2 8% 7% 8% 10%
Interval 3 10% 8% 10% 10%
Interval 4 12% 9% 6% 12%
Interval 5 12% 6% 8% 12%
Interval 6 12% 7% 10% 7%
Interval 7 10% 8% 6% 10%
Interval 8 8% 9% 8% 10%
Interval 9 6% 11% 10% 12%
Interval 10 6% 12% 6% 12%
Interval 11 8% 6% 8% 10%
Interval 12 10% 7% 10% 10%
Interval 13 12% 8% 6% 12%
Interval 14 12% 9% 8% 12%
Interval 15 10% 6% 10% 7%
Interval 16 8% 7% 6% 10%

SPEED
LEVEL 1 P9 P10 P11 P12
Interval 1 3.0 KPH/2% 2.0 KPH/2% 2.0 KPH/2% 2.0 KPH/3%
Interval 2 3.0 KPH/4% 2.0 KPH/3% 2.0 KPH/4% 6.0 KPH/6%
Interval 3 5.0 KPH/6% 5.0 KPH/4% 8.0 KPH/6% 10.0 KPH/6%
Interval 4 5.0 KPH/8% 6.0 KPH/5% 2.0 KPH/2% 6.0 KPH/8%
Interval 5 3.0 KPH/8% 7.0 KPH/2% 2.0 KPH/4% 2.0 KPH/8%
Interval 6 3.0 KPH/10% 5.0 KPH/3% 8.0 KPH/6% 6.0 KPH/3%
Interval 7 5.0 KPH/6% 6.0 KPH/4% 2.0 KPH/2% 10.0 KPH/6%
Interval 8 5.0 KPH/4% 7.0 KPH/5% 2.0 KPH/4% 6.0 KPH/6%
Interval 9 3.0 KPH/2% 5.0 KPH/7% 8.0 KPH/6% 2.0 KPH/8%
Interval 10 3.0 KPH/2% 6.0 KPH/8% 2.0 KPH/2% 6.0 KPH/8%
Interval 11 5.0 KPH/4% 7.0 KPH/2% 2.0 KPH/4% 10.0 KPH/6%
Interval 12 5.0 KPH/6% 7.0 KPH/3% 8.0 KPH/6% 6.0 KPH/6%
Interval 13 3.0 KPH/8% 5.0 KPH/4% 2.0 KPH/2% 2.0 KPH/8%
Interval 14 3.0 KPH/8% 6.0 KPH/5% 2.0 KPH/4% 6.0 KPH/8%
Interval 15 5.0 KPH/6% 8.0 KPH/2% 8.0 KPH/6% 10.0 KPH/3%
Interval 16 5.0 KPH/4% 9.0 KPH/3% 2.0 KPH/2% 6.0 KPH/6%
SPEED
LEVEL 2 P9 P10 P11 P12
Interval 1 5.0 KPH/4% 4.0 KPH/4% 4.0 KPH/4% 4.0 KPH/5%
Interval 2 5.0 KPH/6% 4.0 KPH/5% 4.0 KPH/6% 8.0 KPH/8%
Interval 3 7.0 KPH/8% 7.0 KPH/6% 10.0 KPH/8% 12.0 KPH/8%
Interval 4 7.0 KPH/10% 8.0 KPH/7% 4.0 KPH/4% 8.0 KPH/10%
Interval 5 5.0 KPH/10% 9.0 KPH/4% 4.0 KPH/6% 4.0 KPH/10%
Interval 6 5.0 KPH/12% 7.0 KPH/5% 10.0 KPH/8% 8.0 KPH/5%
Interval 7 7.0 KPH/8% 8.0 KPH/6% 4.0 KPH/4% 12.0 KPH/8%
Interval 8 7.0 KPH/6% 9.0 KPH/7% 4.0 KPH/6% 8.0 KPH/8%
Interval 9 5.0 KPH/4% 7.0 KPH/9% 10.0 KPH/8% 4.0 KPH/10%
Interval 10 5.0 KPH/4% 8.0 KPH/10% 4.0 KPH/4% 8.0 KPH/10%
Interval 11 7.0 KPH/6% 9.0 KPH/4% 4.0 KPH/6% 12.0 KPH/8%
Interval 12 7.0 KPH/8% 9.0 KPH/5% 10.0 KPH/8% 8.0 KPH/8%
Interval 13 5.0 KPH/10% 7.0 KPH/6% 4.0 KPH/4% 4.0 KPH/10%
Interval 14 5.0 KPH/10% 8.0 KPH/7% 4.0 KPH/6% 8.0 KPH/10%
Interval 15 7.0 KPH/8% 10.0 KPH/4% 10.0 KPH/8% 12.0 KPH/5%
Interval 16 7.0 KPH/6% 11.0 KPH/5% 4.0 KPH/4% 8.0 KPH/8%
SPEED LEVEL
3P9 P10 P11 P12
Interval 1 7.0 KPH/6% 6.0 KPH/6% 6.0 KPH/6% 6.0 KPH/7%
Interval 2 7.0 KPH/8% 6.0 KPH/7% 6.0 KPH/8% 10.0 KPH/10%
Interval 3 9.0 KPH/10% 10.0 KPH/8% 12.0 KPH/10% 14.0 KPH/10%
Interval 4 9.0 KPH/12% 10.0 KPH/9% 6.0 KPH/6% 10.0 KPH/12%
Interval 5 7.0 KPH/12% 11.0 KPH/6% 6.0 KPH/8% 6.0 KPH/12%
Interval 6 7.0 KPH/12% 9.0 KPH/7% 12.0 KPH/10% 10.0 KPH/7%
Interval 7 9.0 KPH/10% 10.0 KPH/8% 6.0 KPH/6% 14.0 KPH/10%
Interval 8 9.0 KPH/8% 11.0 KPH/9% 6.0 KPH/8% 10.0 KPH/10%
Interval 9 7.0 KPH/6% 9.0 KPH/11% 12.0 KPH/10% 6.0 KPH/12%
Interval 10 7.0 KPH/6% 10.0 KPH/12% 6.0 KPH/6% 10.0 KPH/12%
Interval 11 9.0 KPH/8% 11.0 KPH/6% 6.0 KPH/8% 14.0 KPH/10%
Interval 12 9.0 KPH/10% 11.0 KPH/7% 12.0 KPH/10% 10.0 KPH/10%
Interval 13 7.0 KPH/12% 9.0 KPH/8% 6.0 KPH/6% 6.0 KPH/12%
Interval 14 7.0 KPH/12% 10.0 KPH/9% 6.0 KPH/8% 10.0 KPH/12%
Interval 15 9.0 KPH/10% 12.0 KPH/6% 12.0 KPH/10% 14.0 KPH/7%
Interval 16 9.0 KPH/8% 13.0 KPH/7% 6.0 KPH/6% 10.0 KPH/10%
• U1 & U2 are users program for
user to set the program he prefers.
• H1, H2, H3 are Heart Rate Control
program.
• When the SAFETY KEY is removed,
motor stops, every program will be
reset.
• Please note every program is
divided into 16 segments.

MASTER POWER SWITCH LOCATION
To completely shut off power to the treadmill,
turn off master power switch and unplug from
outlet.
COMPUTER INSTRUCTION
(A) SAFETY KEY
Safety Key is for the operation and emergency stop. Before beginning a workout session ensure
safety key is securely attached to an article of your clothing.
(B) FAST/SLOW BUTTON
They are for adjusting Speed, choosing Program, and doing presetting.
(C)UP/DOWN BUTTON
They are for adjusting Incline, choosing program, and doing presetting.
(D) START / STOP BUTTON
It’s to start or stop the machine and figures 5 to 1 will count down in the window before machine
starts.
(E) ENTER BUTTON
It’s for entering function.
(F) PULSE SENSOR PLATE
Both hands must hold on two plates at the same time to read your heart beat on the computer.
(G) QUICK SPEED BUTTON
(2kph, 4kph, 6kph, 8kph), SPEED FAST, SLOW and START / STOP button on RIGHT handlebar.
(H) QUICK INCLINE BUTTON
(3%, 6%, 9%, 12%), INCLINE UP, DOWN and ENTER button on LEFT handlebar.

FUNCTIONS DISPLAY
TIME:
Count up; accumulate total working time from zero to 99:99
Count down; counts the preset working time backwards to zero to stop running.
DISTANCE:
Count up; accumulate total working distance from zero to 99.9KM or MILES. (0.1 means 100
meters) count down; count the preset figure backwards to zero to stop running.
CALORIES:
Count up; accumulate calories consumption during exercise from zero to 999 KCAL. (1 means 1
KCAL.) count down; count the preset figure backwards to zero to stop running.
PULSE:
It shows your heart beat when holding sensor plates on two handlebars.
SPEED:
FOR MODEL 8010A / 8020A / 7950
The speed can be adjusted from Min. 0.5MPH/0.8KPH to 10MPH/16KPH by 0.1 increments by
pushing FAST or SLOW buttons.
FOR MODEL 8030A / 8050A
The speed can be adjusted from Min. 0.5MPH/0.8KPH to 12.5MPH/20KPH by 0.1 increments by
pushing FAST or SLOW buttons.
INCLINE:
Display desired incline from 0 – 12%.
PROGRAM:
P0 ~ H3.
LEVEL:
L1 ~ L3.
NOTE IN OPERATION
1. These models are with Touch Panel. You may SOFTLY touch the buttons of START / STOP,
ENTER, UP/DOWN and FAST/ SLOW on the screen to operate the machine.
2. You may also press the buttons on the handlebars to control the machine.
Press QUICK SPEED BUTTON (2kph, 4kph, 6kph, 8kph) to reach the speed you prefer and
press SPEED FAST/ SLOW BUTTON to adjust speed. And press QUICK INCLINE BUTTON (3%,
6%, 9%, 12%) and INCLINE UP/ DOWN BUTTON to adjust incline.
3. For user’s convenience, we suggest that you use controlling buttons on the handlebars to
operate once you have set up the desired program to run.

ERROR MESSAGE & TROUBLE SHOOTING
E1 (Error 1):
When the machine starts but computer could not read the signal from sensor for 7 seconds, E1 will
be shown on the computer.
E6 (Error 6):
When the machine starts but computer could not read the VR signal from incline motor for 6
seconds, E6 will be shown on the computer.
If any above trouble happens, please consult the distributor.
E3 (Error 3):
It happens only in HRC mode (H1, H2, or H3) when user’s heart rate is 20 beats more than target
heart rate and last for over 30 seconds. For your safety, you should stop running when E3 appears.
SMELL
If any smell comes out from motor, please firstly spray out some silicone on the running board
(Please refer to page : RUNNING BOARD MAINTENANCE), and see if the situation improves. Then
consult the distributor for necessary help.
HOW TO ADJUST INCLINE
When the machine is running, just push UP & DOWN button to adjust.
HOW TO FOLD UP FOR STORAGE?
(8010A / 8030A: Manual folding)
Lift the rear end of the frame to the computer till you hear a "CLICK"
sound then push and pull it to make sure the frame is fixed.
HOW TO FOLD DOWN FOR EXERCISE?
There is a safety pin on the air-shock. To fold down the frame,
please hold your hand on the frame and use your foot to push at
the center of air-oil shock (as photo shown) then lean down the
frame into the ground.

HOW TO FOLD UP FOR STORAGE (8020A / 8050A /7950: Auto power folding) ?
Please note there is a LEVER-ARM on the left side of the
main frame. This LEVER-ARM is to control power folding.
The procedures to fold the machine up automatically
are as below:
1. Stop the machine
2. Remove SAFETY KEY from the computer
3. Completely push the LEVER-ARM to the direction of computer
4. Press UP button on the computer / handlebar to let the main frame fold up automatically. And
you will continuously hear the "BEEP" sound to remind the user until the frame is completely in
upright position.
Please note after pressing UP button:
1. If the incline is at 0%, in the lowest position, "FOLD" appears in the TIME window of computer,
machine will be folded up automatically.
2. If the incline is not at 0%, machine will be declined down to 0% automatically, then "FOLD"
appears in the TIME window of computer, then machine will be folded up automatically.
For safety reason, please wait until the frame is completely folded up, turn off master power switch
and unplug the power cable from socket.
HOW TO FOLD DOWN FOR EXERCISE?
Remove SAFETY KEY from computer then press DOWN
button to let the main frame fold down automatically.
You will also hear the "BEEP" sound to remind the user.
Then completely push the LEVER-ARM to the direction of
rear end, "run" appears in the screen, replacing SAFETY
KEY, the machine is now ready for exercise.
WARNING
1. Do not move the lever-arm when the machine is running or folding. Move it only when the main
frame is lying on the ground and in stop mode.
2. If you find the lever-arm is not able to be moved all the way, please first make sure the base of front
stand is levelled, then lift the main frame a bit to freely move the lever-arm.
WARNING
To avoid any danger happening to children, please note:
1. Do not allow children to use the machine alone.
2. Turning off master power switch and unplug power cable from outlet when not in use.
3. For safety reason, always keep the children away from folding area.
4. When the frame is folding down, the motor will not stop even when the frame touchs any
objects. If any objects block the direction of folding-down frame, the main stand at the
front will be tilted to let the frame down then the motor stops. So please do not leave the
machine unattended when it’s in folding operation, especially when the children is around.
Photo 2
FOR STORAGE
Photo 1
FOR EXERCISE

RUNNING BOARD MAINTENANCE
Congratulate that you own this motorized treadmill!
Please follow the below instructions to maintain the
running board for a long-term, functional operation:
Time for maintenance
1st:
Kindly be informed that the surface of running board
had been spread at the factory a kind of special
"silicone" for smooth running.
Please spread some silicone on the surface of running
board after 80 ~ 90 hours operation.
2nd:
Afterwards, please remember to spread silicone
every 30 ~ 40 hours.
Way of maintenance
Firstly, please lift one side of running belt and use
air-spray to spread silicon in between the running belt and running board.
Secondly, please lift another side of running belt and spread the silicone.
Thirdly, walking on the treadmill in low speed for few minutes to completely spread out the silicone
What kind of silicone
In the area of Europe, North & South America, it's "dowcorning dc-200/350cs pdms silicone oil"
In the area of Asian countries & Japan, it's shin etsu kf-96/350cs silicone oil"
In Mainland China, it's " 二甲基硅油 , 黏度 350cs"
HOW TO MAINTAIN BY LIQUID SILICONE
One extra can of liquid SILICONE is enclosed inside the carton for running board maintenance.
When it is necessary to add silicone to maintain the running board, please follow the below
instruction:
1. Make sure the treadmill is off and unplugged from the electrical outlet.
2. Lift over the belt of both sides, follow the arrow direction and evenly pour the silicone inside the
running board underneath the running belt. Then use a nylon cloth to spread it over the board.
3. Plug the power cable, turn the Master Power Switch to the ON position, insert safety key, press
the START button to begin running the belt.
4. If the belt is not centered on the treadmill, please refer to "ALIGNING THE RUNNING BELT" to
adjust it.
REMARKS: If static symptom is found, adding silicone on the running board will aslo help solve it.
This manual suits for next models
3
Table of contents
Other JKEXER Treadmill manuals

JKEXER
JKEXER VIGOR 736 User manual

JKEXER
JKEXER CHEER 465 User manual

JKEXER
JKEXER EPIC 823 User manual

JKEXER
JKEXER Turbo 772 User manual

JKEXER
JKEXER AeroWork 897 User manual

JKEXER
JKEXER M-POWER 870 User manual

JKEXER
JKEXER VIGOR 735 User manual

JKEXER
JKEXER Turbo 776 User manual

JKEXER
JKEXER FitLux 665 User manual
Popular Treadmill manuals by other brands

Gold's Gym
Gold's Gym GGTL03607.2 user manual

ESPRIT
ESPRIT Esprit ET10 owner's manual

True
True CS800 Assembly instructions

Bowflex
Bowflex TreadClimber TC100 Assembly & owners manual

ICON Health & Fitness
ICON Health & Fitness NORDICTRACK COMMERCIAL 2950 user manual

Horizon Fitness
Horizon Fitness ELITE 1.1T user guide