We reserve the right to make change at any time without notice,
in colors, parts and materials.
TABLE OF CONTENTS
IMPORTANT SAFETY INSTRUCTIONS
ELECTRICAL GROUNDING INSTRUCTIONS
CAUTION : BEFORE AND AFTER RUNNING ON THE TREADMILL
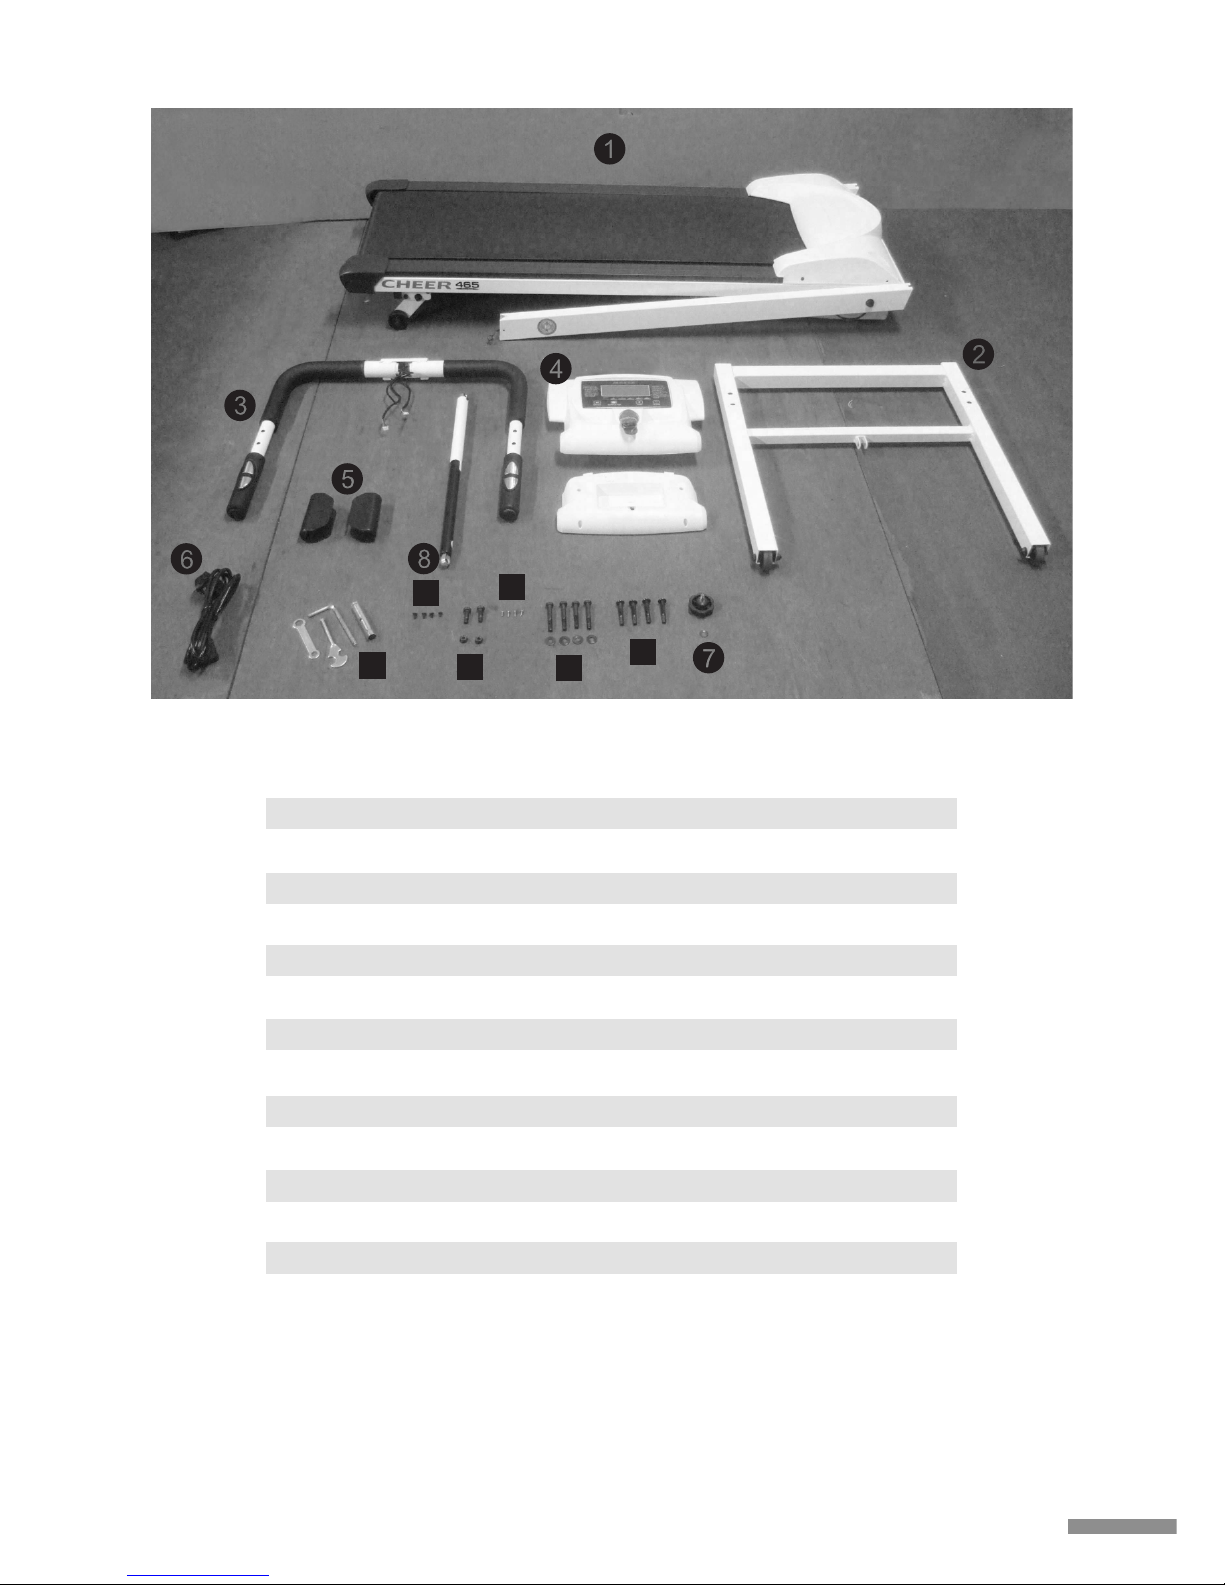
ASSEMBLY INSTRUCTIONS
P. 3-4
POSITIONING FOR OPERATION
PROFILES FOR PROGRAMS
P. 7
MASTER POWER SWITCH LOCATION
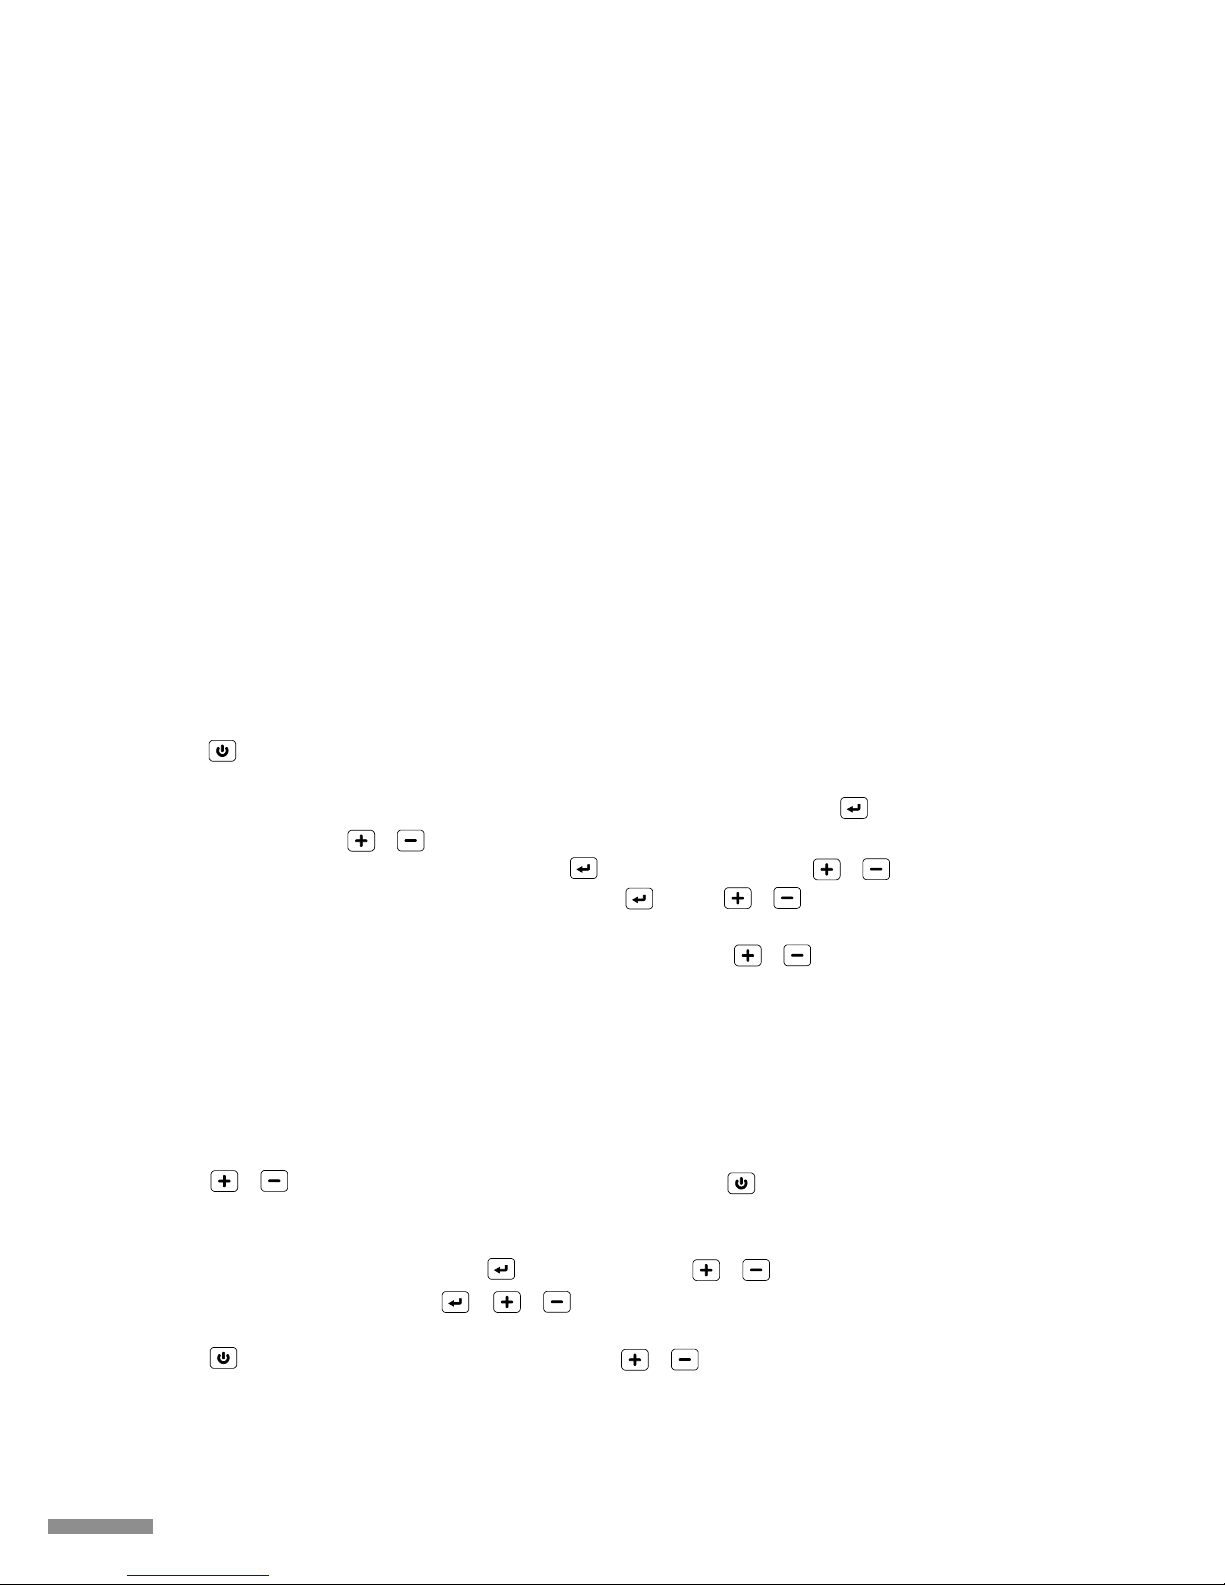
COMPUTER INSTRUCTIONS
ERROR MESSAGE & TROUBLE SHOOTING
P. 10
HOW TO ADJUST INCLINE
P. 10
HOW TO FOLD UP FOR STORAGE
HOW TO FOLD DOWN FOR EXERCISE
HOW TO MOVE
P. 12
COMPUTER ANGLE ADJUSTMENT
P. 12
P. 12
P. 13
ALIGN THE RUNNING BELT
ADJUST THE RUNNING BELT TENSION
CLEANING AND INSPECTING THE RUNNING BELT
P. 13
CLEANING
P. 14
INSPECT FASTENERS AND WIRING
P. 14
STORAGE
P. 14
HOW TO WORK OUT SAFELY AND EFFICIENTLY
P. 14
EXPLODED DRAWING
P. 15
PARTS LIST
P. 15
TREADMILL OPERATION
P. 6-7
P. 9
P. 8
P. 5
P. 3
P. 2
P. 11
P. 11
ASSEMBLY PARTS LIST
RUNNING DECK LUBRICATION
P. 16
P. 17
. . . . . . . . . . . . . . . . . . . . . . . . . . . . . . . . . . . . . . . . . . . . .
. . . . . . . . . . . . . . . . . . . . . . . . . . . . . . . . . . . . . . . .
. . . . . . . . . . . . . . . . . . . . . .
. . . . . . . . . . . . . . .. . . . . . . . . . . . . . . . . . . . . . . . . . . . . . . . . . .
. . . . . . . . . . . . . . . . . . . . . . . . . . . . . . . . . . . . . . . . . . . . . . . . . . . . . . . .
. . . . . . . . . . . . . . . . . . . . . . . . . . . . . . . . . . . . . . . . . . . . . . . . . . . . .
. . . . . . . . . . . . . . . . . . . . . . . . . . . . . . . . . . . . . . . . . . . . . . . . .
. . . . . . . . . . . . . . . . . . . . . . . . . . . . . . . . . . . . . . . . . . . . . . . . . . . . . . .
. . . . . . . . . . . . . . . . . . . . . . . . . . . . . . . . . . . . . . . . . . . . . . . . . . . .
. . . . . . . . . . . . . . . . . . . . . . . . . . . . . . . . . . . . . . . . . . . .
. . . . . . . . . . . . . . . . . . . . . . . . . . . . . . . . . . . . . . . . . . . . . . . . . . . .
. . . . . . . . . . . . . . . . . . . . . . . . . . . . . . . . . . . . . . .
. . . . . . . . . . . . . . . . . . . . . . . . . . . . . . . . . . . . . . . . . . . . . . . . . . . . . .
. . . . . . . . . . . . . . . . . . . . . . . . . . . . . . . . . . . . . . . . . . . . . . .
. . . . . . . . . . . . . . . . . . . . . . . . . . . . . . . . . . . . . . . . . . .
. . . . . . . . . . . . . . . . . . . . . . . . . . . . . . . . . . . . . . . . . . . . . . . . . . . . . . . . . . . . . . .
. . . . . . . . . . . . . . . . . . . . . . . . . . . . . . . . . . . . . . . . . . . . . . .
. . . . . . . . . . . . . . . . . . . . . . . . . . . . . . . . . . . . . . . . . . . . . . . . . . . . .
. . . . . . . . . . . . . . . . . . . . . . . . . . . . . . . . . . . . . . . . . . .
. . . . . . . . . . . . . . . . . . . . . . . . . . . . . . . . . .
. . . . . . . . . . . . . . . . . . . . . . . . . . . . . . . . . . . . . . . . . . . . . . . . . . . . . . . . . . . . . . . . . . .
. . . . . . . . . . . . . . . . . . . . . . . . . . . . . . . . . . . . . . . . . . . . . .
. . . . . . . . . . . . . . . . . . . . . . . . . . . . . . . . . . . . . . . . . . . . . . . . . . . . . . . . . . . . . . . . . . .
. . . . . . . . . . . . . . . . . . . . . . . . . . . . . . . . . . . .
. . . . . . . . . . . . . . . . . . . . . . . . . . . . . . . . . . . . . . . . . . . . . . . . . . . . . . . . .
. . . . . . . . . . . . . . . . . . . . . . . . . . . . . . . . . . . . . . . . . . . . . . . . . . . . . . . . . . . . . . . . . .
P. 1