JOBO GIGA VU SONIC User manual

1
1 von 36136
Manual

2
2 von 36236
Index
Chapter I Basic Functions........................................................................................... 3
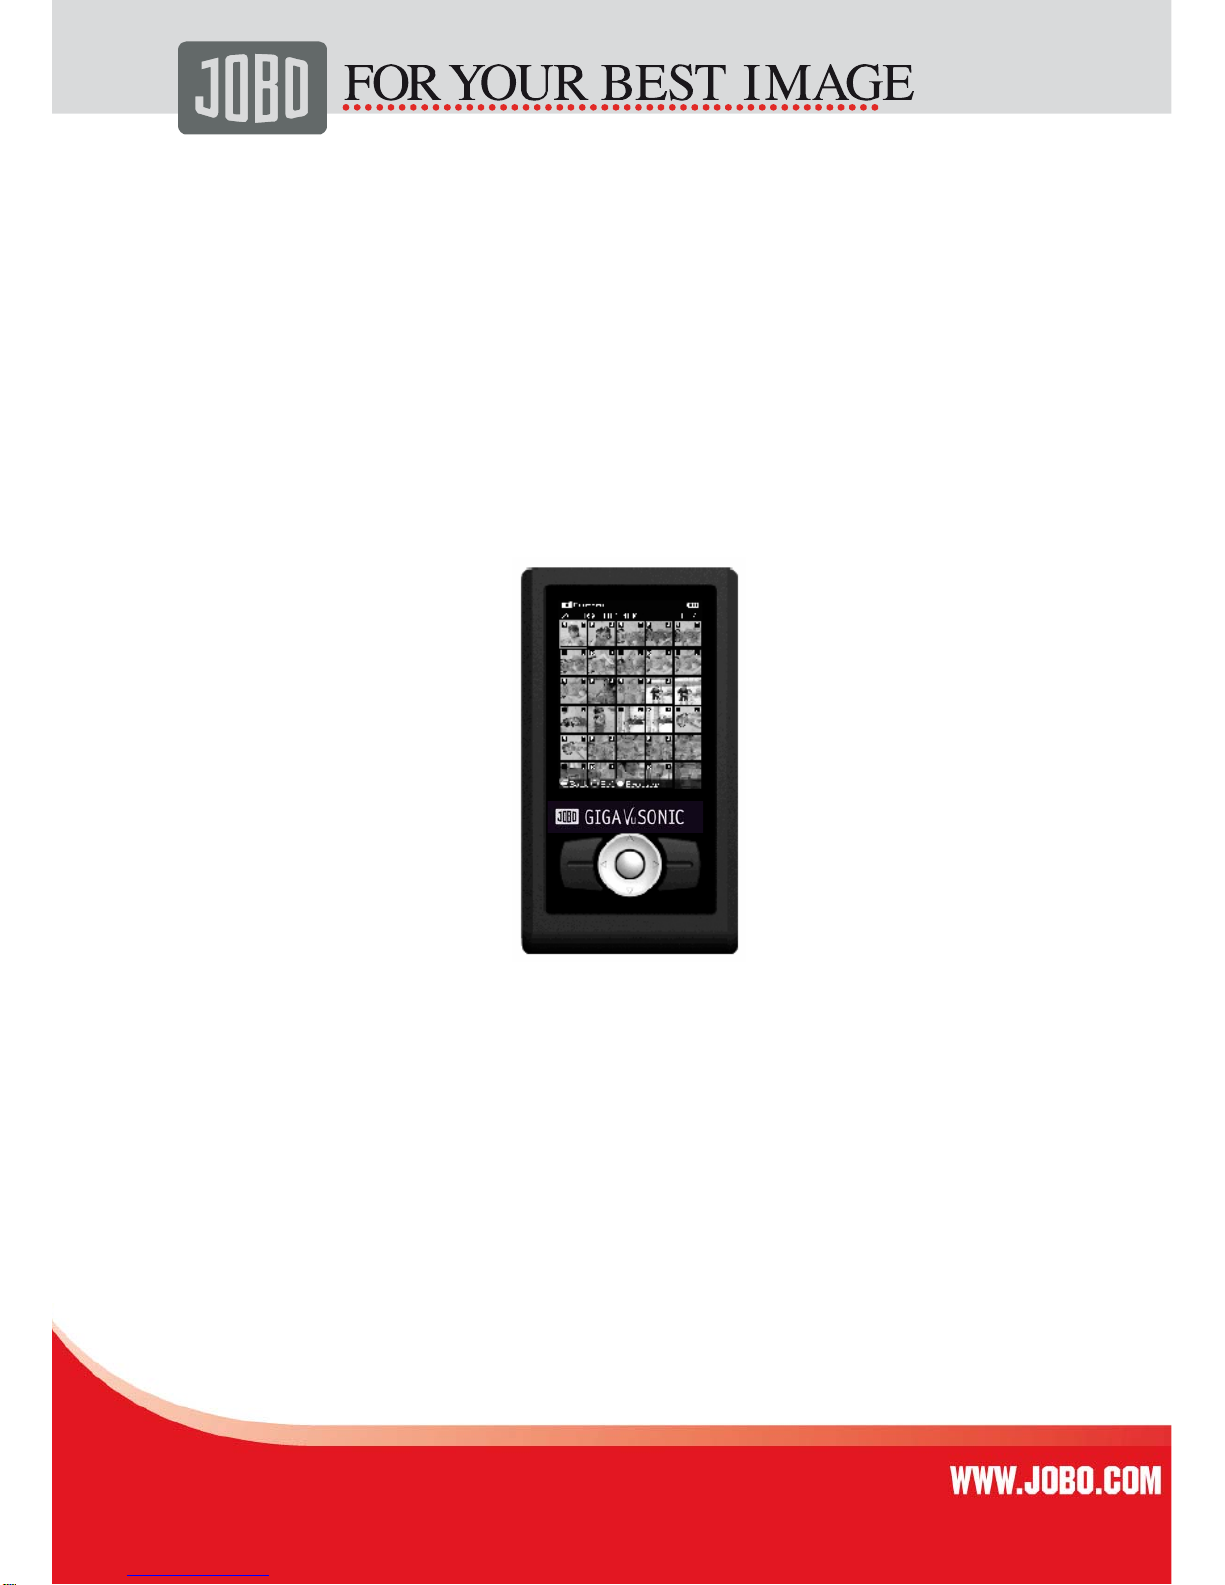
1. Overview............................................................................................................. 3
2. Buttons, Slots and LCD screen........................................................................... 4
Buttons................................................................................................................ 5
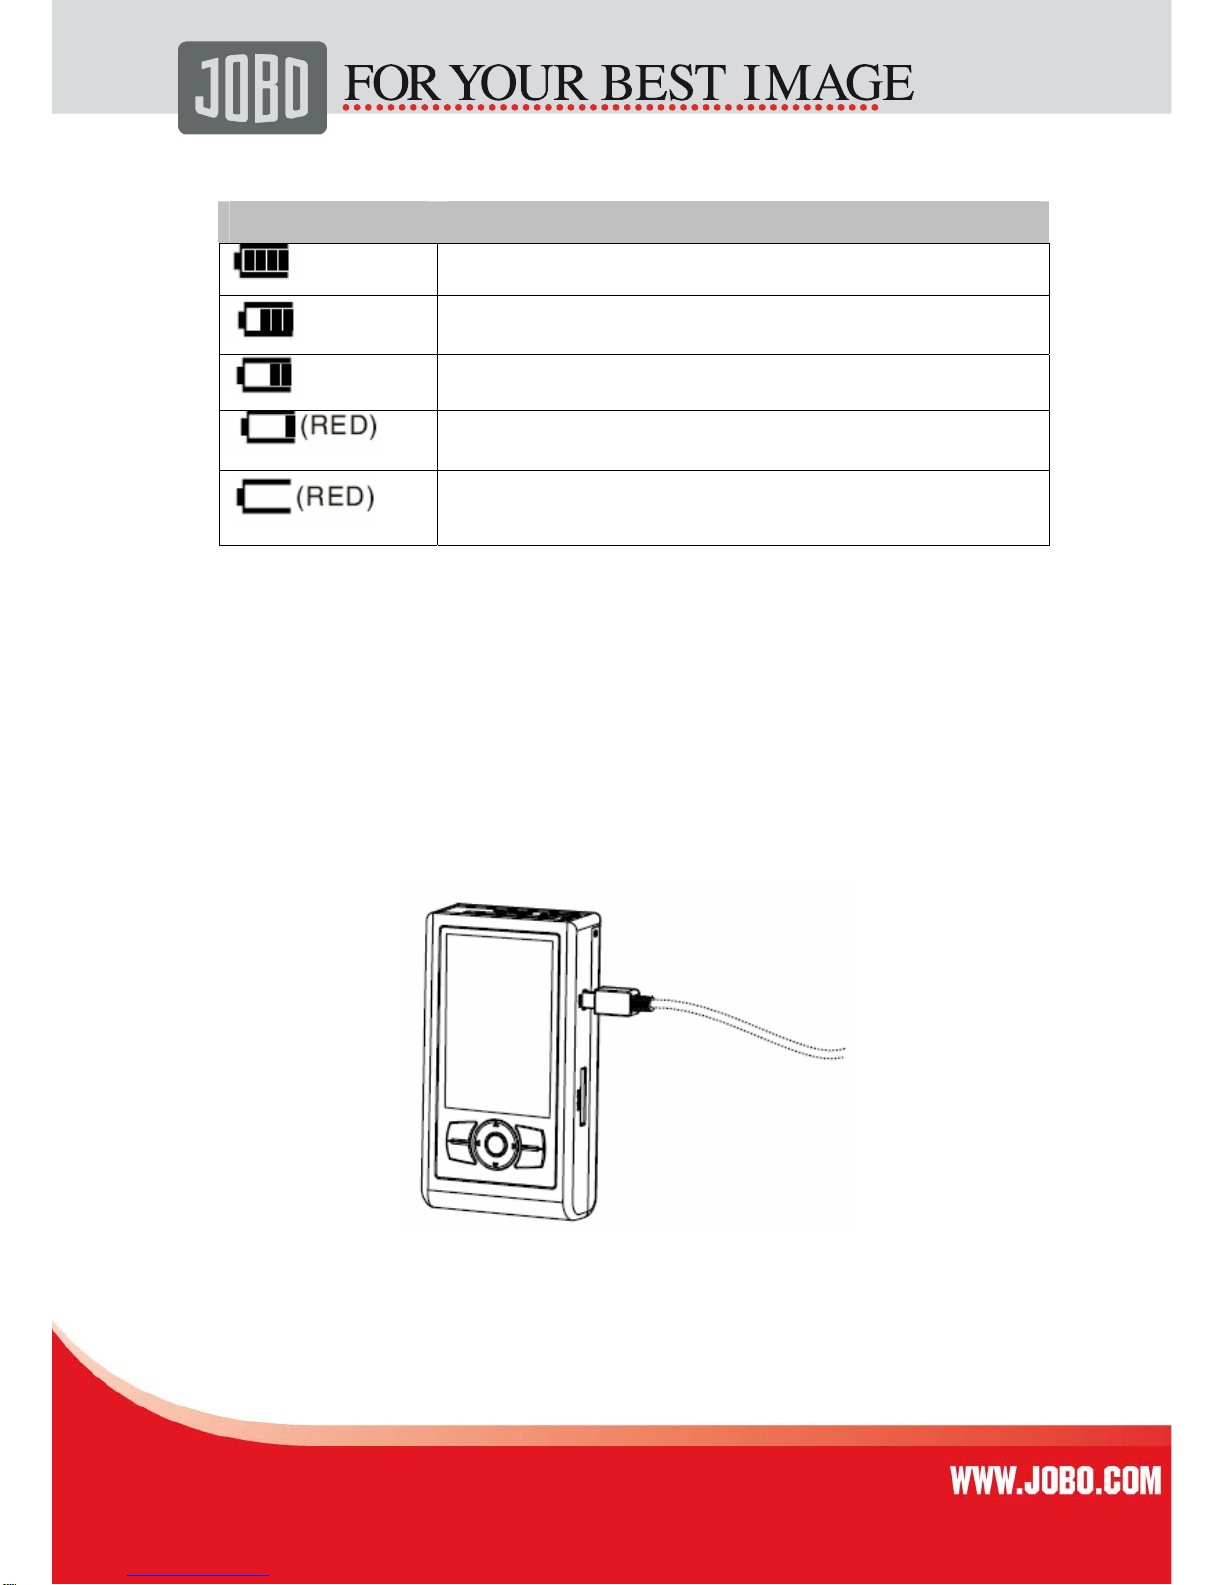
Symbols of battery electricity............................................................................... 6
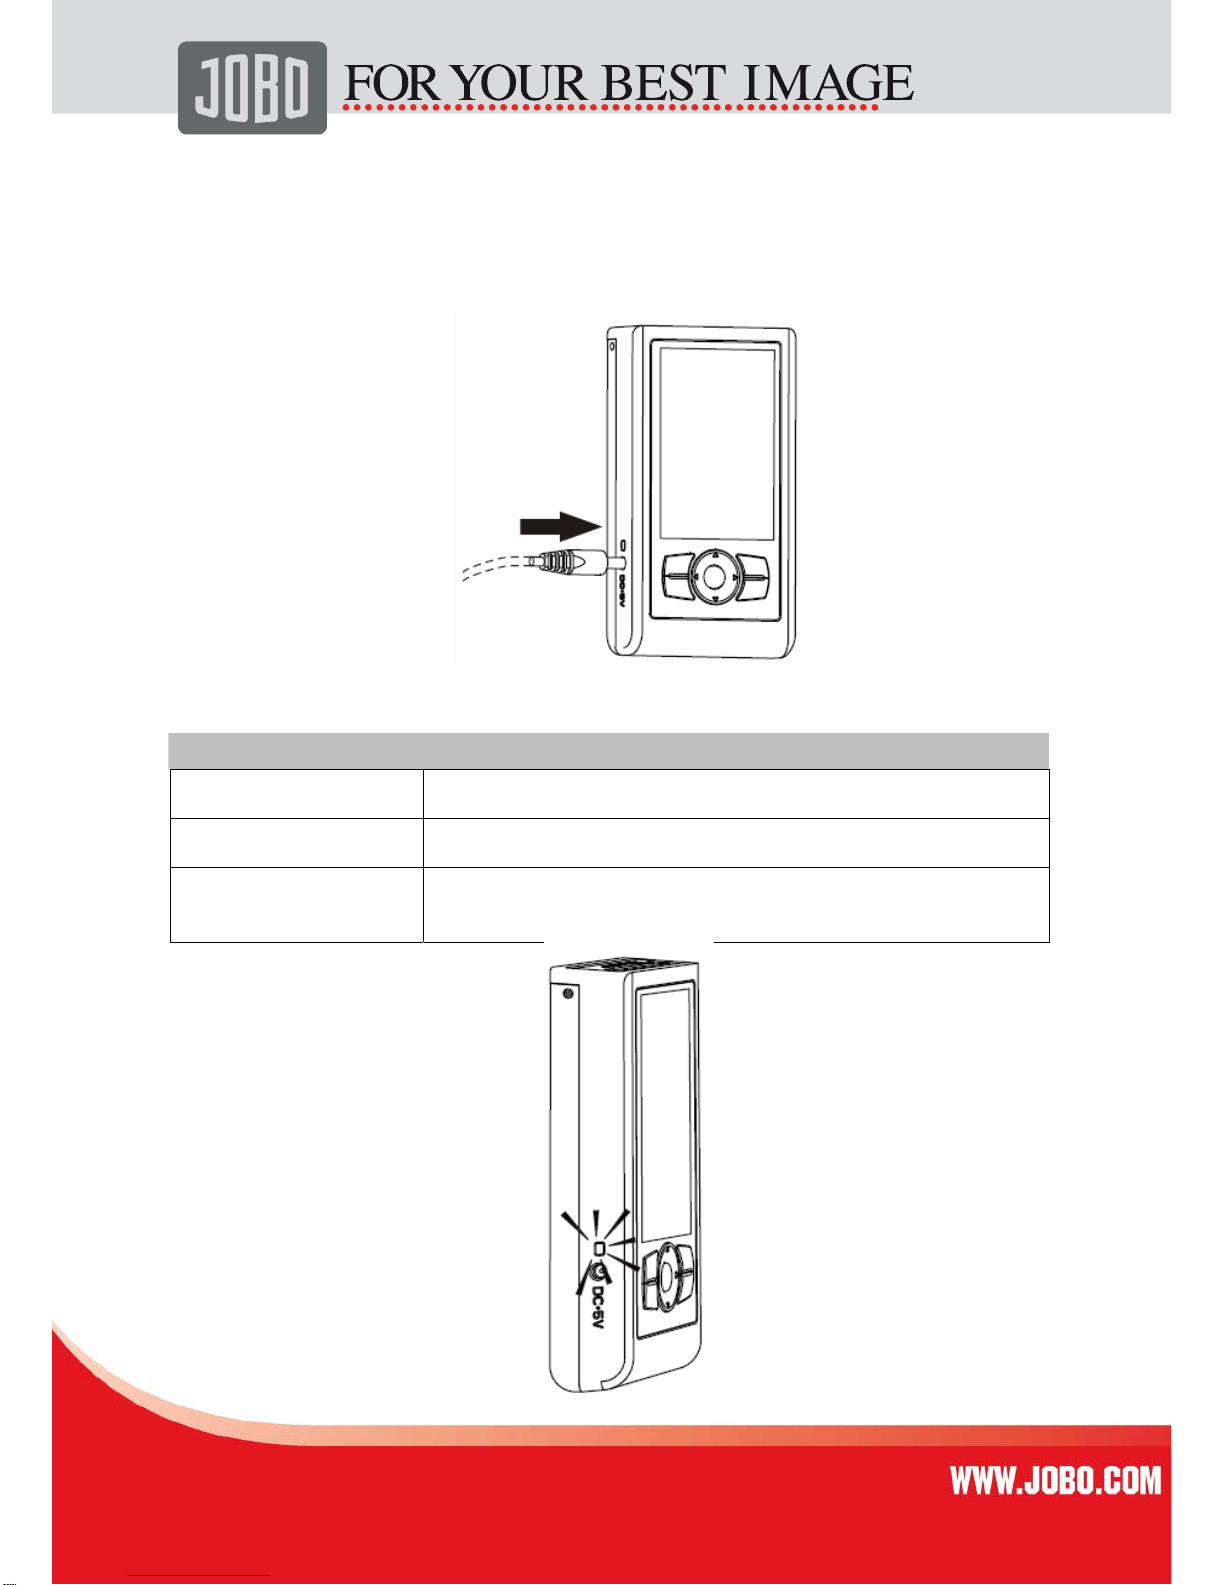
3. Charging the battery ........................................................................................... 6
Charging indicators ............................................................................................. 7
Chapter II.................................................................................................................... 8
Photo ...................................................................................................................... 8
1. Browser............................................................................................................... 9
Picture wall.......................................................................................................... 9
2. Search............................................................................................................... 13
3. Recover............................................................................................................. 14
Chapter III................................................................................................................. 16
Backup.................................................................................................................. 16
1. Full Backup.................................................................................................... 17
2. Incremental Backup...................................................................................... 18
3. Backup Setup................................................................................................ 20
Chapter IV ................................................................................................................ 23
1. File Manager ................................................................................................. 24
2. Creating Thumbs........................................................................................... 25
3. USB Connection............................................................................................ 25
4. Slide Show .................................................................................................... 26
5. Running Script............................................................................................... 26
6. Firmware Update........................................................................................... 26
Chapter V ................................................................................................................. 27
Tools..................................................................................................................... 27
1. Hard Drive Tools ........................................................................................... 28
2. Memory Card Tools....................................................................................... 29
Chapter VI ................................................................................................................ 30
Setup .................................................................................................................... 30
1. Interface Setup.............................................................................................. 31
2. Backlight Setup ............................................................................................. 31
3. Language Setup............................................................................................ 32
4. Key Sound..................................................................................................... 32
5. Reset............................................................................................................. 32
6. System Information........................................................................................ 32
Appendix A: Safety And Operation ....................................................................... 33
Appendix B: Operation Techniques and Problem Solving.................................... 34
1. Operation techniques .................................................................................... 34
2. Troubleshooting............................................................................................. 34
3. Replacing and Installing the Battery.............................................................. 35
Contact/Service..................................................................................................... 36

3
3 von 36336
Chapter I Basic Functions
1. Overview

4
4 von 36436
2. Buttons, Slots and LCD screen
Power switch
Start GIGA VU SONIC:
Push and hold the power switch for about 3 seconds till the startup frame
appears, and then release the power switch.
Turn off GIGA VU SONIC:
Push the power switch slightly and select <Yes> in the Message Box.
Forced shutdown of GIGA VU SONIC:
Push and hold the power switch till the “Shutdown In Process” frame appears,
and then release the power switch.
LED indicators
Yellow is shown:
An error occurred to the current operation.
Green is shown and flashing:
GIGA VU SONIC is processing data, such as USB connection, backup of
memory card.
CompactFlash slot (CF slot for short)
For insertion of CF memory cards and compatible equipment.
MS/SD slot
For insertion of MS and SD memory cards and compatible equipment.

5
5 von 36536
Buttons
LCD screen
GIGA VU SONIC has a 3.2 LCD screen.
Title column:
Indicating current function
Status indication column:
Operating instructions in the current interface Symbols of battery
Button name Function
OK Confirming choice or starting a function.
Directional Pad Changing the selected options.
Menu When the interface has additional functions,
press the button to retrieve the menu.
Exit Exiting the current function mode and
returning to the previous one.
Zoom in Zooming in and out pictures being browsed

6
6 von 36636
Symbols of battery electricity
Status Indication
Electricity is over 75%
Residual electricity is 60%
Residual electricity is 30%
Electricity is used up. Charge it as soon as possible.
Electricity is used up. The unit will shut down
automatically.
3. Charging the battery
Charging the battery with the USB cable provided:
When the unit is powered off, insert GIGA VU SONIC into USB2.0 interface of Mac or
PC (frontal USB ports and external USB HUB of most PCs cannot supply sufficient
power, so please connect GIGA VU SONIC to USB2.0 port of the host), and the built-
in lithium battery will be charged.

7
7 von 36736
Charging the battery with the power adapter provided:
When the unit is powered off, insert the power adapter provided into DC port, and the
built-in lithium battery will be charged. When adapters other than those of the original
manufacturer are used, ensure the output index conforms to requirements. Refer to
relevant sections of “AppendixA”.
Charging indicators:
Status Indication
Constant on Charging in process
Extinguished Charging finished
Flashing Malfunction of charging. Refer to relevant sections of
“Appendix B”

8
8 von 36836
Chapter II
Photo
GIGA VU SONIC has built-in picture browser, picture search and picture recovery
tools, etc. These enable you to browse and share digital pictures conveniently, and
even recover your loss due to deleting pictures by mistake.

9
9 von 36936
1. Browser
The built-in picture browser of GIGA VU SONIC allows you to browse your digital
pictures without going through the computer.
Starting picture browser:
Select <Browser> under <Picture> on the main menu.
Selecting folders to browse:
Select the folder you desire to browse in the Folder Selecting Window.
Picture wall:
Digital pictures in the selected folder will be displayed horizontally in the form of
thumbnail. You may use the „Direction“ button to change the highlighted pictures.
“R” and “J” marks:
R: The picture contains RAW format data.
J: The picture contains JPG format data.
Changing size of thumbnail:
In the Picture Wall, pressing “Zoom In” and “Zoom Out” buttons can change size of
the thumbnail.

10
10 von 361036
Viewing pictures full screen:
In the Picture Wall, press the “Ok” button to
display the highlighted pictures full screen.
Viewing the previous or next picture:
“Direction” button Left: the previous picture “Direction”
button Right: the next picture
Rotating and enlarging the picture:
Every time you press the “Ok” button, the picture will rotate 90
degrees, and automatically zoon in and out to adapt to the screen.
Display control prompt:
Press “Menu” button once to select <Control Prompt>[ <Display>;
likewise, you can select <Off> to turn off control
prompt.

11
11 von 361136
Local enlargement of the picture:
Press “Zoom In” button, and the picture browsed full screen will be
displayed by enlarged central part. Go on pressing “Zoom In” or “Zoom Out” button,
the amplification grades will switch among 1/8, 1/4
and 1/1. Continuously press “Zoom Out” button for a couple of times or
”Exit” button once , it will return to the mode of browsing in full screen.
Changing local area of display:
In the mode of local enlargement, press “Direction” button, and you
can change display area of the picture.

12
12 von 361236
Displaying EXIF brief:
In the mode of browsing in full screen, press Up of the ”Direction”
button to display or close EXIF brief, or press “Menu” button to select
<EXIF > <Display Brief>.
Displaying Histogram:
In the mode of browsing in full screen, press “Menu” button to select <Histogram>.
You may press Down of the “Direction” button to display or conceal the histogram
rapidly.
Select Function
Close The histogram will not be displayed
Red Display the red Histogram of Component of the picture currently browsed
Green Display the green Histogram of Component of the picture currently browsed
Blue Display the blue Histogram of Component of the picture currently browsed
Lum Display the Luminance Histogram of Component of the picture currently browsed

13
13 von 361336
2. Search
GIGA VU SONIC allows you to browse pictures of designated date quickly.
Searching pictures:
If you want to search the memory card, insert it first into the corresponding slot. b)
Select <Search> under <Picture> on the main menu, and then select the device
(hard drive or memory card). c) In the input interface, press Left or Right of the
“Direction” button to change year or month. The current value increases by one when
Up of the “Direction” button is pressed once, and decreases by one when Down of
the “Direction” button is pressed once. Press “Ok” button, and the unit begins
searching according to designated year and month.
When searching is in process, demonstration thumbnail of the
picture searched out will be displayed under the corresponding date.
Name of the folder being searched will display at the bottom. You can exit
searching by pressing “Exit” button.
After searching is finished, you can press “Ok” button to browse
the picture searched out.

14
14 von 361436
3. Recover
If you delete pictures on the memory card by mistake, the function of recovery will
recover your loss.
With the function, you can recover:
•the deleted pictures on the memory card (such as using deletion function of
the digital camera)
•pictures of designated formats. See the form below:
Camera Format
(*Please visit the official website for the list of latest compatible formats)
The function DOES NOT enable you to recover:
•the memory card to which newer data are written after the deletion
•the picture data which are fragmented or covered by other files
•pictures on the hard drive
•files in other formats than those designated
•folder structure on the memory card

15
15 von 361536
Recovering pictures:
a) Insert the memory card to be recovered into the corresponding slot.
b) Select <Recover> under <Picture> on the main menu. Select the memory card to
be recovered on the menu.
c) In the process of recovery, the thumbnail of the picture being recovered appears
on the screen horizontally. You may cancel the recovering operation by pressing
“Exit” button.
d) The picture being recovered will be stored in partition C of the builtin hard drive,
and it will be in the folder named “RECV××××” (× refers to numerical number, which
automatically increases by degree).
Browsing the recovered pictures:
After recovering operation is completed, press “OK” button, and you can browse the
picture in picture browser. You may also browse it by selecting the function of
<Picture Browser> on the main menu, and then opening the folder named
“RECV××××” in disk C.

16
16 von 361636
Chapter III
Backup
The unit adopts parallel processing system that is the most advanced currently and
can enormously enhance the speed of backup from the memory card to the hard
drive.

17
17 von 361736
1. Full Backup
The full backup function can copy all files and folders on the memory card to the hard
drive.
With the function, you can:
•back up multiple types of memory card, such as CF, SD, MS, etc.
•back up the picture data on memory cards of types mentioned above and
other non-system data.
•create new folders in the built-in hard drive and maintain directory structure of
the original card.
The function DOES NOT enable you to:
•back up memory card label and data of system files (such as Recycle Bin of
Windows).
•back up memory cards adopting FAT12 file system.
•back up memory cards capacity of which is less than or equal to 64MB.
Backing up CF memory cards:
Insert CF card into CF slot on the top of GIGA VU SONIC. Select the function of <Full
Backup> on the main menu.
Backing up SD and MS memory cards:
Insert SD and MS memory cards into MS/SD slot on the right of GIGA VU SONIC.
Select the function of <Full Backup> on the main menu.
Backing up multiple memory cards:
In the case of the multiple memory cards of the same type, such as multiple CF
cards, and insert it into the corresponding slot. Select the function of <Full Backup>
on the main menu. After the backup is completed, insert another memory card and
repeat the operation.
In the case of multiple memory cards of different types, such as CF and SD cards,
insert them into the corresponding slots respectively. Select the function of <Full
Backup> on the main menu. Select CF or SD in the Menu of Memory Card Selection.
After the backup is completed, select the function of <Full Backup> again. Select
another memory card in Menu of Memory Card Selection, and go on with the backup.

18
18 von 361836
Viewing backup data
After successful backup, press Ok button to start the picture browser and browse
pictures in the backup folder.
If you need to view other types of data, refer to relevant sections of “File Manager”.
2. Incremental Backup
Incremental backup will distinguish differences between the memory card and folders
of the hard drive. It will also copy the files and folders newly added to the memory
card to the hard drive folder, thus reducing data quantity of each backup and avoid
repeated data.
With the function, you can:
•copy data on the memory card to the last successful backup folder (full backup
or incremental backup)
•select an existing folder, and copy the non-repeated data of the memory card
to the folder.
The function DOES NOT enable you to :
•back up memory card label and data of system files (such as Recycle Bin of
Windows)
•memory cards adopting FAT12 file system.
•back up files of the same name but different data.
•synchronize different data of the memory card and the hard drive folder,
namely the data existing in the designated hard drive folder but not on the
memory card will not be rewritten into the memory card.
•make incremental backup in a hard drive folder without any data.
Making incremental backup of CF memory card: Insert CF card into CF slot on the
top of GIGA VU SONIC. Select the function of <Incremental Backup> on the main
menu. Select <Begin Backup> after confirming the incremental folder.
Making incremental backup of SD / MS memory cards: Insert SD and MS memory
card into MS/SD slot on the right of GIGA VU SONIC. Select the function of
<Incremental Backup> on the main menu. Select <Backup> after confirming the
incremental folder.

19
19 von 361936
Changing incremental backup folder:
Select the function of <Incremental Backup> on the main menu. After entering the
function, select <Select>. Select a folder in the Folder Selecting Window.

20
20 von 362036
3. Backup Setup
You can change Verify, Folder, Speed and Visual of backup.
Changing verification mode:
Under <Backup> on the main menu, select <Backup Setup> [ <Verify>.
Real-Time Verify:
The real-time verification performs CRC verification of data in the course
of file copying. Upon discovery of error, it will be retried. I/O error will be
reported after the retry fails. The real-time verification is supported by
hardware, so it will not influence the copying speed.
The real-time verification is applicable to equipment as follows:
SATA hard drive, CF memory card of UDMA, SD card, MMC card and MS card.
Verify HDD:
After the function of verifying hard drive is selected, for each file copied, CRC
checksum of the file will be recorded (multiple CRC checksums will be recorded for
large files). Whenever all files in a folder are copied, the system will reread the hard
drive, recalculate the CRC checksum of each file and compare it with the checksum
during copying to ascertain the copying operation is fully correct.
When the function is started, it will:
•prevent data from error and loss due to bad sectors of hard drive.
•influence copying speed, extent of which depends on the reading speed of the
hard drive.
Table of contents
Other JOBO Digital Photo Frame manuals

JOBO
JOBO PURE 8 PRO User manual

JOBO
JOBO PDJ007 User manual

JOBO
JOBO PDJL007 User manual

JOBO
JOBO PDJ104 User manual

JOBO
JOBO PDJ007 User manual

JOBO
JOBO PDC008 black User manual

JOBO
JOBO NANO 7 - PRESS RELEASE User manual

JOBO
JOBO GIGA Vu extreme User manual

JOBO
JOBO PDJ080 User manual

JOBO
JOBO PURE 10 MEDIA User manual

JOBO
JOBO GIGA VU PRO User manual

JOBO
JOBO Photo Display PDJ120 User manual

JOBO
JOBO PDJ077 User manual

JOBO
JOBO Plano 10 IPS User manual

JOBO
JOBO PHOTO DISPLAY PDJ 701 User manual

JOBO
JOBO GIGA VU PRO User manual

JOBO
JOBO Photo Frame User manual

JOBO
JOBO PDJ070 User manual

JOBO
JOBO Mobile Photo Display S4 User manual

JOBO
JOBO PDJ100 User manual