manuals.online logo
Brands
  1. Home
  2. •
  3. Brands
  4. •
  5. Johannus
  6. •
  7. Musical Instrument
  8. •
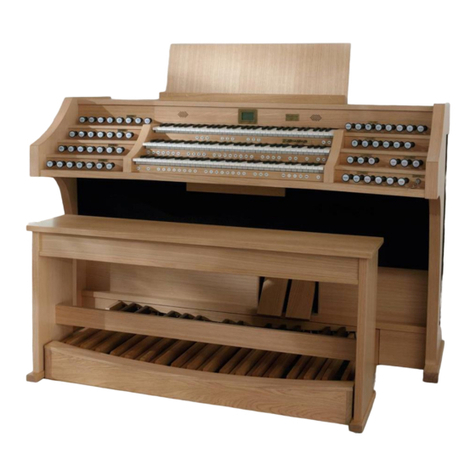
  9. Johannus Ecclesia D-35 User manual

Johannus Ecclesia D-35 User manual

Other Johannus Musical Instrument manuals

Johannus classic 350 User manual

Johannus

Johannus classic 350 User manual

Johannus SWEELINCK 20 User manual

Johannus

Johannus SWEELINCK 20 User manual

Johannus LiVE III AGO User manual

Johannus

Johannus LiVE III AGO User manual

Johannus Vivaldi 150 User manual

Johannus

Johannus Vivaldi 150 User manual

Johannus REMBRANDT 275 User manual

Johannus

Johannus REMBRANDT 275 User manual

Johannus classic 250 User manual

Johannus

Johannus classic 250 User manual

Johannus Opus 5 User manual

Johannus

Johannus Opus 5 User manual

Johannus WM-47 User manual

Johannus

Johannus WM-47 User manual

Johannus LiVE 2T-A User manual

Johannus

Johannus LiVE 2T-A User manual

Johannus Ecclesia T-250 User manual

Johannus

Johannus Ecclesia T-250 User manual

Johannus Opus 250 User manual

Johannus

Johannus Opus 250 User manual

Johannus OPUS 225 User manual

Johannus

Johannus OPUS 225 User manual

Johannus Opus 15 User manual

Johannus

Johannus Opus 15 User manual

Johannus Ecclesia User manual

Johannus

Johannus Ecclesia User manual

Johannus Vivaldi 35 User manual

Johannus

Johannus Vivaldi 35 User manual

Johannus WM-47 LDS User manual

Johannus

Johannus WM-47 LDS User manual

Johannus Vivaldi 370 User manual

Johannus

Johannus Vivaldi 370 User manual

Johannus Opus S User manual

Johannus

Johannus Opus S User manual

Johannus LiVE III User manual

Johannus

Johannus LiVE III User manual

Johannus WM?44 LDS Reference guide

Johannus

Johannus WM?44 LDS Reference guide

Johannus American Classic 770 User manual

Johannus

Johannus American Classic 770 User manual

Johannus Rembrandt 200 User manual

Johannus

Johannus Rembrandt 200 User manual

Johannus Vivaldi 15 User manual

Johannus

Johannus Vivaldi 15 User manual

Johannus Ecclesia T-25 User manual

Johannus

Johannus Ecclesia T-25 User manual

Popular Musical Instrument manuals by other brands

Funkey SP-561 user manual

Funkey

Funkey SP-561 user manual

thomann DP-275 GP BP user manual

thomann

thomann DP-275 GP BP user manual

Kawai CN17 Operation guide

Kawai

Kawai CN17 Operation guide

Yamaha PCY130 owner's manual

Yamaha

Yamaha PCY130 owner's manual

Roland LX-15 Brochure & specs

Roland

Roland LX-15 Brochure & specs

Yamaha Clavinova CVP-609 Reference manual

Yamaha

Yamaha Clavinova CVP-609 Reference manual

Casio celviano ap-700 user guide

Casio

Casio celviano ap-700 user guide

Yamaha PSR-E473 owner's manual

Yamaha

Yamaha PSR-E473 owner's manual

Modulus Quantum Series owner's manual

Modulus

Modulus Quantum Series owner's manual

Gear4music SDP-4 user manual

Gear4music

Gear4music SDP-4 user manual

HOMCOM 390-006 Assembly instruction

HOMCOM

HOMCOM 390-006 Assembly instruction

Xotic Guitars ProVintage Series owner's manual

Xotic Guitars

Xotic Guitars ProVintage Series owner's manual

Sadowsky MetroLine Series operating manual

Sadowsky

Sadowsky MetroLine Series operating manual

Bosendorfer CEUS user manual

Bosendorfer

Bosendorfer CEUS user manual

Yamaha Electone EL-17 owner's manual

Yamaha

Yamaha Electone EL-17 owner's manual

Alesis AHB-1 Assembly guide

Alesis

Alesis AHB-1 Assembly guide

Hotpoint RF512GP How to get the best

Hotpoint

Hotpoint RF512GP How to get the best

Yamaha DGX-530 manual

Yamaha

Yamaha DGX-530 manual

manuals.online logo
manuals.online logoBrands
  • About & Mission
  • Contact us
  • Privacy Policy
  • Terms and Conditions

Copyright 2025 Manuals.Online. All Rights Reserved.

Ecclesia D-35
Quick Reference Guide
Switch on:
Switch on the organ with the on/off switch (J) on the right next to the manuals.
Wait for a few seconds. Starting the control functions and the settings will take some time.
The lamps of the SET and 0 buttons light up and the settings appear on the display.
Overview of controls:
A
Memory lock
L
Manual choir
B
Pedal stops
M
Swell stops
C
Great stops
N
Choir stops
D
Reverb volume knob
O
On/Off switch
E
Reverb length knob
P
Intonations
F
Accessories
Q
Accessories
G
Display
R
Pre-programmed memory locations
H
Accessories
S
Memory bank generals
I
Rolltop cover lock
T
MENU piston
J
Manual swell
U
SET piston
K
Manual great
Accessories:
Chorus (CH): Is a mode for slightly detuning the organ stops for a broader and livelier sound.
Use the CH button to activate the Chorus.
Fix Accessories (FA): This is a mode for fixing accessories. As long as this button is enabled,
the couplers and tremulants can only be switched on and off manually.
Reeds Off (RO): This is a mode for switching off all reeds at once . No reeds can be enabled
as long as this button is pressed. When switching off this mode, the reeds that were on are
activated again. Enable the Reeds Off mode using the RO button.
General Crescendo pedal (CR): This is a mode for switching the General Crescendo pedal on
and off.
Volume controls:
Organ: You can adjust the overall volume of the organ with the ORGAN VOLUME control.
Expression pedals control the volume of Great/Pedal, the Swell and the Choir.
Acoustics: The acoustics volume can be continuously adjusted using the ACOUSTICS VOL.
control.
Change the registration
The 0 button cancels registrations at two levels:
Briefly press the 0 button: This cancels only the last change.
Press the 0 button for a long time: All registrations are cancelled.
Intonaties
The intonations group consist of:
Romantic (ROM.)
Symphonic (SYM.)
Baroque (BAR.)
Historic (HIS.)
1. Select a group by pressing the ROM, SYM, BAR or HIS button.
© 2010 Johannus Orgelbouw b.v.
Pre-programmed memory locations
Pre-programmed memory locations are available through the operating buttons PP to T. These
six memory locations have factory settings (presets) appropriate for the quiet pianissimo to the
loud tutti.
Retrieve a pre-programmed memory location
Press a pre-programmed memory location (PP-T). The active stops light up.
Setzergeheugen
Met behulp van het setzergeheugen kan met één knop een registratie actief gemaakt worden.
De setzergeheugen bestaat uit acht niveaus. Elk niveau heeft acht geheugenplaatsen. Deze
niveaus zijn op de display te zien (Mem:..). De setzergeheugenplaatsen zijn leeg bij aanvang en
zelf te programmeren. Capture memory
Using the capture memory, a registration can be activated with one button. The capture
memory consists of eight levels. Each level has eight memory locations. These levels are
shown on the display (Mem:..). The capture memory locations are initially empty and for the
user to be programmed. Programme a capture memory location
The current setting of the capture memory location will be lost.
1. Select the required stops.
2. Select a level (1-32) on the display using the - and + buttons.
3. Press the SET button. Hold the button.
4. Press the required memory location (1-8).
5. Release the SET button.
Retrieve a capture memory location
1. Use the - and + buttons to select the required level (1-32) on the display.
2. Press the required memory location (1-8). The active stops light up.
Adaptive Surround Reverb
Adaptive Surround Reverb offers you the possibility of choosing your own acoustic
environment. You have a choice of no less than 12 uni- que reverbs, allowing you to choose a
different reverb for each style and
intonation. Your organ comes with the following standard settings:
Romantic Town Church
Symfonic Basilica
Baroque Palace Hall
Historic Hill Church
When changing style and/or intonation, the chosen style, intonation and reverb will be shown
briefly on the display. Volume
Turn the VOLUME knob to change the volume of the reverb.
Length
Turn the LENGTH knob to change the length of the reverb. The length can be set per reverb.
For each reverb the last setting is saved.
Reverb
You can choose from 12 different reverbs. You can alter these per style and intonation.
1. Use the ROM, SYM, BAR (Style), SOLO and TRIO (intonation) knobs to activate the
style and intonation you wish to change the reverb for.
2. Press the MENU button.
3. Use the + and – buttons to obtain the desired reverb.
4. Push the SET button. The selected reverb has now been stored in memory. The ‘3D
Surround On/Off’ option will now appear on the display.
5. Use the + and – buttons to turn the 3D Surround on or off.
6. Press the SET knob. The selected 3D Surround setting has now been stored in memory
and will automatically appear in the main menu.
7. Press the MENU button to leave the Easy Menu.
External connections
The external connections are on the left under the console.
MIDI IN: This is an input for receiving MIDI codes from other devices.
MIDI MOD.: This is a programmable MIDI output for connecting a module or expander, for
example.
MIDI SEQ.: This is a non-programmable MIDI output for connecting a sequencer or PC (with
the optional Johannus Intonat program), for example.
AUX IN: This is a (stereo) input for playing the sound of an external device through the
amplifiers of the organ. For example, an expander connected to the organ through the MIDI
MOD. can be played through the instrument's loudspeakers.
AUX OUT: This is an output for connecting an external (stereo) amplifier.
EXT. REV.: This is an output for connecting Johannus external acoustics. This is a system that
imitates the spatial effect of a concert hall or cathedral.
PHONES: This connection for a (stereo) headphone is suited for a headphone with an
impedance of 30 Ω or more (see headphone specifications).
For further information see CD user manual.
© 2010 Johannus Orgelbouw b.v.