Jojo YBP750 User manual

VSD Booster Pump Range
Instructions for use
Features & Benefits
Easy to operate
Restart delay
Auto-rotation
1-year Quality Warranty
NRCS approved
Energy-ecient
Constant pressure
Ideal for solar systems
January 2023
Get the most out of your purchase!
• Add a JoJo Pump Cover to protect your pump from the elements and prolong its lifespan.
APPLICATIONS
Bathrooms
2
3
Misting
20
26
Pop up
5
6
Impact
2
3
Dishwasher
Yes
Yes
Washing Machine
Yes
Yes
or or
Pump
0.75kW
1.5kW

02 03
Variable Speed Drive (VSD) defined:
The speed at which the pump runs varies as per the
pressure requirements to ensure minimal energy is
being used.
• Unit intended for clean water usage, i.e. water
containing no solid particles, such as drinking water,
non-potable water piping systems, and irrigation.
• Unit suitable for use with water temperatures
ranging from 2 to 80 degrees celsius.
• The pump must be earthed with no strain placed on the electrical cable.
• All maintenance should be carried out with the power supply disconnected.
• The pump is designed for clean water use only, i.e. water containing no solid particles. Pumping muddy water
or water containing suspended solids will severely reduce the lifespan of the unit and falls outside of the
factory warranty.
• Carefully read the instructions before adjusting any settings. Please contact JoJo should you need assistance.
• Extending the cable will aect your factory warranty. Always make use of an approved extending plug adapter.
• The pump should be installed in a ventilated, undercover area to protect the unit against direct sunlight, rain and
spray from any irrigation system. A JoJo pump cover is recommended for best protection.
• The booster pump is equipped with a draining screw at the bottom of the suction/discharge casing. It is advised
to drain the unit when temperatures fall below 0°C.
Performance Curves
Important Information
JoJo pumps purchased from an approved JoJo retail outlet and/or distributor carry a 1-year
warranty from the date of purchase. In order to maintain your warranty, always ensure you install,
operate and maintain the pump as per the instructions provided in this manual.
Detailed T’s and C’s, as well as return policies and procedures are in the back of this manual.
1-year Quality Warranty
YBP1500
YBP750
BEST EFFICIENCY ZONE
Best eciency range
Performance table
INSTALLATION
The foundation should be solid enough to support the pump. It is recommended to
secure the unit by bolting it to a concrete or paved surface.
Before building the foundation, take the following into consideration:
• The placement of the pump incl. the direction of inlet/outlet.
• The height: ensure that the water level in the tank is higher than the suction
side of the pump.
Foundation
Mounting
Piping
• A level base is essential to ensure the pump shaft is aligned horizontally.
• The pump suction line and fittings must all be on a horizontal plane.
• The discharge line and fittings must be on a vertical plane.
• The suction and discharge pipes should be supported independently by utilising
pipe hangers and support blocks - this will prevent strain on the pump joints
and casing.
• Before making a connection, always check the pipe alignment to ensure it
is correct.
• The inlet and discharge pipe should align with the pump to ensure there are no
bends or kinks that might aect the flow.
• The inlet and discharge pipe/connections must correspond with the design
specifications of the pump as it may directly aect the eciency and power
consumption of the pump.
• The diameter of the suction and discharge pipe must be equal or greater than that
of the ports of the pump.
• When used as an alternative water supply for a home, install non-return
valves to ensure no back pressure to the municipal supply or the pump.
Pump specifications 0.75kW 1.5kW
Pump model YBP750 YBP1500
Motor power 0.75kW 1.5kW
Max. flow 66 lt/min 108 lt/min
Max. pressure 4.5 bar 6 bar
Max. fluid temperature 80 ˚C 80 ˚C
Max. ambient temperature 40 ˚C 40 ˚C
Max. suction lift 7m 7m
Flow range 0.75kW 1.5kW
Lt/min 13 to 40 lt 16 to 70 lt
Pressure range 0.75kW 1.5kW
Bar 2 to 3.5 bar 2 to 5 bar
Recommended suction pipes: Recommended discharge pipe:
0.75kW • HDPE (minimum 1 ” or 25mm)
• Helical coil reinforced flexible hose 1 ” or 25mm
Copper, HDPE or any SABS approved piping
(minimum 3/4 ” or 22mm)
1.5kW • HDPE (minimum 1 1/2 ” or 40mm class 6)
• Helical coil reinforced flexible hose 1 1/2 ” or 40mm
HDPE (minimum 1 1/2 ” or 40mm class 6)

04 05
PRIMING INSTRUCTIONS
IMPORTANT: always prime the pump before use to ensure proper functionality and to prevent
possible damage to any of the components.
01. Remove the priming screw located on top of the pump.
02. Fill the pump volute manually with water until it overflows. Note: this unit is equipped with a spring-loaded
non-return valve and will not prime automatically (even if connected to a tank).
03. Put the priming screw back in place. Ensure that there are no leaks.
02 03
OPERATING INSTRUCTIONS
SETTINGS
01. Ensure that the power supply cable is connected correctly.
02. The booster pump is designed to operate with a 230V single-phase power supply. Voltage variance is
maximum 10% up or down. Further variation will damage the electrical motor.
03. The suction and discharge piping should be of rigid characteristics, be able to withstand pressure of up to 6 bar,
be air tight on the suction side, and water tight on the discharge side.
IMPORTANT: changing the default settings
is not recommended, as it enables the unit
to respond optimally to potentially harmful
system conditions.
Direction
of supply
vertically up
parallel to
02. Press “SET” to skip between functions B01 to B05.
02.1 B01: START-UP PRESSURE
• When B01 is displayed and “SET” is pressed, the start-up pressure can be adjusted as a
percentage of the working pressure. The default ratio is set at 70%. Use commands “+”
or “-” to increase or decrease this ratio.
For example, working pressure set at 3.0 bar and ratio set at 70%:
3.0 bar x 0.7 = 2.1 bar
Once water usage has stopped, the pump will allow system pressure to drop to
2.1 bar before starting up.
02.2 B02: DIRECTION OF ROTATION
• Must ALWAYS be set to “00” to ensure the correct direction of rotation.
02.3 B03: DRY RUN PROTECTION
• When “B03” is displayed and “SET” is pressed, the screen will display a value between
0and 1.5 bar. The default is set at 0.15 bar and is the pressure at which the pump will
switch o when it runs dry or against low back pressure, for example, as caused by a
burst discharge pipe. Using “+” or “-” will increase or decrease this value. Note: it is
not recommended to change this default setting as it enables the unit to operate in
its highest eciency zone and most accurately mimics municipal pressure supply
conditions.
02.4 B04 and B05:
• “180” Dry run - DO NOT CHANGE THIS SETTING.
01. Press “MODE” until reaching the desired category.
01.1 Mode “UP” must always be selected for installations where the pump is installed on
ground level and supplies pressure parallel to, or vertically up into a system.
• The screen will display the working pressure (bar).
• Press “+” to increase the set pressure.
• Press “-” to reduce the set pressure.
• The new set point will flash five (5) times before saving the value.
• The recommended operating range is between 2 bar and 5 bar. Do not exceed 4 bar
for residential use.
This booster pump may operate safely for 1 to 2
minutes after dry run conditions have been logged.
Please follow the steps on the following pages to
set up your pump.
01

06 07
E01 Low voltage
supply (below
130V)
The supply voltage is too low.
This is generally a fault from
the local municipality and can
damage your pump.
Turn the pump o and disconnect it from the power
source. Proceed to contact a registered electrician to
inspect your power supply.
E02 High voltage
from supply
(above 280V)
The supply voltage is too high.
This is generally a fault from
the local municipality and can
damage your pump.
Turn the pump o and disconnect it from the power
source. Proceed to contact a registered electrician to
inspect your power supply.
E03 Pressure
transducer
disconnected/
faulty
Caused by a loose cable or
damaged pressure transducer.
• Check the transducer cable to see if it is damaged or
unplugged.
• If within the 12 month warranty period and the cable
is intact, return the unit to the supplier you purchased
it from, otherwise contact JoJo for further assistance.
E04 Motor
temperatures
exceeding
operating
limits
The pump is overheating.
This is generally due to poor
ventilation caused by installing
the motor fan end closer than
100mm from the nearest vertical
surface e.g. a wall or covering.
• Ensure that the motor is installed with sucient
spacing (min. 100mm) between a surface and the
motor fan to allow for sucient cooling.
• Ensure the motor is has sucient ventilation.
E08 Locked rotor Caused by objects such as
stones, plant matter, string,
sand, or mineral build-up
entering the system from the
supply side and lodging in the
pump casing, thus preventing
the impeller from rotating.
• Remove the suction and discharge piping and inspect
the inlet and outlet for any visible obstruction/s.
Remove the obstruction/s if visible.
• If within the 12 month warranty period and the error
code continues to display, return the unit to the
supplier you purchased it from, otherwise contact
JoJo for further assistance.
E09 Variable
speed drive
PC board fault
condition
Caused by power spikes, and
under voltage or over voltage that
damage the PC board. Continued
faults of this nature indicate
power grid instability and can
lead to permanent damage of
the electronic circuitry.
• IMPORTANT: this is not covered by the warranty.
• Please contact JoJo for further assistance. Even
though this is not covered by the warranty, we will
assess the pump to determine the extent of the
damage and advise whether a repair is possible.
E05, EO6, EO7, EO10 & EO11 -Not in use
If an error code appears on the screen, please refer to the below guide for more information.
TROUBLE SHOOTING GUIDE
JOJO PUMP WARRANTY
Please read this warranty in conjunction with the South African Consumer Protection Act 68 of 2008.
01. JoJo warrants its pumps to the original end user/purchaser to be free of defective materials and workmanship
under normal use for a period of 12-months from the date of purchase from authorised retailers and distributors.
To be eligible for warranty repair or replacement, the pump must be returned to the point of purchase during
and up to the expiry date of the warranty period. Proof of date of purchase is required.
02. Liability in terms of this warranty shall be limited to repair or replacement of the pump. Liability for all and any
other losses and/or subsequent damages suered are expressly excluded.
03. This warranty does not obligate JoJo to bear any cost of removal, installation, transportation, or other charges
which may arise in connection with a warranty claim.
03. Indicator lights and fault codes:
03.1 Mode “UP”:
• The “POWER” light will be illuminated.
• The “RUN” light will illuminate when the pump is operating.
• The “RUN” light will flash when the pump is operating but unable to reach the set
pressure. This is not unusual, as the application for household supply and irrigation
supply vary vastly in flow demand.
• The “LEAK” light will illuminate in the event of a pressure leak in the discharge line.
• If an error code appears on the screen, please refer to the trouble shooting guide on
page 7.
• Press the “HAND START/CHECK” button to reset all fault codes. Press again to resume
automatic operation.
• Operating under the “UP” mode will disable the “TIMING” light and function.
03.2 Mode “TIME”:
• “TIME” retains all settings of “UP” mode, but allows for the selection of a restart time.
For example, “3H” will start the pump every 3 hours without the system demanding an
automatic start. This function is important for applications where the unit may not be
required to operate for extended periods of time e.g. a holiday home, weekend retreat, etc.
• Daily starts keep the rotating equipment in good condition and prevents damage to
bearings.
03.3 Mode “DOWN”:
• Must ONLY be selected for installations where the pump is installed on the upper
level and supplying pressure parallel or vertically down into a system. Selecting this
option will reduce the overall pressure delivered by the pump to protect against over
pressurizing lower lying systems.
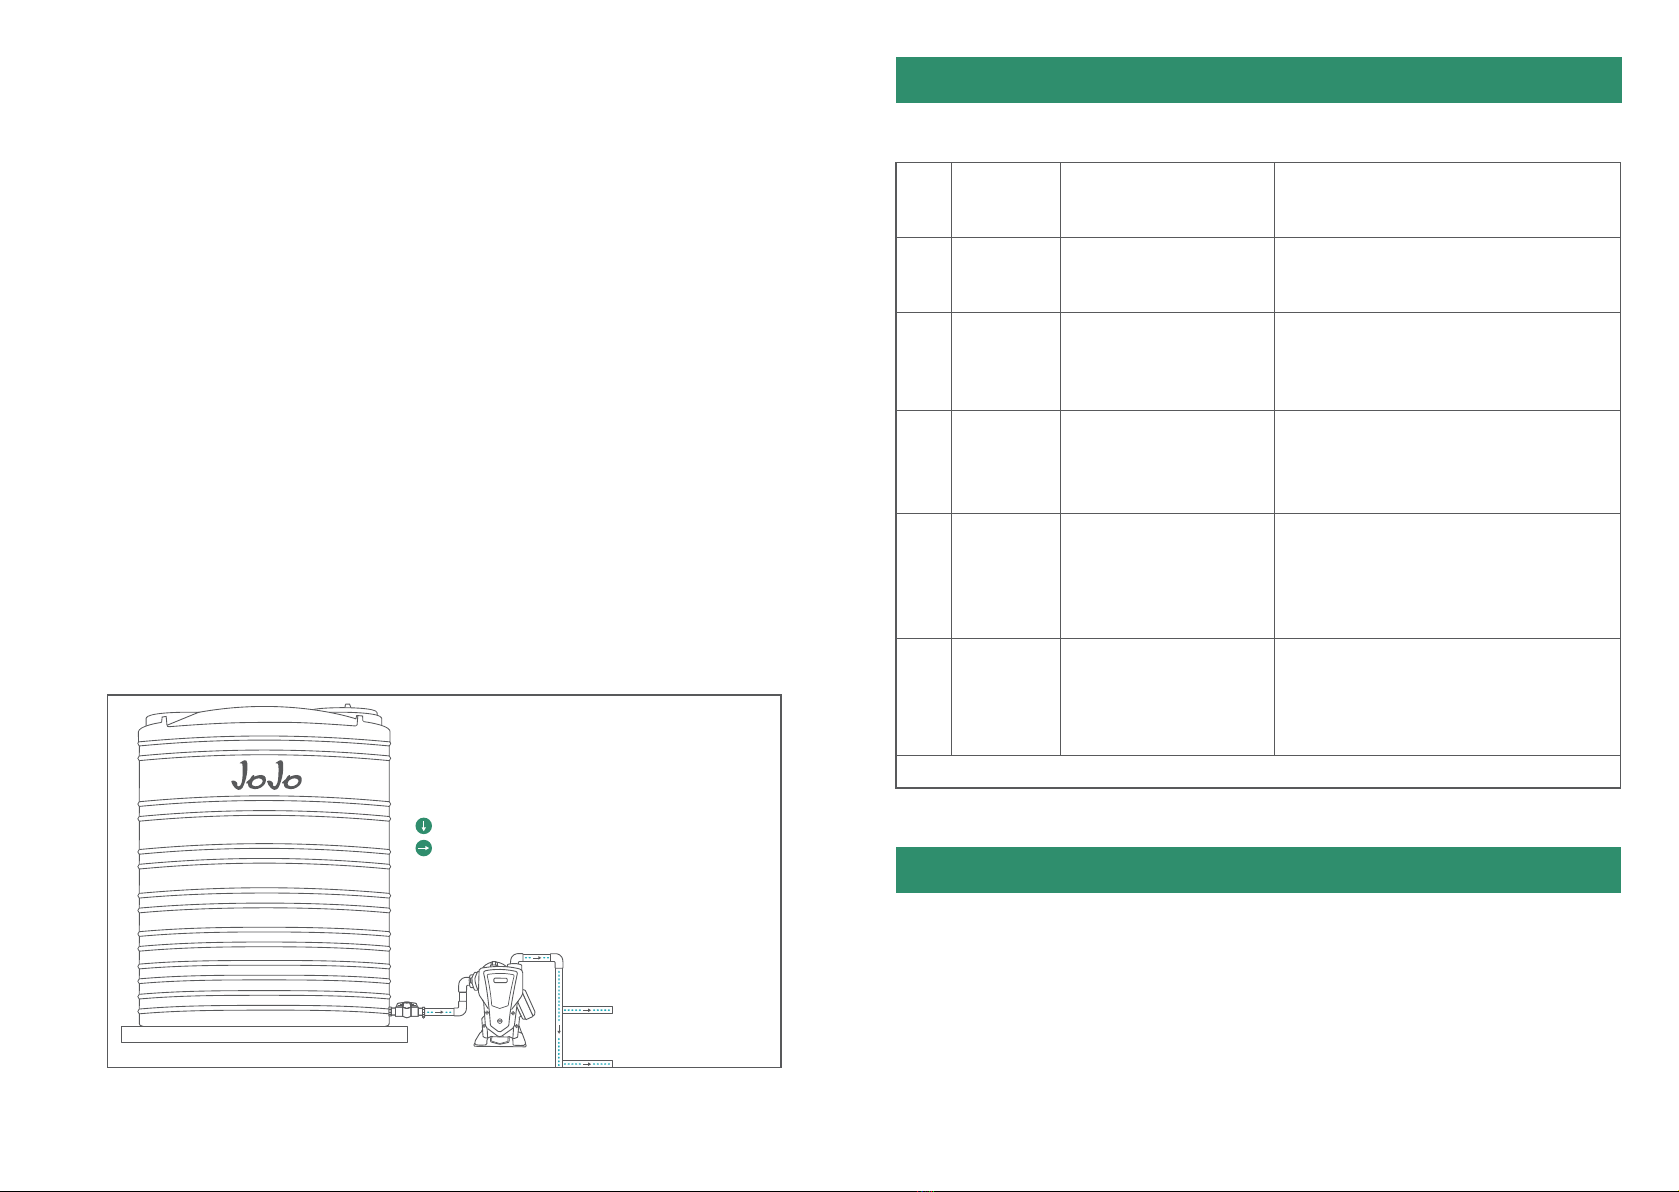
Direction
of supply
vertically down
parallel to

08
+27 11 695 8300 | www.jojo.co.za
Thank you for choosing JoJo, if there is anything that you are unsure
about or need assistance with, please do not hesitate to contact us.
Refunds
Within 5 days of purchase: as part of the cooling o clause (section 16 of the CPA), the pump may be returned for
refund, provided that it is still within the original packaging, unused, and in the original condition.
Within 10 days of purchase: the pump may be returned for refund or replacement if it does not meet the purpose
for which intended (section 20 of the CPA), provided that it is still within the original packaging, unused, and in the
original condition. In such instance the pump will be returned to JoJo for an evaluation, after which an inspection
report will be provided confirming whether it meets the necessary requirements for refund or replacement.
Returns/repairs
Within 12 months: should the pump not operate as specified, or cease to do so within 12 months after being
purchased, the return procedure is as follows:
• Return the pump to the store from which purchased, together with the proof of purchase (to confirm that it is
within the 12-month warranty period). Please ensure that the condition of the pump is as specified in section
four of this warranty, and that it is still packed in the original packaging.
• The store will send the pump to the nearest JoJo factory for an evaluation.
• At JoJo’s election, (a) the pump will either be repaired (if repairable) which repairs shall be and warranted for
three months, or the balance of the 12-month period, whichever period is longer; or (b) the pump will be
exchanged (this only applies if the pump is non-repairable, and a replacement pump in similar visual condition
will be provided by JoJo).
• The evaluation (once the pump is sent back to JoJo), repair/exchange and delivery to the store will take place
within 14 days.
Our return/repair request form is available on our website at www.jojo.co.za.
RETURN POLICIES AND PROCEDURES
04. The warranty shall not apply to repairs or service necessitated by normal wear and tear or for lack of reasonable
and proper maintenance.
This warranty does not apply if in the sole judgement of JoJo the product or any of the components have been;
(a) Tampered with, disassembled (unless as per JoJo’s specific instructions relevant to peripheral pumps and
clearly displayed on fan cover), repaired or altered (except as may be pre-authorised by JoJo in writing);
(b) Subjected to misapplication, misuse, neglect or accident; or
(c) Used to pump anything for which the pump was not designed. Such use may compromise or harm the
pump and/or any of its components.
IMPORTANT: this is the exclusive warranty given by us and no other warranty or guarantees,
expressed or implied shall be of any force or eect. No distributor or other person is authorised
to assume any liability or obligated for JoJo other than expressly provided herein.
This manual suits for next models
1
Table of contents
Other Jojo Water Pump manuals
Popular Water Pump manuals by other brands

Ribimex
Ribimex Rubiland PRJET41P User and maintenance manual

Pentair
Pentair MYERS VRS20A-21 Installation and service manual

Pfeiffer Vacuum
Pfeiffer Vacuum HiPace 300 P operating instructions

Davey
Davey PowerMaster Eco-Series Installation and operating instructions

DROPSA
DROPSA 0012100 Guide

Edwards
Edwards nEXT 240D instruction manual

Power-flo
Power-flo PFSE1524 Series Installation, service & parts manual

Kranzle
Kranzle Ventos 80 Use and maintenance

Aussie Pumps
Aussie Pumps QP Installation, operation and maintenance manual

Franklin
Franklin VFD 1 quick start guide

Jebao
Jebao MCP Series user manual

EINHELL
EINHELL GC-PW 16 Original operating instructions