0504
IN STALLATION
The foundation should be solid enough to support the pump. It is recommended
to secure the unit by bolting it to a concrete or paved surface.
Before building the foundation, take the following into consideration:
• The placement of the pump incl. the direction of inlet/outlet.
• The height: ensure that the water level in the tank is higher than the
suction side of the pump.
• A level base is essential to ensure the pump shaft is aligned horizontally.
• The pump suction line and fittings must all be on a horizontal plane to
ensure there are no high points in the pipeline where air can get trapped.
• The discharge line and fittings must be on a vertical plane.
• The suction and discharge pipes should be supported independently by
utilising pipe hangers and support blocks - this will prevent strain on the
pump joints and casing.
• Before making a connection, always check the pipe alignment to ensure it
is correct.
• The inlet and discharge pipe should align with the pump to ensure there are
no bends or kinks that might aect the flow.
• The inlet and discharge pipe/connections must correspond with the design
specifications of the pump as it may directly aect the eciency and power
consumption of the pump.
• The diameter of the suction and discharge pipe must be equal or greater than
that of the ports of the pump.
• When used as an alternative water supply for a home, install non-return
valves to ensure no back pressure to the municipal supply or the pump.
Important information
• The pump must be earthed with no strain placed on the electrical cable.
• All maintenance should be carried out with the power supply disconnected.
• The pump is designed for clean water use only, i.e. water containing no solid particles. Pumping muddy
water or water containing suspended solids will severely reduce the lifespan of the unit and falls outside of
the factory warranty.
• Extending the cable will aect your factory warranty. Always make use of an approved extending plug adapter.
• The pump should be installed in a ventilated, undercover area to protect the unit against direct sunlight, rain
and spray from any irrigation system. A JoJo pump cover is recommended for best protection.
Foundation
Mounting
Piping
After priming the pump, do the following to test it and ensure proper operation:
02. Insert the plug into the main power supply and
switch the plug on. The power indicator light
of the flow controller must be illuminated.
01. Check that the ball valve (a) between the tank
and the pump is open and that the discharge
valve (b) on the pump is closed. Note: it is always
advised to install a ball valve between pump and
tank for maintenance purposes.
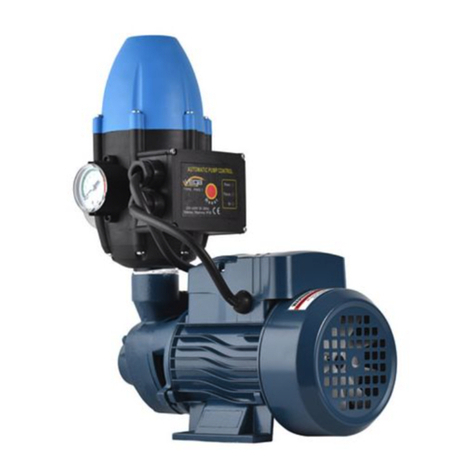
AUTOMATIC PUMP CONTROL
TYPE: PS02.1
220 - 240 50 / 60 Hz
10Amax. 10BARMAX. IP 65
POWER
FAILURE
ON
RESET
PRIMING INSTRUCTIONS
OPERATING INSTRUCTIONS
b
a
IMPORTANT: always prime the pump before use to ensure proper functionality and to prevent
possible damage to any of the components.
01. Ensure that the ball valve between the tank and pump is open.
02. To allow the air in the pump to escape and the pump to be filled with water by gravity feed, unscrew the
priming screw. The suction line and pump should slowly fill with water until a steady flow is visible from the
air valve. Note: this also ensures that all air has been removed from the casing and suction piping.
03. If after a few seconds water is not visible from the air valve, fill the pump volute manually until it is overflowing.
04. Put the priming screw back in place and then tighten. Do not over tighten.
02 0403
Recommended suction pipes:
HDPE (minimum 1” or 25mm)
Helical coil reinforced flexible hose 1” or 25mm
Recommended discharge pipe:
Copper, HDPE or any SABS approved piping
(1” or 25mm)


