Sicherheit safety
QS
Jokey Plastik Sohland GmbH Service Industriestr. 4 D - 02689 Sohland / Spree
Tel.: +49(0)35936 / 36-0 Tel. Service: +49(0)35936 / 36-2265 email: js.service@jokey.com
Fax: +49(0)35936 / 36-2222 Fax Service: +49(0)35936 / 36-2281 http://www.jokey.com
Bei Reklamationen diesen Abschnitt (Kopie) zusammen mit dem Kaufbeleg an Jokey schicken.
If there is a problem send this coupon (or copy) together with the receipt back to Jokey.
15141 TRAVA LED / 01 / 2015
Jokey Service
Pflege, Reinigung, Garantie
Care, cleaning, guarantee
Pflege, Reinigung: Oberflächen nur mit einem feuchten Tuch reinigen, evtl. milden Allzweck-
reiniger verwenden. Keine scheuernden oder lösungsmittelhaltigen Reinigungsmittel oder
scheuernden Schwämme benutzen. Alu-Schränke: keine Säuren! Kristallglasspiegel nur mit
einem weichen Tuch reinigen. Hartnäckigen Schmutz hier mit klarem Wasser und ausge-
wrungenem Leder beseitigen. Bitte für Spiegel niemals chemische Reinigungsmittel verwenden.
Garantie: Für unsere Erzeugnisse gewähren wir ab Verkaufstag eine Garantie von 2 Jahren.
Ausgeschlossen von dieser Garantie sind Schäden durch nicht fachgerechte Montage,
unsachgemäße Behandlung sowie Verschleißteile wie Lampen und Starter. Bei Reparaturen
bitte nur Originalteile verwenden, Elektroreparaturen nur vom Elektrofachmann ausführen
lassen, keine Änderungen am Erzeugnis vornehmen ! Ansonsten müssen wir jede Haftung
ablehnen, der Garantieanspruch geht verloren. Unser Kundendienst hilft Ihnen bei Problemen.
Änderungen und Irrtümer in dieser Anleitung vorbehalten.
Care and Cleaning Only use a damp cloth to clean the surfaces, if necessary with a mild
all-purpose cleaning liquid. Do not use any scouring detergents, detergents that contain
solvents or abrasive sponges. Aluminium cabinets: no acids! The crystal glass mirror may
only be cleaned with a soft cloth. Remove stubborn dirt with clear water and a wrung-out
chamois leather. Please never use chemical detergents on the mirrors.
Guarantee: We guarantee our products for 2 years from the date of purchase. Damage
caused by improper handling or incorrect installation and expendable parts such as bulbs
and starter switches are excluded from the guarantee. Only genuine parts may be used for
repairs. Electric repairs may only be done by qualified electricians. Do not make any
alterations to the product. Otherwise, we shall cease to be liable and warranty claims will not
be accepted. Our customer support will help you have any problems. We are always grateful
Subject to alterations. Errors in this manual excepted.
Für Hinweise und Anregungen sind wir immer offen.
for information and suggestions from customers.
®
15141
TRAVA
LED
D Bitte unbedingt beachten! Die Montage dieses Erzeugnisses
nur von einem autorisierten Elektrofachmann unter Beachtung der
geltenden Vorschriften,v.a. auch der Vorschrift VDE 0100,Teil 701 bzw.
der jeweiligen nationalen Vorschriften vornehmen lassen. Bei Nicht-
beachtung erlöschen unsere Garantie- und Haftungsverpflichtungen,
es kann Lebensgefahr bestehen. Das beigelegte Befestigungsmaterial
ist Standardmaterial und nicht für jeden Untergrund geeignet. Zur
sicheren Befestigung verwenden Sie bitte Spezialbefestigungs-
material. Vor Beginn der Arbeiten und vor dem Lampenwechsel:
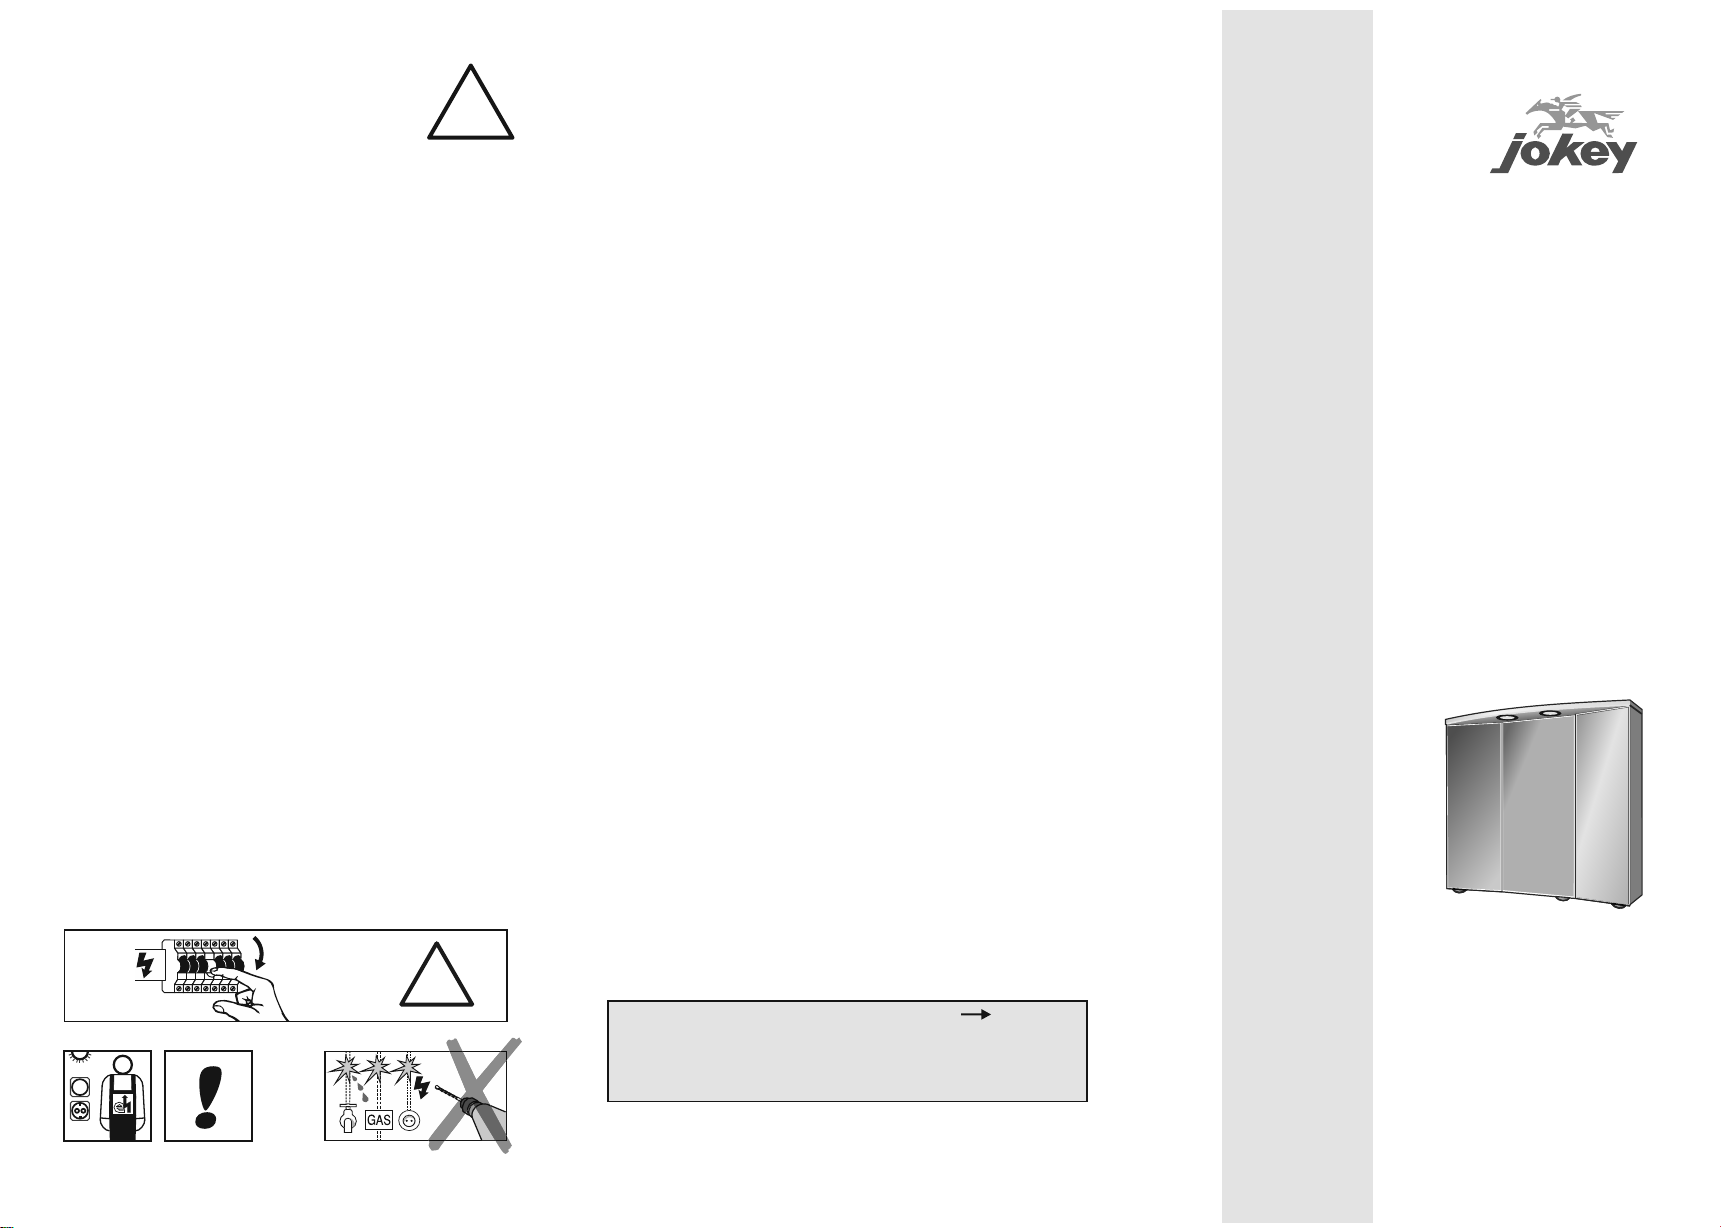
Schrank vom Netz trennen (Sicherung !). Elektroanschluß (auf der
Schrankrückseite): Anschlussleitung des Spiegelschrankes muss in
einer Wandanschlußdose angeschlossen werden (siehe Bild, Klemme:
z.B. Adels Typ 500). Die Mantelisolierung des Anschlusskabels soll bis
in die Dose hineinreichen. Einzelleitungen dürfen keinesfalls eine
metallische Rückwand (z.B. Alutapete) oder das Schrankgehäuse
(Aluschrank) berühren können. Schutzleiter des Spiegelschrankes
(grün/gelb) mit dem Schutzleiter (grün/gelb) der Netzleitung verbinden.
Die Anschlußleitung darf nicht gequetscht werden. Nach der Wand-
montage unbedingt festen Sitz des Schrankes auf den Haken prüfen !
Schutzbereich um Badewanne und Dusche beachten
(Mindestabstand: 60 cm). .
GB Essential points: This unit may only be installed by an
authorised and qualified electrician in conformance to the established
regulations (GB: BS 7671). Any violation of this requirement will invali-
date our warranty and liability obligations and may endanger life. The
enclosed mounting material is standard and not suitable for every
base. Please use special mounting material to ensure that the unit
hangs securely. Turn off the electricity before beginning (fuse box!).
Electrical connection (on the rear of the cabinet): must be led into a
wall connection socket (fig. 3).The external insulation on the connection
cable must extend into the cabinet. It is essential to ensure that single
conductors cannot come into contact with any metal (e.g. aluminium
wallpaper, metal tubes, metal wall of the cabinet ...). The protective
earth conductor (green/yellow) on the mirror cabinet must be connected
to the protective earth conductor (green/yellow) in the mains cable!
The connection lead may not pinched. Once the cabinet is affixed
to the wall, it is essential to make sure that it hangs securely. Leave a
safety area around the bath and shower (minimum distance of 60 cm).
®
!


