Joovv Duo User manual

User Manual
Mini • Solo • Duo • Max •Quad •Elite
JOOVVSOCIALJOOVVSOCIALJOOVV.COM

© Copyright Joovv, Inc. All rights reserved.

Corporate Office
Joovv, Inc.
940 Calle Amanecer, Suite D
San Clemente, CA 92673
Customer Service
Email: [email protected]
Web: www.joovv.com
Setup: www.joovv.com/setup
Getting Started:
Introduction Section 1
Treatment Guidelines Section 2
Testimonials Section 3
Setup Guides:
Joovv Solo or Mini Section 4
Joovv Duo Section 5
Joovv Max Section 6
Joovv Quad Section 7
Joovv Elite Section 8
Other Information:
Troubleshooting Guidelines Section 9
Frequently Asked Questions Section 10
General Information Section 11
TABLE OF CONTENTSTABLE OF CONTENTS

Welcome to the Joovv family! You’ve chosen the
only device that was purposefully designed to
provide the most optimal light therapy
experience possible.
Your Joovv delivers clinical-grade irradiance at
both 660 nm (visible red light), 850 nm (non-
visible near infrared light), or a combination of
both. These light wavelengths have been
scientifically proven to provide therapeutic
effects.
Your Joovv works by emitting red and near
infrared light within a certain range of
therapeutic wavelengths and intensity. These
treatments penetrate your body to generate a
number of health benefits.
How Joovv Works
Many of these benefits happen because red and
near infrared light activates various metabolic
pathways, leading to increased production of
ATP (adenosine triphosphate), enhanced cellular
signaling, and elevated protein synthesis.
Red and near infrared light therapy has been
proven to be effective for a wide range of health
issues, including, but not limited to the following:
• Muscle recovery
• Athletic performance
• Joint pain and arthritis
• Sexual performance
• Mental clarity
• Relaxation and sleep
The light energy emitted by Joovv should be used
on bare skin for best results.
Joovv is indicated for the relief of muscle spasms,
minor muscle & joint aches, as well as pain &
stiffness associated with arthritis.
FDA Indication
INTRODUCTION
1

Photobiomodulation (PBM), or light therapy, is
like food for your cells. Unfortunately, most
people do not get the proper amount of healthy
light their bodies need for optimal wellbeing.
Because of this, their bodies may respond with
detox-like symptoms. So if you're experiencing
these types of effects, we recommend starting
out with 1-2 minute treatments per area, slowly
working up to a 10-minute session(s) over the
course of 2-3 weeks as your body acclimates to
the therapy.
As always, if you have any concerns regarding
the use of photobiomodulation, we recommend
consulting with your trusted healthcare provider.
The amount of time required to see benefits and
improvements depends on your health goals.
The cellular health benefits of light therapy have
been thoroughly proven across hundreds of
clinical studies, so trust that your body is
benefiting from every therapy session. But there
are many factors that may affect how quickly
you experience improvements in your symptoms.
Some people will see benefits within a matter of
days. But overall improvements in health or skin-
related issues can take 8-12 weeks of consistent
use. By using your Joovv on a daily basis, you
can maximize your body’s rate of healing.
Results and Expectations
Your Joovv comes with everything you need to
access the amazing health benefits of light
therapy. For the best results, please read this
manual completely before using your Joovv.
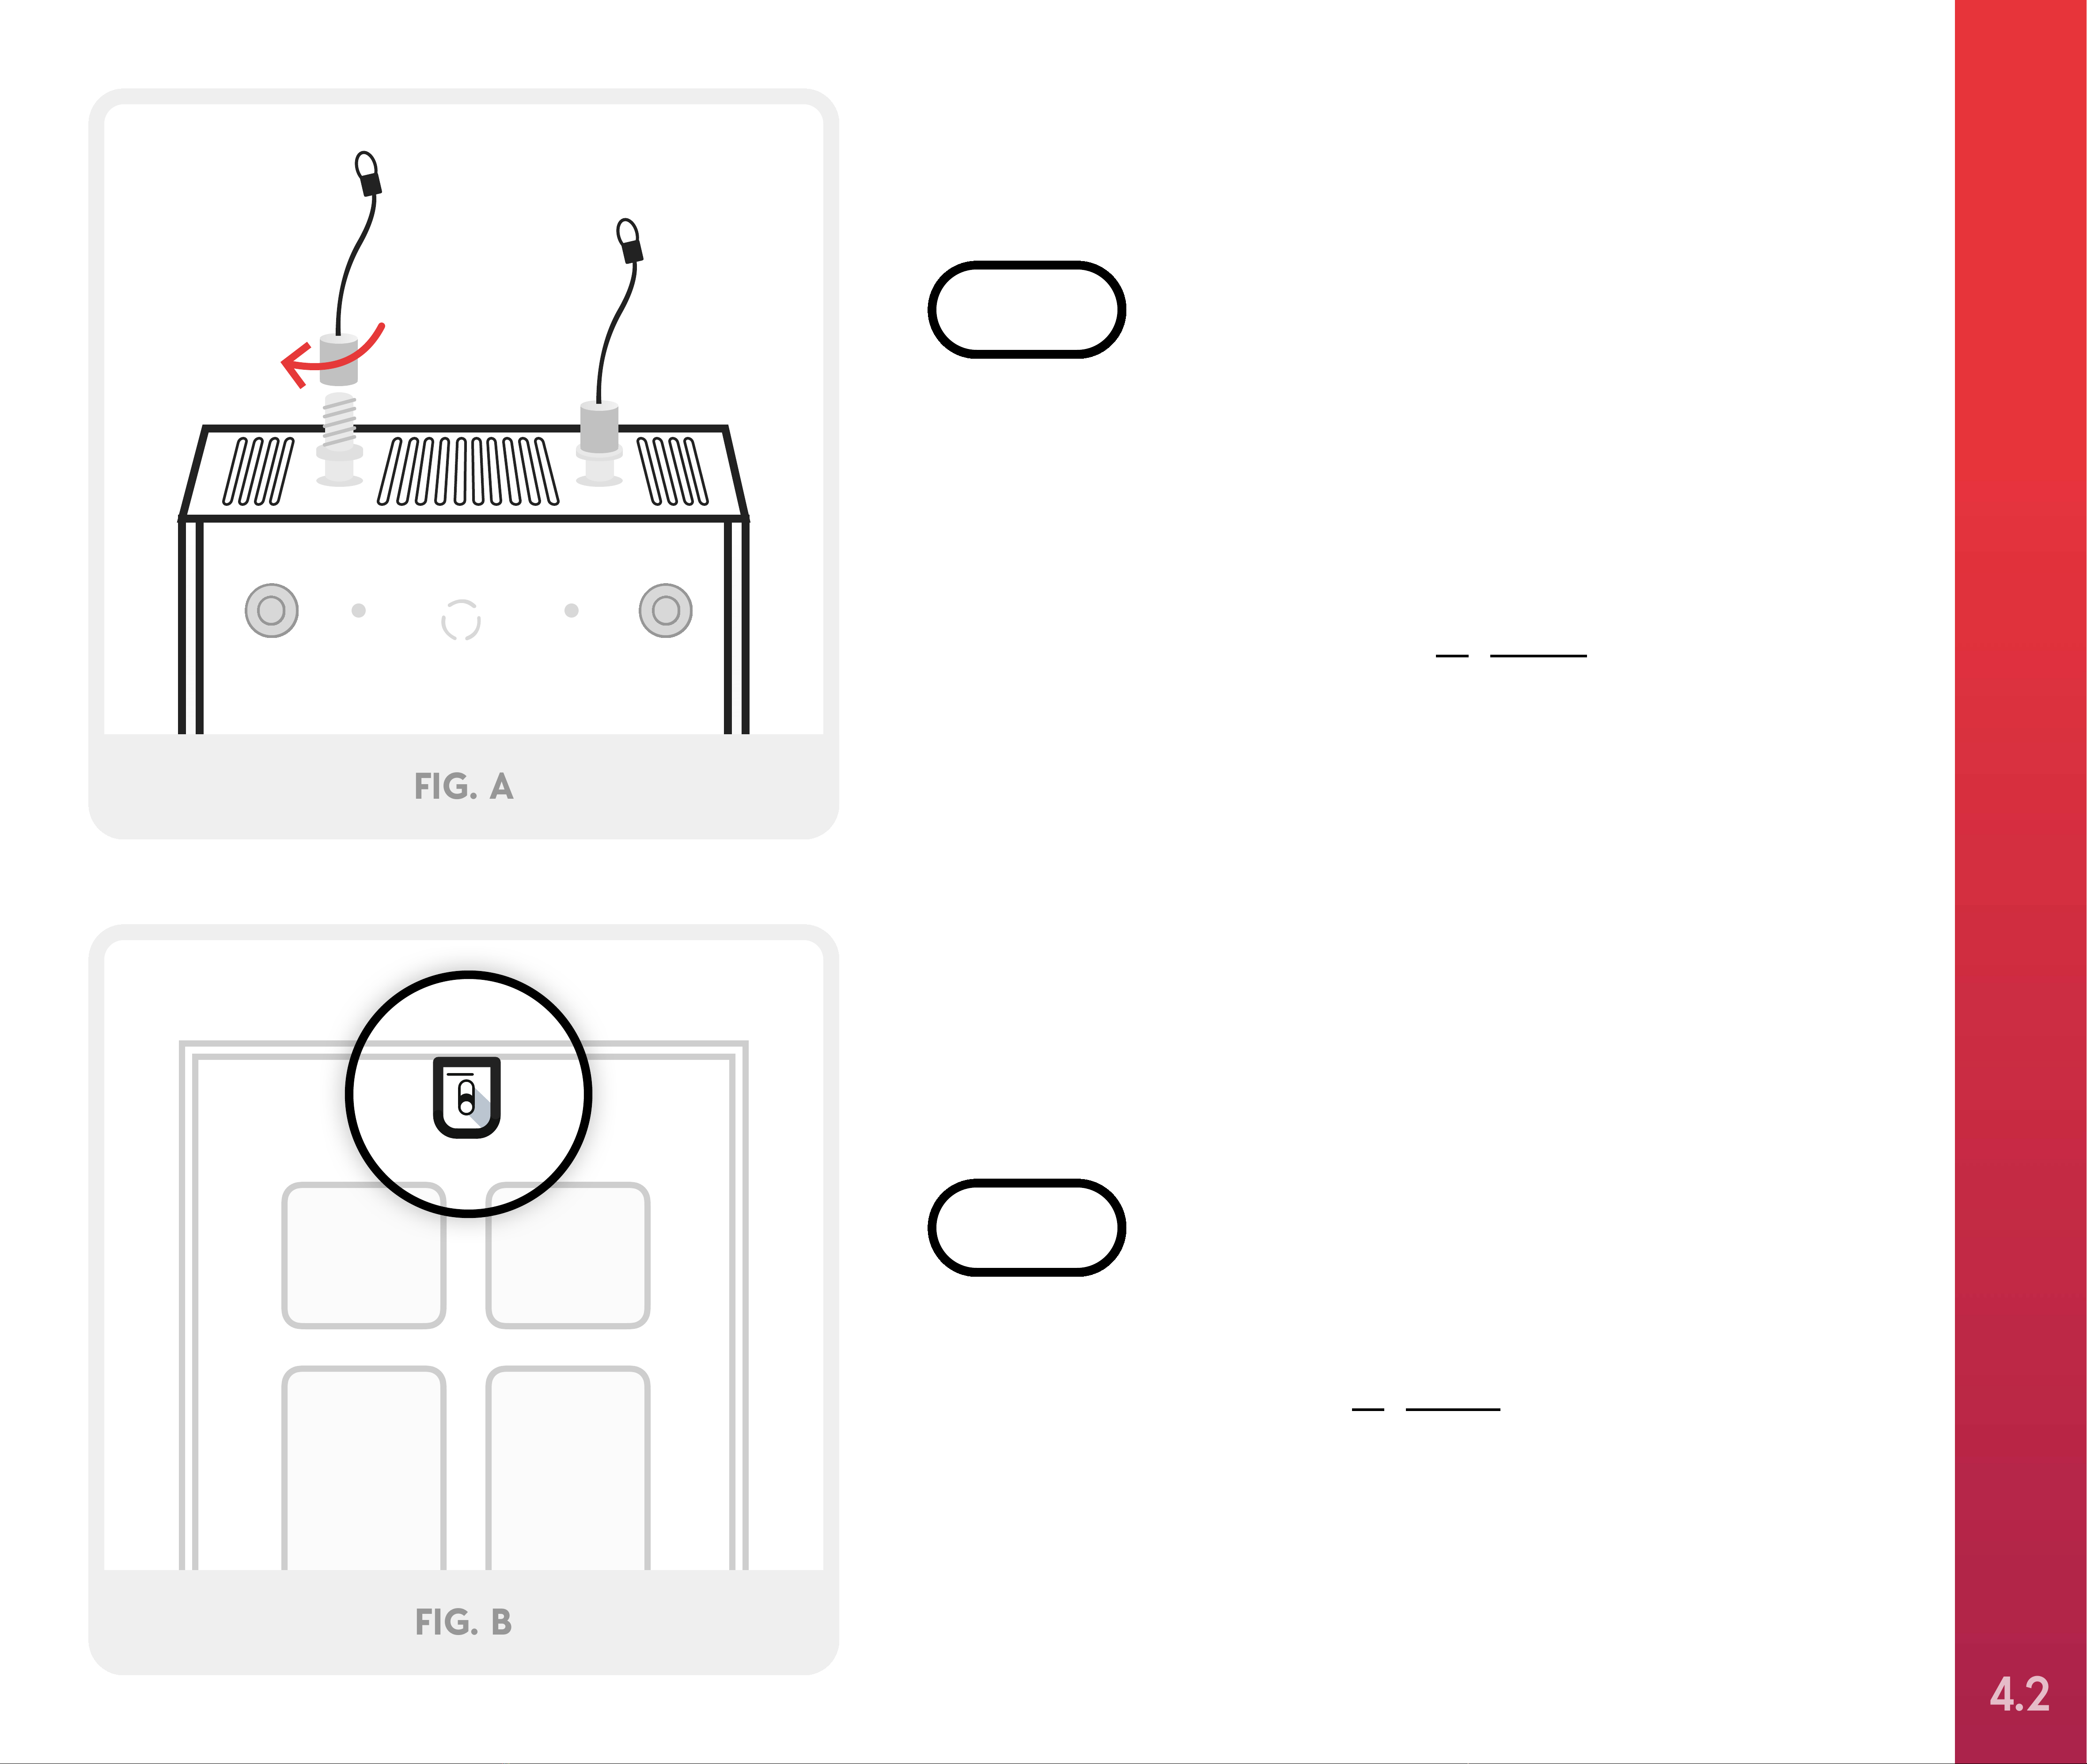
Getting Started with Joovv
Prior to using your Joovv, please check for
photosensitivity. To do this, expose an area of
your forearm 6 inches away from the device for
3 minutes. If you experience any redness or
discomfort, you might be photosensitive and we
recommend consulting with your doctor or
healthcare provider prior to using your Joovv.
Light Sensitivity
Joovv delivers medical-grade power—also called
irradiance—of red and near infrared light. For
optimal results, we recommend positioning your
Joovv approximately 4 to 6 inches from the area
on your body you intend to treat. The
recommended default treatment time is 10
minutes per area, which will result in a clinically-
proven dose of energy for both superficial and
deep tissues.
Treatment Instructions
It’s important to be consistent with your light
therapy treatments. That’s why we recommend
using your Joovv every day, or at least 5 times
per week. For additional health benefits,
including pain relief from aches and strains, up
to 3 treatments per day can be helpful.
Consistency is Key
TREATMENT GUIDELINES
2

"Photobiomodulation has a wide range of clinically-proven health
benefits. Everything from enhanced muscle recovery, to increased sexual
libido, to improved skin health—and much more. After using the Joovv for
close to 2 years, it's the only light therapy device I'd ever recommend. Give
it a try—you won't be disappointed."
- Ben Greenfield, Voted America’s Top Personal Trainer
"The research supporting light therapy is shockingly robust, and my own
experience matches up with what is documented in scientific literature. In
particular, using Joovv has resulted in improved energy, markedly reduced
pain, elevated mood, and improved skin. As you can imagine, I'm a huge
fan—and can't recommend this product enough!"
- Dr. Sarah Ballantyne, Medical Biophysicist and New York Times Best-Selling Author
⋆⋆⋆⋆⋆
“Less muscle soreness
after exercise and am
now sleeping like a
log.”
Rebecca D.
⋆⋆⋆⋆⋆
“The Joovv has
improved my lower
back pain and my skin
is looking so much
better!”
Julie L.
⋆⋆⋆⋆⋆
More energy, better
libido, and looking
better. Absolutely
great light therapy
product.
Olli S.
⋆⋆⋆⋆⋆
"I love the Joovv! It
feels like my own
personal superhuman
charger."
Tim F.
TESTIMONIALS
3

Setting Up Your
Joovv Solo or Mini
If you’d prefer instructional setup videos, please visit: www.joovv.com/setup
!
4

1 x Mini/Solo Device 1 x Power Cord
2 x Threaded Posts 2 x Braided Steel Cables - 90mm
1 x M5 Allen Wrench 1 x Instruction Manual
JOOVV SOLO & JOOVV MINI
1 x Door Hook 1 x Height-Adjusting Pulley
DOOR MOUNTING KIT
Parts List - Door Mount
For instructions on how to set up your Joovv Mini with the Mini Stand, please refer to
the online Setup page at www.joovv.com/pages/setup
!Approximate setup time: 15-30 minutes 4.1

Place your Solo or Mini face down on a scratch-free
surface. Next, screw in the threaded posts to the top
of the device and hand-tighten with the included
Allen wrench. Then, screw the braided cables to the
threaded posts, as shown in Figure A.
STEP 1
FIG. A
Hang the included custom hook on any standard-
sized door, as shown in Figure B.
STEP 2
FIG. B
SETTING UP YOUR JOOVV SOLO OR MINI
4.2

Connect the braided cables to the snap link attached
to the height-adjusting pulley. Then, connect the
snap link on the opposite end directly to the door
hook, as shown in Figure C.
STEP 3
FIG. C
To raise your Solo or Mini to your desired height, pull
down on the loose cable while supporting the device
with your opposite hand, as shown in Figure D.
Be sure to adequately support the device while
raising and lowering it with the height-adjusting
system.
STEP 4
FIG. D
SETTING UP YOUR JOOVV SOLO OR MINI
4.3

To lower your Solo or Mini, push up on the lever on
the height-adjusting pulley while supporting the
device with your opposite hand, as shown in Figure E.
Be sure to adequately support the device while
raising and lowering it with the height-adjusting
system.
STEP 5
FIG. E
Plug the power cord into the male power socket
located on the back of the device and plug the other
end into a wall outlet. Next, turn the pairing switch
to “Neutral mode” and turn the power switch on, as
shown in Figure F.
STEP 6
Lead Mode
Neutral
Follow Mode
FIG. F
SETTING UP YOUR JOOVV SOLO OR MINI
4.4

To adjust the treatment time, press the “Time”
button on the control panel. This will add time
in one-minute increments up to 20 minutes.
The timer will cycle back to 1 minute after the
time exceeds 20 minutes on the display.
STEP 7
Remember that near infrared LEDs emit light
that is NOT visible to the naked eye.
The default wavelength mode utilizes both red
and near infrared wavelengths. After pausing
your treatment session, you can change the
mode to use only the red or near infrared LEDs
by selecting the “Mode” button on the control
panel. The green indicator light will illuminate
indicating which wavelength configuration is
selected.
STEP 8
Your Joovv’s cooling fans will run for
5 minutes after the treatment session is
complete to cool the LEDs.
To start your treatment session, press the
“Play/Pause” button once. You can pause your
treatment at any time by pressing the “Play/
Pause” button a second time. Resume your
treatment by pressing the “Play/Pause” button
again.
That’s it—you’re ready to start Joovvin’!
STEP 9
SETTING UP YOUR JOOVV SOLO OR MINI
4.5

Setting Up Your
Joovv Duo
If you’d prefer instructional setup videos, please visit: www.joovv.com/setup
!
5

2 x Joovv Solo Devices 1 x Power Cord
4 x Threaded Posts 2 x Braided Steel Cables - 90mm
1 x M5 Allen Wrench 1 x Instruction Manual
JOOVV DUO
1 x Door Hook 1 x Height-Adjusting Pulley
DOOR MOUNTING KIT
1 x Power Patch Cord - 120cm
PATCH CORD
Parts List - Door Mount
!Approximate setup time: 35-40 minutes 5.1

Place each Solo face down on a scratch-free surface
and align, as shown in Figure A.
STEP 1
Next, screw in the threaded posts to the tops of both
Solos and hand-tighten with the included Allen
wrench. Then, screw the braided cables onto the
threaded posts, as shown in Figure A.
STEP 2
#1 Lead Mode
#2 Follow Mode
Lead Mode
Neutral
Follow Mode
FIG. A
(2 people required)
SETTING UP YOUR JOOVV DUO
5.2

Next, hang the door hook on any standard-size door,
as shown in Figure B.
STEP 3
Oversized doors may require a different hook.
FIG. B
Remove one of the snap links from the height-
adjusting pulley. Next, connect the braided cables of
#1 Solo to the snap link. Then, attach the snap link
and #1 Solo to the door hook, as shown in Figure C.
The height-adjusting pulley is only needed for
oversized doors.
STEP 4
FIG. C
(2 people required)
SETTING UP YOUR JOOVV DUO
5.3

To connect #2 Solo, lift it into position below #1 Solo
that is already in place. Line up the threaded posts
with the holes in the end caps of #1 Solo. Then,
insert threaded posts into the holes, and slide
forward to lock in place, as shown in Figure D.
STEP 5
FIG. D
(2 people required)
SETTING UP YOUR JOOVV DUO
5.4

Plug the power cord into #2 Solo. Next, connect the
power patch cord from the male socket on #1 Solo to
the female socket on #2 Solo, as shown in Figure E.
STEP 6
#1 Lead Mode
#2 Follow Mode
FIG. E
(2 people required)
SETTING UP YOUR JOOVV DUO
5.5

Locate the pairing switch on #1 and #2 Solos. Turn
the switch on #1 Solo to “Lead Mode” and to “Follow
Mode” on #2 Solo, as shown in Figure F.
If you don’t wish to connect your devices via
Bluetooth, follow the instructions included with the
Hardwire Pairing kit.
Connect the power cord from #2 Solo into a wall
outlet. Then, turn on the power switches on both
Solos and both Solos will pair automatically.
Follow devices will show “No” on the display until
successfully paired with a lead device. Once paired,
the display will change to ":".
Lead Mode
Neutral
Follow Mode
Lead Mode
Neutral
Follow Mode
#1 Lead Mode
#2 Follow Mode
FIG. F
(2 people required)
5.6

Once paired, #1 Solo will display the treatment
time and #2 Solo will display a colon “:”. To
adjust the treatment time, press the “Time”
button on the control panel. This will add time
in one-minute increments up to 20 minutes.
The timer will cycle back to 1 minute after the
time exceeds 20 minutes on the display.
STEP 9
Remember that near infrared LEDs emit light
that is NOT visible to the naked eye.
The default wavelength mode utilizes both red
and near infrared wavelengths. After pausing
your treatment session, you can change the
mode to use only the red or near infrared LEDs
by selecting the “Mode” button on the control
panel. The green indicator light will illuminate
indicating which wavelength configuration is
selected.
STEP 10
Your Joovv’s cooling fans will run for
5 minutes after the treatment session is
complete to cool the LEDs.
To start your treatment session, press the
“Play/Pause” button once. You can pause your
treatment at any time by pressing the “Play/
Pause” button a second time. Resume your
treatment by pressing the “Play/Pause” button
again.
That’s it—you’re ready to start Joovvin’!
STEP 11
(2 people required)
SETTING UP YOUR JOOVV DUO
5.7
This manual suits for next models
5
Table of contents
Other Joovv Personal Care Product manuals