manuals.online logo
Brands
  1. Home
  2. •
  3. Brands
  4. •
  5. Jordan Valve
  6. •
  7. Controllers
  8. •
  9. Jordan Valve STERIFLOW CSDT Series Installation and operating instructions

Jordan Valve STERIFLOW CSDT Series Installation and operating instructions

I & M CSDT Series
Installation & Maintenance Instructions for
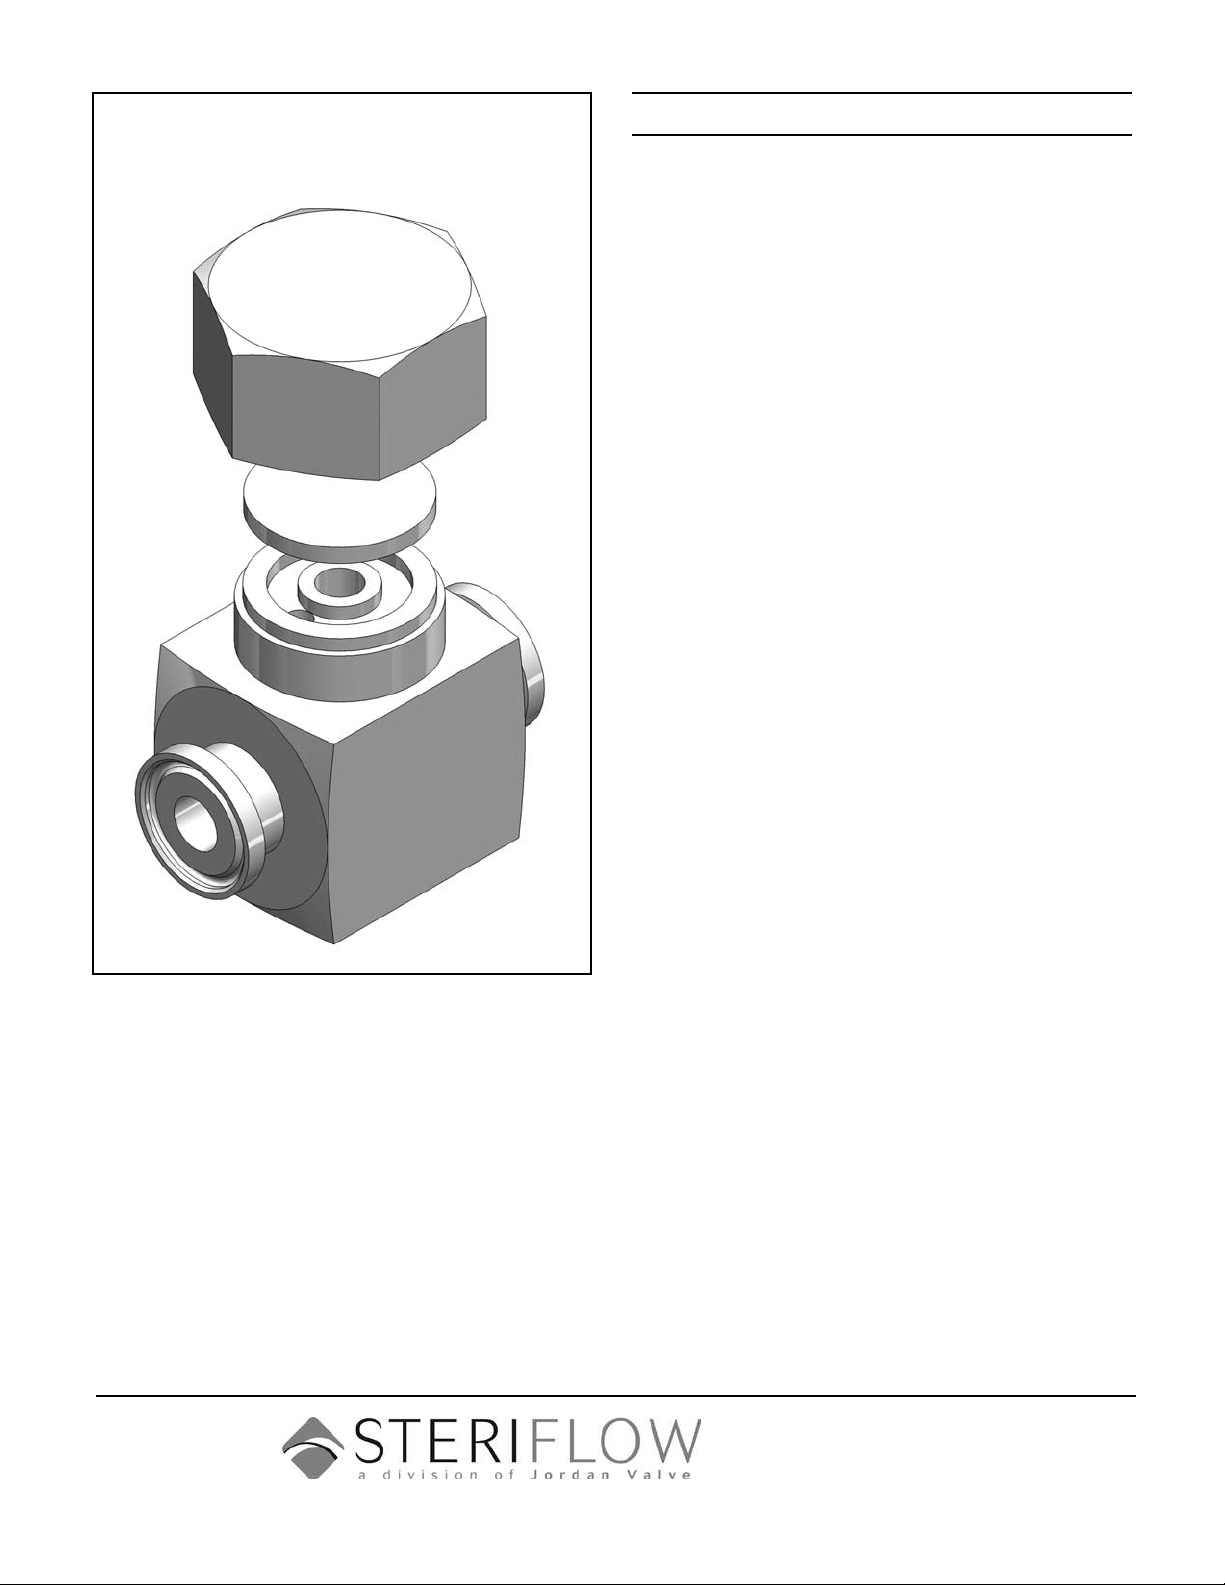
CSDT Series Clean Steam Disc Traps
3170 Wasson Road • Cincinnati, OH 45209 USA
Phone 513-533-5600 • Fax 513-871-0105
E-Mail: steri[email protected] • www.steriowvalve.com
Please read these instructions carefully!
Your Steriow product will provide you with long, trou-
ble-free service if it is correctly installed and maintained.
Spending a few minutes now reading these instructions
can save hours of trouble and downtime later. When
making repairs, use only genuine Steriow Valve parts,
available for immediate shipment from the factory.
Ideal Installation Schematic
Installation
Check that steam supply is shut off. Ensure that 1.
all system pressures are off and trap is cool before
opening.
Remove steam trap from piping by disconnecting 2.
the inlet and outlet Tri-Clamp® and slipping the trap
from the line.
The trap may be installed horizontally or vertically 3.
with discharge downward. The preferred installation
is in the horizontal position as close as possible to
the equipment being drained. Whenever possible,
position the trap below the unit being drained.
Piping should be the same size as the trap connec-4.
tion. To avoid excessive backpressure, discharge
piping should not be smaller on short runs. For
longer lines, use one size larger.
A full-ported shut-off valve upstream is recommend-5.
ed to allow isolation for servicing. A shutoff valve
downstream will protect against back ow from the
return line during servicing.
A strainer should be installed with a blowdown valve 6.
immediately upstream of the trap to protect it from
grit, scale and other foreign matter.
A test valve outlet and pressure gauges should be 7.
provided to check trap operation where condensate
discharge is piped to a return line.
For freeze protection, the trap should be installed 8.
vertically with discharge downward, as shown
above. Discharge as close to drain connection
as practical and discharge to atmosphere directly
through a short pipe. A vacuum breaker upstream
may be require to provide complete drainage.
71
3
6 6
8
45
2
1
9
Shutoff Valve1.
Test Valve2.
Blowdown Valve3.
Strainer4.
Pipe Union5.
Pressure Gauge (with Snubber)6.
Pipe Eccentric Reducer (if required)7.
Steriow CSDT Series Disc Trap8.
Check Valve9.
6
3
1
4
8
56
2
9
Shutoff Valve1.
Test Valve2.
Blowdown Valve3.
Strainer4.
Pipe Union5.
Pressure Gauge6.
(with Snubber)
Steriow CSDT Series7.
Disc Trap
Check Valve8.
3170฀Wasson฀Road฀฀•฀฀Cincinnati,฀OH฀฀45209฀฀USAPhone฀513-533-5600฀฀•฀฀Fax฀513-871-0105steri[email protected]฀฀•฀฀www.steriowvalve.comBulletin฀IM-CSDT-0409฀Maintenance
Warning!
Hot discharge from the trap may cause severe
burns. Shut off steam supply and make sure that the
trap is cool to touch before repairing or inspecting.
The trap can be maintained without disturbing the 1.
piping connections. Ensure that the trap is isolated
- upstream and downstream - before attempting to
dismantle it. ALLOW THE TRAP TO COOL BE-
FORE DISMANTLING.
The Steriow disc trap can be cleaned or repaired 2.
by removing the disc and leaving the body in the
pipe line.
Before loosening the cap, the trap must be isolated 3.
from both, live steam lines and condensate return
lines. Open the blowdown valve to relieve trapped
pressure and allow time for the trap to cool.
Remove the cap and disc.4.
Dirt and deposits can cause erratic operation. Disc 5.
can be removed from inspection and sealing sur-
faces can be wiped with a cleaning solvent. Periodic
cleaning of the disc and seat will facilitate trouble-
free performance. DO NOT USE ABRASIVES /
CORROSIVE MEDIA FOR CLEANING.
If surface is scratched or worn, replace with a new 6.
factory-lapped disc. Only the disc and seat are
subject to wear. A worn disc can be replaced and
slight seat wear can be corrected by resurfacing a
lap plate.
Lubricate the cap threads sparingly with anti-seize 7.
compound, taking care not to apply to disc or seat
surfaces.
Tighten cap until rmly seated, approximately 80 - 8.
85 ft-lbs. DO NOT OVER-TIGHTEN.
CSDT Series Disc Trap

Other Jordan Valve Controllers manuals

Jordan Valve Mark 60 Series Installation and operating instructions

Jordan Valve

Jordan Valve Mark 60 Series Installation and operating instructions

Jordan Valve I 60 Installation and operating instructions

Jordan Valve

Jordan Valve I 60 Installation and operating instructions

Jordan Valve I & M Mark 4150 Series Installation and operating instructions

Jordan Valve

Jordan Valve I & M Mark 4150 Series Installation and operating instructions

Jordan Valve I&M Mark 508UBS Installation and operating instructions

Jordan Valve

Jordan Valve I&M Mark 508UBS Installation and operating instructions

Jordan Valve STERIFLOW Mark 95LL Series Installation and operating instructions

Jordan Valve

Jordan Valve STERIFLOW Mark 95LL Series Installation and operating instructions

Jordan Valve LowFlow Mark 709 7M Installation and operating instructions

Jordan Valve

Jordan Valve LowFlow Mark 709 7M Installation and operating instructions

Popular Controllers manuals by other brands

AUMA PROFOX PF-M100X manual

AUMA

AUMA PROFOX PF-M100X manual

rotork RH Series Installation, commissioning and maintenance manual

rotork

rotork RH Series Installation, commissioning and maintenance manual

MOTECK FD60 user guide

MOTECK

MOTECK FD60 user guide

Conrad FS20 RSU operating instructions

Conrad

Conrad FS20 RSU operating instructions

Hobby-Wing QUICRUN WP 1080 G2 BRUSHED user manual

Hobby-Wing

Hobby-Wing QUICRUN WP 1080 G2 BRUSHED user manual

Siemens GDA Series Mounting instructions

Siemens

Siemens GDA Series Mounting instructions

Barco BarcoMed 2MP2HX Specifications

Barco

Barco BarcoMed 2MP2HX Specifications

Boehringer 3708 user manual

Boehringer

Boehringer 3708 user manual

Phaeton HT-MPPT-48V 30A user manual

Phaeton

Phaeton HT-MPPT-48V 30A user manual

Acuity Brands nLight rIO quick start guide

Acuity Brands

Acuity Brands nLight rIO quick start guide

ARCA 814 Series Operating and maintenance manual

ARCA

ARCA 814 Series Operating and maintenance manual

Neotec NT7070 manual

Neotec

Neotec NT7070 manual

Kidde FENWAL 35-71 Series manual

Kidde

Kidde FENWAL 35-71 Series manual

Burkert 8605 Series operating instructions

Burkert

Burkert 8605 Series operating instructions

EnOcean EASYFIT EISKA installation guide

EnOcean

EnOcean EASYFIT EISKA installation guide

ST STM8AF6223 user manual

ST

ST STM8AF6223 user manual

maxon motor EPOS 24/5 Getting started

maxon motor

maxon motor EPOS 24/5 Getting started

Zmotion ECI2820 Hardware manual

Zmotion

Zmotion ECI2820 Hardware manual

manuals.online logo
manuals.online logoBrands
  • About & Mission
  • Contact us
  • Privacy Policy
  • Terms and Conditions

Copyright 2025 Manuals.Online. All Rights Reserved.