Ausgabe 07.12.2016 Copyright by Joy-IT 8
3
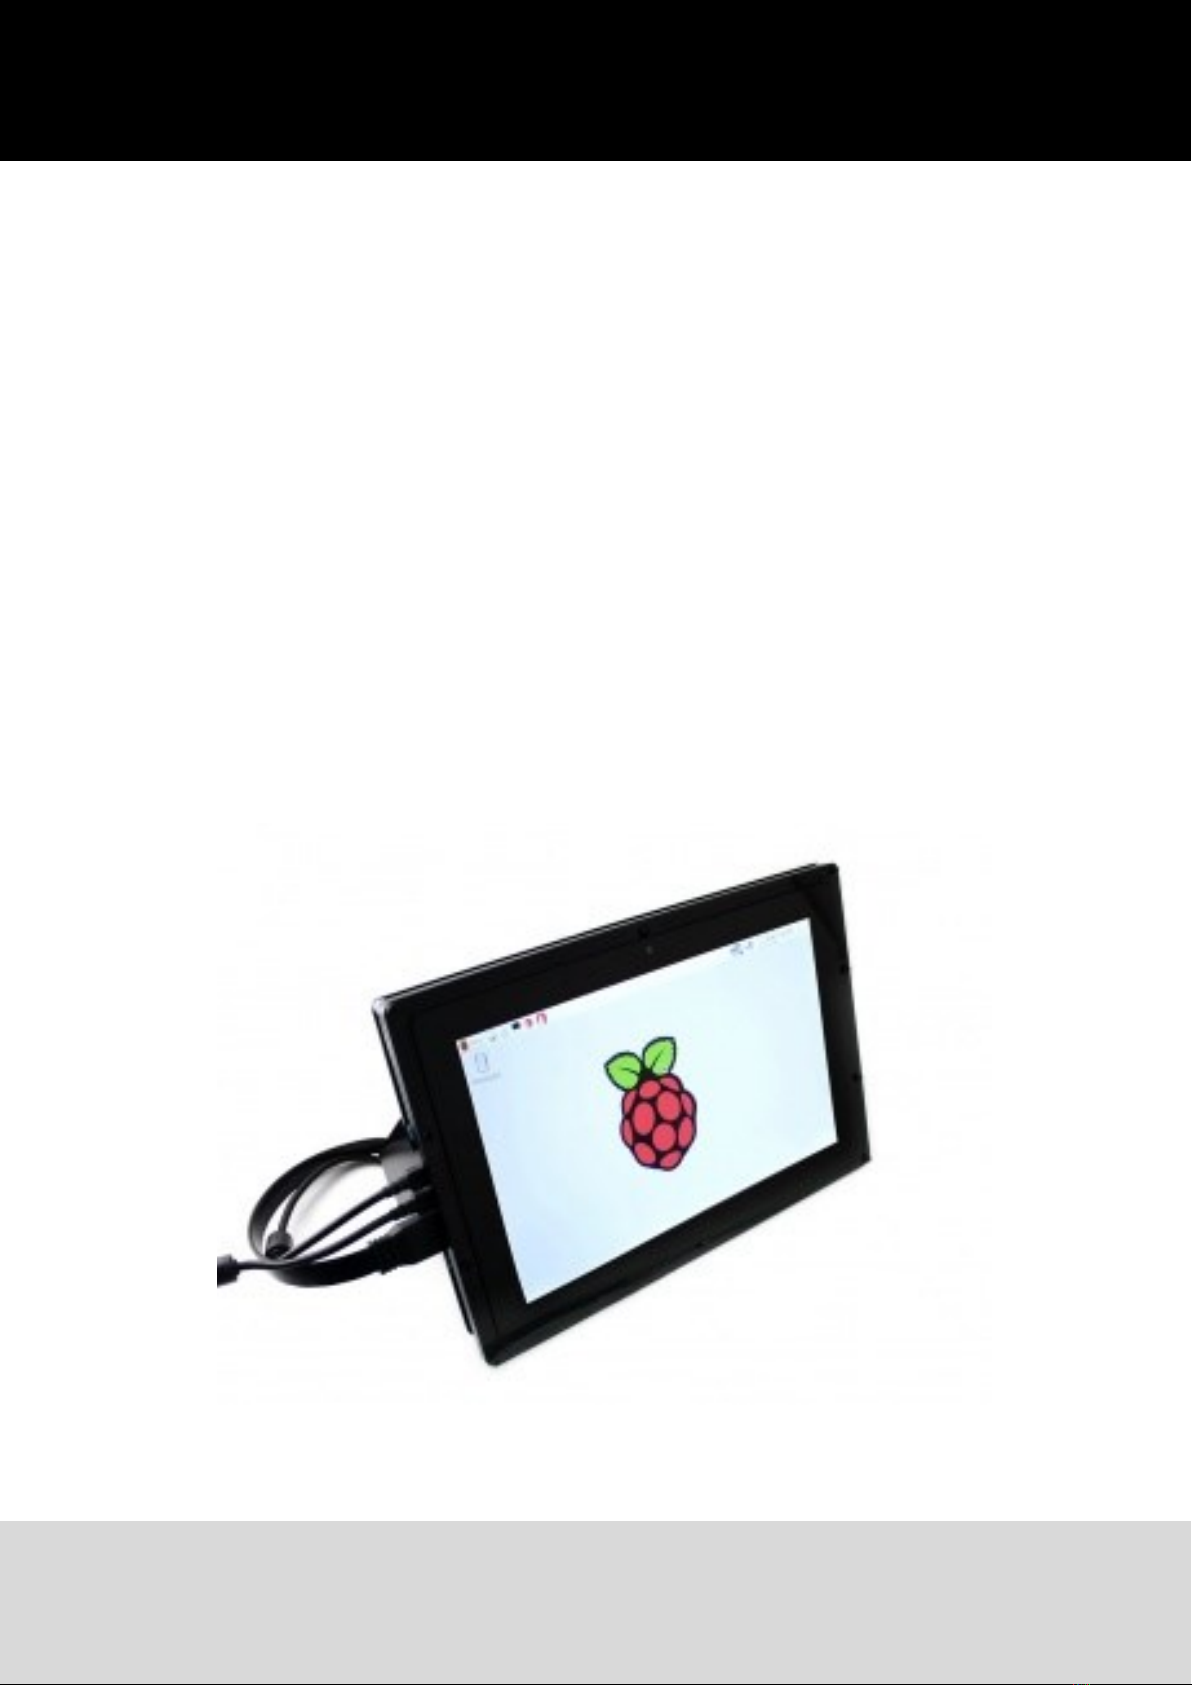
10.1inch HDMI LCD
5. Working with BeagleBone Black
If the LCD is used as a normal display only, you just need to program the latest Angstrom image to the
BeagleBone Black without making any sengs. Then, BeagleBone will read the display parameters of
the 10.1 inch HDMI LCD, and set the resoluon to 1280*800 automacally. When the LCD works as a
touch display, you need to program the 10.1inch HDMI LCD (B) Angstrom boot up image. Here are the
steps for programming the image le:
1. Download the packaged image le into your PC, and extract it, then you will get a le with the
expansion name .img
2. Connect a micro SD card to your PC, and format your micro SD card with the soware SD
Formaer. Noces: The capability of micro SD card in used here should be more than 4GB. In this
operaon, a micro SD card reader is also required, which has to be purchased separately.
3. Start the soware Win32DiskImager, and select image le downloaded in the rst step, then, click
the buon Write to program the system image le.
4. When the image le has been wrien into the micro SD card, you can insert the card to the
BeagleBone Black.
Powering up the BeagleBone Black, it will enter the OS installed in the micro SD card. Aer a
while, you will see the graphic interface.
Notes: If the eMMC of the BeagleBone Black has been installed an OS, you should boot up the
BeagleBone Black from Micro SD card. Press the Boot Buon, and power up the BeagleBone Black.
Don’t releases the Boot Buon unl the USER LEDS start blinking.
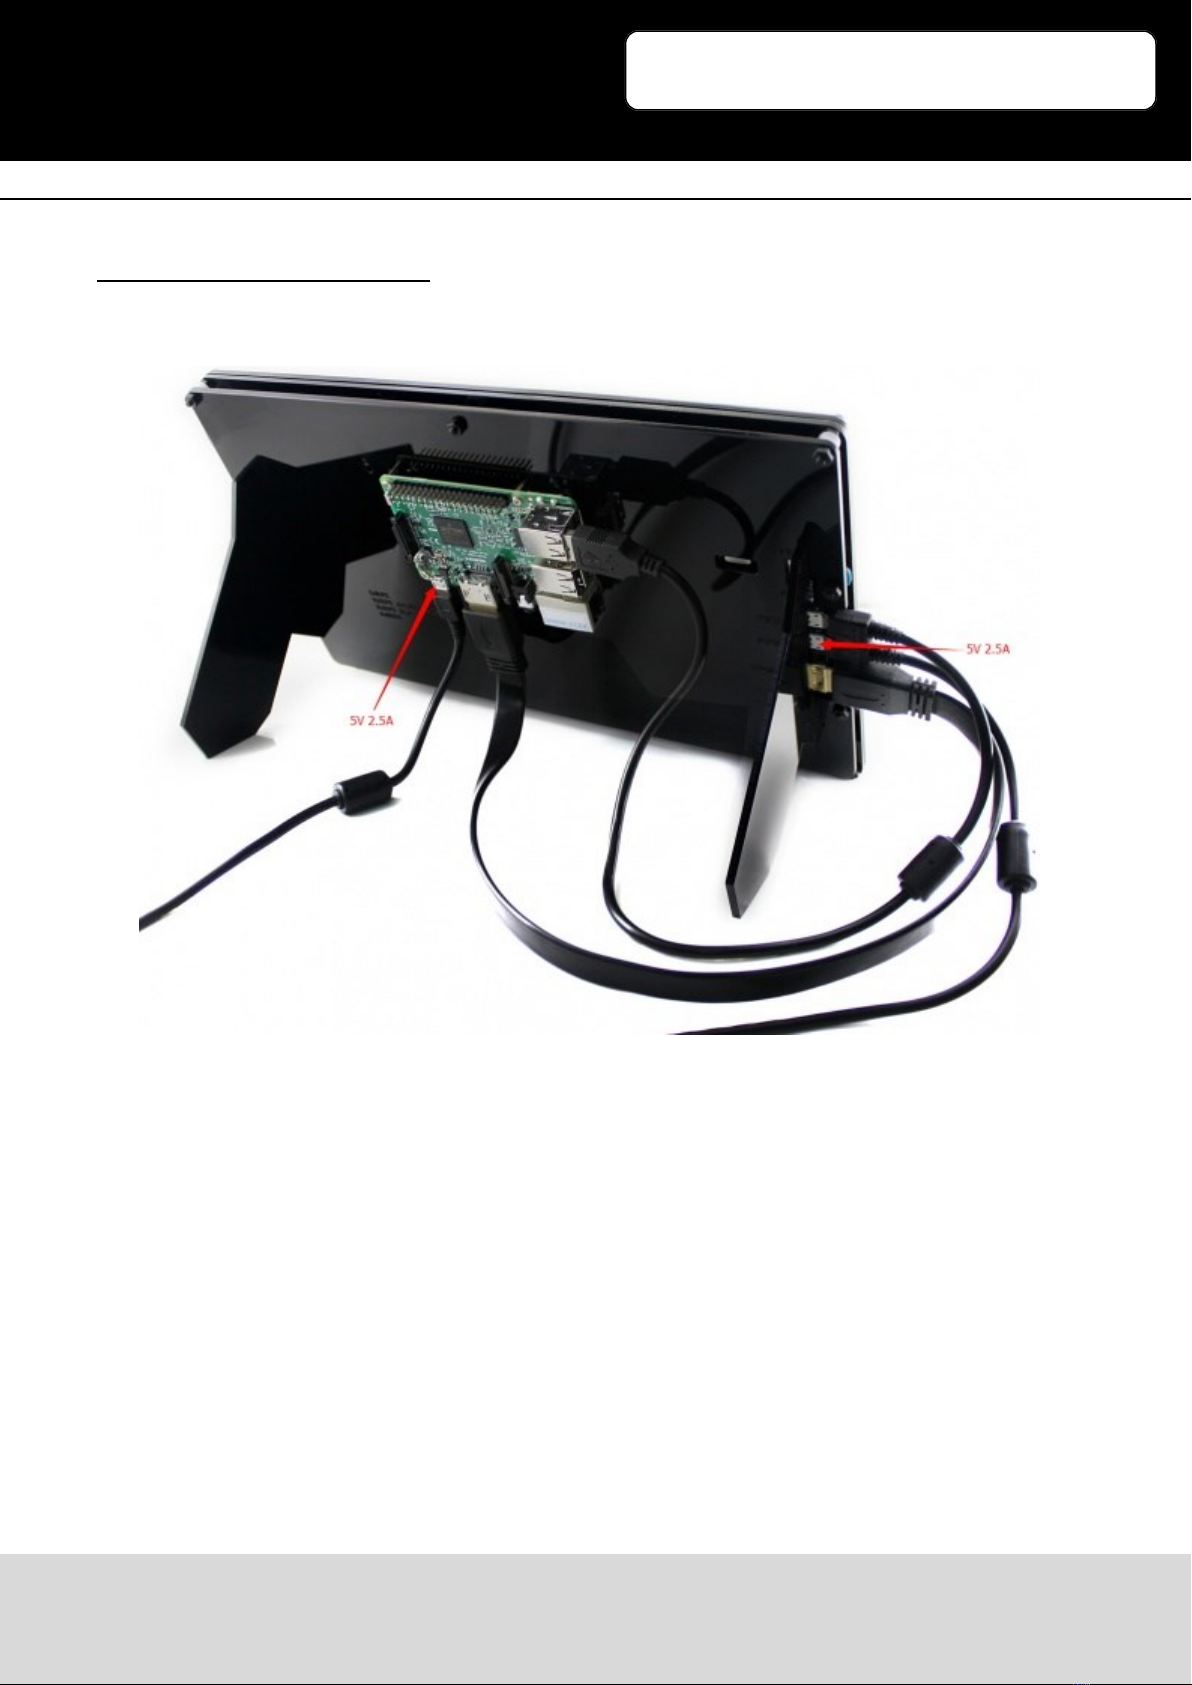
5.1 Hardware connecon
1. Connect the LCD to the HDMI interface of the BeagleBone with a HDMI to micro HDMI cable
(purchased separately).
2. Connect the Touch interface of the LCD to the host USB interface on BeagleBone with a type A to
micro USB cable. (BeagleBone provides a host USB interface and a slave USB interface. This LCD
should be connected to the host USB interface.)
3. Connect the Power Only interface of the LCD to a 5V 2.5A power adapter with a Type A to micro
USB cable