JTECH Medical COMMANDER ECHO User manual

®
S.I. Instruments
256 South Rd. Hilton
South Australia 5033
Ph (08) 8352 5511
si-instruments.com.au

This Page Intenonally Le Blank

1
© 2017 JTECH Medical MN022_M
C
ontents
Publicaon Informaon ............................2
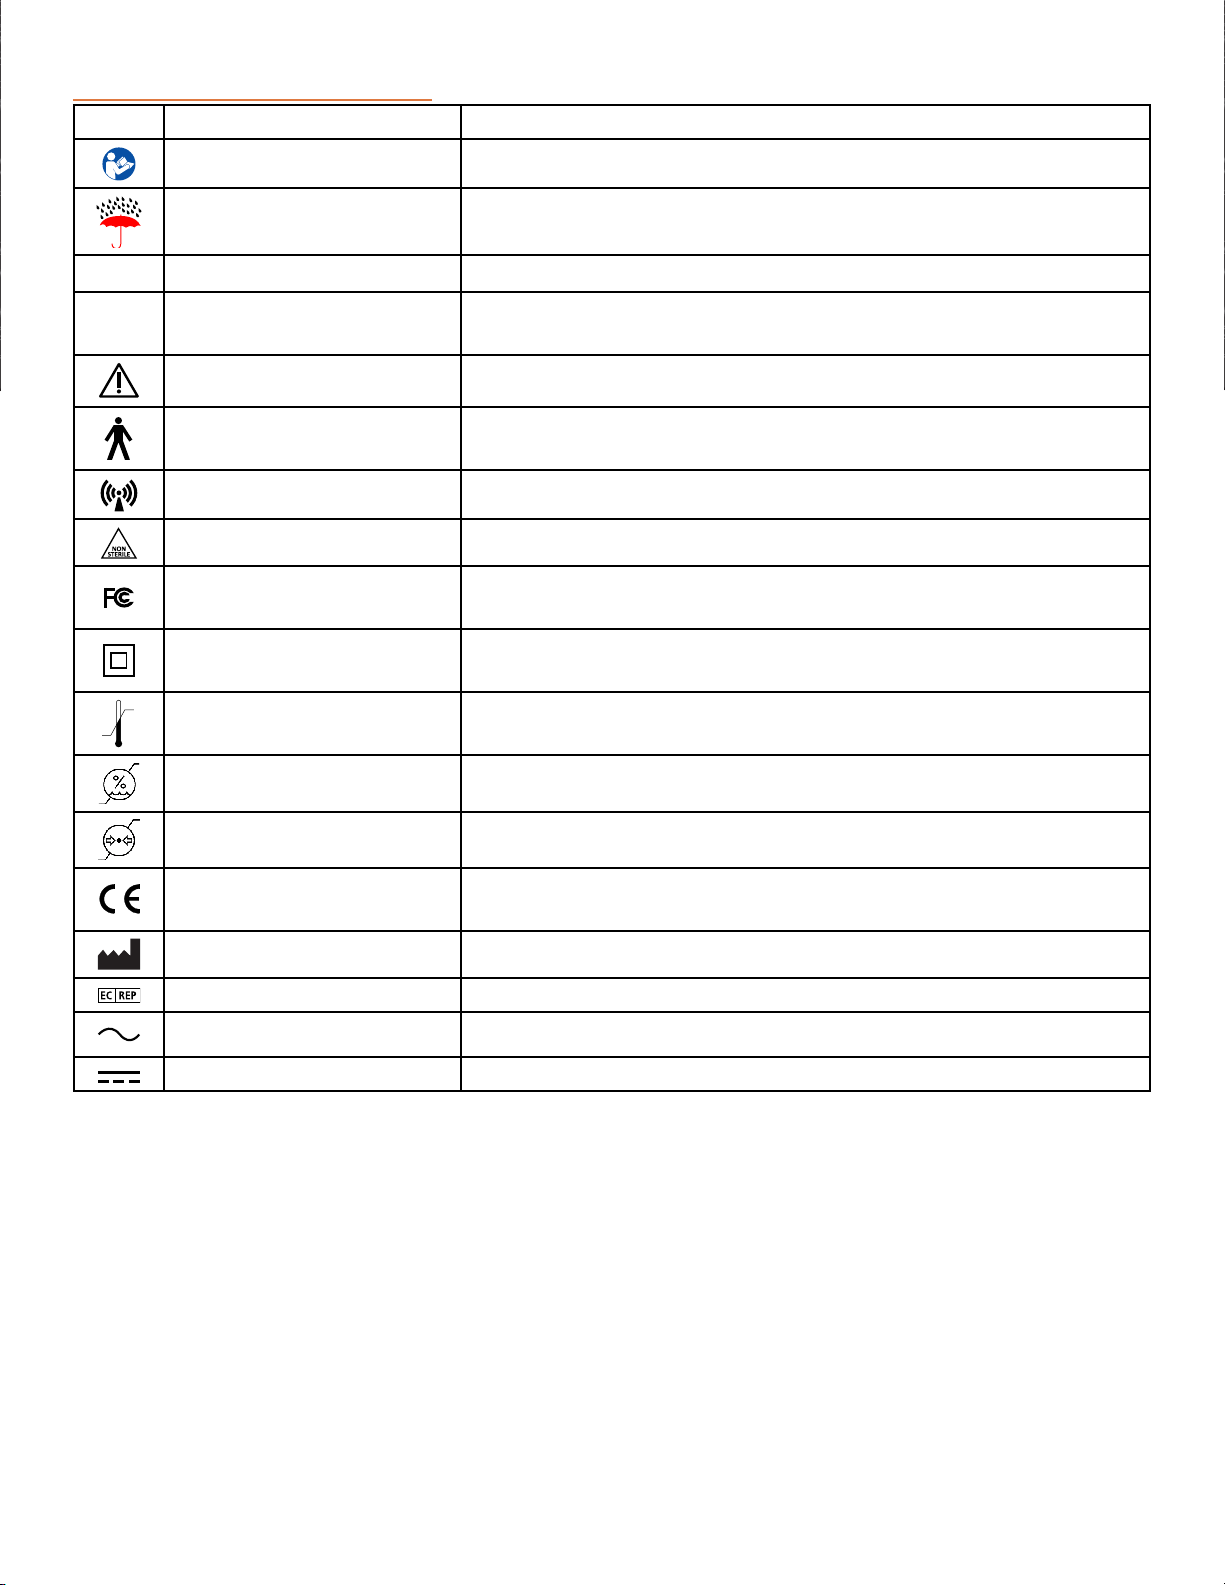
Graphic Symbol Denions .........................3
Convenons Used Throughout This Manual ...........4
Convenons Used Throughout The Console Menus .....4
Console LED/LCD states .........................5
Instrument LED States...........................5
Messages .....................................6
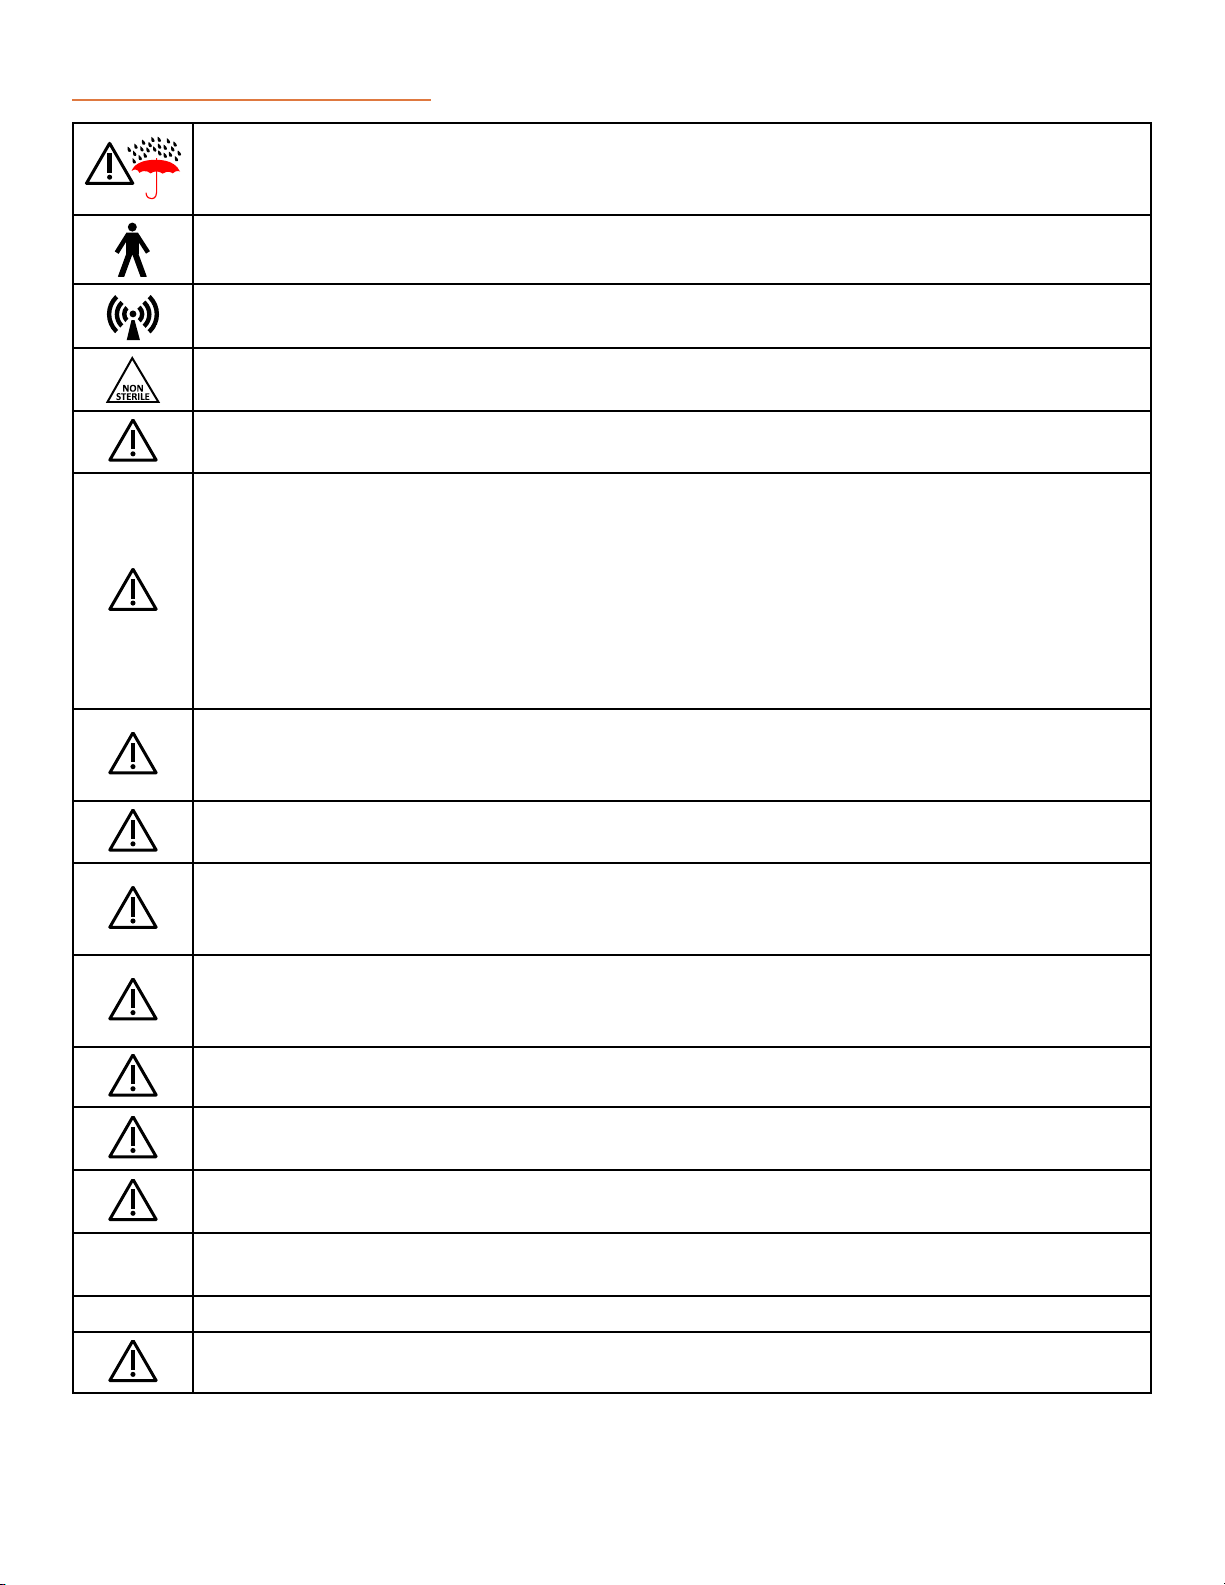
Warnings and Nocaons .........................8
Contraindicaons ..............................8
Waste Disposal .................................9
Wireless informaon.............................9
Declaraon of Conformity ........................9
Intended Use and Intenons for Use................9
System Setup....................................10
Inial Baery Charge ...........................10
Charging Instrument Baeries ...................10
Charging the Console Baeries ..................10
Baery Life...................................10
Commander Echo Console (9RF316) .................11
Using The Commander Echo Console ................12
Operang the Console Control Sck ...............12
Main Menu ...................................12
Viewing And Changing Tesng Defaults ...........12
Global System Sengs .........................12
Console Menu Tree .............................13
Instrument Specic Sengs......................14
Reviewing and Deleng a Test ...................16
Calibraon Sengs .............................16
Performing a Full Calibraon on the Inclinometers ..17
Performing a Full Calibraon on the Goniometer....17
Registering a New Instrument For Use With Your
Commander Echo Console . . . . . . . . . . . . . . . . . . . . . . . 18
Instrucons for registering a new instrument ......18
Instrucons for deleng a registered instrument....18
Instrucons for changing the RF channel ..........18
Instrucons For Mulple Commander Echo Consoles 18
Displaying Instrument Baery Voltage ............18
Displaying Console Baery Voltage ...............19
Features and Benets ...........................19
Available Upgrades .............................19
Wireless Dual Inclinometers (9RF303, 9RF304) ........20
Wireless Muscle Tester (9RF305)....................24
Wireless Grip (9RF306)............................26
Wireless Algometer (9RF307) ......................28
Wireless Goniometer (9RF308) .....................30
Wireless Pinch Gauge (9RF309) .....................32
Wireless Stac Force Gauge (9RF310)................34
User Manual for Commander Echo Downloader® ......36
Computer Specicaons.........................36
Installing From a Flash Drive......................37
Installing From a CD ............................37
First Time Using Commander Echo Downloader .....38
Using Commander Echo Downloader ..............38
Notes about the Soware .......................39
General Informaon ..............................40
Troubleshoong Your Instruments ................43
Storage and Cleaning of Instruments ................44
Storage ......................................44
Cleaning, Disinfecon, and Sterilizaon ............44
Preventave Inspecon ...........................44
Maintenance .................................44
Calibraon of Instrument..........................45
Zero Calibraon ...............................45
Factory Calibraon ............................45
Product Registraon..............................45
Repair Policy ....................................45
Customer Support ...............................46
Support Policies................................46
Hardware ...................................46
Oponal Commander Echo Downloader Soware..46
Before Calling for Support .......................46
Oponal Commander Echo Downloader License
Agreement and Limited Warranty ..................48
Technical Specicaons . . . . . . . . . . . . . . . . . . . . . . . . . . . 50
EMC Guidance .................................62
Index ..........................................66
®

© 2017 JTECH Medical MN022_M
2
JTECH Medical Commander Echo Manual
Publicaon Informaon
© 2017 JTECH Medical All rights reserved. This manual is provided as a service to our customers, any other use
is strictly prohibited. This manual may not be reproduced by any means, physically or electronically, without
the express wrien consent of JTECH Medical.
Commander, Commander Echo, Commander Echo Downloader, and EasyDocs are trademarks of JTECH Medical
Industries, Inc. Microso, Word, Notepad and Windows are trademarks or registered trademarks of Microso
Corporaon. VELCRO® is a registered trademark of Velcro Industries B.V. CaviWipes is a registered trademark of
Metrex Research.
JTECH Medical Industries, Inc
7633 Main Street
Midvale, UT 84047
United States of America
800 985-8324
(385) 695-5000
Fax (385) 695-5001
www.jtechmedical.com
Manufacturer
Authorized Representave for EU
Atlanco Systems
34 Oldeld, Kingston, Galway, Republic of
Ireland
Company number: 443142
Email: Info@AtlancoSystems.com
Phone: +35391443609
®

3
© 2017 JTECH Medical MN022_M
Graphic Symbol Denions
Symbol Meaning
An ISO 7010-M002 symbol Consult Instrucons
An ISO 15223 symbol Keep Dry, do not immerse in water or other liquids
Informaon symbol
I
P
X
N
An IEC 60529 symbol IPXN, N=0 no protecon against ingress of water.
N=1 protecon against vercally falling water drops
An ISO 7000-0434A symbol Cauon
An IEC 60417-5840 symbol Indicates type of protecon against electric shock:
Type B applied part
An IEC 60417-5140 symbol Non-Ionizing Radiaon
An ISO 15223 symbol Warning: devices are non sterile
FCC Logo Commander Echo Console and Echo devices comply with Part 15 of
the FCC Rules
An IEC 60878 symbol Indicang Degree of protecon against electric shock:
Class 2 Electrical equipment
An ISO 15223 symbol Indicang upper and lower temperature limits
An ISO 15223 symbol Indicang upper and lower humidity limits
An ISO 15223 symbol Indicang upper and lower atmospheric pressure limits
“Conformité Européenne”
(“European Conformity”)
Commander Echo Console and Echo devices meet the provisions of
the Council Direcve 93/42/EEC
An EN 980 symbol Idenfying the Manufacturer
An EN 980 symbol Idenfying the Authorized Representave for European Communies
An IEC 60878 symbol Signifying Alternang Current
An IEC 60878 symbol Signifying Direct Current

© 2017 JTECH Medical MN022_M
4
Convenons Used Throughout This Manual
The following convenons are used in the manual to describe the Console, instruments, and operaon:
• Calibraon - The process of using a known force or angle to adjust the instrument parameters so that any
arbitrary force or angle input can be accurately determined.
• Control Sck - The singular mul-axis buon on the Commander Echo Console, which can be moved up,
down, le, right, and pressed, in order to operate the Console.
• CV - The coecient of variaon (CV) is dened as the rao of the standard deviaon (σ) to the mean (μ), or
in mathemacal terms, CV = σ / μ. In probability theory and stascs, CV serves as a normalized measure
of variability to help describe the relave scaer or spread of a data sample. A smaller CV suggests a higher
level of consistency. A calculated CV less than 15% (0.15) is oen used as an indicator of consistent eort
by subjects during biometric strength tests. This value is displayed in the review screen of the Console.
Commander Echo calculates CV using populaon standard deviaon. Note that this diers from CV
calculated using the sample standard deviaon, which can give a very dierent result.
• Device - Refers to both the Commander Echo Console and any Commander Echo instrument.
• Exam - This term is used to refer to a group of tests performed with the same instrument.
• Hold - Indicates that the Control Sck should be pressed and held.
• Instrument - This refers to a JTECH Medical tesng device, used in conjuncon with the Commander Echo
Console to record test data.
• Press - Indicates that the Control Sck should be pressed and released.
• Repeon, or Rep - A single instance of measuring performance for a designated instrument.
• RF - Radio Frequency.
• ROM - Range of Moon.
• Side - Either le or right, noted as L and R, respecvely.
• Test - Used to refer to a group of repeons performed for one or more sides with a given instrument.
• Threshold - The minimum force or angle that must be exceeded to start or end a repeon.
• Zero or Zero Calibraon or Set Zero - The process of determining the instrument parameters when no force
or angle is applied to the instrument
Convenons Used Throughout The Console Menus
The following addional convenons are used throughout the Console menus:
• Cal. - See Manual convenon Calibraon.
• CV% - See Manual convenon CV (Coecient of Variaon).
• DEF% - Percent Deciency, a value calculated from test informaon and displayed in the review screen.
• DEG. - Abbreviaon on the Console for degree.
• DEL. ALL - Abbreviaon on the console for Delete All. A global funcon that deletes all test data.
• DIFF. - Abbreviaon on the Console for dierence. A calculated value for the Maximum angle.
• FAT% - Fague Percent, a value calculated from med test informaon and displayed in the review screen.
• INC - Abbreviaon on the Console for Inclinometer.
• MMT - Abbreviaon on the Console for Manual Muscle Tester.
• Press any key - Indicaon to press the Control Sck in any direcon or into the console.
• Press Enter - Indicaon to press the Control Sck into the console.
• PRI. - Abbreviaon on the Console for Primary Inclinometer.
• POS - Refers to the calibraon posion for the Inclinometer.
• Ready Time - Starng delay before a test rep begins recording data, this is used to ensure transient forces
are not recorded.
• REPS - See Manual convenon Repeon.
• REV - Revision. Hardware Rev is specied on Device label. Firmware REV is noted in the informaon screens
• SEC. - Abbreviaon on the Console for Secondary Inclinometer.
• SFG - Abbreviaon on the Console for Stac Force Gauge.
• SN - Serial Number also referred to as device ID#.
• WT. CT - Weight Count. Instrument reading of a known physical value which is not neutral or minimal.
• Zero CT - Zero Count The value of a force or angle input when the instrument is neutral or equal to zero.

5
© 2017 JTECH Medical MN022_M
Console LED/LCD states LCD Explanaon
Le Right
O O O O power state.
O O
On
The Console is on for navigang menus.
O Rapidly blinking
RED
Baery is dead, and an aempt was made to turn the
console on.
O Solid RED Baery voltage is crically low (Less than 20 minutes
remaining).
Solid GREEN O
The Console is plugged in and receiving power from an
external source. The current charging status is indicated on
the LCD screen.
Solid GREEN Solid GREEN
Logo
The Console is boong into Charging mode.
O Solid GREEN The Console is boong up.
O O The Console is shung down.
O Blinking BLUE 1
me per second On The Console is in tesng mode and acvely communicang
with the instrument.
O Blinking BLUE 1
me per second Scanning Console is aempng to scan for and register a new
instrument.
O O Scanning
Channels
Console is scanning the RF channels and will automacally
set the best one.
Instrument LED States Explanaon
O O power state.
Solid GREEN Instrument is indicang that the baery has completed charging.
Blinking BLUE 1 me per second The instrument is in tesng mode and acvely communicang with the
Console.
Solid BLUE blinking OFF 1 me
per second Aempng to reestablish communicaon with the Console.
Blinking BLUE 10 mes per
second
The instrument is aempng to establish a communicaon link with the
Console.
Blinking RED 10 mes per second The instrument has a low baery and is aempng to establish a
communicaon link with the Console.
Solid RED Baery is crically low (Less than 20 minutes remaining).
Blinking RED 5 mes per second Baery is dead. This happens on any aempt to turn the instrument on.
Blinking RED 1 me per second The instrument has a low baery and acvely communicang with the
Console.
Solid RED blinking OFF 1 me per
second
The instrument has a low baery and is aempng to reestablish
communicaon with Console.
Solid Green, blinking BLUE 1 me
per second,
The instrument is plugged in, receiving power from an external source,
and the baery is acvely charging.
Solid Green, blinking BLUE 5
mes per second The baery is overheated (thermal fault) warning.
Orange Unknown baery charging status.

© 2017 JTECH Medical MN022_M
6
Messages
A number of messages exist that will be displayed on the Console LCD when certain condions are met. Each
message is displayed with a message number as described below.
Message # Message Descripon
Message 1: No Communicaon Received This is displayed anyme that a connected instrument fails to
communicate with the Console for approximately 10 seconds.
It indicates that communicaon between the instrument and
the Console has been lost.
Message 2: All Tests Have Been Completed This is displayed any me the user tries to begin a new test
and no free tests exist within the set tesng range. For
example, if the user sets the number of tests (in sengs) to
5, enters test mode, and completes 5 tests (in any order) then
this message will be displayed at the conclusion of the 5th
test.
Note that if the user deletes a single test (such as test #2) and
then enter test mode again, as soon as they complete test #2
the message will reappear. If the user deletes a single test,
deletes all tests, or increases the number of tests (in sengs)
they can connue tesng.
Message 3: Primary Device Buer
Overow
This is displayed during tesng if the primary instrument’s
sample data buer is lled to capacity (due to communicaon
issues). This stops tesng to prevent loss of sampled data.
Message 4: Secondary Device Buer
Overow
This is displayed during tesng if the secondary instrument’s
sample data buer is lled to capacity (due to communicaon
issues). This stops tesng to prevent loss of sampled data.
Message 5: No Communicaon, Primary
Device
This is idencal to message 1 except it is displayed when two
devices are connected (like Dual Inclinometry) to indicate
that communicaon between the primary instrument and the
Console has been lost.
Message 6: No Communicaon, Secondary
Device
This is idencal to message 1 except it is displayed when two
devices are connected (like Dual Inclinometry) to indicate that
communicaon between the secondary instrument and the
Console has been lost
Message 7: There Are No Saved Tests To
Review
This message is displayed if the user tries to enter the review
screen when there are no saved tests. It is also displayed if the
user is in the review screen and deletes the last saved test.
Message 8: Program Timeout This message is displayed when the Console starts-up aer a
forced restart.
Message 9: Device Not Synced This message is displayed when two instruments (Dual
Inclinometry) lose synchronizaon. This prevents two sampled
data values from dierent mes from being used in the
instrument calculaons.
Message 10: Bad Time-Stamp, Primary
Device
This message is displayed during tesng mode if the Console
receives an out-of-order RF packet from the primary
instrument. This ensures data integrity is maintained.

7
© 2017 JTECH Medical MN022_M
Message # Message Descripon
Message 11: Bad Time-Stamp, Secondary
Device
This message is displayed during tesng mode if the Console
receives an out-of-order data packet from the secondary
instrument. This ensures data integrity is maintained.
Message 12: Bad Sample Number, Primary
Device
This message is displayed during tesng mode if the Console
receives an out-of-order sample value from the primary
instrument, or in cases of RF interference. This ensures data
integrity is maintained.
Message 13: Bad Sample Number,
Secondary Device
This message is displayed during tesng mode if the Console
receives an out-of-order sample value from the secondary
instrument, or in cases of RF interference. This ensures data
integrity is maintained.
Message 14: Must Connect To Primary First This message is displayed if the user aempts to connect to a
secondary instrument (Secondary Inclinometer) without rst
connecng to a primary instrument for tesng.
Message 15: No Registered Instruments This message is displayed if the user aempts to connect to an
instrument when no instruments have been registered with
the Console.
Message 16: Test Data Corrupted, Test
Deleted
This message is displayed if corrupt test data is found while
the user is in review mode. The corrupt test will automacally
be deleted. This ensures data integrity is maintained.
Message 17: Primary Device Calibraon Is
Corrupted
This message is displayed if the Console receives corrupt
calibraon from the primary instrument before entering a
test. In some cases, if the user enters the sengs menu and
restores user calibraon then the problem will be xed. This
will work only if factory calibraon has not been corrupted.
If factory calibraon has been corrupted then the calibraon
values will have to be restored through a producon ulity or
through recalibraon.
Message 18: Secondary Device Calibraon
Is Corrupted
This message is displayed if the Console receives corrupt
calibraon from the secondary instrument before entering a
test. In some cases, if the user enters the sengs menu and
restores user calibraon then the problem will be xed.
This will work only if factory calibraon has not been
corrupted. If factory calibraon has been corrupted then
the calibraon values will have to be restored through a
producon ulity or through recalibraon.
Message 19: Zero Out Of Range This message is displayed if the Console receives an
instrument zero that is +/- 1 pounds from the factory zero
using factory calibraon informaon. This does not prohibit
the user from tesng.
Message 20: Calibraon Out Of Range This message is displayed if the Console receives instrument
calibraon data that is +/- 10% of the factory calibraon
informaon. This does not prohibit the user from tesng.
Message 21: No Free Instrument Slots This message appears if trying to register a new instrument
when 20 instruments have already been registered.

© 2017 JTECH Medical MN022_M
8
Warnings and Nocaons
Protecon against ingress of liquids: Not protected against ingress of liquids. Keep Dry, do
not immerse in water or autoclave any poron of Commander Echo Console, instruments, or
accessories.
Type of protecon against electric shock: Type B applied part.
Devices emit non-ionizing radiaon.
Warning: Devices are not sterile.
Warning: Echo devices should only be used by trained professionals.
Contraindications
Warning: This device should not be used in the following circumstances:
• On or near the eye
• On or near bone fractures
• On or near open wounds
• On or near burned ssue
• With paents suering with severe osteoporosis
• For any purpose other than indicated
Warning: No modicaon of equipment is allowed. Do not open the Console, instrument,
transceiver or receiver housings. Opening of housings by anyone other than an authorized JTECH
service representave will void your warranty.
Warning: Changes, or modicaons, not expressly approved by JTECH Medical could void the
user’s authority to operate the equipment.
Warning: Use only a factory-supplied, medical-grade power supply cered to charge medical
devices. Use of another charger may result in electrical shock or equipment damage. It is not
recommended that you charge the devices by connecng them to a computer.
Warning: Echo instruments are not intended for use while aached to the charger. Never
aempt to operate the instrument while it is connected to the charger as electrical shock or
damage to the instrument may occur.
Warning: Echo instruments have no user serviceable parts.
Warning: This device is not suitable for use in the presence of ammable anesthec mixture with
air, or with oxygen or nitrous oxide
Warning: Follow all direcons as specied by the CaviWipe product being used. Allow devices to
dry before use.
Noce: Echo instruments are precision medical devices and should be treated with care. Avoid
dropping, banging, or other impacts to the instruments.
Noce: Use only within designated operang parameters, i.e. temperature and humidity limits.
Warning: Disconnue use of any product if skin irritaon develops.

9
© 2017 JTECH Medical MN022_M
Waste Disposal
Warning: Echo devices contain Lithium Polymer baeries. Do not dispose of any Echo device in
re.
Disposal Instrucons: Echo Devices are not known to contain any hazardous materials. Consult
your local waste management facility on proper disposal of solid waste. Recycling should be used
where available.
EMC Noce
The Commander Echo wireless system includes a variety of instruments containing a built-in radio frequency
transceiver that transmits to, and receives data from, the Commander Echo Console. For more informaon on
EMC see appendix “EMC Guidance” on page 62.
WARNING: Medical Electrical Equipment needs special precauons regarding EMC and needs to be
installed and put into service according to the EMC informaon provided in this manual. Carefully
read the informaon contained in this secon.
WARNING: The use of portable and mobile RF equipment can aect the normal operaon of
medical electrical equipment.
WARNING: Making any modicaons or using any accessories not specically approved by JTECH
Medical may reduce immunity to electromagnec interference or increase electromagnec
emissions.
WARNING: The Commander Echo Console and Echo devices should not be used while stacked on, or
adjacent to, other electrical or medical electrical equipment. If stacked or adjacent use is necessary,
all electrical equipment should be observed to verify normal operaon.
Wireless informaon
The Commander Echo Console and Echo devices transmit in a 2.4 GHz wireless frequency.
Contains FCC ID: OUR-XBEE
Contains Model XBee-Radio, Canada IC: 4214A-XBEE
Japan ID: 005NYCA0378
This device complies with Part 15 of the FCC Rules. Operaon is subject to the following two
condions: (i) this device may not cause harmful interference and (ii) this device must accept any
interference received, including interference that may cause undesired operaon.
Declaraon of Conformity
Echo instruments are:
Class I measuring medical devices per Annex IX of Council Direcve 93/42/EEC
Class I medical devices per CFR Title 21 Part 888 Subpart B
Class II medical devices per Rule 10 of the Canadian Medical Devices Regulaons
Echo devices also meet the following Technical Standards, to which Conformity is declared:
IEC 60601-1
IEC 60601-1-2
Echo devices are designed and manufactured in a facility cered to the following internaonal standards:
ISO 9001:2008
ISO 13485:2003 with Canadian Medical Devices Conformity Assessment System (CMDCAS)
Intended Use and Intenons for Use
The intended use of the Commander Echo Console and Echo devices is to assist the clinician with establishing
objecve assessment of a person’s physical strength, exibility, and (with the Algometer) establishing pain
tolerance levels. The devices are intended to be used as non-invasive, non-surgical and transient devices.

© 2017 JTECH Medical MN022_M
10
System Setup
The JTECH Medical Commander Echo Console is able to interface with up to seven (7) dierent instrument
types. The devices and accessories will vary depending on which instruments you have chosen to purchase for
use with your Console. Refer to each instrument’s secon within this manual to ensure you received the proper
items and accessories.
Inial Baery Charge
Performing the required inial charge for your new device baeries is essenal before aempng to use them.
Aer inial charging is complete, you can begin tesng immediately.
Warning: Echo instruments should not be used for tesng while connected to the charger.
Warning: Use only a factory-supplied, medical-grade power supply cered to charge medical
devices. Use of another charger may result in electrical shock or equipment damage. It is not
recommended that you charge the devices by connecng them to a computer.
Noce: Device baeries must be fully charged before aempng to use them with your Commander
Echo System. Each device must charge for at least four (4) connuous hours before its rst use.
Noce: Be careful not to drop instruments while connected to the charger as it may cause damage
to the instrument.
Charging Instrument Batteries
1. Plug the baery charger USB daisy chain plug into the USB instrument charging jack. You can charge up
to four devices at a me with one baery charger.
2. Place the instrument on a at level surface or back in the case while it charges.
3. Plug the baery charger into a properly rated wall outlet. Baeries should be charged unl the
instrument indicates that charging is complete with a solid Green LED (approximately four (4)
connuous hours each me you charge).
4. Once an instrument is charged, disconnect it from the USB daisy chain to avoid damage to the baery.
5. Charge all instruments and the Console before establishing communicaons with your Console.
Charging the Console Batteries
1. Plug the baery charger USB daisy chain plug into the USB Console charging jack. You can charge up to
four devices at a me with one baery charger.
2. Place the Console on a at level surface or back in the case while it charges.
3. Plug the baery charger into a properly rated wall outlet. Baeries should be charged unl the Console
indicates that charging is complete on the LCD screen (approximately four (4) to six (6) hours to fully
recharge).
4. Once the Console is charged, disconnect it from the USB daisy chain.
5. Charge the Console and all instruments before establishing communicaons between your Console and
instruments.
Battery Life
The Commander Echo Console and instruments have rechargeable Lithium Polymer baeries. The Console is
able to operate for approximately thirteen (13) hours of connual use. The instruments are able to operate
between ten (10) and fourteen (14) hours of connual use. In order to conserve baery life, the Console has an
automac shut-o, which will trigger aer 255 seconds (4.25 minutes) of inacvity (Note: test data and defaults
will not be aected by the unit turning o).

11
© 2017 JTECH Medical MN022_M
Commander Echo Console (9RF316)
Used to record informaon from the tesng devices.
To turn the Console o, hold the Control Sck down for 2 seconds. (Note: in some menus you have to exit the
menu before you can turn o the Console)
For detailed instrucons on operang the Commander Echo Console, please refer to pages 12-19 in the
manual.
For instrucons for specic instruments, please refer to Instrument Secon of the manual that includes
the Instrument you are interested in.
For instrucons on performing specic tests, refer to the oponal Mulmedia Help System CD.
For troubleshoong informaon, please see page 42
For technical specicaons, please see page 51
1. Press the Control Sck to enable the Commander Echo Console.
2. Select “Test”
3. Select the desired instrument.
4. Push the “On” buon on the desired instrument to enable
communicaon with the Commander Echo Console.
Detachable parts
Wrist Lanyard (7AC006) – The Wrist Lanyard is used to help prevent dropping the
Commander Echo Console when carrying the Console.

© 2017 JTECH Medical MN022_M
12
Using The Commander Echo Console
Operang the Console Control Sck
The Commander Echo Console is ed with a Control Sck, which allows you to turn the Console on and o,
navigate through the menus, and make your selecons. Refer to the following list in order to operate the
Control Sck:
• Press the Control Sck to turn on the Commander Echo Console.
• From the main screen, hold the Control Sck to turn o the Commander Echo Console.
• With the Commander Echo Console turned on, pressing the Control Sck will select the highlighted menu
opon.
• Move the Control Sck up or down to navigate the menus and tests.
• When in the sengs menu, move the Control Sck le or right to adjust test defaults.
• Hold the Control Sck to the le to return to the previous menu (Note: This funcon does not work while
in the Seng Menu, changing the test sengs, or when reviewing specic test informaon. Please select
the “Exit” opon from the menu in order to leave these screens).
Main Menu
When the Commander Echo Console is powered on, the main menu will always be the starng screen. From
the main menu, you can select the following opons:
Test - Select this opon to begin performing tests.
Review - Select this opon to review any completed test data, or delete specic tests.
Sengs - Select this opon to set test defaults, see instrument info, or delete all test data.
Viewing And Changing Testing Defaults
The Commander Echo system allows for up to seven (7) dierent instrument types to be used with the same
Console. The Commander Echo Console has several global sengs, which will change the defaults for all of the
instruments. Other sengs are instrument specic, and will be changed only when accessed via the specic
instrument’s menu.
Global System Settings
Wt. Units - Record and display in either Pounds (lb), Kilograms (kg), or Newtons (N).
Tests - Choose from 1-20 tests per exam.
System menu- View Instrument Info, Delete All Exam Data, or Turn the Sound On/O.
Scan - Used to scan the RF channels and automacally set the best one.
Register - Used to register new devices to the Console.

13
© 2017 JTECH Medical MN022_M
Console Menu Tree
Main
Test
Inclinometers
Set Zero
Test Screen
Up/Down – Next/Previous Test
Right – Next Repetition
Hold Left – Return to Main Screen
Muscle Testing
Set Zero
Test Screen
Up/Down – Next/Previous Test
Right – Next Repetition
Hold Left – Return to Main Screen
Grip
Set Zero
Test Screen
Up/Down – Next/Previous Test
Right – Next Repetition
Hold Left – Return to Main Screen
Algometer
Set Zero
Test Screen
Up/Down – Next/Previous Test
Right – Next Repetition
Hold Left – Return to Main Screen
Goniometer
Set Zero
Test Screen
Up/Down – Next/Previous Test
Right – Next Repetition
Hold Left – Return to Main Screen
Pinch
Set Zero
Test Screen
Up/Down – Next/Previous Test
Right – Next Repetition
Hold Left – Return to Main Screen
Static Force Gauge
Set Zero
Test Screen
Up/Down – Next/Previous Test
Right – Next Repetition
Hold Left – Return to Main Screen
Review
Up/Down – Cycle through Available Tests
Right Side
Left/Right – Cycle through Menu
Back
Left Side
Left/Right – Cycle through Menu
Back
Exit
Hold Left – Return to Main Screen
Press and Hold – Delete Test
Settings
Up/Down – Move Up and Down the Menu Items
Left/Right – Change Testing Defaults/Cycle through Menu
Units – Pound, Kilogram, Newton
Tests – 1-20
System – Info, Delete All, Sound O, Scan, Register Instrument
Instrument
Exit
Up/Down – Move Up and Down the Menu Items
Left/Right – Change Testing Defaults/Cycle through Menu
Instrument Name
Reps – 1-8
Threshold – Varies by Unit of Measurement
Time –
Order – LLRR, RRLL, LRLR, RLRL
System – Info, Calibrate, Restore
Exit
Grip
Instrument Name
Reps – 1-8
Mode – Auto. Rep, Static, Dynamic
System – Info, Calibrate, Restore
Exit
Inclinometer
Instrument Name
Reps – 1-8
System – Info, Calibrate, Restore
Exit
Goniometer
Instrument Name
Reps – 1-4
Threshold – Varies by Unit of Measurement
Order – LLRR, RRLL, LRLR, RLRL
System – Info, Calibrate, Restore
Exit
MMT
Instrument Name
Reps - 1-4
Threshold – Varies by Unit of Measurement
Time –
Order – LLRR, RRLL, LRLR, RLRL
System – Info, Calibrate, Restore
Exit
Pinch
Instrument Name
Reps – 1-8
Threshold – Varies by Unit of Measurement
Time –
Ready Time –
System – Info, Calibrate, Restore
Exit
SFG
Instrument Name
Reps – 1-4
Threshold – Varies by Unit of Measurement
Time –
Order – LLRR, RRLL, LRLR, RLRL
System – Info, Calibrate, Restore
Exit
Algometer

© 2017 JTECH Medical MN022_M
14
Instrument Specic Sengs
Inclinometer
Reps - Select from 1-8 repeons (Note: This instrument does not dierenate between sides).
Mode - Select either Stac, Dynamic, or Auto-Rep.
Info. - Displays instrument informaon (SN, REV, Baery, POS1-4)
Calibrate - Perform a full calibraon of the selected instrument.
Restore - This will restore the instrument’s calibraon to factory sengs.
Muscle Tester (MMT)
Reps - Select from 1-4 repeons, per side.
Threshold - Select a threshold at which the instrument will begin to record test data (1, 3, 5, 10, 20 lb).
Order - Select the order, in which the test will switch sides (LLRR, RRLL, LRLR, RLRL).
Info. - Displays instrument informaon (SN, REV, Baery, Zero CT, WT CT, Weight)
Calibrate - Perform a full calibraon of the selected instrument.
Restore - This will restore the instrument’s calibraon to factory sengs.
Grip
Reps - Select from 1-8 repeons, per side.
Threshold - Select a threshold at which the instrument will begin to record test data (3, 5, 10, 20 lb).
Time - Select a me, in seconds, for the test (1, 2, 3, 4, 5, or not med).
Order - Select the order, in which the test will switch sides (LLRR, RRLL, LRLR, RLRL).
Info. - Displays instrument informaon (SN, REV, Baery, Zero CT, WT CT, Weight)
Calibrate - Perform a full calibraon of the selected instrument.
Restore - This will restore the instrument’s calibraon to factory sengs.
Algometer
Reps - Select from 1-4 repeons, per side.
Threshold - Select a threshold at which the instrument will begin to record test data (0.2, 0.4, 1, 3 lb).
Time - Select a me, in seconds, for the test (1, 2, 3, 4, 5, 30, or not med).
Order - Select the order, in which the test will switch sides (LLRR, RRLL, LRLR, RLRL).
Info. - Displays instrument informaon (SN, REV, Baery, Zero CT, WT CT, Weight)
Calibrate - Perform a full calibraon of the selected instrument.
Restore - This will restore the instrument’s calibraon to factory sengs.
Goniometer
Reps - Select from 1-8 repeons (Note: This instrument does not dierenate between sides).
Info. - Displays instrument informaon (SN, REV, Baery, Zero CT, WT CT, Angle)
Calibrate - Perform a full calibraon of the selected instrument.
Restore - This will restore the instrument’s calibraon to factory sengs.

15
© 2017 JTECH Medical MN022_M
Instrument Specic Sengs (connued)
Pinch
Reps - Select from 1-4 repeons per side.
Threshold - Select a threshold at which the instrument will begin to record test data (0.4, 1, 3, 5 lb).
Time - Select a me, in seconds, for the test (1, 2, 3, 4, 5, or not med).
Order - Select the order, in which the test will switch sides (LLRR, RRLL, LRLR, RLRL).
Info. - Displays instrument informaon (SN, REV, Baery, Zero CT, WT CT, Weight)
Calibrate - Perform a full calibraon of the selected instrument.
Restore - This will restore the instrument’s calibraon to factory sengs.
Stac Force Gauge (SFG)
Reps - Select from 1-8 repeons (Note: This instrument does not dierenate between sides).
Threshold - Select a threshold at which the instrument will begin to record test data (5, 10, 20 lb).
Time - Select a me, in seconds, for the test (1, 2, 3, 4, 5, or not med).
Ready Time - Select a Ready Time, in seconds, which will run prior to the start of each repeon (0, 1, 2, 3s).
Info. - Displays instrument informaon (SN, REV, Baery, Zero CT, WT CT, Weight)
Calibrate - Perform a full calibraon of the selected instrument.
Restore - This will restore the instrument’s calibraon to factory sengs.

© 2017 JTECH Medical MN022_M
16
Performing an Exam
Prior to beginning a test, ensure that the test defaults are set as desired (i.e. unit of measurement, number of
tests, number of repeons, etc.). Once test defaults are set, choose the “Test” opon from the main menu,
and follow the instrucons listed under the specic instrument you will be tesng with.
“Wireless Dual Inclinometers (9RF303, 9RF304)” on page 20.
“Wireless Muscle Tester (9RF305)” on page 24.
“Wireless Grip (9RF306)” on page 26.
“Wireless Algometer (9RF307)” on page 28.
“Wireless Goniometer (9RF308)” on page 30.
“Wireless Pinch Gauge (9RF309)” on page 32.
“Wireless Stac Force Gauge (9RF310)” on page 34.
Reviewing and Deleting a Test
Once a test has been completed, it will be stored on the Commander Echo Console unl it is deleted. To view
the completed test data, follow these steps:
1. From the main menu, select “Review.”
2. Move the Control Sck up or down to navigate between the completed tests.
3. Press the Control Sck to view more specic informaon regarding a specic test
(Note: moving the Control Sck up and down while viewing specic test informaon will move between
tests).
4. Move the Control Sck le and right, and press to view more informaon for a specic side, or to exit the
test informaon screen.
5. Hold down the Control Sck to delete individual tests.
Calibraon Sengs
Restoring Factory Calibration
Each instrument has been factory calibrated to ensure accuracy. It is possible that the user calibraon may be
dierent from these pre-set parameters, which may lead to invalid force/angle reading. Prior to performing a
full calibraon, aempt to restore the factory calibraon stored on each instrument. If this does not correct the
problem a full calibraon may be required.
Follow these steps to restore the factory calibraon:
1. Select “Sengs” from the main menu.
2. Select “Instrument” from the Sengs menu.
3. Select the Instrument, for which you wish to restore the factory calibraon.
4. Highlight the “System” opon in the Instrument menu.
5. Move the Control Sck le or right unl you highlight “Restore.”
6. Press the Control Sck to select restore.
7. The LCD screen will display the instrument ID at the top and Disconnected at the boom.
8. Press the “On” buon for the corresponding instrument followed by pressing the Control Sck on the
Console to establish connecon.
9. The LCD Screen will show the device is connecng.
10. If the instrument connects to the Console, the LCD screen will display “RESTORE CALIBRATION.”
i. Select, “No” to return to the Sengs menu.
ii. Select “Yes” to restore the factory calibraon sengs.
Note: restoring the factory calibraon only overwrites the user calibraon data with the factory calibraon
data stored on the instrument.

17
© 2017 JTECH Medical MN022_M
Performing a Full Calibration
(For all Instruments Except the Inclinometers and Goniometer)
Follow these steps to perform a full calibraon:
1. Select “Sengs” from the main menu.
2. Select “Instrument” from the Sengs menu.
3. Select the Instrument, for which you wish to perform a full calibraon.
4. Highlight the “System” opon in the Instrument menu.
5. Move the Control Sck le or right unl you highlight “Calibraon.”
6. Press the Control Sck to begin calibraon.
7. The Commander Echo Console will now aempt to connect to the selected instrument. Press the “On”
buon for the corresponding instrument followed by pressing the Control Sck on the Console to establish
connecon.
8. Follow the prompt to Press the Control Sck to set the instrument zero.
9. Move the Control Sck up and down to select the desired weight to be used for calibraon.
10. Once the proper weight has been selected, and this weight is currently being applied to the instrument,
press the Control Sck to enter the calibraon point.
Performing a Full Calibration on the Inclinometers
Follow These Steps to Perform a Full Calibraon:
Note: The angles for a full calibraon on the inclinometers must be exact for the calibraon to be valid. It is
recommended to use a T-Square or other tools that have exact right angles.
1. Select “Sengs” from the main menu.
2. Select “Instrument” from the Sengs menu.
3. Select “Inclinometer.”
4. Select the device ID for the Instrument which you wish to perform a full calibraon.
5. Using the joysck, scroll to the “System” opon in the Instrument menu.
6. Move the joysck le or right unl you highlight “Cal.”
7. Press the joysck to begin calibraon.
8. The Commander Echo Console will now aempt to connect to the selected instrument.
9. Press the “on” buon for the corresponding instrument to establish connecon.
10. Set the inclinometer in the upright posion.
11. Press the joysck to save this posion.
12. Rotate the inclinometer 90 degrees to the le.
13. Press the joysck to save this posion.
14. Rotate the inclinometer 90 degrees more to the le, so it is 180 degrees from the starng posion.
15. Press the joysck to save this posion.
16. Rotate the inclinometer an addional 90 degrees to the le, so it is 270 degrees from the starng posion.
17. Press the joysck to save this posion.
Performing a Full Calibration on the Goniometer
Follow These Steps to Perform a Full Calibraon:
1. Follow Steps 1-9 as above, selecng the goniometer in Step 3
2. Fully close the arm of the goniometer.
3. Press the joysck to set the instrument zero.
4. Open the arm of the goniometer to 180°
5. Press the joysck to save the calibraon

© 2017 JTECH Medical MN022_M
18
Registering a New Instrument For Use With Your Commander Echo Console
The Commander Echo Console comes with all instruments pre-registered for use; however, should you
purchase a new instrument at a later me, the following instrucons can be used to add or remove a
instrument. If you need addional help registering new instruments with the Console, contact customer
service.
Instructions for registering a new instrument
1. Select “Sengs” from the main menu.
2. Highlight “System.”
3. Press le/right unl “Register” is displayed.
4. Turn on the instrument followed by pressing the Control Sck.
5. If the Console successfully registers the instrument then the Console will return to the sengs screen.
Otherwise, once the instrument turns o, turn the instrument back on to try again.
6. To exit the registraon without registering a instrument, hold le for 2 seconds.
Instructions for deleting a registered instrument
1. Select “Sengs” from the main menu.
2. Select “Instrument.”
3. Select the instrument type for the instrument ID you wish to delete and press the Control Sck.
4. Highlight “System.”
5. Press le/right unl “Info” is displayed, and press the Control Sck.
6. Press up/down unl the device ID that you wish to delete is displayed.
7. Hold the Control Sck unl the Console returns to the sengs screen.
Instructions for changing the RF channel
1. Select “Sengs” from the main menu.
2. Highlight “System.”
3. Press le/right unl “Scan” is displayed, and press the Control Sck.
4. Wait approximately 10 seconds, when the Console is nished it will have set the best channel found at the
me.
Instructions For Multiple Commander Echo Consoles
1. Aer turning on a Console enter the “Test” menu to connect any instrument.
2. Next turn on an addional Console then follow the instrucons for “changing the RF channel.
3. Connect to an instrument.
4. Repeat as necessary for each addional system
This will insure that each Console does not interfere with any other Console at your locaon. A total of 12
systems can be setup to operate without interfering with each other. The 12 system limit does not account
for possible interference from wireless systems other than Commander Echo.
Displaying Instrument Battery Voltage
1. Select “Sengs” from the main menu.
2. Select “Instrument.”
3. Select the instrument type for the instrument ID you wish to display baery voltage.
4. Highlight “System.”
5. Press le/right unl “Info” is displayed, and press the Control Sck.
6. The Console will now aempt to connect to the selected instrument. Press the “On” buon for the
corresponding instrument followed by pressing the Control Sck on the Console to establish connecon.
7. Once connected the Console LCD will show the instrument’s serial number, revision, baery voltage and
calibraon informaon.
Table of contents
Other JTECH Medical Medical Equipment manuals
Popular Medical Equipment manuals by other brands

DEMARTA VIRGINIO
DEMARTA VIRGINIO OBA MEDICA user manual

inhealth
inhealth Blom-Singer Instructions for use

TASKA Prosthetics
TASKA Prosthetics TASKA-XXXXXX Appropriate Use Guidelines

Michigan Instruments
Michigan Instruments LIFE-STAT 1008MII Instructions for use

ASAHI
ASAHI Hyperion Instructions for use

Drive DeVilbiss
Drive DeVilbiss Med Aire FlexWave Instructions for use