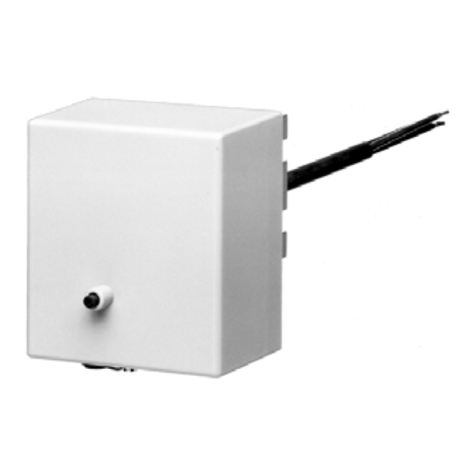
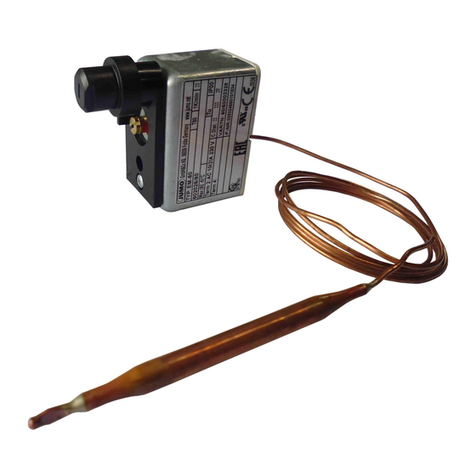
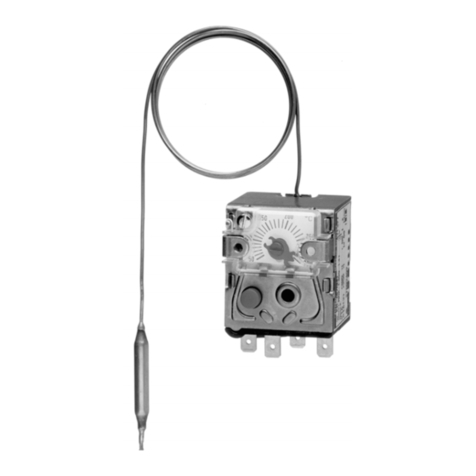
JUMO EMf-80 Series User manual

Panel-mounting
thermostats
Series EMf-80
B 60.2026
Operating Instructions
11.00 / 00073776
All manuals and user guides at all-guides.com
all-guides.com

Please read these Operating Instructions before commissioning the instrument. Keep the
operating instructions in a place which is accessible to all users at all times. Please assist
us to improve these operating instructions where necessary. Your suggestions will be wel-
come.
Phone in Germany (06 61) 6003-716
abroad (+49) 661 6003-0
Fax in Germany (06 61) 6003-504
abroad (+49) 661 6003-607
All necessary settings and, where required, alterations inside the instrument are described
in these operating instructions. If, however, any difficulties should arise during commis-
sioning, you are asked not to carry out any unauthorized manipulations on the unit. You
could endanger your rights under the instrument warranty! Please contact the nearest
subsidiary or the main factory in such a case.
All manuals and user guides at all-guides.com

Contents
1 Introduction 5
1.1 Typographical conventions ......................................................................... 5
1.1.1 Warning signs ................................................................................................. 5
1.1.2 Note signs ...................................................................................................... 5
1.2 Application .................................................................................................... 6
1.3 Marking ......................................................................................................... 6
1.4 Safety notes .................................................................................................. 6
2 Identifying the instrument 7
2.1 Nameplate ..................................................................................................... 7
2.2 Type designation .......................................................................................... 7
2.2.1 Extra codes .................................................................................................... 7
3 Mounting 8
3.1 Dimensions ................................................................................................... 8
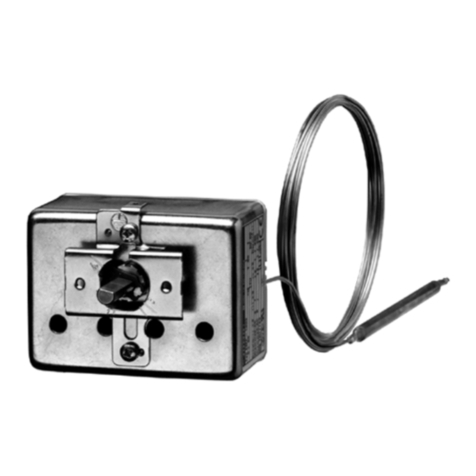
3.2 Securing the panel-mounting thermostat .................................................. 9
3.2.1 Central fixing .................................................................................................. 9
3.2.2 Fixing bracket ................................................................................................. 9
3.3 Capillary/ temperature probe/ pocket ..................................................... 10
3.3.1 General ......................................................................................................... 10
3.3.2 Approved probe forms and protection tubes (pockets) ............................... 11
3.4 Permissible operating conditions at the pocket ..................................... 12
3.4.1 Pockets U, US and UH ................................................................................. 12
3.5 Mounting the probe .................................................................................... 13
4 Installation 14
4.1 Regulations and notes ............................................................................... 14
4.2 Electrical connection ................................................................................. 15
4.3 Connection diagrams ................................................................................. 15
5 Resetting the STB thermostat 16
5.1 Resetting the STB ...................................................................................... 16
5.1.1 Version for central fixing ............................................................................... 16
5.1.2 Version with fixing bracket ........................................................................... 17
All manuals and user guides at all-guides.com

Contents
5.2 Self-monitoring ........................................................................................... 17
5.2.1 Response to a break of the measuring system ............................................ 17
5.2.2 Response to low temperature ...................................................................... 17
6 Instrument description 18
6.1 Technical data ............................................................................................. 18
All manuals and user guides at all-guides.com

5
1 Introduction
1.1 Typographical conventions
1.1.1 Warning signs
1.1.2 Note signs
abc1Footnote
Footnotes are comments that refer to specific parts of the text. Footnotes
consist of two parts:
1) The marking in the text, arranged as continuous superscript numbers.
2) The footnote text, at the bottom of the page, in a smaller typeface than the
main text, and preceded by a superscript number.
✱Action
This sign marks the description of a required action.
The individual steps are indicated by an asterisk, e.g.
✱ Unscrew crosspoint screw
✱Remove cover
VDanger
This sign is used where there may be danger to personnel if the instructions
are disregarded or not followed accurately.
ACaution
This sign is used where there may be damage to equipment if the instruc-
tions are disregarded or not followed accurately.
HNote
This sign is used to draw your special attention to a remark.
vReference
This sign refers to additional information in other chapters or sections.
All manuals and user guides at all-guides.com

1 Introduction
6
1.2 Application
JUMO panel-mounting thermostats Series EMf-80 are used as safety temper-
ature limiters in open and closed heating installations to DIN 4751 and steam
boilers to DIN 4752.
1.3 Marking
HVersion to DIN 3440 as STB = safety temperature limiter
1.4 Safety notes
Physical and toxicological properties of the media which may escape in the
event of a system fracture.
– = no; X = yes
ACutting through or kinking the capillary of the panel-mounting thermostat
Series EMf-80 will result in the permanent failure of the instrument!
JUMO panel-mounting thermostats Series EMf-80
are approved to VDE 0631
HThe expansion fluid may escape in the event of a system fracture. At present,
there is no restrictive statement from health authorities concerning any danger
to health over short periods and at low concentrations, e.g. after a fracture of
the measuring system.
Top end of scale
°C
Danger-
ous
reactions
Fire/ explosion
hazard
Water
contami-
nation
Toxicological data
Ignition
temperature
°C
Explosion
limit
% v/v
irritant danger
to
health
toxic
≥up to 200°C – +280 1.2 - 7.5 X X X –
All manuals and user guides at all-guides.com
all-guides.com

7
2 Identifying the instrument
2.1 Nameplate
(1) Type code (see type designation below)
(2) Limit value / ambient temperature at which this thermostat has been
calibrated (option) / permissible ambient temperature and Protection
(3) Rating
(4) Test mark
2.2 Type designation
Type
designation
2.2.1 Extra codes
Case fixing standard central fixing
b1 2 screws M4, spaced 28 mm
b2 2 screws M3, spaced 33 mm
b3 2 screws M3, spaced 22 mm
(1)
(2)
(3)
(4)
STB 82699
EMf-80 panel-mounting thermostat with single-pole snap-action
switch,
f with capillary
(normally Form A = plain cylindrical probe)
-80 safety temperature limiter (STB)
with n.c. (break) contact and lock-out,
switching point factory-set
/U with n.c. (break) contact and lock-out,
and additional signal contact
/au switch contacts gold-plated
All manuals and user guides at all-guides.com

8
3 Mounting
3.1 Dimensions
EMf-80
(standard)
EMf-80 /
b1, b2, b3
2
1
SW10 46 12
15.5
36.5
L
16
6
21
26
29
52
SW13
Ød
Ø
1.5
13 a/f
10 a/f
2
1
6
G
21
16
21
36.5
1.5
L
46
52
2.5
29
Ø
d
Ø
B
38
thread
All manuals and user guides at all-guides.com

9
3 Mounting
3.2 Securing the panel-mounting thermostat
Operating
position
any
3.2.1 Central fixing
(standard)
✱Drill fixing hole 10.5 mm dia. in panel.
✱Unscrew cap nut M 10 x 1, 10 a/f .
✱Unscrew fixing nut M 10 x 1, 13 a/f.
✱Insert thermostat in panel and secure with fixing nut.
Do not overload the plastic thread!
✱Screw on the cap nut.
3.2.2 Fixing bracket
(Code b1, b2, b3)
✱Drill two fixing holes 3.5 mm or 4.5 mm dia. into the panel.
If required, drill the hole into the panel for resetting the thermostat.
Secure the thermostat with two M3 or M4 screws. It is essential that
the thermostat is not damaged by excessively long screws.
H➩Chapter 3.1 "Dimensions", page 8
All manuals and user guides at all-guides.com

3 Mounting
10
3.3 Capillary/ temperature probe/ pocket
3.3.1 General
ACutting through or kinking the capillary will result in the permanent failure of
the instrument!
The minimum permissible bending radius of the capillary is 5 mm.
The temperature probe must be installed in JUMO pockets. If this is not the
case, the approval of the thermostat becomes void.
HThe temperature probe must be completely immersed in the medium.
Fitting several probes into a common pocket is permitted only with 2 or 3 plain
probes 6 mm dia. and pockets 15 x 0.75 mm.
When fitting 2 probes, the spring clip supplied by the factory must be fitted in
the pocket.
For use in air, Form A (without pocket) has to be used.
All manuals and user guides at all-guides.com

11
3 Mounting
3.3.2 Approved probe forms and protection tubes (pockets)
AU
Plain cylindrical bulb Screw-in pocket with
screw-in spigot Form A
to DIN 3852/2,
with fixing screw
L
_15
Ød
SW
ØD
G
L1
S
hex
thread
US UH
Weld-in pocket
with fixing screw and clip
Screw-in pocket, no
sealing shoulder; for
sealing with hemp
(for temperatures
up to +110°C).
With fixing screw and
clip.
27
S
ØD
Ø25
Ø10
Ø13
Ø8
Ø12
Ø30
SW
ØD
G
L1
S
hex
thread
All manuals and user guides at all-guides.com
all-guides.com

3 Mounting
12
3.4 Permissible operating conditions at the pocket
3.4.1 Pockets U, US and UH
3.4.1.1 Protection tube in steel U and US
Material: Tube: St 35.8 I
Screw-in nipple: 9 SMnPb.28 K
Weld-in nipple: 16 Mo 3
3.4.1.2 Protection tube in steel U and US
Material of tube and nipple: X 6 CrNiMoTi 17 122
3.4.1.3 Protection tube in brass U
Material of tube and nipple: brass (CuZn)
3.4.1.4 Protection tube in brass UH
Material of tube and nipple: brass (CuZn)
AThe values below refer to the maximum loading on the mounting concerned.
The maximum pressure that can be sealed depends on the mounting condi-
tions and may be lower.
Temperature Tube diameter
8 x 0.75 mm
or taper
10 x 0.75 mm 15 x 0.75 mm
max. permissible pressure
100°C89bar 72bar 48
150°C83bar 67bar 45
100°C92bar 74bar 50
150°C88bar 71bar 48
100°C50bar 40bar 27
150°C48bar 39bar 26
110°C16bar
*
All manuals and user guides at all-guides.com

13
3 Mounting
Probe
mounting A
For use in pressure-free media only
3.5 Mounting the probe
ATo ensure overall accuracy, the thermostat must only be used in conjunction
with the pockets supplied by the factory.
HThe temperature probe (2) must be completely immersed in the medium. If this
is not the case, there will be appreciable deviations from the switching point.
With mountings U, UH and US, the temperature probe is secured in the pocket
by a clip (1).
(1)
(2)
All manuals and user guides at all-guides.com

14
4 Installation
4.1 Regulations and notes
❏The electrical connection must only be carried out by qualified personnel.
❏The choice of the cable, the installation and the electrical connection must
conform to the requirements of VDE 0100 “Regulations for the installation
of power circuits with nominal voltages below 1000 V”, or the appropriate
local regulations.
❏If contact with live parts is possible while working on the unit, it must be
completely disconnected from the supply.
❏Earth the instrument at terminal PE to the earth conductor. This cable must
have a cross-section that is at least as large as the supply cables. Earth
cables must be run in a star configuration, to a common earth point which
is connected to the protective earth of the supply. Do not loop the earth
cables, i.e. do not run them from one instrument to another.
❏Apart from faulty installation, incorrect settings on the thermostat can affect
the proper functioning of the following process or lead to damage. Only
qualified personnel must be allowed to make adjustments. Please observe
the appropriate safety regulations in this matter.
All manuals and user guides at all-guides.com

15
4 Installation
4.2 Electrical connection
Fast-on
connection
(standard)
Rear view
( 1 ) = fast-on connector A 6.3 x 0.8 DIN 46 244
Screw
connection
Code X
(1) = receptacle
(2) = connecting screw
(3) = terminal strip
(4) = fast-on connector
A 6.3 x 0.8,
DIN 46 244
4.3 Connection diagrams
The cable can be attached or replaced without any special tools, by using
standardized cables that do not require any special preparation.
HWhen the thermostat is mounted using the fixing bracket (extra code b1, b2 or
b3), the protective earth conductor must always be connected through a fast-
on connector A 6.3 x 0.8, DIN 46 244.
2
1
( 1 )
( 1 )
( 2 )
( 3 )
( 4 )
EMf-80 EMf-80/U
ϑ
1
2
ϑ
1
24
All manuals and user guides at all-guides.com

16
5 Resetting the STB thermostat
5.1 Resetting the STB
After the temperature has dropped by approx. 10°C of the scale span below
the set limit (danger temperature), the snap-action switch can be reset.
5.1.1 Version for central fixing
✱Unscrew the cap nut (1).
✱Push down the reset button (2) until
the snap-action switch is reset.
➩Chapter 5.1.2 "Version with fixing bracket", page 17.
Screw the cap nut (1) back into position.
( 1 )
( 2 )
( 1 )
All manuals and user guides at all-guides.com
all-guides.com

17
5 Resetting the STB thermostat
5.1.2 Version with fixing bracket
✱Push the reset button (1) in the direction of the arrow
until the snap-action switch is reset.
5.2 Self-monitoring
5.2.1 Response to a break of the measuring system
5.2.2 Response to low temperature
( 1 )
HFailure of the measuring system, i.e. when the expansion liquid escapes, will
cause the pressure in the sensing system of the EMf-80 to drop and the circuit
1-2 will open. The thermostat can no longer be reset.
HAt temperatures below -10°C, circuit 1-2 will open, but will close automatically
when the temperature rises.
All manuals and user guides at all-guides.com

18
6 Instrument description
6.1 Technical data
Permissible
ambient
temperature
in operation
Permissible
storage
temperature
+50°C max., -50°C min.
Max.
current rating
Fusing required see max. current rating
Switching point
accuracy
based on limit setting at Tamb +22°C = +0 °C/-5°C
Mean ambient
temperature
drift referred
to limit setting
If the ambient temperature at the switch head and / or the capillary deviates
from the +22°C calibration ambient temperature, there will be a switching
point displacement.
Higher ambient temperature = lower switching point
Lower temperature = higher switching point
If the operating temperature differs appreciably from the +22°C calibration
ambient temperature, it is possible to allow for this during calibration (at extra
charge).
Weight approx. 0.3 kg
Protection EN 60 529 - IP00
Capillary Switch head at temperature probe
max. +80°C+80°C max. limit setting +15%
min. -40°C-40°C-50°C
Type Current rating
EMf-80 230 V AC, 10 (2) A, p.f. = 1 (0.6)
230 V DC, 0.25 A
EMf-80/U Terminal 2:
230 V AC, 10 (2) A, p.f. = 1 (0.6)
230 V DC, 0.25 A
Term in al 4 :
230 V AC, 2 (0.4) A, p.f. = 1 (0.6)
230 V DC, 0.25 A
EMf-80/au AC/DC 24 V, 0.1 A
contact resistance ≤ 5mΩ
at the switch head at the capillary per m
0.35 °C per °C0.07 °C per °C·m
All manuals and user guides at all-guides.com

19
6 Instrument description
Operating
medium
water, oil, air, superheated steam
Time constant
t0.632
Action according to EN 60 730-1
Type 2BK =automatic action with micro switch-off in operation, with break
protection.
Capillary and
probe
Materials
Connecting
cable
Conductor cross-section 2.5 mm2 max.
in water in oil in air/ superheated
steam
≤45 sec ≤60 sec ≤120 sec
Capillary Probe
standard copper, Mat. Ref. 2.0090
1.5 mm dia.
copper, Mat. Ref. 2.0090
brazed
on request stainless steel,
Mat. Ref. 1.4571
1.5 mm dia.
stainless steel,
Mat. Ref. 1.4571
welded
All manuals and user guides at all-guides.com

M. K. JUCHHEIM GmbH & Co
Street address:
Moltkestraße 13 - 31
36039 Fulda, Germany
Delivery address:
Mackenrodtstraße 14
36039 Fulda, Germany
Postal address:
36035 Fulda, Germany
Phone: +49 (0) 661 60 03-0
Fax: +49 (0) 661 60 03-5 00
E-Mail: mail@jumo.net
Internet: www.jumo.de
JUMO Instrument Co. Ltd.
JUMO House
Temple Bank, Riverway
Harlow, Essex CM20 2TT, UK
Phone: +44 (0) 1279 63 55 33
Fax: +44 (0) 1279 63 52 62
E-Mail:
sales@jumo.co.uk
JUMO PROCESS CONTROL INC.
885 Fox Chase, Suite 103
Coatesville, PA 19320, USA
Phone: 610-380-8002
1-800-554-JUMO
Fax: 610-380-8009
E-Mail:
info@JumoUSA.com
Internet: www.JumoUSA.com
All manuals and user guides at all-guides.com
Other manuals for EMf-80 Series
1
This manual suits for next models
3
Table of contents
Other JUMO Thermostat manuals

JUMO
JUMO eTron M 100 User manual

JUMO
JUMO EM Series User manual

JUMO
JUMO AMDR-1 User manual

JUMO
JUMO STM-RW-2 User manual

JUMO
JUMO ATH.-SE Series User manual

JUMO
JUMO B 70.1050.0 User manual

JUMO
JUMO WTHc Series User manual

JUMO
JUMO ATH-EXx User manual

JUMO
JUMO heatTHERM-AT User manual

JUMO
JUMO EM Series User manual
Popular Thermostat manuals by other brands

Honeywell
Honeywell RTH2310 operating manual

Honeywell
Honeywell FocusPRO TH5110D installation instructions

HYSEN
HYSEN HY04BW user manual

resideo
resideo RTHL111 Series owner's manual

Dettson
Dettson R02P033 Installation instructions and homeowner's manual

Aprilaire
Aprilaire 8600 Safety & installation instructions