manuals.online logo
Brands
  1. Home
  2. •
  3. Brands
  4. •
  5. Jumper
  6. •
  7. Medical Equipment
  8. •
  9. Jumper JPD-500G User manual

Jumper JPD-500G User manual

JPD-500G
FINGER
pulse
OXIMETER
Important Safety Instructions
This instruction for use provides important product operation and safety information regarding
this device. Please read this document thoroughly before using the device and keep for future
reference. This device may only be used for the purposes described in these instructions. The
manufacturer cannot be held liable for damage caused by incorrect application.
Never immerse this device in water or other liquids. For cleaning please follow the
instructions in the «Cleaning and Disinfecting» section.
Do not use this device if you think it is damaged or notice anything unusual.
Never open this device.
This device comprises sensitive components and must be treated with caution. Observe the
operating conditions described in the «Technical Specifications» section.
Protect it from:
- water and moisture
- extreme temperatures
- impact and dropping
- contamination and dust
- direct sunlight
- heat and cold
The function of this device may be compromised when used close to strong electromagnetic
fields such as mobile phones or radio installations and we recommend a distance of at least
1 m (according to 60601-1-2). In cases where you suspect this to be unavoidable, please verify
if the device is working properly before use.
Precautions
■ Use of this device is not intended as a substitute for a consultation with your doctor.
■ Do not attempt to repair PULSE OXIMETER unless you are professional engineers. Only
professionals with maintenance qualification are allowed to perform interior maintenance
as necessary.
■ Change the contact position between the PULSE OXIMETER probe and the finger
periodically if you are monitoring your SpO2 levels and pulse rate for more than 2 hours.
■ Stop immediately if you have broken skin or the blood circulation of your finger is aected
during prolong use.
■ This product is not designed to be used by newborn babies. Seek for medical care if the
measured value goes beyond the normal range and you are sure that the instrument is not
malfunctioning.
■ The pulse oximeter uses infrared light (invisible to your eyes) to measure your SpO2 levels.
Hence, please do not stare at the light-emitting components of the PULSE OXIMETER, as
that could cause harm and/or potentially blind your eyes.
The following factors may aect the accuracy of the measurement:
■ The patient suers from significant levels of dysfunctional hemoglobin (such as
carboxyhemoglobin or methemoglobin).
■ Intravascular dyes such as indocyanine green or methylene blue have been injected into
the patient.
■ There is excessive patient movement.
■ The patient experiences venous pulsations.
■ The patient has hypotension, severe vasoconstriction, severe anemia, or hypothermia.
■ Ambient light intensity is too bright. Hence, please avoid direct exposure to strong light
(such as beams from operating lamps or sunlight) during measurement.
■ The patient is in cardiac arrest or is in shock.
■ Fingernail polish or false fingernails are applied.
Warnings
WARNING: Do not use the PULSE OXIMETER in an environment with any flammable gases,
flammable anesthetic, or other flammable substances.
WARNING: Keep unit and lanyard away from children as the included lanyard may present
an entanglement or choking hazard to small children. Adult supervision
required; never leave children unattended with unit or lanyard.
WARNING: Do not throw the batteries into fire, as that could cause an explosion.
WARNING: Do not attempt to charge the included batteries, as that could cause leakage, fire
disaster, or even explosion. Dispose the used batteries in accordance to the local
laws and regulations.
WARNING: Do not use the PULSE OXIMETER in an MRI or CT environment.
WARNING: Caution: Do not operate the PULSE OXIMETER if it is wet. Avoid moving the
PULSE OXIMETER from a cold to a hot and humid environment.
WARNING: Install the batteries properly before powering on the PULSE OXIMETER for normal
use. Please remove the batteries if you are not planning to use the PULSE
OXIMETER for a long time.
WARNING: Close the battery cover when the instrument is in use.
Symbols
Meaning
Type BF applied part
Caution: Please see this manual
Symbol of oxygen saturation
Symbol of pulse rate
No SpO2 alarms
When end users abandon this product,
they must send the product to the
collection place for recycling
SpO
2
%SpO2
bpmPR
Symbol
General Description
Oxygen saturation indicates the percentage of hemoglobin in arterial blood that is loaded
with oxygen. This is a very important parameter for the respiratory circulation system. Many
respiratory diseases can result in lower oxygen saturation within human blood. Therefore, it
is very important to know the oxygen saturation of a patient so that doctors can detect
problems in a timely manner.
The oxygen saturation (SpO2) of arterial blood in a normal human body is 98%. If the
measured value of oxygen saturation is lower than 94%, an insuicient supply of oxygen is
considered. Please consult your doctor. The pulse rate (bpmPR) is the number of pulse beats
per minute. Normally, the pulse rate is consistent with the heart rate. In general, the pulse
rate of every people is 60 to 90 beats per minute. The Perfusion Index (PI) usually reflects the
limb perfusion status of an examined patient, and shows the detection precision of the
instrument as well. The PI of a normal human body is 3% or greater.
Working Principles and Usage
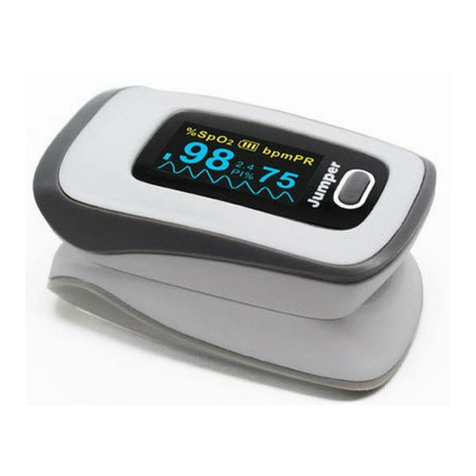
EVOLU Finger PULSE OXIMETER is a portable non-invasive device intended for spot-check-
ing of oxygen saturation of arterial hemoglobin (SpO2) and pulse rate of patients in hospitals,
hospital-type facilities, and home environments. This device is not intended for continuous
monitoring.
Device
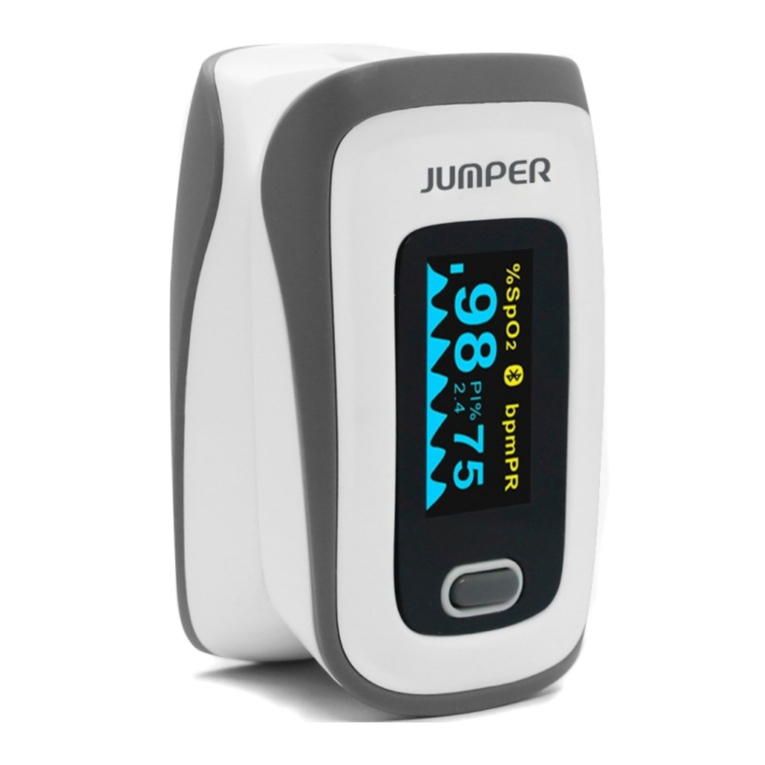
%SpO2 bpmPR
PI%
Low power
indication Perfusion Index
Bar graph
Symbol of
pulse rate
Measured value
of pulse rate
Measured value
of oxygen
saturation
Symbol of
oxygen
saturation
Display indications
The following figure shows the information display on the LED screen of the PULSE OXIMETER
in normal detection state:
Power-ON button/Function Button Operations
Press the power-ON/function button to turn on the PULSE OXIMETER. Once it is turned on.
Simply press or hold the button to perform corresponding operations.
Press: Press the button for less than 0.5 seconds.
Hold: Press the button for more than 0.5 seconds
Alarm Setting
After setting the brightness, press the power-ON button to enter
the alarm setting interface (as "interface 2" below shows, "AL"
represents alarm). Then hold the button to set "AL" to on or o.
When "AL" is set to on and the measured values of the blood
oxygen saturation and pulse rate go beyond the upper limit or
lower limit, the PULSE OXIMETER will beep to alarm.
Alert Range Setting
When "AL" is set to on, you can set the upper limit and lower limit of SpO2 Alert and PR Alert.
Press it to switch an option (SpO2 upper limit, SpO2 lower limit, PR upper limit and PR lower
Interface 1
PI%
Interface 2
LED display screen
Power ON button
Function button
Battery cover
Battery cover lock
INSTRUCTION for USE
Brightness Setting
Hold the power-ON button while the PULSE OXIMETER is in
powered-on state, then the PULSE OXIMETER shows a brightness
setting interface (as "Interface 1" below shows, "br" represents
brightness). Hold the button to adjust brightness. There 3
brightness settings (1, 2, 3). 3 is the brightest.
limit). Hold the power-on button to adjust the limits. (as "Interface 3, 4, 5, 6" below show, "Hi"
represents upper limit, "Lo" represents lower limit).
Alert Range Setting
When "AL" is set to on, you can set the upper limit and lower limit of SpO2 Alert and PR Alert.
Press it to switch an option (SpO2 upper limit, SpO2 lower limit, PR upper limit and PR lower
Operation Guide
Stick one finger completely into the finger chamber of the PULSE OXIMETER. The fingernail
should be facing upward. Release the clip and press the power-ON button to power on the
PULSE OXIMETER.
NOTE: The PULSE OXIMETER will automatically shut down 10 seconds after
you remove your finger.
Interface 3
%SpO2
Interface 4
%SpO2
Interface 5
bpmPR
Interface 6
bpmPR
If you do not insert your finger
completely into the chamber,
measurement will be inaccurate.
Keep your finger still during measurement. It is also not advisable to use this
instrument during sports activities as movement may lead to inaccuracies.
Once the reading stabilizes, read the measured values of oxygen saturation
and pulse rate on the screen.
Never use abrasive cleaning agents, thinners or benzene for cleaning.
Never immerse the device in water or other cleaning liquids.
Replace the batteries when the batteries run out of power and
the symbol ( ) flickers on the screen.
Do not sterilize this device using autoclaving or ethylene oxide sterilizing.
This device is not intended for sterilization.
Do not disinfect the instrument by means of high-temperature/high-
pressure or gas disinfection.
6. Technical parameters
Opening or altering the device invalidates the guarantee.
The following items are excluded from the guarantee:
■ Transport costs and risks of transport.
■ Damage caused by incorrect application or noncompliance with the instructions for use.
■ Damage caused by leaking batteries.
■ Damage caused by accident or misuse.
■ Packaging/storage material and instructions for use.
■ Regular checks and maintenance (calibration).
■ Accessories and wearing parts: Batteries.
Compensation is limited to the value of the product. The guarantee will be granted if the complete
product is returned with the original invoice.
Repair or replacement within guarantee does not prolong or renew the guarantee period. The legal
claims and rights of consumers are not limited by this guarantee.
The period of host free for warranty service is 2 years.
During the warranty period, we will decide to repair or replace damaged parts or
accessories according to the case.
5. Default values and conditions of alert
Safety Type
Attention: please contact our distributor when the device needs maintenance. Please
keep the packing of the product so that it could be used when returning the
device to maintenance.
Storage and Transportation
warranty card
Parameter
Oxygen saturation
Pulse rate
Alert condition
Value
Upper limit: 99
Lower limit: 94
Upper limit: 130
Lower limit: 50
When the alert switch is on and the actual measured
value goes beyond the preset alert parameter range,
the PULSE OXIMETER gives an alert sound.
Parameter Value
Display range
Resolution
Oxygen saturation
Pulse rate
35% to 99%
35 bpm to 250 bpm
1%
1 bpm
±2% (70% to 99%)
No requirement (≤ 69%)
±2 bpm
Oxygen saturation
Pulse rate
Measurement
precision
Oxygen saturation
Pulse rate
Parameter Value
Pulse rate
Upper limit: 50% to 100%
Lower limit: 50% to 100%
Upper limit: 35 bpm to 250 bpm
Lower limit: 35 bpm to 250 bpm
Alert range
Oxygen saturation
Pulse rate
Weak PI Min. 0.3%
± 1% of the preset value
The greater of ±10% of the preset
value and ±5 bpm
Alert error
PI
Oxygen saturation
Anti-electric-shock
type: internal power
supply device
Anti-electric-shock
degree: Type BF applied
part
Waterproof
grade: IP22
Running mode:
continuous working
Shenzhen Jumper Medical Equipment Co., Ltd.
D Building, No. 71, Xintian Road, Fuyong Street, Baoan, Shenzhen,
Guangdong, China, Tel.: + 86-755-26692192, + 86-755-26696279.
E-mail: [email protected], www.jumper-medical.com
MedPath GmbH
Mies-van-der-Rohe-Strasse 8,
80807 Munich, Germany
Distributor: FORANS SIA, “Piepilsētas”, Krustkalni,
Ķekavas nov., LV-2111, Latvija, tel.: +371 67462367
Produced for FORANS International AG, Switzerland
Technical alterations reserved.
0482
REV.0/2020.10
Install the two AAA batteries into the battery slot according to polarity indication, and mount
the battery cover.
Cleaning and Disinfecting
Power o the instrument and remove the batteries before cleaning. Ensure that the
appearance of the instrument is neat, dust and dirt free. Use an alcohol swab or cotton
tissue moistened with alcohol (75% Isopropyl) to clean the outer surface of the instrument
(including the LED screen) and silicone that touches the finger inside of the device. Also,
clean the finger being tested using alcohol before and after each test. Allow the device to
dry thoroughly before use.
Maintenance
■ Remove the batteries from the battery slot and properly store them if you do not plan to use
the PULSE OXIMETER for a long period of time.
■ Avoid using the PULSE OXIMETER in an environment with inflammable gases or using it in
an environment where the temperature or humidity is excessively high or low.
■ Check the accuracy of the oxygen saturation and pulse rate readings by using an
appropriate calibration apparatus.
Product inspection and calibration is carried out by accredited laboratory and is not
a warranty service!
Technical Specifications
1. Dimensions: 58.0 mm (Width) × 32.0 mm (Depth) × 32.9 mm (Height). Weight: 50.4 g
(including two AAA batteries)
2. Peak wavelength range of the light emitted from the probe: red light 663 nm ± 3;
infrared light 900 nm ± 7.
3. Maximum optical output power of the probe: 60 mW for infrared light (905 nm).
4. Normal working condition
limit). Hold the power-on button to adjust the limits. (as "Interface 3, 4, 5, 6" below show, "Hi"
represents upper limit, "Lo" represents lower limit).
Working
Temperature
+ 40°C
+5°C
(41 0F-1040F)
15%-80%
Relative
humidity
(no condensation)
Rated Voltage: DC 3.0 V
Atmospheric
pressure
70.0kPa
~106.0 kPa Temperature
+ 50°C
-10°C
(14 0F-1220F)
10%-93%
Relative
humidity
(no condensation)
Atmospheric
pressure
50.0kPa
~106.0 kPa
Date of purchase:
Sale company:
Contact number:
Address of sales company:

Other Jumper Medical Equipment manuals

Jumper JPD-300E User manual

Jumper

Jumper JPD-300E User manual

Jumper JPD-100A User manual

Jumper

Jumper JPD-100A User manual

Jumper JPD-500E Instruction Manual

Jumper

Jumper JPD-500E Instruction Manual

Jumper JPD-ES100 User manual

Jumper

Jumper JPD-ES100 User manual

Jumper JPD-500F User manual

Jumper

Jumper JPD-500F User manual

Jumper AngelSounds JPD-100S9 User manual

Jumper

Jumper AngelSounds JPD-100S9 User manual

Jumper FOX-200 Instruction Manual

Jumper

Jumper FOX-200 Instruction Manual

Jumper JPD-ES200 User manual

Jumper

Jumper JPD-ES200 User manual

Jumper Pulse Oximeter User manual

Jumper

Jumper Pulse Oximeter User manual

Jumper AngelSounds JPD-100S4 User manual

Jumper

Jumper AngelSounds JPD-100S4 User manual

Popular Medical Equipment manuals by other brands

EKO CORE manual

EKO

EKO CORE manual

Otto Bock 3R30 Instructions for use

Otto Bock

Otto Bock 3R30 Instructions for use

NanoVibronix PainShield FD-14A Instructions for use

NanoVibronix

NanoVibronix PainShield FD-14A Instructions for use

Winncare AERYS-120 user manual

Winncare

Winncare AERYS-120 user manual

Pain Management Technologies Ultima OTC user manual

Pain Management Technologies

Pain Management Technologies Ultima OTC user manual

Spirometrics Spiro Flow instruction manual

Spirometrics

Spirometrics Spiro Flow instruction manual

Nellcor N-200 Operator's manual

Nellcor

Nellcor N-200 Operator's manual

BIOPAC Systems NIBP100E Quick Start Installation

BIOPAC Systems

BIOPAC Systems NIBP100E Quick Start Installation

bort medical Osgood-Schlatter quick guide

bort medical

bort medical Osgood-Schlatter quick guide

Lowenstein Medical Allegra M30 Instructions for use

Lowenstein Medical

Lowenstein Medical Allegra M30 Instructions for use

Dr. Mach MACH 120 Series Mounting instructions, Directions for use

Dr. Mach

Dr. Mach MACH 120 Series Mounting instructions, Directions for use

Covidien Nellcor D-YSPD Instructions for use

Covidien

Covidien Nellcor D-YSPD Instructions for use

Stryker Masimo LNCS Instructions for use

Stryker

Stryker Masimo LNCS Instructions for use

MABIS 40-741-000 Guide book

MABIS

MABIS 40-741-000 Guide book

EMSI Flex-Tens instruction manual

EMSI

EMSI Flex-Tens instruction manual

Creative PC-60NW user manual

Creative

Creative PC-60NW user manual

Otto Bock Lisa HR32130000 Instructions for use

Otto Bock

Otto Bock Lisa HR32130000 Instructions for use

Kinetik TD1 Series user manual

Kinetik

Kinetik TD1 Series user manual

manuals.online logo
manuals.online logoBrands
  • About & Mission
  • Contact us
  • Privacy Policy
  • Terms and Conditions

Copyright 2025 Manuals.Online. All Rights Reserved.