Juna JRDAB-04 Series User manual

DAB/DAB+ module for CAR
JRDAB-04 Model:
JRDAB-04 CAN MIB/MIB2
INSTALLATION MANUAL
ul. Zgorzelicka 34 , 97-200 Tomaszow Mazowiecki POLAND
JuNa PPHU Manufacturer
Table of Contents
3
1111
1. INTRODUCTION ...............................................................................
2. RECOMMENDATIONS .....................................................................
3. MODULE .................... CONNECTION DIAGRAM FOR THE DAB
4. LOCATION OF THE KIT COMPONENTS .......................................
5. CONNECTING ANTENNA ................................................................
6. AUX ACTIVATION .............................................................................
7. R ........................................................... ADJUSTMENT TO THE CA
8. BASIC TECHNICAL PARAMETERS ...............................................
9. ELEMENTS SET ...............................................................................
2
2
4
5
6
7
8
9
9

ul. Zgorzelicka 34 , 97-200 Tomaszow Mazowiecki POLAND
JuNa PPHU Manufacturer
Digital radio tuner DAB/DAB+ for factory car radio VW/SKODA/SEAT/AUDI.
Module JRDAB-04 allow to receive and play digital radio stations on factory
sound system. Device has function which allow to follow selected station while
riding. Full integrated with CAN bus system.
Copyright
All assembly and operating instructions are protected by copyright. Distributing
documentation via print or online media is only allowed with the prior consent of
JUNA electronics.
Important
Please read installation manual very careful and keep it in right way. During
installation, pay attention to all relevant aspects related to safety of installation and
use of the device.
The priority during the design and production of all devices by JUNA electronics
company is security and service comfort. It has been achieved by applying the
modern techniques of design and production processes of electronic devices.
Module should be installed in technical workshops by qualified personnel or
by people who have experience in this type of installations. Installation of devices by
not qualification people can cause injury to persons or damage to property.
It is recommended keep to the general safety rules and pay attention for any
threat that can cause of damage to the vehicle.
We advice to mount device in safety place, where it is not exposed for moisture,
water or too high temperatures.
2
2. Recommendations
1. Introduction

ul. Zgorzelicka 34 , 97-200 Tomaszow Mazowiecki POLAND
JuNa PPHU Manufacturer
Device should not be installed in places where it could difficult safe driving or
operating efficiency of other units installed in vehicle.
The devices can be connected only to 12V. Modules can't be used in vehicles with
24V and higher voltage.
Please note that most of our devices are based on software that may require an
update. That's why you should always mount the device in easily available place in
the vehicle.
In some countries it may be necessary to check the legal provisions before
installation and startup of the device. In the interest of high quality and development
of our products, JUNA Electronics reserves the right to make technical changes.
In the case of a warranty claim, the device should be sent back to the seller in
original packaging with a detailed description of the problem with attached
purchase invoice.
Warranty claims as well as exploitation rights expire due:
A) Not authorized changes in devices or accessories, which have not been approved
or have not been provided by the manufacturer or his partners.
B) Opening the device's box
C) Yourself repair the device
D) Improper use / improper operation of the device
E) Mechanical damage
F) Flooding with water or other liquids
3
2.1. Recommendations

ul. Zgorzelicka 34 , 97-200 Tomaszow Mazowiecki POLAND
JuNa PPHU Manufacturer 4
3. Connection diagram for the DAB module
1. Turn off the ignition and vehicle radio
2. Disconnect the factory ISO connector from the MIB unit
3. Connect the harness ISO plug from the set to the vehicle's MIB
4. Connect the factory ISO connector plug to the ISO harness socket
5. Disconnect the factory LVDS connector from the MIB unit
6. Connect the cable from the set to the factory LVDS socket
7. Connect the LVDS cable from the set to the JRDAB-04 module
8. Connect the factory display cable to the JRDAB-04 module
9. Connect the QUADLOCK cable to the JRDAB-04 module
10. Connect the FAKRA antenna connector to the JRDAB-04 module
11. Turn on the ignition and start the vehicle radio
12. Perform the station search process
2
3
44
5
1
5
6
7
9
CAN bus,
power supply
LVDS connector
Factory
ISO connector
LVDS connector
Antenna Amplifier
(TLG7205)
Cable for MIB LVDS
( K-LVDS-104 )
Cable for JRDAB-04 MIB
( W-JRDAB-04-101 )
Factory cable in the car
(Screen <-> MIB head unit)
JRDAB-04 module
5m
1
2
3
44
55
5555
6
7
8
9
Important information:
AUX support is required for the JRDAB-04 module to work properly.
If the radio does not have the AUX option active, activate it.
More information on page 7.
8

ul. Zgorzelicka 34 , 97-200 Tomaszow Mazowiecki POLAND
JuNa PPHU Manufacturer 5
4. Location of the kit components
Correct placement of JRDAB-04 components:
1. Connecting the JRDAB-04 module behind the car glove box
2. Connecting the JRDAB-04 module below the LCD screen
3. DAB / DAB + antenna installation location
1. Location and connection of the module behind the car glove box
2. Location and connection of the module under the LCD display
Factory cable in the car
(Screen <-> MIB head unit) Installation site of the
JRDAB-04 module
Screen
Connect the screen to the
JRDAB-4 module (green socket)
with the K-LVDS-104 cable.
The factory cable should be
disconnected from the screen
and connected to the yellow socket
of the JRDAB-04 module
Connect the QUADLOCK
cable to the JRDAB-04 module
Connect the W-JRDAB-04-101
cable between the main unit and
the factory cable (QUADLOCK)
Installation example in VW GOLF 7 variant
The factory cable should be
disconnected from the head unit
and connected to the green socket
of the JRDAB-04 module
Connect the to the main unit
JRDAB-4 module (yellow socket)
with the K-LVDS-104 cable.
Factory cable in the car
(Screen <-> MIB head unit)
Connect the QUADLOCK
cable to the JRDAB-04
module
JRDAB-04 module
Suggested module installation
behind the car glove box
Connect the W-JRDAB-04-101
cable between the head unit and
the factory cable (QUADLOCK)
Head unit
Head unit
Installation example in VW GOLF 7 variant

ul. Zgorzelicka 34 , 97-200 Tomaszow Mazowiecki POLAND
JuNa PPHU Manufacturer 6
5. Antenna connection
The device in addition to the possibility of connecting the DAB/DAB+ antenna included
in the set, allow to connect the factory antenna set which includes the factory antenna
with the antenna amplifier mounted most often on the tailgate of the luggage
compartment. The amplifier is powered from the JRDAB-04 module with 12 voltage.
Important:
During installation antenna cable along the pistol it is necessary to pay attention for side airbags.
Cable must be installed in way to not disturb the proper operation of the air curtain.
Installation process:
1) Installation of antenna is not recommended when windscreen is very cold
2) Antenna should be mounted on windscreen from passenger side
3) Carefully remove the passenger side pistol cover
4) Clean a place where antenna will be mounted
5) Antenna should be mounted 15 cm from top edge and 7 cm from side edge of windscreen
6) Ground element of antenna amplifier should touch metal part of post. It can be join to factory
painted part of pistol
7) Antenna cable should be mounted in way to not interference with side airbag
15cm
7cm
Grounding the antenna
with the vehicle body
Antenna
Antenna amplifier
Antenna cable - 6m
Grounding element
Example of mounting a DAB/DAB+ antenna
Antenna DAB/DAB+
To join a metal ground component of antenna
amplifier remove top safety cover. Join copper
ground component with metal part of cars pistol.
Before antenna installation on windscreen remove
top safety cover.
Pic.2

6. AUX activation
ul. Zgorzelicka 34 , 97-200 Tomaszow Mazowiecki POLAND
JuNa PPHU Manufacturer 7
After the whole activation process
of the AUX source, it is recommended to
restart the radio.

ul. Zgorzelicka 34 , 97-200 Tomaszow Mazowiecki POLAND
JuNa PPHU Manufacturer 8
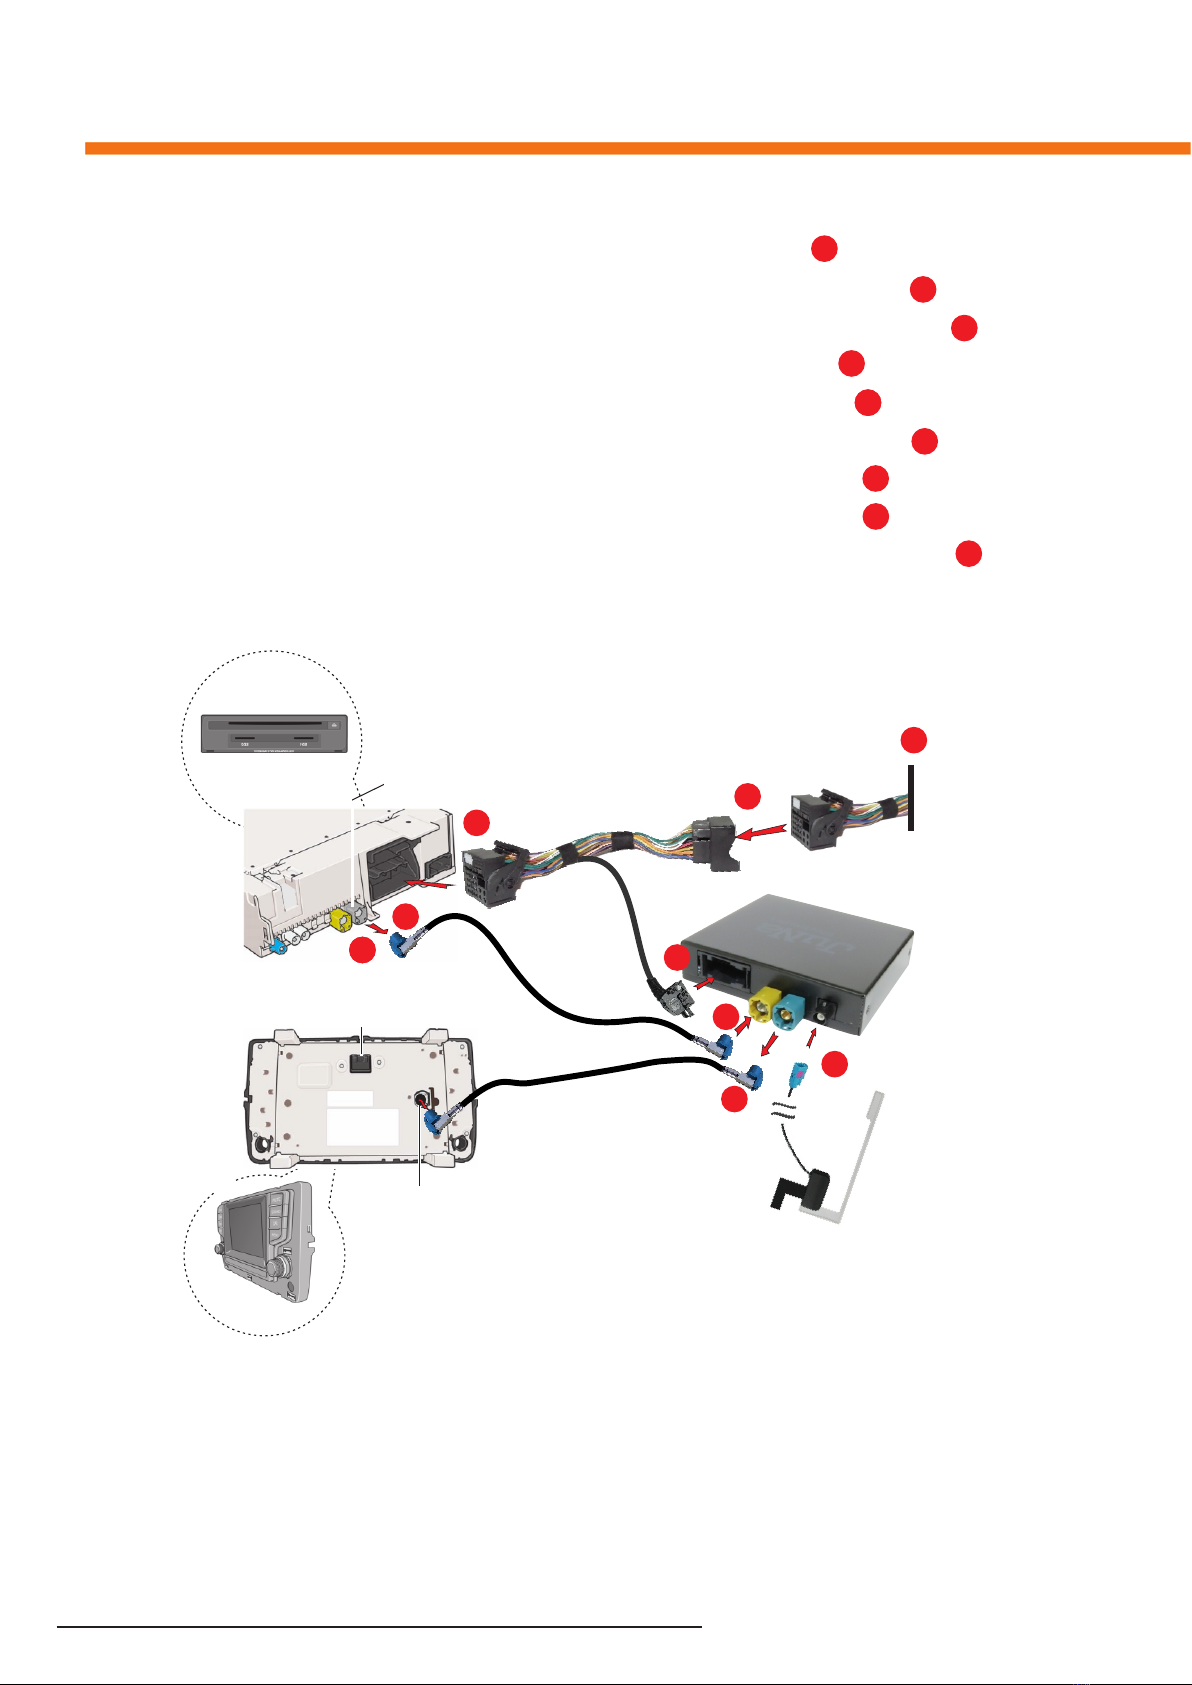
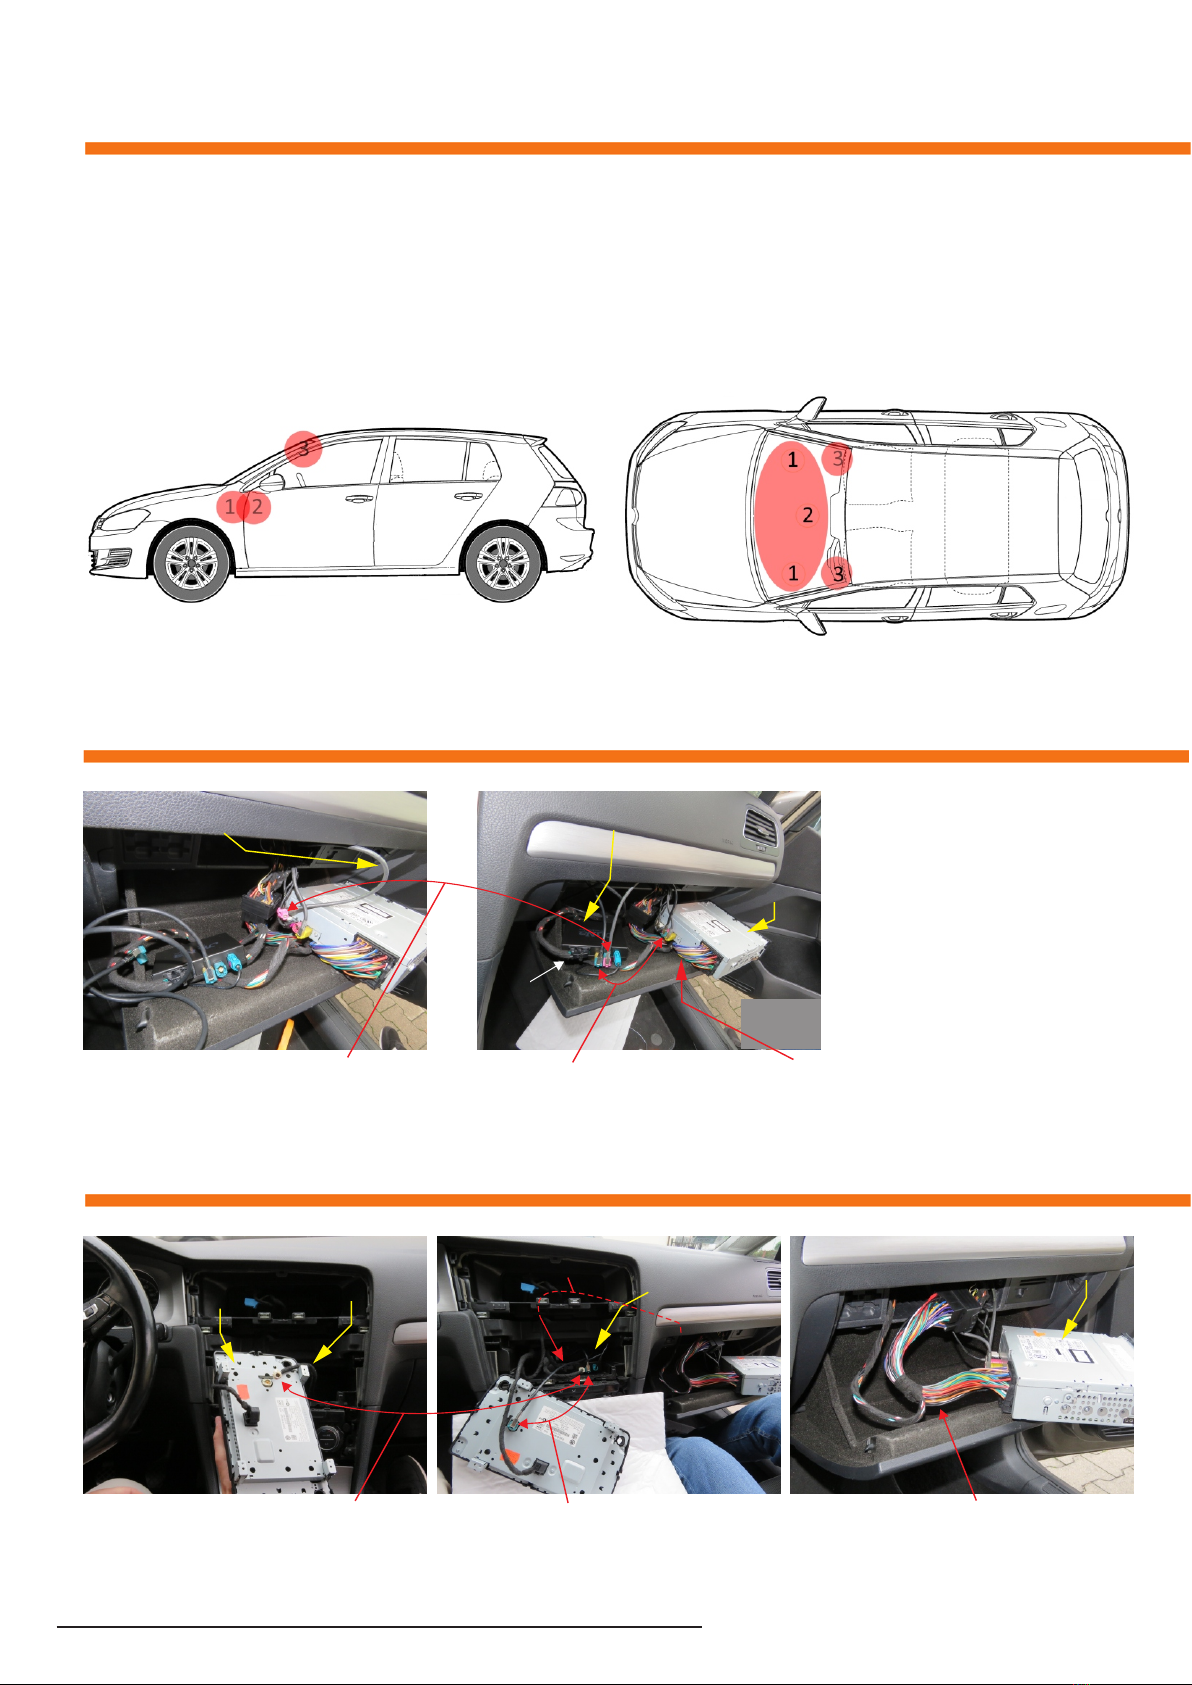
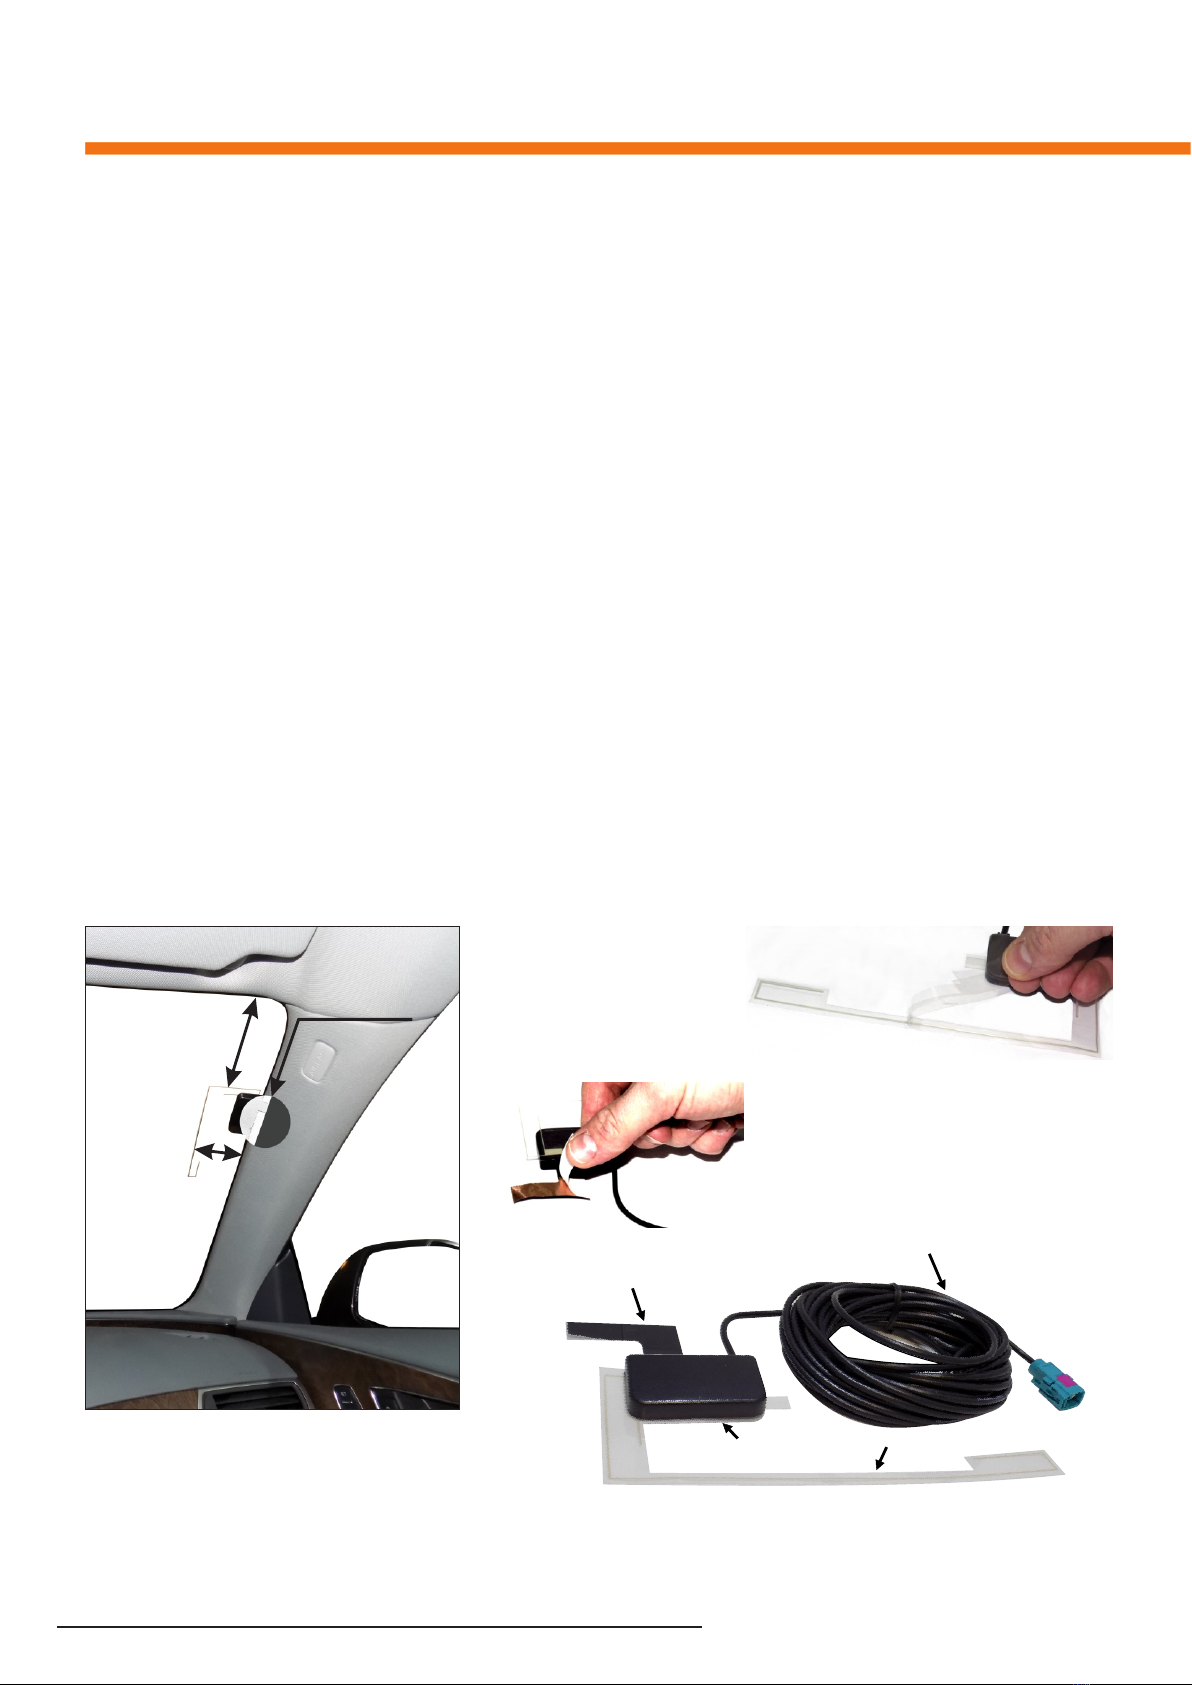
7. Adjustment to the car
After completing the installation process and turning on the DAB radio for the first
time, it is necessary to perform the matching process with the head unit and car
equipment.
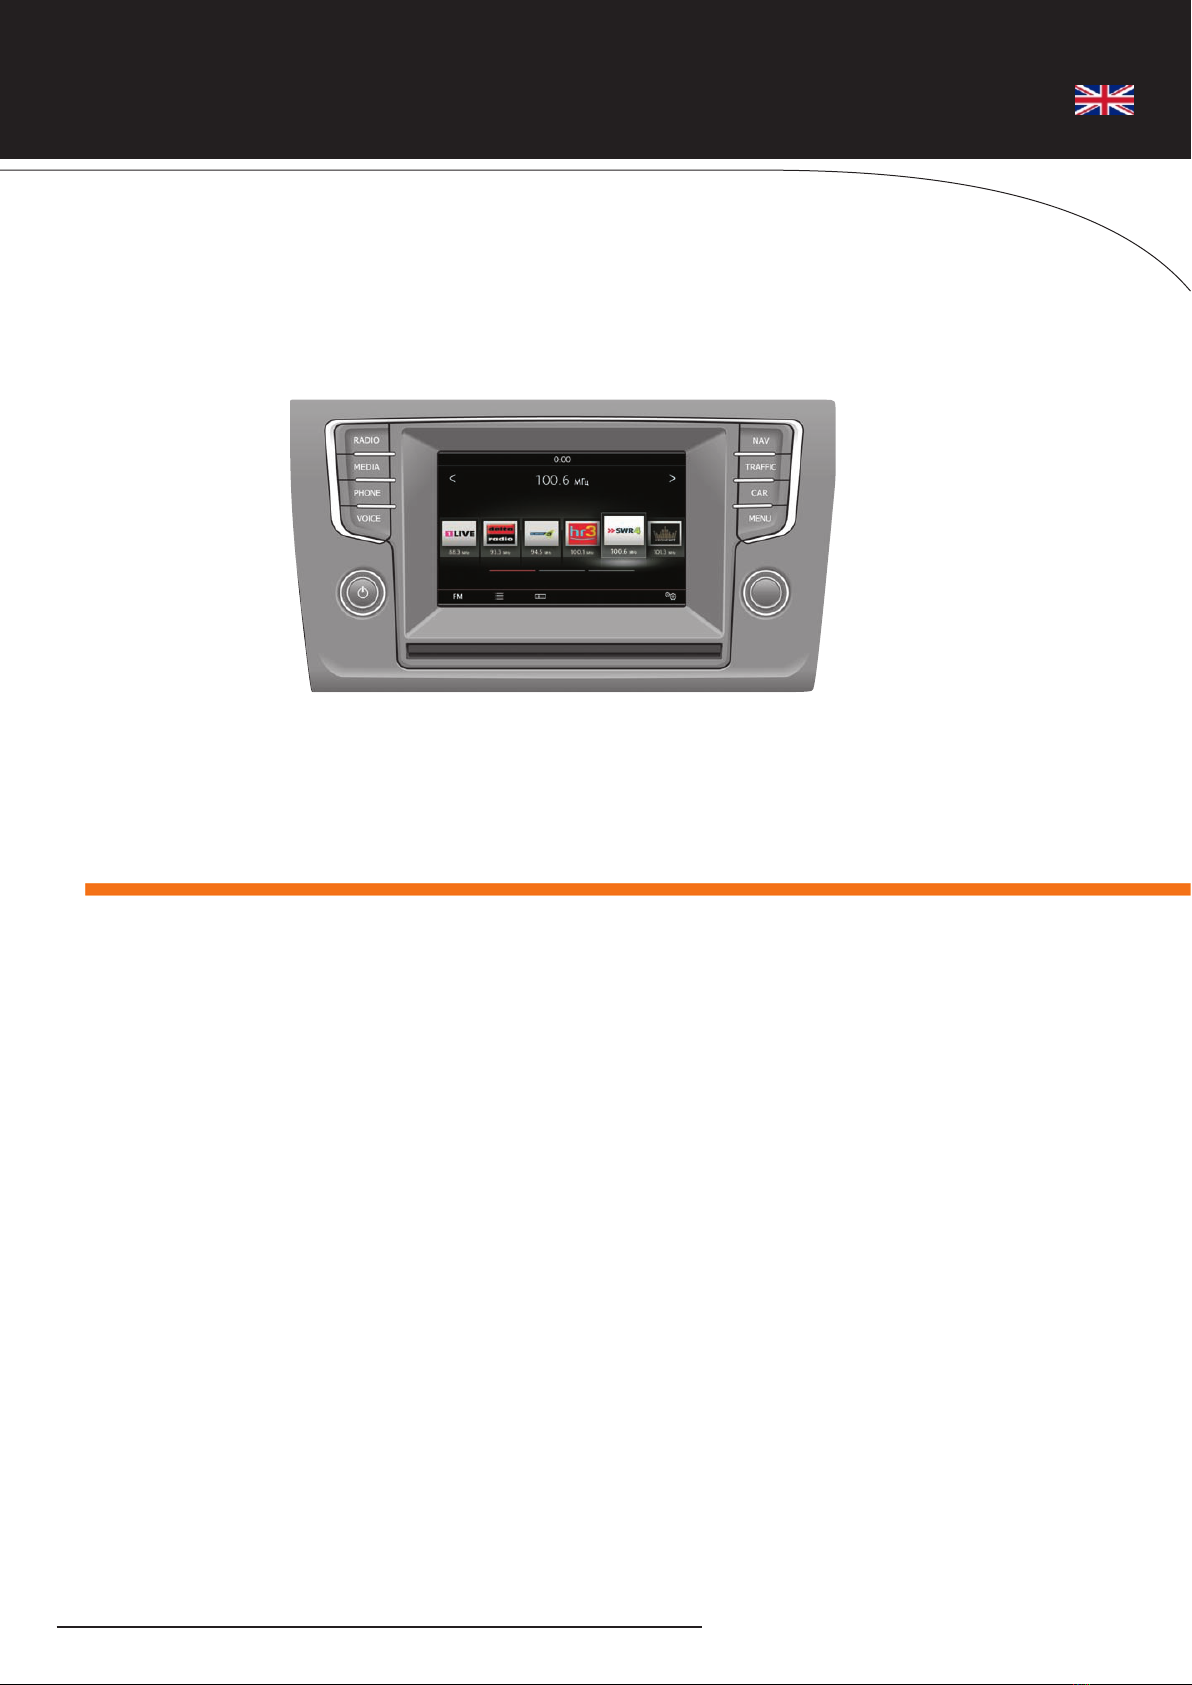
1. Selecting the screen resolution after turning on the DAB radio for the first time:
a window will appear on the screen, allowing to select the appropriate screen resolution
to match the main MIB unit Fig.1,2. This window will appear for the brand new JRDAB-04
module. When we choose the resolution, the information will remain stored and will not
reappear when DAB radio is turned on again.
Main unit window with screen
400x240 pix resolution
screen diagonal 5,7"
Main unit window with screen
resolution 800x480 pix
screen diagonal 6.4 "or 8.0"
Fig. 1 Fig. 2
2. Changing the screen resolution from the "Setup" level:
in the main window, select DAB, Setup -> Adjustment to the Car -> Change resolution
Fig. 3 and then confirm that you want change the resolution Fig. 4
Note: A special case is the situation when the JRDAB-04 module has a resolution
of 800x480 and was installed in a car with a screen resolution of 400x240, 5.7 ".
In such a situation, touch and hold for 4 seconds the space in the upper left corner
of the screen Fig. 5. to call up the resolution selection window. It does not apply to the
appearance of Seat.
Fig.3 Fig.4 Fig.5
3. Rear view camera „Setup”:
mark "Rear view camera" on the bar, according to the vehicle equipment Fig. 3.
. If the vehicle is equipped with a reversing camera, mark it as enabled.
Note: Incorrect selection may result in incorrect system operation parking.
4. Choice of window design for the car „Setup”:
mark "SKODA, VW or SEAT" on the bar according to the vehicle make Fig. 3.
The choice of the appearance of the views does not affect the operation of the system.

1. Supply voltage
2. Active power consumption with antenna
3. Active power consumption without antenna
4. Standby current
5. Antenna Power (Phantom System)
5. Communication and control
6. Housing
7. Dimensions
8. Weight
- 12V
- 321mA
- 281mA
- 0,039mA
- 8,2V (max 150mA)
- CAN
- Metal
- 107,2mm x 92,6mm x 25,2mm
- 280g
8. Basic technical parameters
ul. Zgorzelicka 34 , 97-200 Tomaszow Mazowiecki POLAND
JuNa PPHU Manufacturer 9
9. Elements set
Cable - W-JRDAB-04-101
JRDAB-04 module
Cable - K-LVDS-104 ((LVDS)
Antenna Amplifier - TLG7205
Other manuals for JRDAB-04 Series
2
This manual suits for next models
2
Table of contents
Other Juna Automobile Accessories manuals
Popular Automobile Accessories manuals by other brands

Aries
Aries S224047 installation manual

benbat
benbat NIGHT&DAY Car Mirror Instructions for use

Saris
Saris 4026F Assembly instructions

Atera
Atera STRADA SPORT M quick start guide

Hirschmann Car Communication
Hirschmann Car Communication HIT AUTA 70 B installation instructions

AlienTech
AlienTech K-TAG Master Instruction manual and users guide