5
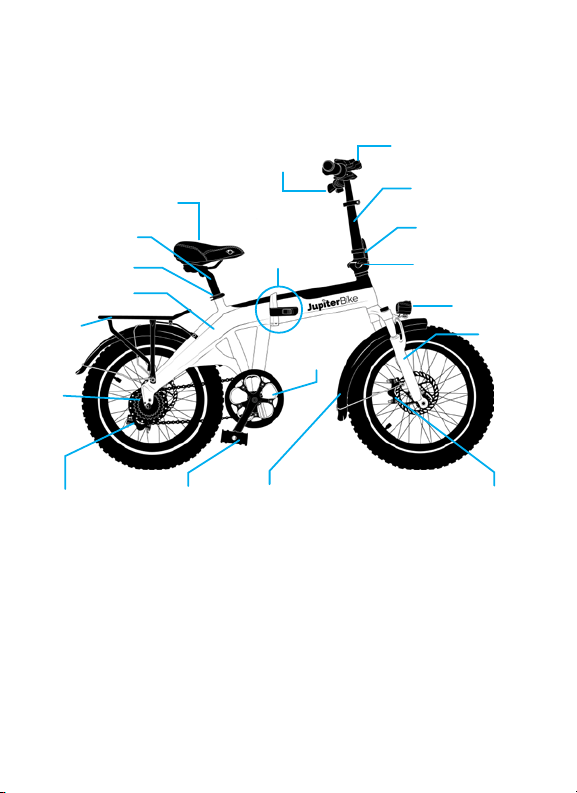
PACKING CONTENTS:
Defiant Electric Bike
Saddle & Seat Tube
User Manual
Charger
In Frame Battery
2 Keys for Battery Lock
Front & Rear Mudguard
Multi-Purpose Bike Tool
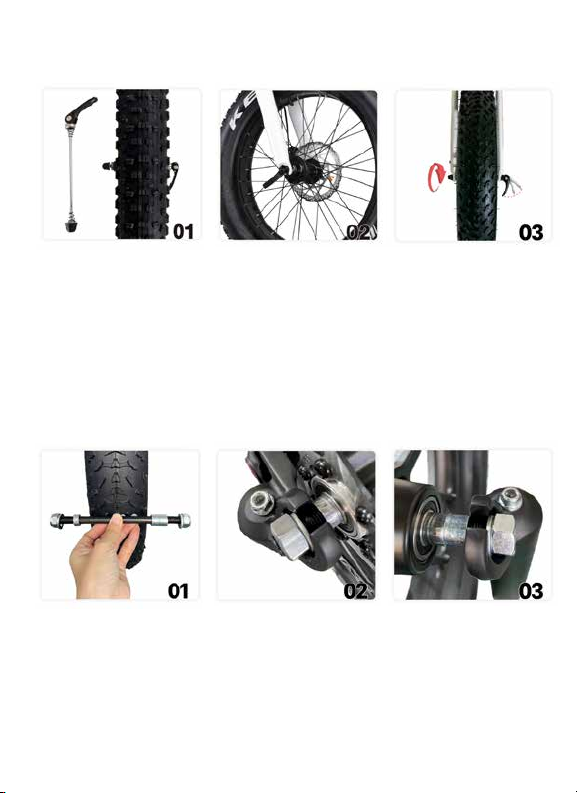
PARK TOOL
INSTALLING THE KICKSTAND
1. Locate Kickstand, Kickstand
Bolts with Washers, & Park
Tool.
2. Align the Kickstand behind
where it attaches on the left
side of the frame.
3. Screw in bolts with washers
using the included Park Tool.
1. For Defiant ST and PRO,
attach the front fender and
headlight to the crown of the
front fork using the bolt and
wingnut provided.
2. Attach the 2 fender support
rods to the back of the front
fork.
FENDER & HEADLIGHT
1b. For Defiant, attach the headlight
and front fender bracket, then retighten
the wingnut screw. Make sure no wires
are between the fork legs.
2b. Attach the rear fender so the bolt
goes through the hole in the horizonal
bar on the rear fork.
3b. Bend the forks until they are in
proper position.