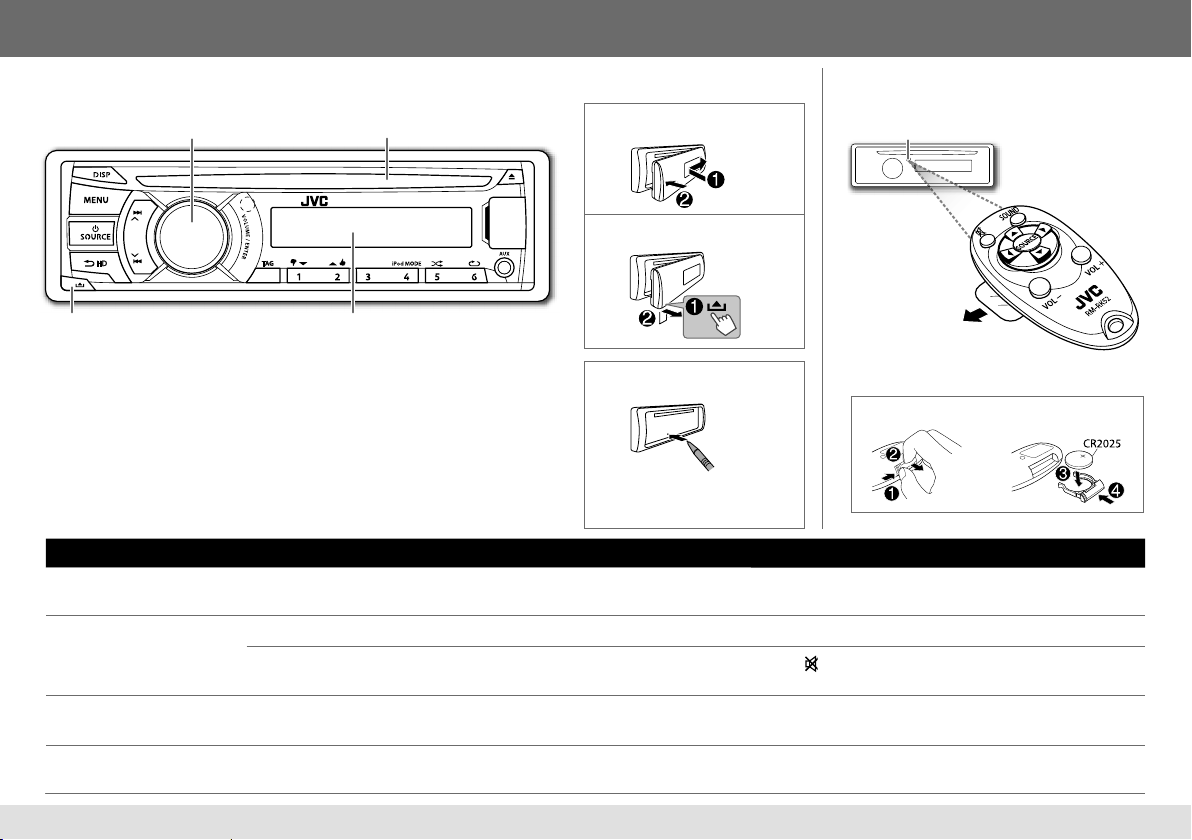
JVC KD-AHD57 User manual

KD-AHD57 / KD-HDR52
GET0837-001A [J]
ENGLISH
ESPAÑOL
FRANÇAIS
CD RECEIVER
INSTRUCTION MANUAL
RECEPTOR CON CD
MANUAL DE INSTRUCCIONES
RÉCEPTEUR CD
MANUEL D’INSTRUCTIONS
For customer Use:
Enter below the Model No. and Serial No. which are located on
the top or bottom of the cabinet. Retain this information for future
reference.
Model No.
Serial No.
Please read all instructions carefully before operation to obtain the
best possible performance from the unit.
Por favor lea detenidamente este manual para comprender a fondo
todas las instrucciones y obtener un máximo disfrute de esta unidad.
Veuillez lires les instructions attentivement avant d’utiliser l’appareil
afin d’obtenir les meilleures performances possibles de l’appareil.
EN_KD-AHD57[J]3.indd 1EN_KD-AHD57[J]3.indd 1 9/13/12 4:07:17 PM9/13/12 4:07:17 PM

2
CONTENTS BEFORE USE
BEFORE USE 2
BASICS 3
GETTING STARTED 4
CD / USB / iPod 5
AUX 8
How to read this manual
• Operations explained mainly using
buttons on the faceplate.
• [XX] indicates the selected items.
•
(
➜
XX)
indicates references are available
on the stated page number.
Warning
Do not operate any function that takes your attention away from safe driving.
Caution
Volume setting:
• Adjust the volume so that you can hear sounds outside the car to prevent accident.
• Lower the volume before playing digital sources to avoid damaging the speakers by the sudden increase of
the output level.
General:
• Avoid using the USB device or iPod/iPhone if it might hinder driving safety.
• Make sure all important data has been backed up. We shall bear no responsibility for any loss of recorded data.
• Never put or leave any metallic objects (such as coins or metal tools) inside the unit, to prevent a short circuit.
• If a disc error occurs due to condensation on the laser lens, eject the disc and wait for the moisture to evaporate.
Remote control (RM-RK52):
• Do not leave the remote control in hot places such as on the dashboard.
• The Lithium battery is in danger of explosion if replaced incorrectly. Replace it only with the same or
equivalent type.
• The battery pack or batteries shall not be exposed to excessive heat such as sunshine, fire or the like.
• Keep battery out of reach of children and in original package until ready to use. Dispose of used batteries
promptly. If swallowed, contact a physician immediately.
For USA-California Only:
This product contains a CR Coin Cell Lithium Battery which contains Perchlorate Material—special handling
may apply. See www.dtsc.ca.gov/hazardouswaste/perchlorate
2
Maintenance
Cleaning the unit: Wipe off dirt on the faceplate with a dry silicon or soft cloth.
Cleaning the connector: Detach the faceplate and clean the connector with a
cotton swab gently, being careful not to damage the connector.
Handling discs:
• Do not touch the recording surface of the disc.
• Do not stick tape etc. on the disc, or use a disc with tape stuck on it.
• Do not use any accessories for the disc.
• Clean from the center of the disc and move outward.
• Clean the disc with a dry silicon or soft cloth. Do not use any solvents.
• When removing discs from this unit, pull them out horizontally.
• Remove burrs from the center hole and disc edge before inserting a disc.
Pandora® 9
AUDIO SETTINGS 10
Connector (on the reverse
side of the faceplate)
MORE INFORMATION 11
TROUBLESHOOTING 12
SPECIFICATIONS 13
INSTALLATION / CONNECTION 14
RADIO 6
EN_KD-AHD57[J]f.indd 2EN_KD-AHD57[J]f.indd 2 10/12/12 3:58:05 PM10/12/12 3:58:05 PM

3
BASICS
To Do this (on the faceplate) Do this (on the remote control)
Turn on the power Press LSOURCE.
• Press and hold to turn off the power. ( not available )
Adjust the volume Turn the volume knob. Press VOL + or VOL –.
Press the volume knob to mute the sound or pause playback.
• Press again to cancel.
Press to mute the sound or pause playback.
• Press again to cancel.
Select a source • Press LSOURCE repeatedly.
• Press LSOURCE, then turn the volume knob within 2 seconds.
Press SOURCE repeatedly.
Change the display
information
Press DISP repeatedly.
(
➜
11)
• Press and hold to scroll the current display information. ( not available )
Faceplate
Attach
How to reset
Detach
Remote control (RM-RK52)
Volume knob
(turn/press) Loading slot
Detach button
Remote sensor
(Do not expose to bright sunlight.)
How to replace the battery
Your preset adjustments will
also be erased.
Pull out the insulation sheet
when using for the first time.
Display window
ENGLISH
EN_KD-AHD57[J]3.indd 3EN_KD-AHD57[J]3.indd 3 9/13/12 4:07:18 PM9/13/12 4:07:18 PM

4
GETTING STARTED
Cancel the demonstration
1
Press and hold
MENU
.
2
Press the volume knob to select
[DEMO]
.
3
Turn the volume knob to select
[DEMO OFF]
, then press the knob.
4
Press
MENU
to exit.
Set the clock
1
Press and hold
MENU
.
2
Turn the volume knob to select
[CLOCK]
, then press the knob.
3
Turn the volume knob to select
[CLOCK SET]
, then press the knob.
4
Turn the volume knob to select the day, then press the knob.
5
Turn the volume knob to adjust the hour, then press the knob.
6
Turn the volume knob to adjust the minute, then press the knob.
7
Press
MENU
to exit.
Set the basic settings
1
Press and hold
MENU
.
2
Turn the volume knob to make a selection, then press the knob.
• See the following table for selection.
3
Press
MENU
to exit.
To return to the previous hierarchy, press
G
HD
.
1
2
3
Default:
XX
CLOCK
CLOCK ADJ AUTO: The clock time is automatically set using the Clock Time (CT) data in FM Radio
Broadcast Data System signal. ; OFF: Cancels.
CLOCK DISP ON: The clock time is shown on the display even when the unit is turned off. ;
OFF: Cancels.
DIMMER
DIMMER SET Selects the display and button illumination adjusted in the [BRIGHTNESS] setting.
AUTO: Changes between the day and night adjustments when you turn off or on the car
headlights.*
1
; ON: Selects the night adjustments. ; OFF: Selects the day adjustments.
BRIGHTNESS Sets the display and button brightness for day and night separately.
1
DAY/NIGHT: Select day or night.
2
BUTTON ZONE/DISP ZONE: Select the zone for setting.
3
Set the brightness level (00 to 31). (Default: DAY: 31 ; NIGHT: 15)
DISPLAY
SCROLL
* 2
ONCE: Scrolls the display information once. ; AUTO: Repeats scrolling at 5-second
intervals. ; OFF: Cancels.
(Not applicable for HD Radio stations. The display information always scroll regardless of
the setting made.)
TAG DISPLAY ON: Shows the TAG information while playing MP3/WMA files. ; OFF: Cancels.
IPOD SWITCH*
3
HEAD MODE: Controls music playback only from this unit. ; IPOD MODE: Controls music
playback from both the unit and iPod/iPhone. ; EXT MODE: Controls music playback only
from the iPod/iPhone.
SRC SELECT
AM
* 4
ON: Enables AM in source selection. ; OFF: Disables.
PANDORA
* 4
ON: Enables PANDORA in source selection. ; OFF: Disables.
AUX
* 4
ON: Enables AUX in source selection. ; OFF: Disables. ; BT ADAPTER: Select when the
KS-BTA100 Bluetooth adapter is connected to the AUX jack (
➜
8). The source name will
change to BT AUDIO.
*1The illumination control wire connection is required.
(
➜
15)
*2Some characters or symbols will not be shown correctly (or will be blanked).
*3Displayed only when the source is USB-IPOD.
*4Not displayed when the corresponding source is selected.
EN_KD-AHD57[J]3.indd 4EN_KD-AHD57[J]3.indd 4 9/13/12 4:07:19 PM9/13/12 4:07:19 PM

5
CD / USB / iPod
To Do this CD USB iPod
Select a track/file Press E/ F(or 2/3on RM-RK52). *2
Select a folder
(MP3/WMA)
Press 1∞/25(or 5/∞on RM-RK52). —
Reverse/Fast-forward Press and hold E/ F(or 2/3on RM-RK52). *2
Select a track/file
from a list
1Press MENU
2Turn the volume knob to make a selection, then press the knob.
• MP3/WMA file: Select the desired folder, then a file.
• iPod or JVC Playlist Creator (JPC) / JVC Music Control (JMC) file*3: Select
the desired file from the list (PLAYLISTS, ARTISTS, ALBUMS, SONGS,
PODCASTS*4, GENRES, COMPOSERS*4).
• To return to the previous hierarchy, press GHD.
• To cancel, press MENU.
Note: Turn the volume knob quickly to fast-search.
*5
Repeat play Press 6Brepeatedly to make a selection.
• Audio CD or JPC / JMC file: TRACK RPT, RPT OFF
• MP3/WMA file: TRACK RPT, FOLDER RPT, RPT OFF
• iPod: ONE RPT, ALL RPT
*5
Random play Press 5Arepeatedly to make a selection.
• Audio CD: ALL RND, RND OFF
• MP3/WMA file or JPC / JMC file: FOLDER RND, ALL RND, RND OFF
• iPod: SONG RND, ALBUM RND*6, RND OFF
*5
Start playback
CD
The source changes to CD and playback starts.
• To eject a disc, press 0.
USB
The source changes to USB and playback
starts.
iPod/iPhone
The source changes to USB-IPOD and
playback starts.
Press 4 iPod MODE repeatedly to select
the control mode (
[HEAD MODE]
/
[IPOD
MODE]
/
[EXT MODE]
).
• See also
[IPOD SWITCH]
.
(
➜
4)
*1Do not leave the cable inside the car
when not using.
Label side
USB input terminal
USB input terminal USB 2.0 cable
*1
(commercially available)
USB 2.0 cable
*1
(accessory of the iPod/iPhone)
: Applicable
— : Not applicable
*4Only for iPod.
*5Applicable under
[HEAD MODE]
only.
(
➜
4)
*6Not applicable for some iPod/iPhone.
*2Applicable under
[HEAD MODE]
and
[IPOD MODE]
only.
(
➜
4)
*3Only for files registered in the database created with JPC / JMC.
(
➜
11)
ENGLISH
EN_KD-AHD57[J]3.indd 5EN_KD-AHD57[J]3.indd 5 9/13/12 4:07:19 PM9/13/12 4:07:19 PM

6
You can tune in to both conventional and HD Radio broadcasts.
• To find HD Radio stations in your area, visit <http://www.hdradio.com>.
Search for a station or channel
1 Press LSOURCE to select FM or AM.
2 Press and hold GHD to select the tuning mode.
•
SEEK MODE
=
HD SEEK
: Search for HD Radio broadcast only.
•
SEEK MODE
=
MANUAL SEEK
: Search for both conventional and HD Radio
broadcasts.
3 Press E/F(or 2/3on RM-RK52) to search for a station or channel
automatically.
(or)
Press and hold E/F(or 2/3on RM-RK52) until “M” flashes, then press
repeatedly to search for a station or channel manually.
• When receiving a HD Radio station, “HD” lights up on the digital audio reception,
or flashes on the analog audio reception.
• When receiving a conventional FM stereo broadcast, “ST” lights up.
To select an HD Radio multicast channel
Many HD Radio stations offer more than one channel programming. This service is
called multicasting. While receiving HD Radio multicast channels....
Press E/Fto select your desired channel (HD1 to HD8).
“LINKING” appears while linking to a multicast channel.
RADIO
Select the HD Radio reception mode
While receiving an HD Radio broadcast, you can select the reception mode of digital
audio, analog audio, or both.
Press GHD to make a selection.
•
AUTO
(default): Switches between digital and analog audio automatically. “HOLD”
flashes if the radio station forces only analog reception.
•
ANALOG
: Tunes to analog audio only. “HOLD” lights up.
•
DIGITAL
: Tunes to digital audio only. “HOLD” lights up.
• This setting does not take effect for the conventional FM/AM stations.
• The setting automatically returns to
[AUTO]
when you tune in to another
broadcast.
Store a station or channel
You can store up to 18 stations for FM and 6 stations for AM.
• HD Radio multicast channels can also be stored.
While listening to a station or channel....
Press and hold one of the number buttons (1to 6) to store.
(or)
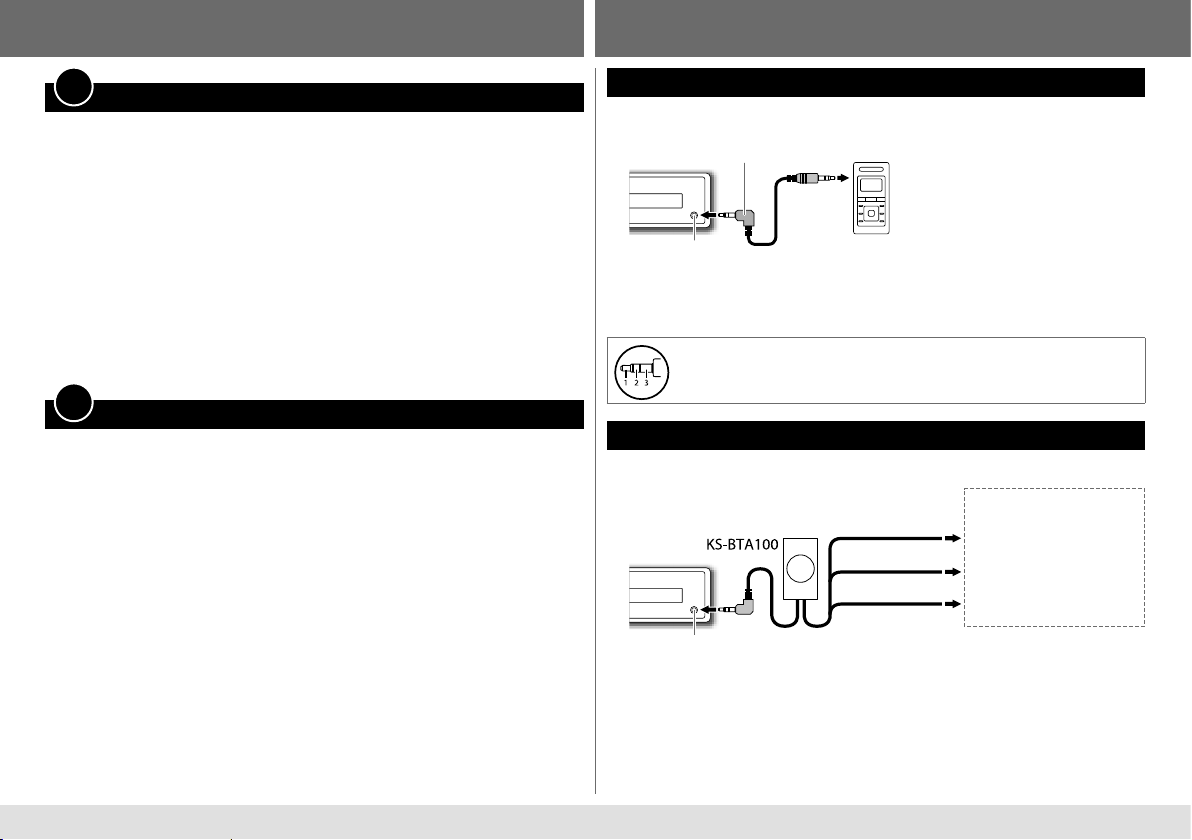
1 Press and hold the volume knob until “PRESET MODE” flashes.
2 Turn the volume knob to select a preset number, then press the knob.
The preset number flashes and “MEMORY” appears.
Select a stored station or channel
Press one of the number buttons (1to 6).
(or)
1 Press MENU.
2 Turn the volume knob to select a preset number, then press the knob.
EN_KD-AHD57[J]4.indd 6EN_KD-AHD57[J]4.indd 6 9/19/12 9:50:19 AM9/19/12 9:50:19 AM

7
RADIO
Other settings
1 Press and hold MENU.
2 Turn the volume knob to select
[TUNER]
, then press the knob.
3 Turn the volume knob to make a selection (see the following table), then
press the knob.
4 Press MENU to exit.
Default:
XX
SSM For FM: SSM 01 – 06 / SSM 07 – 12 / SSM 13 – 18:
For AM: SSM 01 – 06:
Automatically presets up to 18 stations for FM and 6 stations for AM. “SSM” stops
flashing when the first 6 stations are stored. Select SSM 07 – 12 / SSM 13 – 18 to
store the following 12 stations for FM.
AREA AREA US: For North/Central/South America, AM/FM intervals: 10 kHz/200 kHz. ;
AREA EU: For any other areas, AM/FM intervals: 9 kHz/50 kHz. ; AREA SA: For
some South American countries, AM/FM intervals: 10 kHz/50 kHz.
MONO Displayed only when the source is FM.
MONO ON: Improves the FM reception, but the stereo effect will be lost. ;
MONO OFF: Cancels.
IF BAND AUTO: Increases the tuner selectivity to reduce interference noises from adjacent
stations. (Stereo effect may be lost.) ; WIDE: Subjects to interference noises from
adjacent stations, but sound quality will not be degraded and the stereo effect will
remain.
RADIO TIMER Turns on the radio at a specific time regardless of the current source.
1
ONCE/ DAILY/ WEEKLY/ OFF: Select how often the timer will be turned on.
2
FM/ AM: Select the FM or AM band.
3
01 to 18 (for FM)/ 01 to 06 (for AM): Select the preset station.
4
Set the activation day and time.
• “
M
” lights up when complete.
Radio Timer will not activate for the following cases.
• The unit is turned off.
• [OFF] is selected for [AM] in [SRC SELECT] after Radio Timer for AM is selected.
(
➜
4)
Tag and purchase your favorite songs from iTunes Store
Some HD Radio broadcasts provide Program Service Data (PSD) for songs. You can
tag the song and store its PSD up to 50 songs while listening to the song.
• By using the tagging function, you can easily purchase the songs from iTunes
Store.
• For the best compatibility of iTunes Tagging, use the latest software versions with
the iPod/iPhone that can be connected to this unit.
(
➜
11)
Tag the song
While receiving a song with PSD (“TAG” lights up)...
Press TAG.
“TAG SAVED” appears when the song is stored on the unit.
• When
pressing TAG within 10 seconds before or after the PSD changes (while
“TAG” flashes), the tags for two songs are stored.
To check the number of tagged songs stored on the unit
Press and hold TAG.
To delete the tagged songs from the unit
1 Press and hold MENU.
2 Turn the volume knob to select
[TAG ALL CLR]
, then press and hold the knob.
“COMPLETED” appears when all the tagged songs are deleted.
1
ENGLISH
EN_KD-AHD57[J]4.indd 7EN_KD-AHD57[J]4.indd 7 9/19/12 9:37:41 AM9/19/12 9:37:41 AM

8
AUX
Use a portable audio player
1 Connect a portable audio player (commercially available).
2 Select
[ON]
for
[AUX]
in
[SRC SELECT]
.
(
➜
4)
3 Press LSOURCE to select AUX.
4 Turn on the portable audio player and start playback.
Use a 3-core plug head stereo mini plug for optimum audio output.
Use a Bluetooth® device
1 Connect the Bluetooth adapter, KS-BTA100 (separately purchased).
2 Register (pair) the Bluetooth device with KS-BTA100.
3 Select
[BT ADAPTER]
for
[AUX]
in
[SRC SELECT]
.
(
➜
4)
.
4 Press LSOURCE to select BT AUDIO
5 Start using the Bluetooth device.
For details, refer to the instruction manual of KS-BTA100.
3.5 mm (1/8") stereo mini plug with “L”
shaped connector (commercially available)
Portable audio player
Auxiliary input jack
Blue/white Blue/white: Remote
Black Black: Ground
Brown Brown: Tel muting
Wiring harness of the unit
(
➜
15)
RADIO
Transfer the tagged PSD to your iPod/iPhone
Connect the iPod/iPhone to the unit.
The source changes to “USB-IPOD,” and starts transferring the tagged PSDs to the
iPod/iPhone automatically.
• While transferring, “TAG” flashes and the number of PSD transferring and stored
appears. When all the tagged PSDs are transferred, “COMPLETED” appears.
Notes:
• Your iPod/iPhone must have 50 MB free space which is required for transferring a
tagged PSD.
• During the transferring process:
– Do not change the source.
– Do not disconnect the iPod/iPhone.
• When the connected iPod/iPhone is not compatible with iTunes Tagging you
cannot transfer the tagged PSDs.
Purchase songs from iTunes Store
1 Connect the iPod/iPhone to the PC.
2 Synchronize the iPod/iPhone on the iTunes.
The tagged PSDs are transferred to the PC and iTunes displays the list of
the tagged songs. After the data transfer is completed, the stored PSDs are
automatically deleted from the iPod/iPhone.
Notes:
• iTunes 7.4 or later version is required.
• For details about iPod/iPhone and iTunes, refer also to the instructions supplied
with the iPod/iPhone or visit <http://www.apple.com>.
2
3
EN_KD-AHD57[J]4.indd 8EN_KD-AHD57[J]4.indd 8 9/19/12 9:37:41 AM9/19/12 9:37:41 AM

9
Pandora®
Preparation:
Install the latest version of the Pandora application into
your device (iPhone/iPod touch), then log in and create
an account with Pandora.
• Select
[ON]
for
[PANDORA]
in
[SRC SELECT]
.
(
➜
4)
Start listening
1 Open the Pandora application on your device.
2 Connect your device to the USB input terminal.
The source changes to PANDORA and broadcast
starts.
* Do not leave the cable inside the car when not
using.
About Pandora
• Pandora is only available in the US.
• Because Pandora is a third-party service, the
specifications are subject to change without prior
notice. Accordingly, compatibility may be impaired or
some or all of the services may become unavailable.
• Some functions of Pandora cannot be operated from
this unit.
• For issues using the application, please contact Pandora
• If the version of the OS of the connected iPhone is
earlier than 4.0, start the Pandora application before
selecting the PANDORA source.
To Do this
Pause or resume
playback
Press the volume knob (or on RM-RK52).
Thumbs up or thumbs
down
Press 1/ 2.
• If thumbs down is selected, the current track is skipped.
Skip a track Press F(or 3on RM-RK52).
Create a new station 1 Press MENU.
2 Turn the volume knob to select
[NEW STATION]
, then press the knob.
3 Turn the volume knob to select
[FROM TRACK]
or
[FROM ARTIST]
, then press
the knob.
A new station is created based on the current song or artist.
Search for a registered
station
1 Press MENU.
2 Turn the volume knob to make a selection, then press the knob.
[BY DATE]
: According to the registered date.
[A–Z]
: Alphabetical order.
3 Turn the volume knob to select the desired station, then press the knob.
Bookmark a song or
artist information
1 Press and hold the volume knob.
2 Turn the volume knob to select
[THIS TRACK]
or
[THIS ARTIST]
, then press the
knob.
“BOOKMARKED” appears and the information is stored to your device.
The bookmark is available on your Pandora account but not on this unit.
USB input terminal
USB 2.0 cable*
(accessory of the iPhone/iPod touch)
ENGLISH
EN_KD-AHD57[J]f.indd 9EN_KD-AHD57[J]f.indd 9 10/12/12 4:00:30 PM10/12/12 4:00:30 PM

10
AUDIO SETTINGS
1 Press and hold MENU.
2 Turn the volume knob to select
[EQ SETTING]
or
[AUDIO]
, then press the knob.
3 Turn the volume knob to make a selection (see the following table), then
press the knob.
Repeat step 3until the desired item is selected.
4 Press MENU to exit.
• To return to the previous hierarchy, press GHD.
Default:
XX
EQ SETTING
EQ PRESET FLAT /
NATURAL /
DYNAMIC /
VOCAL BOOST /
BASS BOOST /
USER: Selects a preset equalizer.
EASY EQ Adjust your own sound settings.
SUB.W
*1
–08 to +08 (00)
BASS LVL –06 to +06 (00)
MID LVL –06 to +06 (00)
TRE LVL –06 to +06 (00)
• The setting is stored to [USER] in [EQ PRESET].
PRO EQ
1
BASS / MIDDLE / TREBLE: Select a sound tone.
2
Adjust the sound elements of the selected sound tone.
BASS Frequency: 60/ 80/ 100/ 200 Hz Default: (80 Hz)
Level: –06 to +06 (00)
Q: Q1.0/ Q1.25/ Q1.5/ Q2.0 (Q1.0)
MIDDLE Frequency: 0.5/ 1.0/1.5/ 2.5 kHz Default: (1.0 kHz)
Level: –06 to +06 (00)
Q: Q0.75/ Q1.0/ Q1.25 (Q1.25)
TREBLE Frequency: 10.0/ 12.5/ 15.0/ 17.5 kHz Default: (10.0 kHz)
Level: –06 to +06 (00)
Q: Q FIX (Q FIX)
• The setting is stored to [USER] in [EQ PRESET].
AUDIO
FADER
*2
*3
R06 — F06 (00): Adjusts the front and rear speaker output balance.
BALANCE
*3
L06 — R06 (00): Adjusts the left and right speaker output balance.
BASS BOOST +01 / +02: Selects your preferred bass boost level. ; OFF: Cancels.
LOUD LOW / HIGH: Boosts low or high frequencies to produce a well-balanced
sound at low volume. ; OFF: Cancels.
VOL ADJUST –05 — +05 (00): Presets the volume adjustment level of each source
(compared to the FM volume level). Before adjustment, select the source you
want to adjust. (“VOL ADJ FIX” appears if FM is selected.)
L/O MODE SUB.W / REAR: Selects whether rear speakers or a subwoofer are connected
to the REAR/SW line out terminals on the rear panel (through an external
amplifier).
SUB.W
*4
ON / OFF: Turns on or off the subwoofer output.
SUB.W LPF
*5
THROUGH: All signals are sent to the subwoofer. ; LOW 55Hz / MID 85Hz /
HIGH 120Hz: Audio signals with frequencies lower than 55 Hz/ 85 Hz/ 120 Hz
are sent to the subwoofer.
SUB.W LEVEL
*5
–08 — +08 (00): Adjusts the subwoofer output level.
BEEP ON / OFF: Activates or deactivates the keypress tone.
TEL MUTING
*6
ON: Mutes the sounds while using the cellular phone (not connected through
KS-BTA100). ; OFF: Cancels.
AMP GAIN LOW POWER: Limits the maximum volume level to 30. (Select if the
maximum power of each speaker is less than 50 W to prevent damaging the
speakers.) ; HIGH POWER: The maximum volume level is 50.
*1Displayed only when
[L/O
MODE]
is set to
[SUB.W]
and
[SUB.W]
is set to
[ON]
.
*2If you are using a two-speaker system, set the fader level to
[00]
.
*3This adjustment will not affect the subwoofer output.
*4Displayed only when
[L/O MODE]
is set to
[SUB.W]
.
*5Displayed only when
[SUB.W]
is set to
[ON]
.
*6Does not work if
[BT ADAPTER]
is selected for
[AUX]
in
[SRC SELECT]
.
EN_KD-AHD57[J]3.indd 10EN_KD-AHD57[J]3.indd 10 9/13/12 4:07:20 PM9/13/12 4:07:20 PM

11
MORE INFORMATION
About discs and audio files
• This unit can only play the following CDs:
• This unit can play back multi-session discs;
however, unclosed sessions will be skipped
during playback.
• Unplayable discs:
- Discs that are not round.
- Discs with coloring on the recording surface or
discs that are dirty.
- Recordable/ReWritable discs that have not
been finalized.
- 8 cm CD. Attempting to insert using an
adapter may cause malfunction.
• DualDisc playback: The Non-DVD side of a
“DualDisc” does not comply with the “Compact
Disc Digital Audio” standard. Therefore, the use
of Non-DVD side of a DualDisc on this product
cannot be recommended.
• Playable files:
- File extensions: MP3 (.mp3), WMA (.wma)
- Bit rate: MP3: 8 kbps — 320 kbps
WMA: 32 kbps — 192 kbps
- Sampling frequency:
MP3: 48 kHz, 44.1 kHz, 32 kHz, 24 kHz,
22.05 kHz, 16 kHz, 12 kHz, 11.025 kHz, 8 kHz
WMA: 48 kHz, 44.1 kHz, 32 kHz
- Variable bit rate (VBR) files.
• Maximum number of characters for file/
folder name:
It depends on the disc format used (includes 4
extension characters—<.mp3> or<.wma>).
- ISO 9660 Level 1 and 2: 64 characters
- Romeo: 64 characters
- Joliet: 32 characters
- Windows long file name: 64 characters
About USB devices
• This unit can play MP3/WMA files stored on a
USB mass storage class device.
• You cannot connect a USB device via a USB hub
and Multi Card Reader.
• Connecting a cable whose total length is longer
than 5 m may result in abnormal playback.
• The maximum number of characters for:
- Folder names: 63 characters
- File names: 63 characters
- MP3 Tag: 60 characters
- WMA Tag: 60 characters
• This unit can recognize a total of 65 025 files,
255 folders (255 files per folder including
folder without unsupported files), and of 8
hierarchies.
• This unit cannot recognize a USB device whose
rating is other than 5 V and exceeds 1 A.
About iPod/iPhone
• Made for
- iPod touch (1st, 2nd, 3rd, and 4th
generation)
- iPod classic
- iPod with video (5th generation)*
- iPod nano (1st*, 2nd, 3rd, 4th, 5th and 6th
generation)
- iPhone, iPhone 3G, 3GS, 4, 4S
* [IPOD MODE]/ [EXT MODE] are not
applicable.
• It is not possible to browse video files on the
“Videos” menu in [HEAD MODE].
• The song order displayed on the selection menu
of this unit may differ from that of the iPod/
iPhone.
• If some operations are not performed
correctly or as intended, visit: <http://www3.
jvckenwood.com/english/car/index.html>
(English website only).
About JVC Playlist Creator and JVC Music Control
• This unit supports the PC application JVC Playlist Creator and Android
TM
application JVC Music Control.
• When you play audio files with song data added using the JVC Playlist Creator or JVC Music Control,
you can search for audio files by Genres, Artists, Albums, Playlists and Songs.
• JVC Playlist Creator and JVC Music Control are available from the following web site:
<http://www3.jvckenwood.com/english/car/index.html> (English website only).
About HD Radio™ Technology
•
Program Service Data provides song name, artist, station ID, and other relevant
data streams.
• Adjacent to traditional main stations are HD2/HD3 Channels, providing new
original formats on the FM dial.
• HD Radio broadcasts deliver crystal clear, CD-like digital audio quality to
consumers.
• iTunes® Tagging provides users the means to “tag” broadcast radio content for later
review and purchase from the iTunes® Store.
Display information
“NO TEXT,” “NO DATA” or “NO NAME” appears if unavailable.
FM or AM Station name (PS)*
1
=
Frequency
=
Program type (PTY)*
1
or ANALOG
=
Title*
1
*
2
=
Day/Clock
=
(back to the beginning)
HD RADIO
Call Sign*
3
=
Frequency
=
Program type (PTY)*
4
=
PSD
=
Day/Clock
=
(back to
the beginning)
CD or USB Album title/Artist
=
Track title
=
Track no./Playing time
=
Day/Clock
=
(back to
the beginning)
USB-IPOD [HEAD MODE] or [IPOD MODE]: Album title/Artist
=
Track title
=
Track no./Playing
time
=
Day/Clock
=
(back to the beginning)
[EXT MODE]: EXT MODE Day/Clock
PANDORA Station name
=
Album title/Artist
=
Track title
=
Playing time
=
Day/Clock
=
(back to the beginning)
AUX AUX Day/Clock
BT AUDIO BT AUDIO Day/Clock
*
1
For FM Radio Broadcast Data System stations only.
*
2
Title information shown is dependent on the broadcast station.
*
3
Displayed only when a call sign is received.
*
4
When no program type (PTY) is received, “HD RADIO” appears.
ENGLISH
EN_KD-AHD57[J]f.indd 11EN_KD-AHD57[J]f.indd 11 10/30/12 5:17:21 PM10/30/12 5:17:21 PM

12
TROUBLESHOOTING
Symptom
Remedy
Sound cannot be heard. • Adjust the volume to the optimum level.
• Check the cords and connections.
• Be sure the rear ground terminal connected to the car’s chassis
are using shorter and thicker cords.
“MISWIRING CHK WIRING
THEN RESET UNIT” /
“WARNING CHK WIRING THEN
RESET UNIT” appears and no
operations can be done.
Check to be sure the terminals of the speaker wires are insulated
properly, then reset the unit. If this does not solve the problem,
consult your nearest service center.
Source cannot be selected. Check the [SRC SELECT] setting. (
➜
4)
Radio reception is poor. /
Static noise while listening to
the radio.
• Connect the antenna firmly.
• Pull the antenna out all the way.
Sound quality changes when
receiving HD Radio stations/
channels.
Fix the reception mode to either [ANALOG] or [DIGITAL].
(
➜
6)
No sound can be heard. • [ANALOG] is selected when receiving all digital broadcast of HD
Radio station. Select [AUTO] or [DIGITAL]. (
➜
6)
• [DIGITAL] is selected when receiving a weak digital signals
or receiving conventional radio broadcast. Select [AUTO] or
[ANALOG]. (
➜
6)
iTunes Tagging
“MEMORY FULL” You are trying to store the 51st PSD. Transfer the tagged PSDs to
the iPod/iPhone, or clear all tagged PSDs.
“TAG ALREADY SAVED” You are trying to tag the same song for the 2nd time .
“NO TAG DATA” The broadcast currently received does not support the iTunes
Tagging or the broadcast does not provide PSD.
“CAN’T TRANS IPOD FULL” The memory of the iPod/iPhone is full.
“UNSUPPORTED DEVICE
FOR TAGGING”
The connected iPod/iPhone is not compatible with iTunes
Tagging.
“TRANS ERROR” The iPod/iPhone is disconnected during data transfer.
“TRANS OFF” Data transfer is canceled.
Correct characters are not
displayed.
This unit can only display uppercase letters, numbers, and a
limited number of symbols.
“PLEASE” and “EJECT” appear
alternately.
Press
0
, then insert the disc correctly.
Symptom
Remedy
“IN DISC” appears. Make sure nothing is blocking the loading slot when you eject the
disc.
Disc cannot be ejected. Press and hold
0
to forcibly eject the disc. Be careful not to drop the
disc when it is ejected.
Playback order is not as
intended.
The playback order is determined by the file name (USB) or the order
in which files were recorded (disc).
Elapsed playing time is
not correct.
This depends on the recording process earlier.
“NOT SUPPORT” appears
and track skips.
Check whether the track is a playable format. (
➜
11)
“CANNOT PLAY” flashes
and/or connected device
cannot be detected.
• Check whether the connected device is compatible with this unit and
ensure the files are in supported formats. (
➜
11)
• Reattach the device.
“READING” keeps
flashing.
• Do not use too many hierarchical levels and folders.
• Reload the disc or reattach the USB device.
The iPod/iPhone does
not turn on or does not
work.
• Check the connection between this unit and iPod/iPhone.
• Detach and reset the iPod/iPhone using hard reset.
• Check whether the [IPOD SWITCH] setting is appropriate. (
➜
4)
Pandora
“ADD ERROR” /
“SEARCH ERR”
New station creation is unsuccessful.
“CHK DEVICE” Check the Pandora application on your device.
“NO SKIPS” The skip limit has been reached.
“NO STATIONS” No registered station is found.
“STATION LIM” The number of registered stations has reached it’s limit. Retry after
deleting an unnecessary station in your device.
“UPGRADE APP” Make sure you have installed the latest version of the Pandora
application on your device.
If you have any troubles, try the following:
1 Check TROUBLESHOOTING
2 Reset the unit (➜3)
3 Contact (USA only)
Call: 1-800-252-5722 ( or ) visit: http://www.jvc.com
EN_KD-AHD57[J]5.indd 12EN_KD-AHD57[J]5.indd 12 9/28/12 11:25:21 AM9/28/12 11:25:21 AM

13
SPECIFICATIONS
Audio amplifier
Power Output 20 W RMS ×4 Channels at 4 Ω
and ≤ 1% THD+N
Load Impedance 4 Ω (4 Ω to 8 Ω allowance)
Frequency Response 40 Hz to 20 000 Hz
Signal-to-Noise Ratio 80 dBA (reference: 1 W into 4 Ω)
Line-Out, Subwoofer-Out Level/
Impedance
2.5 V/20 kΩ load (full scale)
Output Impedance ≤ 600 Ω
Tuner
FM Frequency Range 87.9 MHz to 107.9 MHz (200 kHz step)
87.5 MHz to 108.0 MHz (50 kHz step)
Usable Sensitivity 11.3 dBf (1.0 μV/75 Ω)
50 dB Quieting Sensitivity 19.3 dBf (2.5 μV/75 Ω)
Alternate Channel Selectivity 65 dB (at 400 kHz)
Frequency Response 20 Hz to 20 000 Hz (HD Radio broadcast)
40 Hz to 15 000 Hz (Conventional broadcast)
Stereo Separation 70 dB (HD Radio broadcast)
48 dB (Conventional broadcast)
AM Frequency Range 530 kHz to 1 700 kHz (10 kHz step)
531 kHz to 1 611 kHz (9 kHz step)
Sensitivity/Selectivity 20 μV/70 dB
Frequency Response 40 Hz to 15 000 Hz (HD Radio broadcast)
Stereo Separation 70 dB (HD Radio broadcast)
CD player
Signal Detection System Non-contact optical pickup (semiconductor laser)
Number of Channels 2 channels (stereo)
Frequency Response 5 Hz to 20 000 Hz
Signal-to-Noise Ratio 98 dB
Wow and Flutter Below measurable limit
USB
USB Standard USB 1.1, USB 2.0
Data Transfer Rate (Full Speed) Max. 12 Mbps
Compatible Devices Mass storage class
Compatible File Systems FAT 32/16/12
Playable Audio Formats MP3/WMA
Maximum Supply Current DC 5 V
d
1 A
General
Power Requirements (Operating Voltage)
DC 14.4 V (11 V to 16 V allowance)
Grounding System Negative ground
Allowable Operating Temperature 0°C to +40°C (32°F to 104°F)
Dimensions
(W × H × D)
Installation Size
(approx.)
182 mm × 53 mm × 159 mm
(7-3/16" × 2-1/8" × 6-5/16")
Panel Size (approx.) 188 mm × 59 mm × 13 mm
(7-7/16" × 2-3/8" × 9/16")
Weight (excluding accessories) 1.2 k
g
(2.6lbs)
Subject to change without notice.
ENGLISH
EN_KD-AHD57[J]3.indd 13EN_KD-AHD57[J]3.indd 13 9/13/12 4:07:21 PM9/13/12 4:07:21 PM

14
INSTALLATION / CONNECTION
Warning
•
The unit can only be used with a 12 V DC power supply, negative ground.
•
Disconnect the battery’s negative terminal before wiring and mounting.
• Do not connect Battery wire (yellow) and Ignition wire (red) to the car
chassis or Ground wire (black) to prevent a short circuit.
• Insulate unconnected wires with vinyl tape to prevent a short circuit.
• Be sure to ground this unit to the car’s chassis again after installation.
Caution
• For safety’s sake, leave wiring and mounting to professionals. Consult
the car audio dealer.
• Install this unit in the console of your vehicle. Do not touch the metal
parts of this unit during and shortly after use of the unit. Metal parts
such as the heat sink and enclosure become hot.
• Do not connect the
·
wires of speaker to the car chassis, Ground wire
(black), or in parallel.
• Connect speakers with a maximum power of more than 50 W. If the
maximum power of the speakers is lower than 50 W, change the
[AMP GAIN] setting to avoid damaging the speakers. (
➜
10)
• Mount the unit with the angle of 30° or less.
• If your vehicle wiring harness does not have the ignition terminal,
connect Ignition wire (red) to the terminal on the vehicle’s fuse box
which provides 12 V DC power supply and is turned on and off by the
ignition key.
• After the unit is installed, check whether the brake lamps, blinkers,
wipers, etc. on the car are working properly.
• If the fuse blows, first make sure the wires are not touching car’s
chassis, then replace the old fuse with one that has the same rating.
Basic procedure
1 Remove the key from the ignition switch, then
disconnect the ·terminal of the car battery.
2 Connect the wires properly.
See Wiring connection.
(
➜
15)
3 Install the unit to your car.
See Installing the unit (in-dash mounting).
4 Connect the ·terminal of the car battery.
5 Reset the unit.
(
➜
3)
Do the required wiring.
(
➜
15)
How to remove the unit
Installing the unit (in-dash mounting)
When installing without the mounting sleeve
Bracket (not supplied)
Bend the appropriate tabs to hold
the sleeve firmly in place.
Make sure the direction of
the trim plate.
Pocket
Flat or round head screws (not supplied)
M5 × 8 mm (M5 × 3/8")
EN_KD-AHD57[J]5.indd 14EN_KD-AHD57[J]5.indd 14 9/28/12 11:25:38 AM9/28/12 11:25:38 AM

15
STEERING
WHEEL
REMOTE
Car fuse block
Ignition switch
Recommended
connection
Light blue/yellow
KD-AHD57
only
Vehicle-specific Wiring Harness
(separately purchased)
For more information:
Metra Electronics:
www.metraonline.com
Scosche Industries:
www.scosche.com
Blue/white: To amplifier
Blue: To power antenna
Make this connection if
your vehicle factory wiring
harness does not have “12 V
ignition switch” wire.
Separate red wire
Wiring connection
Signal cord (not supplied)
Remote wire
(not supplied)
Rear ground terminal
To the steering wheel
remote control adapter
Fuse (10 A)
Antenna terminal
Front output
Rear/subwoofer output
JVC Amplifier
Factory wiring harness
(vehicle)
Vehicle dashboard
Part list for installation
( ×2 )
( ×1 )
( ×1 )
( ×1 )
( ×1 )
A
Faceplate
B
Mounting sleeve
C
Trim plate
D
Wiring harness
E
Extraction key
Black: Ground
Yellow: Battery 12 V
White: Front speaker (left)
White/black
Gray: Front speaker (right)
Gray/black
Green: Rear speaker (left)
Green/black
Purple: Rear speaker (right)
Purple/black
Join the same color wires together.
Red: Ignition 12 V
Orange/white: Illumination
Brown: Tel muting
Blue/white: Remote (200 mA max.)
ENGLISH
EN_KD-AHD57[J]3.indd 15EN_KD-AHD57[J]3.indd 15 9/13/12 4:07:21 PM9/13/12 4:07:21 PM

2
CONTENIDO ANTES DEL USO
ANTES DEL USO 2
PUNTOS BÁSICOS 3
PROCEDIMIENTOS INICIALES 4
CD / USB / iPod 5
AUX 8
Cómo leer este manual
• Las operaciones se explican utilizando
principalmente los botones de la placa
frontal.
• [XX] indica los elementos seleccionados.
•
(
➜
XX)
significa que hay información
disponible en el número de página
indicado.
Advertencia
No utilice ninguna función que pueda desviar su atención mientras está conduciendo el vehículo.
Precaución
Ajuste del volumen:
• Ajuste el volumen a un nivel que le permita oír los ruidos del exterior para impedir accidentes.
• Antes de reproducir fuentes digitales, baje el volumen para evitar que el repentino aumento del nivel de salida
cause daños a los altavoces.
General:
• Evite el uso de dispositivos USB o iPod/iPhone cuando puedan afectar la seguridad de conducción.
• Asegúrese de tener una copia de respaldo de todos los datos importantes. No aceptamos responsabilidad
alguna por la pérdida de los datos grabados.
• Para evitar cortocircuitos, nunca coloque ni deje objetos metálicos (por ejemplo, monedas o herramientas
metálicas) dentro de la unidad.
• Si ocurre un error de disco debido a la condensación en el lente láser, extraiga el disco y espere hasta que se
evapore la humedad.
Mando a distancia (RM-RK52):
• No deje el mando a distancia sobre superficies calientes, tales como el salpicadero.
• Si la batería de litio no se instala correctamente, existirá el peligro de una explosión. Sustituya la batería
únicamente por otra del mismo tipo o un tipo equivalente.
• El bloque de baterías no debe exponerse a una fuente de calor excesiva, como luz solar, fuego o similar.
• Mantenga la batería fuera del alcance de los niños y en su embalaje original hasta que esté listo para su uso.
Deseche las baterías utilizadas de forma rápida. En caso de tragarse, póngase con un médico inmediatamente.
Sólo para EE.UU.-California:
Este producto contiene una batería de litio CR de tipo botón que contiene perclorato (puede requerirse una
manipulación especial). Visite www.dtsc.ca.gov/hazardouswaste/perchlorate
Mantenimiento
Limpieza de la unidad: Limpie la suciedad de la placa frontal con un paño suave o paño de silicona seco.
Limpieza del conector: Desmonte la placa frontal y limpie el conector con un
palillo de algodón, teniendo cuidado de no dañarlo.
Cómo manipular los discos:
• No toque la superficie de grabación del disco.
• No pegue cinta etc. sobre el disco ni utilice un CD con cinta pegada sobre él.
• No utilice accesorios para el disco.
• Limpie desde el centro del disco hacia el exterior.
• Limpie el disco con un paño seco o de silicona. No utilice disolventes.
• Cuando extraiga los discos de esta unidad, tire de estos en sentido horizontal.
• Antes de insertar un disco, quite las rebabas de los bordes del orificio central y del borde exterior.
Pandora® 9
AJUSTES DE AUDIO 10
Conector (en el reverso de
la placa frontal)
MÁS INFORMACIÓN 11
LOCALIZACIÓN Y SOLUCIÓN DE
PROBLEMAS 12
ESPECIFICACIONES 13
INSTALACIÓN / CONEXIÓN 14
RADIO 6
SP_KD-AHD57[J].indd 2SP_KD-AHD57[J].indd 2 10/25/12 4:56:18 PM10/25/12 4:56:18 PM

3
PUNTOS BÁSICOS
Para Hacer esto (en la placa frontal) Hacer esto (en el mando a distancia)
Encender la unidad Pulse LSOURCE.
• Pulse y mantenga pulsado para apagar la unidad. ( no disponible )
Ajustar el volumen Gire la rueda de volumen. Pulse VOL + o VOL –.
Pulse la rueda de volumen para enmudecer el sonido o pausar la
reproducción.
• Pulse otra vez para cancelar.
Pulse para enmudecer el sonido o pausar la
reproducción.
• Pulse otra vez para cancelar.
Seleccionar una fuente • Pulse LSOURCE repetidamente.
• Pulse LSOURCE y, a continuación, gire la rueda de volumen antes de
que transcurran 2 segundos.
Pulse SOURCE repetidamente.
Cambiar la información en
pantalla
Pulse DISP repetidamente.
(
➜
11)
• Pulse y mantenga pulsado para desplazar la información en pantalla. ( no disponible )
Placa frontal
Fijar
Cómo reinicializar
Desmontar
Mando a distancia (RM-RK52)
Rueda de volumen
(girar/pulsar) Ranura de carga
Botón de liberación
Sensor remoto
(DO lo exponga a la luz solar brillante.)
Cómo cambiar la batería
También se borrarán los ajustes
preestablecidos por usted.
Retire la hoja aislante cuando
se utilice por primera vez.
Ventanilla de visualización
ESPAÑOL
SP_KD-AHD57[J].indd 3SP_KD-AHD57[J].indd 3 10/25/12 4:56:20 PM10/25/12 4:56:20 PM

4
PROCEDIMIENTOS INICIALES
Cancele la demostración
1
Pulse y mantenga pulsado
MENU
.
2
Pulse la rueda de volumen para seleccionar
[DEMO]
.
3
Gire la rueda de volumen para seleccionar
[DEMO OFF]
y luego
púlsela.
4
Pulse
MENU
para salir.
Puesta en hora del reloj
1
Pulse y mantenga pulsado
MENU
.
2
Gire la rueda de volumen para seleccionar
[CLOCK]
y luego púlsela.
3
Gire la rueda de volumen para seleccionar
[CLOCK SET]
y luego
púlsela.
4
Gire la rueda de volumen para seleccionar el día, y luego púlsela.
5
Gire la rueda de volumen para ajustar la hora y luego púlsela.
6
Gire la rueda de volumen para ajustar los minutos y luego púlsela.
7
Pulse
MENU
para salir.
Realice los ajustes básicos
1
Pulse y mantenga pulsado
MENU
.
2
Gire la rueda de volumen para seleccionar y luego púlsela.
• Para realizar la selección, consulte la siguiente tabla.
3
Pulse
MENU
para salir.
Para volver a la jerarquía anterior, pulse
G
HD
.
1
2
3
Predeterminado:
XX
CLOCK
CLOCK ADJ AUTO: El reloj se ajusta automáticamente en sincronización con los datos de CT (hora del
reloj) de la señal del FM Radio Broadcast Data System. ; OFF: Se cancela.
CLOCK DISP ON: La hora del reloj siempre se visualiza en la pantalla cuando la unidad está apagada. ;
OFF: Se cancela.
DIMMER
DIMMER SET Selecciona la iluminación de la pantalla y de los botones definida mediante el ajuste
[BRIGHTNESS].
AUTO: Cambia entre los ajustes diurno y nocturno cuando se apagan o encienden los faros del
vehículo.*
1
; ON: Selecciona los ajustes de uso nocturno. ; OFF: Selecciona el ajuste diurno.
BRIGHTNESS Ajusta separadamente el brillo de la pantalla y de los botones para uso diurno y nocturno.
1
DAY/NIGHT: Selecciona ajuste diurno o nocturno.
2
BUTTON ZONE/DISP ZONE: Selecciona la zona para el ajuste.
3
Ajusta el nivel de brillo (00 a 31). (Predeterminado: DAY: 31 ; NIGHT: 15)
DISPLAY
SCROLL
* 2
ONCE: Desplaza una vez la información en pantalla. ; AUTO: El desplazamiento se repite a
intervalos de 5 segundos. ; OFF: Se cancela.
(No aplicable a emisoras HD Radio. La información siempre se desplaza en la pantalla,
independientemente del ajuste realizado.)
TAG DISPLAY ON: Muestra la información de etiqueta (TAG) mientras se reproducen pistas MP3/WMA. ;
OFF: Se cancela.
IPOD SWITCH*
3
HEAD MODE: Controla la reproducción de música solo con esta unidad. ;
IPOD MODE: Controla la reproducción de música tanto con la unidad como con el iPod/
iPhone. ; EXT MODE: Controla la reproducción de música solo con el iPod/iPhone.
SRC SELECT
AM
* 4
ON: Habilita AM en la selección de la fuente. ; OFF: Se deshabilita.
PANDORA
* 4
ON: Habilita PANDORA en la selección de la fuente. ; OFF: Se deshabilita.
AUX
* 4
ON: Habilita AUX en la selección de la fuente. ; OFF: Se deshabilita. ;
BT ADAPTER: Selecciónelo cuando el adaptador Bluetooth KS-BTA100 está conectado a la
toma AUX (
➜
8). El nombre de la fuente cambiará a BT AUDIO.
*1Se requiere la conexión del cable de control de iluminación.
(
➜
15)
*2Algunos caracteres o símbolos no se mostrarán correctamente (o aparecerán en blanco).
*3Se puede visualizar solamente cuando la fuente sea USB-IPOD.
*4No se visualiza cuando se ha seleccionado la fuente correspondiente.
SP_KD-AHD57[J].indd 4SP_KD-AHD57[J].indd 4 10/25/12 4:56:22 PM10/25/12 4:56:22 PM

5
CD / USB / iPod
Para Hacer esto CD USB iPod
Seleccionar una
pista/archivo
Pulse E/F(o 2/3en el RM-RK52). *2
Seleccione una
carpeta (MP3/WMA)
Pulse 1∞/25(o 5/∞en el RM-RK52). —
Retroceder/avanzar
rápidamente
Pulse y mantenga pulsado E/F(o 2/3en el RM-RK52). *2
Seleccionar una
pista/archivo de una
lista
1Pulse MENU
2Gire la rueda de volumen para seleccionar y luego púlsela.
• Archivo MP3/WMA: Seleccione la carpeta que desee y luego el archivo.
• iPod o archivo JVC Playlist Creator (JPC) / JVC Music Control (JMC)*3:
Seleccione en la lista el archivo que desea (PLAYLISTS, ARTISTS, ALBUMS,
SONGS, PODCASTS*4, GENRES, COMPOSERS*4).
• Para volver a la jerarquía anterior, pulse GHD.
• Para cancelar, pulse MENU.
Nota: Gire rápidamente la rueda de volumen para la búsqueda
rápida.
*5
Repetir
reproducción
Pulse 6Brepetidas veces para realizar una selección.
• CD de audio o archivo JPC / JMC: TRACK RPT, RPT OFF
• Archivo MP3/WMA: TRACK RPT, FOLDER RPT, RPT OFF
• iPod: ONE RPT, ALL RPT
*5
Reproducción
aleatoria
Pulse 5Arepetidas veces para realizar una selección.
• CD de audio: ALL RND, RND OFF
• Archivo MP3/WMA o archivo JPC / JMC: FOLDER RND, ALL RND, RND OFF
• iPod: SONG RND, ALBUM RND*6, RND OFF
*5
Inicie la reproducción
CD
La fuente cambia a CD y se inicia la
reproducción.
• Para expulsar un disco, pulse 0.
USB
La fuente cambia a USB y se inicia la
reproducción.
iPod/iPhone
La fuente cambia a USB-IPOD y se inicia la
reproducción.
Pulse 4 iPod MODE repetidas veces para
seleccionar el modo de control (
[HEAD
MODE]
/
[IPOD MODE]
/
[EXT MODE]
).
• Consulte también
[IPOD SWITCH]
.
(
➜
4)
*1No deje el cable dentro del vehículo
cuando no lo esté utilizando.
Lado de la etiqueta
Terminal de entrada USB
Terminal de entrada USB Cable USB 2.0
*1
(disponible en el
mercado)
Cable USB 2.0
*1
(accesorio del iPod/iPhone)
: Aplicable
— : No aplicable
*4Sólo para iPod.
*5Aplicable en
[HEAD MODE]
solamente.
(
➜
4)
*6No aplicable para algunas unidades iPod/
iPhone.
*2Aplicable en
[HEAD MODE]
y
[IPOD MODE]
solamente.
(
➜
4)
*3Sólo para los archivos registrados en la base de datos creados
con JPC / JMC.
(
➜
11)
ESPAÑOL
SP_KD-AHD57[J].indd 5SP_KD-AHD57[J].indd 5 10/25/12 4:56:22 PM10/25/12 4:56:22 PM

6
Puede sintonizar tanto transmisiones convencionales como transmisiones HD Radio.
• Para encontrar emisoras de HD Radio en su área, visite
<http://www.hdradio.com/>.
Busca una emisora o un canal de radio
1 Pulse LSOURCE para seleccionar FM o AM.
2 Pulse y mantenga pulsado GHD para seleccionar el modo de sintonización.
•
SEEK MODE
=
HD SEEK
: Busca sólo emisión de HD Radio.
•
SEEK MODE
=
MANUAL SEEK
: Busca tanto emisiones convencionales como HD
Radio.
3 Pulse E/F(o 2/3en el RM-RK52) para la búsqueda automática de una
emisora o un canal.
(o)
Pulse y mantenga pulsado E/F(o 2/3en el RM-RK52) hasta que parpadee
“M” y, a continuación, pulse repetidas veces para la búsqueda manual de una
emisora o un canal.
• Cuando se recibe una emisora HD Radio, “HD” se enciende en la recepción de
audio digital, o parpadea en la recepción de audio analógico.
• Cuando se recibe una emisión en FM estéreo convencional, se enciende “ST”.
Seleccione un canal multidifusión HD Radio
Numerosas emisoras HD Radio ofrecen más de un canal de programación. Este
servicio recibe el nombre de “multicasting” (multidifusión). Durante la recepción de
canales HD Radio multidifusión...
Pulse E/Fpara seleccionar el canal que desee (HD1 a HD8).
Aparece “LINKING” mientras se establece el enlace con un canal multidifusión.
RADIO
Seleccione el modo de recepción de HD Radio
Mientras se recibe una emisión HD Radio, puede seleccionar entre el modo de
recepción de audio digital, audio analógico, o ambos.
Pulse GHD para realizar una selección.
•
AUTO
(predeterminado): Cambia automáticamente entre audio digital y audio
analógico. “HOLD” parpadea cuando se mantiene la recepción analógica.
•
ANALOG
: Se sintoniza solo audio analógico. “HOLD” se enciende.
•
DIGITAL
: Sintoniza solo audio digital. “HOLD” se enciende.
• Este ajuste no posee ningún efecto en las emisoras FM/AM convencionales.
• El ajuste volverá automáticamente a
[AUTO]
cuando se sintonice otra difusión.
Guarde una emisora o un canal
Puede almacenar hasta 18 emisoras de FM y 6 emisoras de AM en la memoria.
• También se pueden guardar canales HD Radio multicast.
Mientras escucha una emisora o un canal....
Para almacenarlas, pulse y mantenga pulsado uno de los botones numéricos
(1a 6).
(o)
1 Pulse y mantenga pulsada la rueda de volumen hasta que “PRESET MODE”
parpadee.
2 Gire la rueda de volumen para seleccionar un número de preajuste y luego
púlsela.
El número de preajuste parpadea y aparece “MEMORY”.
Seleccione una emisora o canal guardado
Pulse uno de los botones numéricos (1a 6).
(o)
1 Pulse MENU.
2 Gire la rueda de volumen para seleccionar un número de preajuste y luego
púlsela.
SP_KD-AHD57[J].indd 6SP_KD-AHD57[J].indd 6 10/25/12 4:56:26 PM10/25/12 4:56:26 PM
This manual suits for next models
1
Table of contents
Languages:
Other JVC Car Receiver manuals