JVC KW-R940BTS User manual

2
Data Size: B6L (182 mm x 128 mm)
Book Size: B6L (182 mm x 128 mm)
Basic procedure
1 Remove the key from the ignition switch, then disconnect the
terminal of the car battery.
2 Connect the wires properly. See “Wiring connection” on page 3.
3 Install the unit to your car. See the following “Installing the unit
(in-dash mounting)”.
4 Connect the terminal of the car battery.
5 Press SOURCEBto turn on the power.
6 Reset the unit. See “How to reset” on page 4.
Installing the unit (in-dash mounting)
Part list (supplied)
(A) Wiring harness (×1)
(B) Flat head screw, M5 × 8 mm (M5 × 3/8”) (×8)
(C) Round head screw, M5 × 8 mm (M5 × 3/8”) (×8)
Installation/Connection
This section is for the professional installer.
For safety’s sake, leave wiring and mounting to professionals. Consult the car audio dealer.
WARNING
• The unit can only be used with a 12 V DC power supply, negative ground.
• Disconnect the battery’s negative terminal before wiring and mounting.
• Do not connect Battery wire (yellow) and Ignition wire (red) to the car chassis or Ground wire (black) to
prevent a short circuit.
• To prevent short circuit:
– Insulate unconnected wires with vinyl tape.
– Be sure to ground this unit to the car’s chassis again after installation.
– Secure the wires with cable clamps and wrap vinyl tape around the wires that comes into contact with
metal parts to protect the wires.
CAUTION
• Install this unit in the console of your vehicle. Do not touch the metal parts of this unit during and shortly
after use of the unit. Metal parts such as the heat sink and enclosure become hot.
• Do not connect the wires of speakers to the car chassis or Ground wire (black), or connect them in
parallel.
• Connect speakers with a maximum power of more than 50 W. If the maximum power of the speakers is
lower than 50 W, change the
[AMPGAIN]
setting to avoid damaging the speakers.
• Mount the unit at an angle of less than 30º.
• If your vehicle wiring harness does not have the ignition terminal, connect Ignition wire (red) to the
terminal on the vehicle’s fuse box which provides 12 V DC power supply and is turned on and off by the
ignition key.
• Keep all cables away from heat dissipate metal parts.
• After the unit is installed, check whether the brake lamps, blinkers, wipers, etc. on the car are working
properly.
• If the fuse blows, first make sure the wires are not touching car’s chassis, then replace the old fuse with
one that has the same rating.
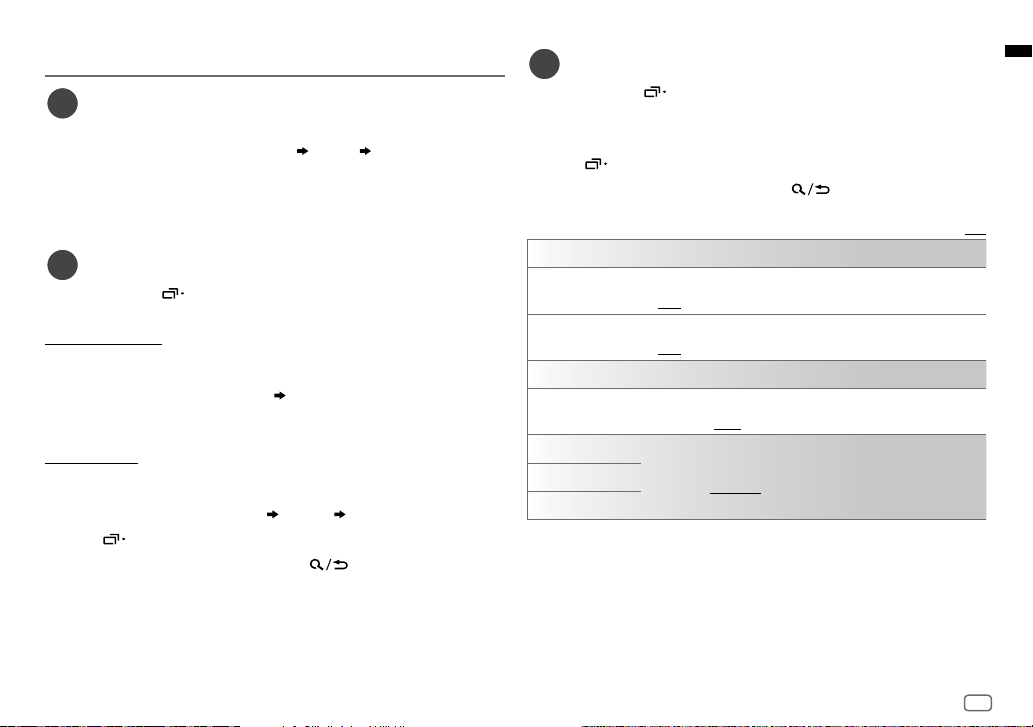
Car bracket *
Dashboard of
your car
Use only the specified screws. Using wrong screws
might damage the unit.
* Only for illustration purpose.
JS_JVC_QSG_KW_R940BTS_K_EN_4.indd 2JS_JVC_QSG_KW_R940BTS_K_EN_4.indd 2 10/4/2019 2:30:29 PM10/4/2019 2:30:29 PM

3
Data Size: B6L (182 mm x 128 mm)
Book Size: B6L (182 mm x 128 mm)
Wiring connection
a Light blue/yellow: To the steering wheel remote control adapter
b Brown (not used)
c Blue: To power antenna
d Blue/white: To amplifier
e Blue/white: Remote (12 V 350 mA)
f Orange/white: Illumination
g Yellow: Battery 12 V
h Red: Ignition 12 V
i Black: Ground
j Gray ª, Gray/black ·: Front speaker (right)
k White ª, White/black ·: Front speaker (left)
l Purple ª, Purple/black ·: Rear speaker (right)
m Green ª, Green/black ·: Rear speaker (left)
Join the same color
wires together.
Custom wiring harness
(separately purchased)
Vehicle dashboard
Recommended connection
Factory wiring
harness (vehicle)
Antenna terminal
Fuse (10 A)
JS_JVC_QSG_KW_R940BTS_K_EN_4.indd 3JS_JVC_QSG_KW_R940BTS_K_EN_4.indd 3 9/17/2019 1:49:15 PM9/17/2019 1:49:15 PM

4
Data Size: B6L (182 mm x 128 mm)
Book Size: B6L (182 mm x 128 mm)
Basics (on faceplate)
KW-X840BTS:
Volume knob
Eject button and loading slot
USB input terminal
Display window*1
Auxiliary input jack
To On the faceplate
Turn on the power Press SOURCEB.
• Press and hold to turn off the power.
Adjust the volume Turn the volume knob.
Select a source Press SOURCEBrepeatedly.
Change the display information*2 Press MENU repeatedly.
*2 One of the display information supports Music Synchronization Effect. The illumination color or brightness level of
the buttons changes and synchronizes with the music level.
Before Use
IMPORTANT
• To ensure proper use, please read through this Guide before using
this product. It is especially important that you read and observe
Warnings and Cautions in this Guide.
• Please keep the Guide in a safe and accessible place for future
reference.
WARNING
Do not operate any function that takes your attention away from safe
driving.
CAUTION
Volume setting:
• Adjust the volume so that you can hear sounds outside the car to
prevent accidents.
• Lower the volume before playing digital sources to avoid
damaging the speakers by the sudden increase of the output level.
General:
• Avoid using the external device if it might hinder safe driving.
• Make sure all important data has been backed up. We shall bear no
responsibility for any loss of recorded data.
• Never put or leave any metallic objects (such as coins or metal
tools) inside the unit to prevent a short circuit.
• For KW-R940BTS: If a disc error occurs due to condensation on the
laser lens, eject the disc and wait for the moisture to evaporate.
• Depending on the types of cars, the antenna will automatically
extend when you turn on the unit with the antenna control wire
connected. Turn off the unit when parking at a low ceiling area.
*1 Only for illustration purpose.
How to reset
JS_JVC_QSG_KW_R940BTS_K_EN_3.indd 4JS_JVC_QSG_KW_R940BTS_K_EN_3.indd 4 8/8/2019 2:07:03 PM8/8/2019 2:07:03 PM

5
Data Size: B6L (182 mm x 128 mm)
Book Size: B6L (182 mm x 128 mm)
Getting Started
1Cancel the demonstration
When you turn on the power for the first time (or
[FACTORY RESET]
is set to
[YES]
), the display shows: “CANCEL DEMO” “PRESS” “VOLUME KNOB”
1 Press the volume knob.
[YES]
is selected for the initial setup.
2 Press the volume knob again.
“DEMO OFF” appears.
2Set the clock and date
1 Press and hold MENU.
2 Turn the volume knob to select
[CLOCK]
, then press the knob.
To adjust the clock
3 Turn the volume knob to select
[CLOCKADJUST]
, then press the knob.
4 Turn the volume knob to make the settings, then press the knob.
Set the time in the order of “Hour” “Minute”.
5 Turn the volume knob to select
[CLOCK FORMAT]
, then press the knob.
6 Turn the volume knob to select
[12H] or [24H]
, then press the knob.
To set the date
7 Turn the volume knob to select
[DATESET]
, then press the knob.
8 Turn the volume knob to make the settings, then press the knob.
Set the date in the order of “Day” “Month” “Year”.
9 Press MENU to exit.
To return to the previous setting item, press .
3Set the basic settings
1 Press and hold MENU.
2 Turn the volume knob to select an item (see the following table), then
press the knob.
3 Repeat step 2until the desired item is selected or activated.
4 Press MENU to exit.
To return to the previous setting item, press .
Default: [XX]
[SYSTEM]
[KEY BEEP] (Not applicable when 3-way crossover is selected.)
[ON]: Activates the keypress tone. ; [OFF]: Deactivates.
[FACTORY RESET] [YES]: Resets the settings to default (except the stored station). ;
[NO]: Cancels.
[CLOCK]
[CLOCK DISPLAY] [ON]: The clock time is shown on the display even when the unit is
turned off. ; [OFF]: Cancels.
[ENGLISH] Select the display language for menu and music information if
applicable.
By default, [ENGLISH] is selected.
[ESPANOL]
[FRANCAIS]
JS_JVC_QSG_KW_R940BTS_K_EN_1.indd 5JS_JVC_QSG_KW_R940BTS_K_EN_1.indd 5 7/12/2019 10:26:25 AM7/12/2019 10:26:25 AM

6
Data Size: B6L (182 mm x 128 mm)
Book Size: B6L (182 mm x 128 mm)
Radio
Search for a station
1 Press SOURCEBrepeatedly to select FM or AM.
2 Press S/ Tto search for a station automatically.
(or)
Press and hold S/ Tuntil “M” flashes, then press repeatedly to
search for a station manually.
Settings in memory
You can store up to 18 stations for FM and 6 stations for AM.
Store a station
While listening to a station....
Press and hold one of the number buttons (1 to 6).
(or)
1 Press and hold the volume knob until “PRESETMODE” flashes.
2 Turn the volume knob to select a preset number, then press the knob.
“MEMORY” appears once the station is stored.
Select a stored station
Press one of the number buttons (1to6).
(or)
1 Press .
2 Turn the volume knob to select a preset number, then press the knob.
CD/USB/iPod
Selectable source:
• KW-R940BTS: CD/USB/iPod USB or iPod BT
• KW-X840BTS: USB/iPod USB or iPod BT
Start playback
The source changes automatically and playback starts when you load a disc
or attach a device (USB device/ iPod/iPhone) to the USB input terminal.
To On the faceplate
Reverse/Fast-forward Press and hold S/ T.
Select a track/file Press S/ T.
Select a folder Press 1J/ 2K.
Repeat play Press 5repeatedly.
Random play Press 4repeatedly.
JS_JVC_QSG_KW_R940BTS_K_EN_1.indd 6JS_JVC_QSG_KW_R940BTS_K_EN_1.indd 6 7/12/2019 10:26:26 AM7/12/2019 10:26:26 AM

7
Data Size: B6L (182 mm x 128 mm)
Book Size: B6L (182 mm x 128 mm)
Menu Settings
1 Press and hold MENU to enter menu settings.
2 Turn the volume knob to select an item, then press the knob.
3 Repeat step 2until the desired item is selected/activated.
4 Press MENU to exit.
To return to the previous setting item, press .
• Refer to the INSTRUCTION MANUAL on the following website for the
detailed explanation of each item: <http://www.jvc.net/cs/car/>
• The availability of each item vary depending on the model.
Menu items
[EQ SETTING]
: Selects a preset equalizer or adjusts your own sound
settings.
[AUDIO CONTROL]
: Sets your preferred audio settings.
[SOUND EFFECT]
: Sets your preferred sound effect.
[DISPLAY]
: Sets your preferred control for the display window.
[COLOR]
: Sets your preferred illumination color for buttons.
[TUNER SETTING]
: Settings for radio source.
[SIRIUS XM]
: Settings for Sirius XM tuner.
[BT MODE]
: Settings for using a Bluetooth device.
[REMOTE APP]
: Settings for using smartphone to control this unit.
[MIC GAIN]
* : Sets the sensitivity of the microphone.
[NR LEVEL]
* : Adjusts the noise reduction level.
[ECHO CANCEL]
* : Adjusts the echo cancellation delay time.
[SYSTEM]
: Settings for this unit.
[CLOCK]
: Adjusts the clock.
[ENGLISH]
: Selects language for the menu and music information.
[ESPANOL]
: Selects language for the menu and music information.
[FRANCAIS]
: Selects language for the menu and music information.
[DEMO MODE]
: Activates or deactivates the display demonstration.
* Applicable only while talking on the phone.
Examples of some well-used settings
Subwoofer Level Setting
1 Press and hold MENU to enter menu settings.
2 Turn the volume knob clockwise to select
[AUDIO CONTROL]
, then press
the knob.
3 Turn the volume knob clockwise to select
[SUBWOOFER SET]
, then press
the knob.
4 Turn the volume knob clockwise to select
[ON]
, then press the knob.
5 Turn the volume knob clockwise to select
[SUB.W LEVEL]
, then press the
knob.
6 Press the volume knob if
[PRE-OUT]
is shown on the display.
7
Turn the volume knob to adjust the subwoofer level, then press the knob.
Continued on the next page...
JS_JVC_QSG_KW_R940BTS_K_EN_1.indd 7JS_JVC_QSG_KW_R940BTS_K_EN_1.indd 7 7/12/2019 10:26:26 AM7/12/2019 10:26:26 AM

8
Data Size: B6L (182 mm x 128 mm)
Book Size: B6L (182 mm x 128 mm)
5 Turn the volume knob to choose a color, then press the knob.
•
[COLOR01]
to
[COLOR49]
•
[USER]
: The color you have created for
[DAYCOLOR]
or
[NIGHTCOLOR]
is shown.
•
[COLORFLOW01]
to
[COLORFLOW03]
: Color changes at
different speeds.
•
[CRYSTAL]
/
[FLOWER]
/
[FOREST]
/
[GRADATION]
/
[OCEAN]
/
[RELAX]
/
[SUNSET]
: The selected color pattern is
shown. (Selectable only when
[ALLZONE]
is selected
in step 4.)
6 Repeat step 4 and step 5 to set color for other zones.
7 Press MENU to exit.
Note for specifications
Bluetooth Frequency Range:
2.402 GHz — 2.480 GHz
Bluetooth RF Output Power (E.I.R.P.):
+4 dBm (MAX), Power Class 2
Speaker Impedance:
4 Ω — 8 Ω
Operating Voltage:
12 V DC car battery
8 Press MENU to exit the setting menu.
Illumination Color Setting
You can set your preferred illumination color for each zone.
1 Press and hold MENU to enter menu settings.
2 Turn the volume knob clockwise to select
[COLOR]
, then press the knob.
3 Press the volume knob if
[PRESET]
is shown on the display.
4 Turn the volume knob to choose a zone (
[ALL ZONE]
,
[ZONE 1]
,
[ZONE 2]
),
then press the knob.
JS_JVC_QSG_KW_R940BTS_K_EN_1.indd 8JS_JVC_QSG_KW_R940BTS_K_EN_1.indd 8 7/12/2019 10:26:29 AM7/12/2019 10:26:29 AM

Data Size: B6L (182 mm x 128 mm)
Book Size: B6L (182 mm x 128 mm)
Bluetooth®
• Depending on the Bluetooth version, operating system and the
firmware version of your mobile phone, Bluetooth features may not
work with this unit.
• Be sure to turn on the Bluetooth function of the device to make the
following operations.
• Signal conditions vary depending on the surroundings.
Connect the microphone
Connect the supplied microphone to the microphone input jack on the rear
panel.
Adjust the
microphone
angle
Secure using cord
clamps (not supplied)
if necessary.
Pair and connect a Bluetooth device for the first time
1 Press BSRC to turn on the unit.
2 Search and select the name of your receiver (“KW-R940BTS”/
“KW-X840BTS”) on the Bluetooth device.
3 Perform (A) or (B) depending on what appears on the display.
For some Bluetooth devices, pairing sequence may vary from the steps
described below.
(A) “[Device Name]” “XXXXXX” “VOL–YES” “BACK–NO”
“XXXXXX” is a 6-digit passkey randomly generated during each pairing.
Ensure that the passkeys appear on the unit and Bluetooth device
are the same.
Press the volume knob to confirm the passkey.
Operate the Bluetooth device to confirm the passkey.
(B) “[Device Name]” “VOL–YES” “BACK–NO”
Press the volume knob to start pairing.
• If “PAIRING” “PIN 0000” scrolls on the display, enter the PIN code
“0000” into the Bluetooth device.
• If only “PAIRING” appears, operate the Bluetooth device to confirm
pairing.
“PAIRING COMPLETED” appears when pairing is completed and “ ” will light
up when the Bluetooth connection is established.
Answer a call
Press or the volume knob.
• To adjust the phone volume
[00]
to
[35]
, turn the volume knob.
• To end a call, press and hold or the volume knob.
Audio player via Bluetooth
1 Press SOURCEBrepeatedly to select BTAUDIO.
2 Operate the audio player via Bluetooth to start playback.
To On the faceplate
Play back/pause Press the volume knob.
Select group or folder Press 1J/ 2K.
Reverse skip/Forward skip Press S/ T.
Reverse/Fast-forward Press and hold S/ T.
Repeat play Press 5repeatedly.
Random play Press 4repeatedly.
JS_JVC_QSG_KW_R940BTS_K_EN_1.indd 9JS_JVC_QSG_KW_R940BTS_K_EN_1.indd 9 7/12/2019 10:26:32 AM7/12/2019 10:26:32 AM
Learn more about stereos on our website.
Other manuals for KW-R940BTS
1
This manual suits for next models
1
Table of contents
Other JVC Car Receiver manuals