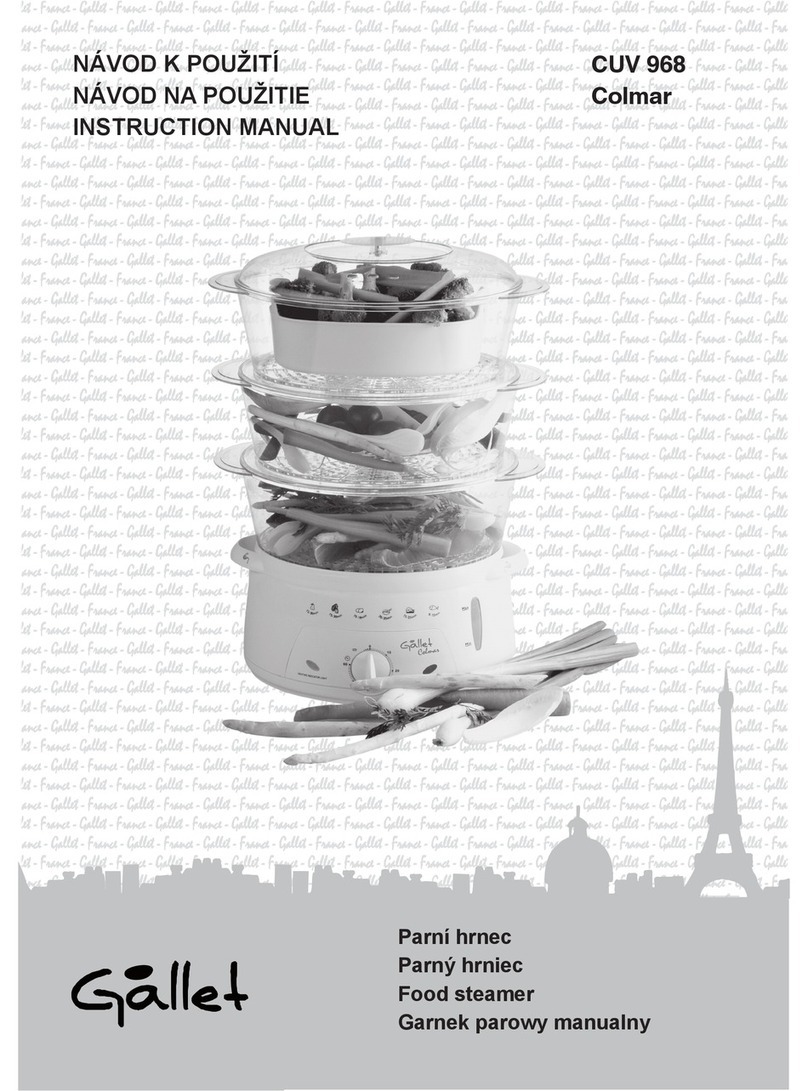
Kalorik USK DG 33761 User manual

Copies of the I/B. Please reproduce them without any
changes except under special instruction from Team
International USA. The pages must e reproduced and folded
in order to o tain a ooklet A5 (+/- 148.5 mm width x 210 mm
height). When folding, make sure you keep the good
num ering when you turn the pages of the I/B. Don’t change
the page num ering. Keep the language integrity. Print only
what is inside the frame.
Front cover page (first page)
Assem ly page 1/32
Fax +1 305 430 9692
QUIGG TO 6
Food Steamer
Cuiseur Vapeur
Cocina a vapor
USK DG 33 61
120V~60Hz 800W (6. A)
All manuals and user guides at all-guides.com
all-guides.com

Copies of the I/B. Please reproduce them without any
changes except under special instruction from Team
International USA. The pages must e reproduced and folded
in order to o tain a ooklet A5 (+/- 148.5 mm width x 210 mm
height). When folding, make sure you keep the good
num ering when you turn the pages of the I/B. Don’t change
the page num ering. Keep the language integrity. Print only
what is inside the frame.
2 USK DG 33761 - 111026
Assem ly page 2/32
Fax +1 305 430 9692
1
2
3
4
5
6
7
8
9
10
11
12
13
All manuals and user guides at all-guides.com

Copies of the I/B. Please reproduce them without any
changes except under special instruction from Team
International USA. The pages must e reproduced and folded
in order to o tain a ooklet A5 (+/- 148.5 mm width x 210 mm
height). When folding, make sure you keep the good
num ering when you turn the pages of the I/B. Don’t change
the page num ering. Keep the language integrity. Print only
what is inside the frame.
3 USK DG 33761 - 111026
Assem ly page 3/32
Fax +1 305 430 9692
EN
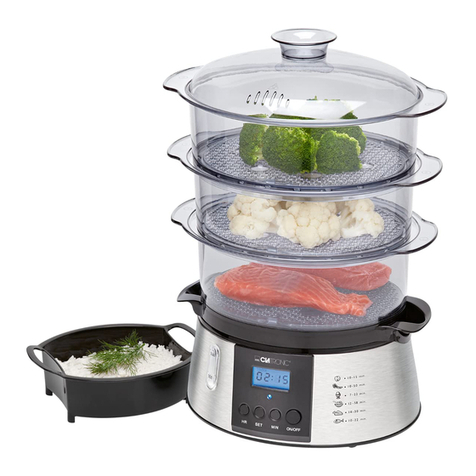
1. Lid
2. Rice owl / tray
3. Upper steaming asket with uilt-in
egg holder (Basket #3)
4. Intermediate steaming asket with
uilt-in egg holder (Basket #2)
5. Lower steaming asket with uilt-in
egg holder (Basket #1)
6. Drip tray
7. Steam nozzle
8. Interior maximum water level
9. Heating element
10. Water tank
11. Pilot Light
12. Timer dial / Control kno
13. Exterior water level indicator
F
1. Couvercle
2. Panier à riz
3. Panier supérieur avec cuit-œufs
incorporé (Panier No. 3)
4. Panier intermédiaire avec cuit-œufs
incorporé (Panier No. 2)
5. Panier inférieur avec cuit-œufs
incorporé (Panier No. 1)
6. Plateau égouttoir
7. Em out vapeur de l’élément
chauffant
8. Indicateur du niveau maximum d’eau
9. Elément chauffant
10. Réservoir d'eau
11. Témoin lumineux
12. Bouton de la minuterie / contrôle
13. Indicateur extérieur du niveau d’eau
ES
1. Tapa
2. Cesta para arroz
3. Cesta superior con cuecehuevos
integrado (No. 3)
4. Cesta intermediaria con cuecehuevos
integrado (No. 2)
5. Cesta inferior con cuecehuevos
integrado (No. 1)
6. Escurridero
7. Protección del elemento calentador
8. Indicador del nivel máximo de agua
9. Elemento calentador
10. Tanque para agua
11. Testigo luminoso
12. Minutero / mando de control
13. Indicador exterior del nivel de agua
All manuals and user guides at all-guides.com

Copies of the I/B. Please reproduce them without any
changes except under special instruction from Team
International USA. The pages must e reproduced and folded
in order to o tain a ooklet A5 (+/- 148.5 mm width x 210 mm
height). When folding, make sure you keep the good
num ering when you turn the pages of the I/B. Don’t change
the page num ering. Keep the language integrity. Print only
what is inside the frame.
4 USK DG 33761 - 111026
Assem ly page 4/32
Fax +1 305 430 9692
IMPORTANT SAFEGUARDS
When using electrical appliances, basic safety precautions should
always be followed, including the following:
READ ALL INSTRUCTIONS BEFORE USE
Check that your mains voltage corresponds to that stated on the
appliance.
Keep the product out of reach of children and pets. This product
is not intended to e used y children. Extra caution is needed
when using this product near children.
Do not leave the product unattended while in use. Always
unplug the product from the electrical outlet when not in use.
Place the product on a flat, sta le, heat resistant surface.
Do not touch hot surfaces. Use handles or kno s. Use protective
oven mitts or gloves when handling.
To protect against electrical shock, fire or personal injury, do not
immerse cord, plugs, or the appliance in water or any other
liquid. Do not put in the dishwasher.
Unplug from outlet when not in use and efore cleaning. Allow to
cool efore putting on or taking off parts. To disconnect from the
electrical outlet, pull on the plug and never on the cord.
Do not operate any appliance with a damaged cord or plug or
after the appliance malfunctions or has een damaged in any
manner. Return appliance to the nearest qualified service facility
for examination, repair, or adjustment.
The use of accessory attachments not recommended y the
appliance manufacturer may cause electrical shocks, fire or
injuries. Allow attachments to completely cool efore handling.
Do not use outdoors.
Do not let cord hang over edge of ta le or counter, or touch hot
surfaces.
Do not place on or near a hot gas or electric urner, or in a
heated oven, or microwave oven.
Do not allow this product to touch curtains, wall coverings,
clothing, dishtowels or other flamma le materials during its use.
Use the product in a well-ventilated area. Provide adequate air
space a ove and on all sides of the product for air circulation
when using it.
All manuals and user guides at all-guides.com

Copies of the I/B. Please reproduce them without any
changes except under special instruction from Team
International USA. The pages must e reproduced and folded
in order to o tain a ooklet A5 (+/- 148.5 mm width x 210 mm
height). When folding, make sure you keep the good
num ering when you turn the pages of the I/B. Don’t change
the page num ering. Keep the language integrity. Print only
what is inside the frame.
5 USK DG 33761 - 111026
Assem ly page 5/32
Fax +1 305 430 9692
Always attach plug to appliance first, then plug cord into the wall
outlet. To disconnect, put the switch in off position, then remove
plug from wall outlet. Do not plug in unless completely
assem led. Fill the water tank efore plugging the appliance into
a wall outlet.
Do not use appliance for other than intended use, which is non-
commercial, household food cooking, for human consumption.
Never touch the hot parts of the appliance during cooking. The
translucent askets are parts of the appliance with hot surfaces.
You must use their side handles when handling them. Use
protective oven mitts or gloves when handling.
The water in the product is heated to 212°F (100°C). Use extreme
caution while steaming food, removing food, or when you may
come into contact with the water or the steam.
This product generates steam during use. Use care to avoid eing
urned y the steam.
Make sure nothing comes into contact with the heating element
of the appliance. Only water should e in the tank where the
heating element is. Never place food in it.
Never use this appliance without the drip tray.
Do not use this product without water.
After use and a ove all when the water hasn’t completely
evaporated, wait until the steam stops leaking through the hole
on the upper part of the lid then open the lid carefully in order
not to hurt you. Let the water drip into the food steamer. Using
mitts or gloves slightly move the lid so that the steam does not
reach your hands or your face. Caution: the condensation on the
sides of the different askets may generate steam and urn you.
Allow the product to completely cool efore touching or
cleaning the lid, owls or ase.
Be cautious while transporting your appliance filled with hot food,
water or other liquids. It is not recommended to move your
appliance when it has not completely cooled down.
SAVE THESE INSTRUCTIONS
HOUSEHOLD USE ONLY
All manuals and user guides at all-guides.com

Copies of the I/B. Please reproduce them without any
changes except under special instruction from Team
International USA. The pages must e reproduced and folded
in order to o tain a ooklet A5 (+/- 148.5 mm width x 210 mm
height). When folding, make sure you keep the good
num ering when you turn the pages of the I/B. Don’t change
the page num ering. Keep the language integrity. Print only
what is inside the frame.
6 USK DG 33761 - 111026
Assem ly page 6/32
Fax +1 305 430 9692
POLARIZED PLUG INSTRUCTIONS
This appliance is equipped with a polarized plug (one lade is wider
than the other). To reduce the risk of electric shock, this plug will fit
into the polarized outlet only one way. If the plug does not properly
fit into the outlet at first, reverse it. If it still does not fit, contact a
competent qualified electrician. Do not attempt to modify the plug in
any way.
SHORT CORD INSTRUCTIONS
A short power supply cord is provided to reduce the hazards resulting
from ecoming entangled in, or tripping over a longer cord.
Extension cords may e used if care is exercised in their use.
• The electrical rating of the extension cord should e at least
that of the appliance. If the electrical rating of the extension
cord is too low, it could overheat and urn.
• The resulting extended cord should e arranged so that it will
not drape over the counter top or ta letop where it can e
pulled on y children or tripped over.
PART DESCRIPTION
SEE PAGE 3.
BEFORE FIRST USE
In order to eliminate any manufacturing residues, it is necessary to
clean the appliance and the accessories (Cf. "Care and cleaning ")
COOKING IN YOUR FOOD STEAMER
• Before using your food steamer, make sure it is OFF and cold. Fill
water tank with cold water. To do so, pour the water directly into
the water tank. The amount of water depends on the required
cooking time. However, it is very important to respect the minimum
and maximum level. Non-o servance of this instruction could
damage your appliance. Do not add any her s, spices or other
liquid such as wine or roth to the water in the water tank.
All manuals and user guides at all-guides.com
all-guides.com

Copies of the I/B. Please reproduce them without any
changes except under special instruction from Team
International USA. The pages must e reproduced and folded
in order to o tain a ooklet A5 (+/- 148.5 mm width x 210 mm
height). When folding, make sure you keep the good
num ering when you turn the pages of the I/B. Don’t change
the page num ering. Keep the language integrity. Print only
what is inside the frame.
7 USK DG 33761 - 111026
Assem ly page 7/32
Fax +1 305 430 9692
• Place the steam nozzle around the heating element, large size on
the ottom.
• Place the food in the different steaming askets. Do not add
seasoning, her s etc. until cooking has een completed.
Note: if steaming meat, place it in the owl at the ottom, so that it is
closest to the water
• Always place the drip tray onto the water tank efore adding a
steaming owl.
• Note: each bowl is numbered 1, 2 or 3 on its handle. Always
place the steaming owl #1 at the ottom (#3 would e the
owl always placed at the top)
• If using more than one tier, place steam owl #2 on top of steam
owl #1; and then, optionally, place steam owl #3 on top of #2,
ensuring the jags at the ase of each owl fit into the grooves of
the container elow it.
Caution: always use the side handles to move the baskets. Pay
attention during the positioning of the askets ecause if they are
not placed correctly, steam may escape through the side of your
appliance and may urn you.
• Place the lid on the upper asket. Make sure the holes in the lid
are not locked, as the steam must e a le to circulate and
escape. DO NOT OPERATE THIS APPLIANCE UNCOVERED - STEAM IS
GENERATED DURING USE.
• Plug the power cord into a wall outlet
• Turn the control know / timer to the correct time setting for the
food you wish to steam (see the Cooking Guide elow). The pilot
light will light on. If the cooking time is less than 10 minutes, please
turn the dial past 10 minutes and then turn it ack to the desired
cooking time.
• When the cooking time has elapsed, the ell will sound, and the
pilot light and the heating element will shut off. Unplug the power
cord and, using mitts or gloves, lift the lid and steam owl
carefully, taking care to avoid facial or hand contact with the
steam. Warning: steam can cause scalding and burns!
All manuals and user guides at all-guides.com

Copies of the I/B. Please reproduce them without any
changes except under special instruction from Team
International USA. The pages must e reproduced and folded
in order to o tain a ooklet A5 (+/- 148.5 mm width x 210 mm
height). When folding, make sure you keep the good
num ering when you turn the pages of the I/B. Don’t change
the page num ering. Keep the language integrity. Print only
what is inside the frame.
8 USK DG 33761 - 111026
Assem ly page 8/32
Fax +1 305 430 9692
• Check the food to make sure it is cooked thoroughly. If not,
replace the steam owls and reset the control kno . Check the
water level to make sure it is not empty.
Note: The water in the product is heated to 212°F (100°C). Use
extreme caution while steaming food, removing food, or when you
may come into contact with the water or the steam. Do not touch
the heating element.
Note: it is possi le to refill the water tank during the cooking, using a
water ottle and adding water through the sides of the drip tray.
• Once cooking is complete, unplug the steamer, and carefully
remove the steam owls and lid.
Note: the appliance stops automatically once all the water has run
out.
COOKING GUIDE
• When cooking rice, we advise you to cover it with hot water in
order to accelerate the cooking process (fast cooking). 1 cup of
uncooked rice will make 2 cups of cooked rice.
• It is possi le to cook food with very different cooking times ut this
needs frequent operations to take away the food that will e
ready. To avoid this, it is recommended to prepare food with
similar cooking time.
• Frozen food does not need to e defrosted, ut its cooking time
will e longer.
• Fruits and Vegeta les
o Cut thick stems off ca age, roccoli, or cauliflower.
o Use the minimum time necessary for leafy greens.
Overcooking will result in color and taste degradation.
o Stir contents halfway through cooking time.
• Meat/Poultry
o Always use ottom tier when cooking meat and poultry. Use
tender, lean cuts of meat and poultry.
o Trim off as much fat as possi le efore steaming.
o Thoroughly cook all meat efore serving. Pierce with a knife or
fork to ensure that the center is cooked and that juices run
All manuals and user guides at all-guides.com

Copies of the I/B. Please reproduce them without any
changes except under special instruction from Team
International USA. The pages must e reproduced and folded
in order to o tain a ooklet A5 (+/- 148.5 mm width x 210 mm
height). When folding, make sure you keep the good
num ering when you turn the pages of the I/B. Don’t change
the page num ering. Keep the language integrity. Print only
what is inside the frame.
9 USK DG 33761 - 111026
Assem ly page 9/32
Fax +1 305 430 9692
clear. The US Department of Agriculture advises to cook
ground meats ( eef, veal, lam , and pork) to an internal
temperature of 160°F and ground poultry to 165°F. Steak
cooked to an internal temperature of 145°F is medium rare,
160°F is medium, and 170°F is well done. Cook poultry reasts
to 170°F and drumsticks to 180°F.
o Use a meat thermometer to assure that meat and poultry
reach a safe internal temperature.
o Sausages must e fully cooked efore steaming.
• Fish/Seafood
o Always use ottom tier when cooking fish and seafood.
o Fish is done when it ecomes opaque and flakes apart easily.
o You can add wedges of lemon while steaming, as desired.
The steaming times indicated hereunder are indicative.
Food Quantity Water Level Time
(Minutes)
Asparagus 16 Oz. (450g) Max 10-12
Broccoli 8 Oz. (225g) Min 6-10
Ca age (sliced) 8 Oz. (225g)
Max 8-11
Carrots 8 Oz. (225g)
Max 8-10
Cauliflower 1 head Max 11-14
Corn 3 ears Max 20-25
Egg (Hard Boiled)
6
Max
12
-
22
Peas 10 Oz. (280g) Max 12-15
Potato (Sliced) 8 Oz. (225g) Max 8-10
White Rice 1 cup
(add 1 ¼
cup water in tray)
Max 10-14 (Fast) /
30-35 (Slow)
Brown rice 1 cup
(add 1 ½
cup water in tray)
Max 45-60
Beef 8 Oz. (450g),
cut
in ½” thick slices
Max 15-20
Chicken (Breast) 16 Oz. (450g) Max 20-30
Chicken (Drumsticks) 4 Max 20-30
Sausages 16 Oz. (450g)
Max 15-20
Fish filet 16 Oz. (450g) Min 7-12
Shrimps 8 Oz. (225g) Max 10-15
Clams 16 Oz. (450g) Max 10-20
All manuals and user guides at all-guides.com

Copies of the I/B. Please reproduce them without any
changes except under special instruction from Team
International USA. The pages must e reproduced and folded
in order to o tain a ooklet A5 (+/- 148.5 mm width x 210 mm
height). When folding, make sure you keep the good
num ering when you turn the pages of the I/B. Don’t change
the page num ering. Keep the language integrity. Print only
what is inside the frame.
10 USK DG 33761 - 111026
Assem ly page 10/32
Fax +1 305 430 9692
CARE AND MAINTENANCE
• Unplug the power cord, and allow the steamer to cool efore
cleaning it.
• Empty the water tank and clean it with a damp cloth
• Remove the mineral deposits from the appliance every 8 times.
To proceed, position the ring upside down around the heating
element (the largest side up). Fill the water tank with cold water
up to “max.” level, fill the inside of the ring with vinegar up to the
same level. Leave overnight to descale. Rinse out the inside of
water tank with warm water several times.
• The askets, the drip tray and the lid may e washed with soapy
water, or put in the dishwasher. Never use a rasive cleaners to
clean any part of your appliance.
• The ody of the appliance should e washed with a non-
a rasive damp cloth.
• Never immerse the body in water or any other liquid.
• Once dry, you can stack the steam owls and containers inside
each other, putting the smaller one into the igger one, to save
storage space. The lid can e put on top.
All manuals and user guides at all-guides.com

Copies of the I/B. Please reproduce them without any
changes except under special instruction from Team
International USA. The pages must e reproduced and folded
in order to o tain a ooklet A5 (+/- 148.5 mm width x 210 mm
height). When folding, make sure you keep the good
num ering when you turn the pages of the I/B. Don’t change
the page num ering. Keep the language integrity. Print only
what is inside the frame.
11 USK DG 33761 - 111026
Assem ly page 11/32
Fax +1 305 430 9692
WARRANTY
We suggest that you complete and return the enclosed Product
Registration Card promptly to facilitate verification of the date of
original purchase. However, return of the Product Registration Card is
not a condition of these warranties. You can also fill this warranty
card online, at the following address: www.KALORIK.com
This KALORIK product is warranted in the U.S.A. for 1 year from the
date of purchase against defects in material and workmanship. This
warranty is not transfera le. Keep the original sales receipt. Proof of
purchase is required to o tain warranty performance.
During this period, the KALORIK product that, upon inspection y
KALORIK, is proved defective, will e repaired or replaced, at
Kalorik’s option, without charge to the customer. If a replacement
product is sent, it will carry the remaining warranty of the original
product.
This warranty does not apply to any defect arising from a uyer's or
user's misuse of the product, negligence, failure to follow KALORIK
instructions noted in the user’s manual, use on current or voltage
other than that stamped on the product, wear and tear, alteration
or repair not authorized y KALORIK, or use for commercial purposes.
There is no warranty for glass parts, glass containers, filter asket,
lades and agitators, and accessories in general. There is also no
warranty for parts lost y the user.
ANY WARRANTY OF MERCHANTABILITY OR FITNESS WITH RESPECT TO
THIS PRODUCT IS ALSO LIMITED TO THE ONE YEAR LIMITED WARRANTY
PERIOD.
Some states do not allow limitation on how long an implied warranty
lasts or do not allow the exclusion of incidental or consequential
damages, so the a ove limitations may not apply to you. This
warranty gives you specific legal rights, and you may also have other
rights which vary from state to state.
If the appliance should ecome defective within the warranty
period and more than 30 days after date of purchase, do not return
All manuals and user guides at all-guides.com
all-guides.com

Copies of the I/B. Please reproduce them without any
changes except under special instruction from Team
International USA. The pages must e reproduced and folded
in order to o tain a ooklet A5 (+/- 148.5 mm width x 210 mm
height). When folding, make sure you keep the good
num ering when you turn the pages of the I/B. Don’t change
the page num ering. Keep the language integrity. Print only
what is inside the frame.
12 USK DG 33761 - 111026
Assem ly page 12/32
Fax +1 305 430 9692
the appliance to the store: often, our Consumer Service
Representatives can help solve the pro lem without having the
product serviced. If servicing is needed, a Representative can
confirm whether the product is under warranty and direct you to the
nearest service location.
If this is the case, ring the product, or send it, postage prepaid y
the user (all Kalorik customers are responsi le for the initial shipment
ack to the warranty center), along with proof of purchase and
indicating a return authorization number given y our Consumer
Service Representatives, to the authorized KALORIK Service Center
(please visit our we site at www.KALORIK.com or call our Customer
Service Department for the address of our authorized KALORIK
Service Center).
If you send the product, please include a letter explaining the nature
of the claimed defect.
If you have additional questions, please call our Consumer Service
Department (please see elow for complete contact information),
Monday through Friday from 9:00am - 6:00pm (EST). Please note
hours are su ject to change.
If you would like to write, please send your letter to:
KALORIK Consumer Service Department
Team International Group of America Inc.
1400 N.W 159th Street, Suite 102
Miami Gardens, FL 33169 USA
Or call:
Toll Free: +1 888-521-TEAM / +1 888-KALORIK
Only letters can be accepted at this address above. Shipments and
packages that do not have a return authorization number will be
refused.
All manuals and user guides at all-guides.com

Copies of the I/B. Please reproduce them without any
changes except under special instruction from Team
International USA. The pages must e reproduced and folded
in order to o tain a ooklet A5 (+/- 148.5 mm width x 210 mm
height). When folding, make sure you keep the good
num ering when you turn the pages of the I/B. Don’t change
the page num ering. Keep the language integrity. Print only
what is inside the frame.
13 USK DG 33761 - 111026
Assem ly page 13/32
Fax +1 305 430 9692
POUR VOTRE SÉCURITÉ
CONSIGNES DE SECURITE
Pour utiliser un appareil électrique, des précautions élémentaires
sont à respecter, telles que celles énumérées ci-dessous :
LISEZ ATTENTIVEMENT LA NOTICE AVANT L’UTILISATION
Avant d'utiliser l'appareil, vérifiez que la tension du réseau
correspond ien à celle de l'appareil.
Gardez l’appareil hors de portée des enfants et animaux
domestiques. Ce produit n’est pas fait pour être utilisé par des
enfants. Des précautions particulières sont à prendre si l’appareil
est utilisé en présence d’enfants.
Ne laissez jamais votre appareil sans surveillance lorsque celui-ci
est en marche. Dé ranchez-le de la prise murale s’il n’est pas
utilisé.
Placez l’appareil sur une surface plane, sta le et résistante à la
chaleur.
Ne touchez pas les surfaces chaudes. Utilisez les poignées et
outons. Utilisez des gants de cuisine ou maniques pour vous
protéger lors de la manipulation.
Pour éviter tout risque de choc électrique, incendie ou
dommage personnel, ne pas immerger le cordon, la fiche ou
l’appareil dans de l’eau ou tout autre liquide.
Dé ranchez de la prise quand l’appareil n’est pas utilisé ou
avant le nettoyage. Laissez refroidir avant de mettre ou retirer des
éléments. Pour dé rancher de la prise électrique, tirez sur la fiche
et pas sur le cordon.
Vérifiez régulièrement l’état de votre appareil et s’il est
endommagé de quelque façon que ce soit, ne l'utilisez pas mais
faites-le vérifier et réparer par un service qualifié. Si le câ le est
endommagé, il doit être o ligatoirement remplacé par un
service qualifié.
Ne pas utiliser des accessoires non recommandés par le
fa ricant, cela peut présenter un danger pour l’utilisateur, ou un
risque d’incendie ou de choc électrique et risque
d’endommager l’appareil. Laissez les accessoires fournis refroidir
complètement avant de les manipuler.
All manuals and user guides at all-guides.com

Copies of the I/B. Please reproduce them without any
changes except under special instruction from Team
International USA. The pages must e reproduced and folded
in order to o tain a ooklet A5 (+/- 148.5 mm width x 210 mm
height). When folding, make sure you keep the good
num ering when you turn the pages of the I/B. Don’t change
the page num ering. Keep the language integrity. Print only
what is inside the frame.
14 USK DG 33761 - 111026
Assem ly page 14/32
Fax +1 305 430 9692
Veillez à ne pas utiliser l'appareil à l'extérieur et entreposez-le
dans un endroit sec.
Ne laissez pas le cordon pendre du ord de la ta le ou du plan
de travail, ou entrer en contact avec une surface chaude.
N'utilisez pas l'appareil près de sources de chaleur, près d’un four
ou ruleur électrique ou à gaz, ou dans un four ou un four a
micro-ondes.
Ne laissez pas l’appareil entrer en contact avec des rideaux,
tentures murales, vêtements, tissus ou autres matériaux
inflamma les, pendant son utilisation.
Utilisez l’appareil dans un endroit ien ventilé. Assurez-vous de
fournir un espace suffisant autour et au-dessus de l’appareil pour
offrir une circulation d’air adéquate.
Soyez extrêmement prudent si vous transportez l’appareil lorsqu’il
contient des aliments chauds, de l’eau ou d’autres liquides.
Pour dé rancher l’appareil, mettez l’appareil en position « 0» puis
retirer la fiche de la prise murale. Ne pas rancher l’appareil
avant l’assem lage complet. Remplissez le réservoir d’eau avant
le ranchement sur une prise murale.
N’utilisez l'appareil que pour des usages domestiques et de la
manière indiquée dans la notice.
Veillez à ne pas toucher les surfaces chaudes de l’appareil en
cours de fonctionnement. Les paniers sont des parties de
l’appareil à surfaces chaudes et doivent être manipulés en
utilisant leurs poignées latérales. Utilisez des gants de cuisine ou
des maniques pendant la manipulation.
L’eau est chauffée à 212°F (100°C) dans cet appareil. Faites très
attention en cuisant à la vapeur, ou en retirant la nourriture, pour
éviter d’entrer en contact avec la vapeur ou l’eau ouillante.
Cet appareil génère de la vapeur. Prenez soin à ne pas vous
ruler avec la vapeur chaude.
Prenez garde que rien n’entre en contact avec l’élément
chauffant de l’appareil. En fait, seule de l’eau doit se trouver dans
le réservoir où il se situe. Ne jamais y placer d'aliments.
Ne jamais utiliser l’appareil sans son plateau égouttoir.
N’utilisez pas l’appareil sans eau.
Après emploi et surtout lorsque toute l’eau n'est pas évaporée,
attendez que la vapeur cesse de s’échapper par les trous situés en
partie supérieure du couvercle puis soulevez et enlevez le
couvercle de façon soigneuse, afin d’éviter tout risque de rûlure,
All manuals and user guides at all-guides.com

Copies of the I/B. Please reproduce them without any
changes except under special instruction from Team
International USA. The pages must e reproduced and folded
in order to o tain a ooklet A5 (+/- 148.5 mm width x 210 mm
height). When folding, make sure you keep the good
num ering when you turn the pages of the I/B. Don’t change
the page num ering. Keep the language integrity. Print only
what is inside the frame.
15 USK DG 33761 - 111026
Assem ly page 15/32
Fax +1 305 430 9692
et faites égoutter l’eau chaude dans l’appareil. En utilisant des
gants de protection, asculez le couvercle en le retirant, de façon
à éloigner la vapeur des mains et du visage. Attention, en coulant,
la condensation se trouvant sur les parois des différents réservoirs
risque de générer de nouveau de la vapeur et de vous rûler.
Laissez l’appareil refroidir complètement avant de toucher ou de
nettoyer les paniers, le couvercle ou la ase.
Soyez prudent si vous transportez l’appareil lorsqu’il contient des
aliments chauds, de l’eau ou d’autres liquides. Il est fortement
déconseillé de transporter votre appareil lorsqu’il n’est pas
totalement froid.
CONSERVEZ CES INSTRUCTIONS
USAGE DOMESTIQUE UNIQUEMENT
INSTRUCTIONS POUR LES FICHES POLARISÉES
Cet appareil est équipé d’une prise polarisée (une des deux tiges
métalliques est plus longue que l’autre). Pour réduire le risque de
choc électrique, cette prise ne peut être introduite que d’une seule
façon dans la fiche murale. Si cette prise ne rentre pas correctement
dans la fiche, retournez-la. Si elle ne rentre toujours pas, contactez
un électricien qualifié et reconnu. N’essayez jamais de modifier
vous-même la prise polarisée.
CONSIGNES CONCERNANT LE CORDON
Le cordon d’alimentation de l’appareil est un cordon de type court,
et ce afin de diminuer les risques d’accidents (chute si vous marchez
sur le cordon...). Vous pouvez toutefois utiliser une rallonge si
nécessaire mais:
• Assurez-vous que l'ampérage de la rallonge soit égal ou
supérieur à celui de l'appareil. Une rallonge avec un
ampérage inférieur à celui de l'appareil risquerait de
surchauffer et de rûler.
• La rallonge ne doit pas pendre du plan de travail ou de la
ta le afin d'éviter que les enfants ne le tirent ou tré uchent.
All manuals and user guides at all-guides.com

Copies of the I/B. Please reproduce them without any
changes except under special instruction from Team
International USA. The pages must e reproduced and folded
in order to o tain a ooklet A5 (+/- 148.5 mm width x 210 mm
height). When folding, make sure you keep the good
num ering when you turn the pages of the I/B. Don’t change
the page num ering. Keep the language integrity. Print only
what is inside the frame.
16 USK DG 33761 - 111026
Assem ly page 16/32
Fax +1 305 430 9692
DESCRIPTION DES ELEMENTS
Voir page 3
AVANT LA PREMIÈRE UTILISATION
Afin d’éliminer les résidus de fa rication, il est nécessaire de nettoyer
l’appareil et ses accessoires (voir chapitre « Nettoyage et
Entretien »).
CUISINER DANS VOTRE CUISEUR VAPEUR
• Avant d’utiliser votre cuiseur-vapeur, assurer vous qu’il est éteint
et froid. Remplissez le réservoir avec de l’eau froide; versez-la
directement dans le réservoir. La quantité d’eau dépendra de la
durée de cuisson désirée. Il est néanmoins important de respecter
les niveaux MIN et MAX. Le non-respect des niveaux pourrait
endommager l'appareil. Ne rajoutez pas d’her es, épices ou
autres liquides (tels que du vin ou du ouillon) à l’eau du
réservoir.
• Assurez-vous que l’em out-vapeur de l'élément chauffant soit
mise en place et ien fixé, c’est-à-dire la face la plus large vers le
as.
• Placez les aliments à cuire dans les différents paniers à vapeur.
Ne rajoutez pas d’assaisonnement, d’her es etc. avant la fin de
la cuisson.
Note: si vous cuisez de la viande, il est préféra le de la mettre dans
le panier du as, le plus proche de l’eau.
• Positionnez ensuite le plateau égouttoir sur le réservoir, puis
placez-y le panier 1.
• Si vous utilisez plus d’un panier, empilez le panier 2 sur le panier 1,
et le panier 3 sur le panier 2.
• Assurez-vous du fait que le plus petit panier (N°1) doit toujours
être installé en premier lieu sur le plateau égouttoir et que le plus
grand panier (N° 3) doit toujours se trouver au-dessus du panier
intermédiaire (N° 2).
All manuals and user guides at all-guides.com
all-guides.com

Copies of the I/B. Please reproduce them without any
changes except under special instruction from Team
International USA. The pages must e reproduced and folded
in order to o tain a ooklet A5 (+/- 148.5 mm width x 210 mm
height). When folding, make sure you keep the good
num ering when you turn the pages of the I/B. Don’t change
the page num ering. Keep the language integrity. Print only
what is inside the frame.
17 USK DG 33761 - 111026
Assem ly page 17/32
Fax +1 305 430 9692
• Pour empiler les paniers correctement, assurez-vous que les
ergots au as des paniers entrent dans les encoches prévues à
cet effet sur le re ord du récipient d'en-dessous.
Attention: faites toujours usage des poignées pour transporter les
paniers. Prenez soin de positionner de façon correcte les accessoires
car s’ils sont mal placés, de la vapeur peut s’échapper par les côtés
de votre appareil et risque de vous rûler.
• Placez le couvercle sur le dernier panier. Assurez-vous que les
trous du couvercle ne sont pas ouchés, car la vapeur doit
pouvoir circuler et s’échapper. NE FAITES PAS FONCTIONNER CET
APPAREIL SANS LE COUVERCLE ; DE LA VAPEUR EST PRODUITE LORS
DE L’UTILISATION.
• Branchez l’appareil dans une prise murale.
• Tournez le outon de la minuterie jusqu'à indiquer le temps de
cuisson désiré (Voir « Guide de Cuisson » ci-dessous). La lampe
témoin s’allume. Si le temps de cuisson est de moins de 10
minutes, dépassez la position montrant 10 minutes, puis retournez
au temps de cuisson désiré.
• Quand le temps de cuisson est écoulé, un signal sonore est
produit, et la lampe témoin, ainsi que l’élément chauffant,
s’éteignent. Dé ranchez de la prise murale, et, en utilisant des
gants de protection ou des maniques, soulevez soigneusement le
couvercle et les paniers, en prenant soin de ne pas laisser la
vapeur entrer en contact avec vos mains ou votre visage.
• Vérifiez que la nourriture est ien cuite. Si ce n’est pas le cas,
replacez les paniers et le couvercle et tournez la minuterie.
Vérifiez le niveau d’eau et assurez-vous qu’il n’est pas vide.
Note : L’eau est chauffée à 212°F (100°C) dans cet appareil. Faites
très attention en cuisant à la vapeur, ou en retirant la nourriture, pour
éviter d’entrer en contact avec la vapeur ou l’eau ouillante.
Note : il est possi le de rajouter de l’eau en cours de cuisson, en
remplissant le réservoir avec une outeille d’eau, par les côtés du
plateau-égouttoir.
• Une fois la cuisson terminée, dé ranchez le cuiseur-vapeur et
retirer soigneusement les paniers et le couvercle.
Note : l’appareil cesse de fonctionner dès qu’il n’y a plus d’eau.
All manuals and user guides at all-guides.com

Copies of the I/B. Please reproduce them without any
changes except under special instruction from Team
International USA. The pages must e reproduced and folded
in order to o tain a ooklet A5 (+/- 148.5 mm width x 210 mm
height). When folding, make sure you keep the good
num ering when you turn the pages of the I/B. Don’t change
the page num ering. Keep the language integrity. Print only
what is inside the frame.
18 USK DG 33761 - 111026
Assem ly page 18/32
Fax +1 305 430 9692
GUIDE DE CUISSON
• Pour la cuisson du riz, il vous est conseillé de couvrir le riz avec de
l’eau chaude, afin d'en accélérer la cuisson (Cuisson rapide). 1
dose de riz cru donnera 2 doses de riz cuit.
• Il est possi le de faire cuire des aliments ayant des temps de
cuisson totalement différents mais ceci nécessitera des
interventions fréquentes pour retirer au fur et à mesure les
aliments qui seront prêts. Pour éviter cela, il est préféra le de
préparer simultanément des aliments à temps de cuisson proche.
• Les aliments congelés ne devront pas nécessairement être
décongelés au préala le mais leur temps de cuisson sera plus
long.
• Fruits et légumes:
o Coupez et retirez les tiges épaisses du chou, rocolis ou chou-
fleur.
o Utilisez le temps minimum pour les légumes à feuilles vertes
(épinards, salade). Une cuisson prolongée aura pour
conséquence décoloration et dégradation du gout.
o Remuez à mi-cuisson
• Viandes et volailles:
o Utilisez le panier inferieur pour cuire la viande. Utilisez des
morceaux tendres et maigres.
o Retirez autant de gras que possi le.
o Cuisez complètement avant de servir. Assurez-vous que le
cœur de la pièce est ien cuit, avec un couteau ou une
fourchette.
o Utilisez un thermomètre à viande pour vous assurer que la
pièce de viande a atteint une température interne
adéquate.
o Les saucisses doivent être précuites avant la cuisson vapeur.
• Poissons et fruits de mer:
o Utilisez le panier inferieur pour cuire le poisson et les fruits de
mer.
o Le poisson est cuit quand celui-ci devient opaque et se
sépare facilement
o Vous pouvez ajouter des quartiers de citron pour cuire avec le
poisson.
All manuals and user guides at all-guides.com

Copies of the I/B. Please reproduce them without any
changes except under special instruction from Team
International USA. The pages must e reproduced and folded
in order to o tain a ooklet A5 (+/- 148.5 mm width x 210 mm
height). When folding, make sure you keep the good
num ering when you turn the pages of the I/B. Don’t change
the page num ering. Keep the language integrity. Print only
what is inside the frame.
19 USK DG 33761 - 111026
Assem ly page 19/32
Fax +1 305 430 9692
Les temps de cuisson indiqués sont indicatifs.
Aliments Quantité Niveau d’eau
Temps
(Minutes)
Asperges 16 Oz. (450g) Max 10-12
Brocoli 8 Oz. (225g) Min 6-10
Chou (émincé) 8 Oz. (225g)
Max 8-11
Carottes 8 Oz. (225g)
Max 8-10
Chou-fleur 1 tête Max 11-14
Mais 3 épis Max 20-25
Œufs (Durs) 6 Max 12-22
Pois 10 Oz. (280g) Max 12-15
Pomme de terre
(tranchée)
8 Oz. (225g) Max 8-10
Riz Blanc 1 verre
(ajouter 1
verre ¼ d’eau dans
le panier)
Max 10-14
(Rapide) / 30-
35 (Lent)
Riz run 1 verre
(ajouter 1
verre ½ d’eau dans
le panier)
Max 45-60
Bœuf 8 Oz. (450g),
coupé en tranches
de 1.25 cm
Max 15-20
Poulet (Blanc) 16 Oz. (450g) Max 20-30
Poulet (Pilons) 4 Max 20-30
Saucisses 16 Oz. (450g)
Max 15-20
Filet de poisson 16 Oz. (450g) Min 7-12
Crevettes 8 Oz. (225g) Max 10-15
Palourdes 16 Oz. (450g) Max 10-20
All manuals and user guides at all-guides.com

Copies of the I/B. Please reproduce them without any
changes except under special instruction from Team
International USA. The pages must e reproduced and folded
in order to o tain a ooklet A5 (+/- 148.5 mm width x 210 mm
height). When folding, make sure you keep the good
num ering when you turn the pages of the I/B. Don’t change
the page num ering. Keep the language integrity. Print only
what is inside the frame.
20 USK DG 33761 - 111026
Assem ly page 20/32
Fax +1 305 430 9692
NETTOYAGE ET ENTRETIEN
• Dé ranchez l’appareil et laissez-le refroidir avant le nettoyage.
• Videz le réservoir et nettoyez-le à l’aide d’un chiffon humide.
• Détartrez l’appareil toutes les 8 utilisations. Pour ce faire, placez
l’anneau de protection vers le as autour de l’élément
chauffant(le côté le plus large vers le as). Remplissez le réservoir
d’eau froide jusqu’au niveau « max », remplissez l’intérieur de
l’anneau jusqu’au même niveau avec du vinaigre. Laissez agir
toute la nuit. Rincez plusieurs fois l’intérieur du réservoir avec de
l’eau chaude.
• Les paniers, le plateau égouttoir et le couvercle peuvent être
lavés avec de l’eau chaude savonneuse, ou être mis au lave-
vaisselle. N'utilisez pas de produits ou de tampons a rasifs qui
pourraient rayer les surfaces.
• La ase de l’appareil doit être lavée à l’aide d’un chiffon doux
ou d’une éponge légèrement im i ée d’eau.
• Ne jamais immerger la base de l'appareil dans l'eau ou dans tout
autre liquide.
• Une fois secs, les paniers peuvent s’empiler les uns dans les autres,
en mettant le plus petit panier dans le plus grand, pour un
rangement plus facile. Le couvercle peut être placé sur
l’assem lage de paniers.
All manuals and user guides at all-guides.com
Other manuals for USK DG 33761
2
Table of contents
Languages:
Other Kalorik Electric Steamer manuals