Copies of the I/B. Please reproduce them without any
changes except under special instruction from Team
International BELGI M. The pages must be reproduced
and folded in order to obtain a booklet A5 (+/- 148.5 mm
width x 210 mm height). When folding, make sure you
keep the good numbering when you turn the pages of
the I/B. Don’t change the page numbering. Keep the
language integrity. Print only what is inside the frame.
6
WCL 42513 - 120501
Back cover page (last page)
Assembly page 6/36
Fax +32 2 359 95 50
3-P ONG PLUG INST UCTIONS
For your personal safety, this appliance must be grounded. This
appliance is equipped with a power supply cord having a 3-prong
grounding plug. To minimize possible shock hazard, the cord must be
plugged into a mating 3-prong, grounding type, wall receptacle,
grounded in accordance with the National Electrical Code
ANSI/NFPA 70 latest edition and all local codes and ordinances. If a
mating wall receptacle is not available, it is the personal
responsibility and obligation of the customer to have a properly
grounded, 3-prong, wall receptacle installed by a qualified
electrician.
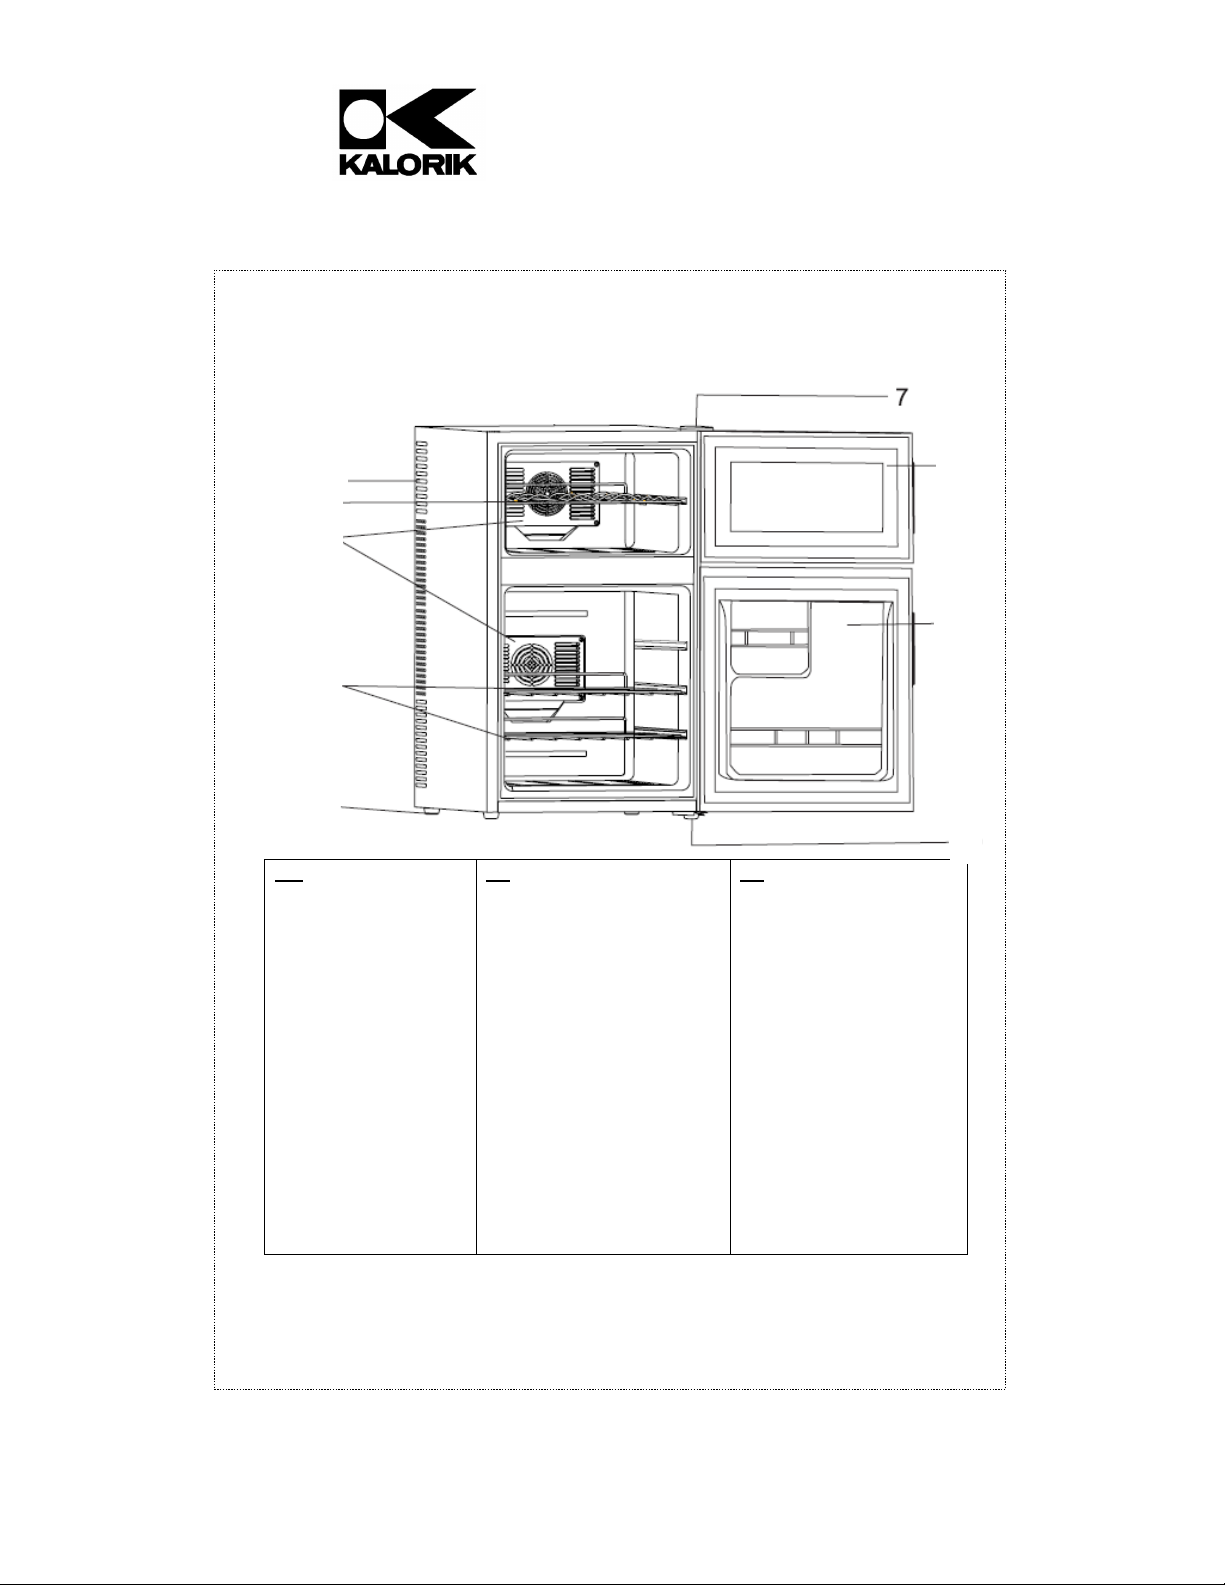
TECHNICAL DATA
Internal Volume pper cavity: 0.75 cu.ft. / 21L
Lower cavity: 1.35 cu.ft. / 39L
Capacity 8 bottles (wine cooler)
16 bottles (refrigerator)
Adjustable temperature 46°F to 64°F (8°C – 18°C)
( pper Zone)
Adjustable temperature 37°F to 46°F (3°C – 8°C)
(Lower Zone)
Without CFC, no refrigerant gas
NOTE: this appliance is not a standard refrigerator. The maximum
cooling capacity is around 30 degrees F (15 degrees C) below the
ambient temperature.
POSITIONING THE APPLIANCE
For best results, use the height-adjustable foot to level the wine
cooler. This will allow it to stand perfectly horizontal, which allows for
stability.
The height-adjustable foot is located under the lower hinge. It is
smaller than the feet placed on the other 3 corners of the appliance.
It is positioned in a threaded insert on the hinge, marked by an arrow
in the picture below. Turn the foot clockwise or counter-clockwise to
adjust its height and to ensure the perfect horizontality of the unit.