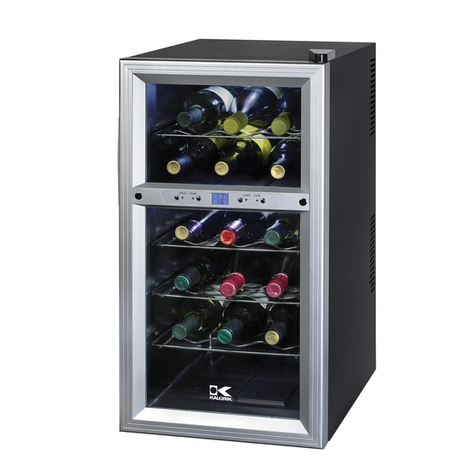
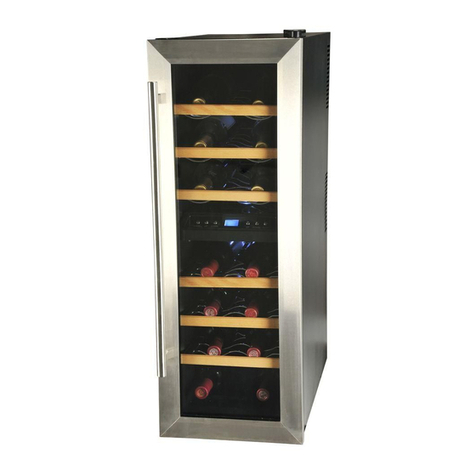
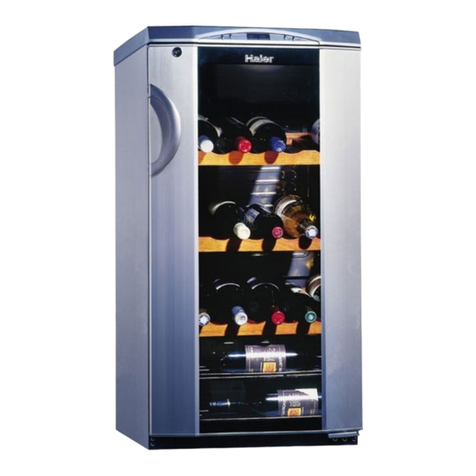
Kalorik Chambrer WineBar with Dual Zone User manual

Chambrer WineBar
with Dual Zone
Enfriador de
botellas 2 zonas
Bar à Vin
2 Zones
USK WCL 1
120V~60Hz 96W
www.KALORIK.com
All manuals and user guides at all-guides.com
all-guides.com

IMPORTANT SAFEGUARDS
When using an electrical appliance, basic precautions should always
be followed to reduce the risk of fire, electric shock, and injury to
persons, including the following:
1. Use this appliance only as described in this manual. Other uses
not recommended may cause fire, electric shock or personal
injury.
2. his product is intended for household use ONLY and not for
commercial industrial or outdoor use.
3. o protect against electric shock, do not immerse unit, plug or
cord in water or spray with liquids.
4. Close supervision is necessary when any appliance is used by or
near children.
5. Unplug the appliance from the outlet when not in use, when
moving from one location to another and before cleaning.
6. o disconnect the appliance, grip the plug and pull it from the
wall outlet. Never pull by the cord.
7. Do not operate the appliance in the presence of explosive
and/or flammable fumes.
8. Do not place the appliance or any of its parts near an open
flame, cooking or other heating appliance.
9. Do not operate the appliance with a damaged cord or plug, if
the product malfunctions, or if it is dropped or damaged in any
manner.
10. he use of attachments not recommended by the manufacturer
may be hazardous.
11. Place the unit on a dry level surface.
12. Do not operate if the housing is removed or damaged.
13. A loose fit between the AC outlet (receptacle) and plug may
cause overheating and a distortion of the plug. Contact a
qualified electrician to replace loose or worn outlet.
14. his appliance is designed to be free standing only, and should
not be recessed or built-in (fully recessed).
All manuals and user guides at all-guides.com

15. Locate the unit away from direct sunlight and sources of heat
(stove, heater, radiator, etc.). Direct sunlight will affect / alter the
outside color of the appliance.
WARNING: To r duc th risk of fir , l ctric shock or p rsonal injury,
unplug or disconn ct th applianc from th pow r
supply b for s rvicing.
SAVE THESE INSTRUCTIONS
Save time and money. Before you call for service, check at the back
of this manual. It lists causes of minor operating can correct yourself.
Warning: Chang s or modifications to this unit not xpr ssly
approv d by th manufactur r could void th us r’s
authority to op rat th quipm nt
POLARIZED PLUG INSTRUCTIONS
Some appliances are equipped with a polarized plug (one blade is
wider than the other). o reduce the risk of electric shock, this plug
will fit into the polarized outlet only one way. If the plug does not
properly fit into the outlet at first, reverse it. If it still does not fit,
contact a competent qualified electrician.
Do not att mpt to modify th plug in any way.
For appliances equipped with a standard plug, simply insert the plug
into the outlet without paying attention to the way you plug it.
SHORT CORD INSTRUCTIONS
A short power supply cord is provided to reduce the hazards resulting
from becoming entangled in, or tripping over a longer cord.
Extension cords may be used if care is exercised in their use.
• he electrical rating of the extension cord should be at least that
of the appliance. If the electrical rating of the extension cord is
too low, it could overheat and burn.
• he resulting extended cord should be arranged so that it will not
drape over the counter top or tabletop where it can be pulled on
by children or tripped over.
All manuals and user guides at all-guides.com

Unpacking th unit
1. Remove the exterior and interior packing.
2. Check to be sure you have all the following parts:
a) One (1) wine bar with Perfect- emp system
b) One (1) instruction manual
c) wo (2) wireless temperature probes
d) One detachable power cord
PART DESCRIPTION
A. Left Zone
B. Probe for Left Zone
C. Left Zone emperature
Display
D. Left Zone LCD
E. Left Zone WINE YPE Button
F. Right Zone
G. Probe for Right Zone
H. Right Zone emperature
Display
I. Right Zone LCD
J. Right Zone WINE YPE Button
K. POWER Button
Finding a good spot for your win bar
• Place your wine bar on a flat surface that is strong enough to
support it when fully loaded.
• Allow 5 cm of space on the back side and 20 cm of space along
the left and right side of the wine bar to allow proper ventilation.
• his wine bar is designed to be free standing only, and should not
be recessed or built-in (fully recessed).
• Do not place any objects on top of the unit.
• Do not locate the unit in a moist place.
All manuals and user guides at all-guides.com

• he unit’s cooling system operates efficiently with an ambient
temperature of less than 21°C.
• Do not locate the wine bar in direct sunlight. Do not place unit
next to a major appliance that emits large amounts of heat, such
as a dishwasher, microwave, oven, barbecue, etc.
• ALWAYS REMOVE ALL BOTTLES BEFORE MOVING THE WINE BAR
Installing / R placing Batt ri s in your Win Bar’s
Wir l ss T mp ratur Prob s
he Wine Bar’s Wireless emperature Sensors already come with
batteries installed at the factory. Should the Sensor Unit batteries ever
need to be replaced:
1. Open the Sensor Unit by removing the battery lid with a small flat
head screwdriver.
2. Remove the exhausted battery and replace it with a lithium
button cell “CR2032”
3. When inserting the new battery make sure that the positive “+”
terminal of the battery is upwards.
4. Replace the battery lid.
BE CAREFUL WHEN INSTALLING BATTERIES IN THE WIRELESS
TEMPERATURE SENSOR OF WINE BAR. INSTALLING THE INCORRECT
BATTERIES OR REVERSING THE POLARITIES COULD CAUSE PERMANENT
DAMAGES TO THE PRODUCT.
Op rating instructions
Easy to Us Pr s t Mod (Using th Win Bar with th T mp ratur
Prob s)
1. urn on the Wine Bar by pressing the “POWER” button on the
Main Unit
2. For each zone (left & right) set the wine setting according to the
wine type you wish to chill by pressing the “WINE YPE” button.
Keep pressing the wine type button until the correct setting
appears on the LCD & screen.
3. Once you have selected the appropriate temperature preset
turn on the correct temperature probe and insert it in your bottle
to activate that particular zone (Left or Right). You will notice the
All manuals and user guides at all-guides.com

blue Wireless Link turn on indicating that the Wireless Link is active
and the temperature of your wine is being transmitted to the
Wine Bar.
4. At this point your Wine Bar will now chill your wine to the
appropriate temperature preset selected and once that
temperature is achieved it will maintain the set temperature.
How th Display Works
he grapes below are displayed on the Wine Bar’s display, each
having its own Preset setting automatically programmed to chill your
wine to its appropriate serving temperature. he preset temperatures
can be modified see the section “Manual Mode” for instructions on
how to do so.
he lines below are displayed on the Wine Bar’s display when the unit
is on. he empty line indicates the target temperature (according to
the preset you have selected) whereas the solid line indicates the
actual temperature that is being measured by the wireless
temperature probe.
As previously mentioned, when the WIRELESS LINK LIGH (Blue) is lit it
indicates that there is a wireless link between the Wireless
emperature Probe and the Wine Bar
When the NO READY LIGH (Red) is lit it indicates that the
temperature of your wine is not at the Perfect- emp emperature
according to the Wine ype Preset you have selected.
All manuals and user guides at all-guides.com
all-guides.com

When the READY LIGH (Green) is lit it indicates that the temperature
of your wine is at the Perfect- emp temperature according to the
Wine ype Preset you have selected.
Manual Mod (Modifying th D fault
T mp ratur S ttings)
Your Wine Bar comes pre-programmed at the factory with
suggested serving temperatures for Reds (17°C / 63°F), Rosés (13°C /
55°F), Whites (10°C / 50°F), and Champagnes (9°C / 48°F). hese
settings can be modified to suit your needs. o modify the default
temperature setting:
1. urn on the Wine Bar by pressing the “POWER” button and select
the preset you wish to modify by pressing the “WINE YPE” button
on either the Left or Right Zone or Both.
2. Press and hold the “POWER” button until the LCD’s on the Wine
Bar start flashing.
3. Once flashing press the “WINE YPE” button to lower the Preset
emperature Setting by 1°C (~1.8°F) decrements. You can cycle
through to a warmer temperature just by continuing to press the
WINE YPE button. Once you have selected the modified
temperature do not touch any buttons for approximately 5
seconds. he Red LED & Preset emperature Bar will stop flashing
and the Wine Bar will save the new temperature for the preset
you modified.
*Note: You can change the Default Temperature Setting of the
preset at anytime by following steps 1-3 above This new setting will
be stored until it is modified or the power to the Wine Bar is
interrupted (power failure, or by unplugging from wall Should this
occur, the Default Preset Temperature Settings will return to the
factory programmed temperatures)
All manuals and user guides at all-guides.com

Ic Chill Mod
Note: Using the Wine Bar without the Temperature Probes Please
note that when activated, your Wine Bar will constantly run, it could
result in your beverage getting too cold
1. Press and hold the “WINE YPE” button (Left Zone or Right Zone)
for ten (10) seconds until the Red LED stops flashing.
2. Unit will simply turn on and start to cool.
o turn off the “ICE CHILL MODE” simply press the “POWER” button, or
turn “ON” the wireless probe.
CLEANING INSTRUCTIONS
Below is a listing of general cleaning tips that should be taken when
cleaning your wine bar.
When cleaning your wine bar, be cautious when using any type of
cleaning products, some individuals may have allergic reactions to
the chemicals in some of these products.
By using solvents to clean your wine cellar, you may damage its
finish, hence it is recommended to use mild detergents, baking soda
and water. Never spray or squirt any type of liquid onto your wine
bar. If a spray is needed, spray the liquid onto a cloth and then use
the moistened cloth to rub down the wine cellar.
• Always unplug the wine bar before cleaning.
• Wash the inside surface with a warm water and baking soda
solution. he solution should be about 2 tablespoons of baking
soda to a quart (~1 liter) of water.
• he outside of the wine bar should be cleaned with a mild
detergent solution.
• Use a damp cloth or sponge to clean the control panel.
• Always dry all the parts with a clean dry cloth before plugging
the wine bar back into the receptacle.
DO NOT USE ABRASIVE PRODUCTS SUCH AS SCOURING PADS AND
POWDERS.
THEY WILL PERMANENTLY DAMAGE THE FINISH OF YOUR WINE BAR
In addition to the cleaning tips listed above it is recommended to
clean the external grills of your wine bar every 6 months as dirt, dust
All manuals and user guides at all-guides.com

and hair can build up causing the cooling system to not function as
efficiently.
ALWAYS UNPLUG THE UNIT FROM THE WALL PRIOR TO CLEANING THE
GRILLS
here are 2 effective methods to clean the external grills of your wine
bar:
• A vacuum cleaner can be used collect the dirt, dust and hair
that has built up.
• Alternatively compressed air can be used to clean the fan of
your wine bar. Ensure to follow the directions of the compressed
air container to avoid damage or personal injury
NO E: his device complies with Part 15 of the FCC Rules. Operation
is subject to the following two conditions: (1) this device may not
cause interference, and (2) this device must accept any
interference received, including interference that may cause
undesired operation of the device.
his equipment has been tested and found to comply with the limits
for a Class B digital device, pursuant to Part 15 of the FCC Rules.
hese limits are designed to provide reasonable protection against
harmful interference in a residential installation. his equipment
generates, uses and can radiate radio frequency energy and, if not
installed and used in accordance with the instructions, may cause
harmful interference to radio communications.
However, there is no guarantee that interference will not occur in a
particular installation.
If this equipment does cause harmful interference to radio or
television reception, which can be determined by turning the
equipment off and on, the user is encouraged to try to correct the
interference by one or more of the following measures:
- Reorient or relocate the unit.
- Increase the separation between the equipment and receiver.
- Connect the equipment into an outlet on a circuit different from
that to which the receiver is connected.
- Consult a dealer or an experienced radio/ V technician for
help.
All manuals and user guides at all-guides.com

Troubl shooting
You can easily solve many common problems by trying the
suggestions below:
SYMP OM POSSIBLE CAUSE
No Power
• Check to make sure the power cord is plugged into a
standard electrical outlet and that the power cord is securely
plugged into the bar of the Wine Bar
Wireless Link Loss
• Check the batteries in Wireless Temperature Probe. Replace
if necessary
• nvironmental interference (microwaves, cell phones, etc.)
could be affecting the wireless communication. Please re-
orient the unit and try again.
Wireless Link L D
Light is on but no
temperature is
being displayed on
the temperature
display
• Low Battery in the Wireless Probe Check the batteries in
Wireless Temperature Probe. Replace if necessary.
• nvironmental interference (microwaves, cell phones, etc.)
could be affecting the wireless communication. Please re-
orient the unit and try again.
• The Wireless Probe is too far away from the Wine bar
The Wine Bar does
not cool enough
• Make sure the cooling vents on the back and sides of the
Wine Bar are not obstructed. Have at least 5 cm (2”) of space
on back side and 20 cm on either side of the unit for proper
ventilation.
• The unit will have difficulty in cooling if the set temperature is
16°C (29°F) below the ambient temperature.
xample: if the ambient temperature is 30°C (86°F), the unit
will have difficulty cooling to 14°C (57°F).
Water build-up in
Bottle Chamber
• This is Normal operation of the unit. It is due to the
condensation of the moisture in the room’s air. Please wipe
out the water with a dry clean cloth.
All manuals and user guides at all-guides.com

CONSEJOS DE SEGURIDAD
Al utilizar un aparato eléctrico, procure seguir las medidas
preventivas abajo para reducir todo riesgo de incendio, de
electrocución o de lesiones corporales.
1. Utilice ese aparato respetando las directivas de ese manual.
Otros usos no recomendados pueden provocar incendios,
electrocución o lesiones corporales.
2. Utilice el aparato SÓLO para usos domésticos. No puede ser
utilizado con fines comerciales o industriales ni tampoco en el
exterior.
3. Para protegerse contra electrocuciones, no sumerja el aparato,
su cable o su enchufe en el agua. No lo vaporice con líquidos.
4. Les rogamos sean muy vigilantes cuando su aparato esté
utilizado por niños, o a proximidad de ellos.
5. Desenchufe el aparato del circuito eléctrico si no lo utiliza, o si lo
mueve, o si quiere limpiarlo.
6. Para desenchufar el aparato, tome firmemente la ficha y
sáquela para removerla de la toma de corriente. Nunca estire
del cable.
7. No utilice el aparato cerca de explosivos ni de emanaciones de
productos inflamables.
8. No ponga el aparato o uno de sus componentes cerca de
llamas vivas, de aparatos de cocción o de cualquier dispositivo
de calefacción.
9. No utilice el aparato si el cable o la ficha estén dañados, si el
aparato funciona mal, si cayó o si ha sido dañado de cualquiera
manera.
10. El uso de accesorios no recomendados por el fabricante
presenta riesgos y puede ser peligroso.
11. Instale el aparato en una superficie estable y seca.
12. No utilice el aparato si se ha removido su caja o si éste está
dañado.
13. Si se enchufa mal la ficha en la toma de corriente (corriente
alternativo), puede provocar un sobrecalentamiento y una
All manuals and user guides at all-guides.com
all-guides.com

distorsión de la ficha. Contacte un electricista cualificado para
reemplazar la ficha defectuosa o usada.
14. Ese aparato fue concebido para estar utilizado de pie y no
debería ser empotrado, que sea parcialmente o
completamente.
15. Aleje el aparato de la luz directa del sol y de las fuentes de calor
(estufas, calentapiés, aparatos de calefacción, etc.). La luz
directa del sol alterará el color de la capa exterior del aparato.
AVISO: Para r ducir los ri sgos d inc ndio, d l ctrocución o d
l sion s corporal s, l s rogamos d s nchuf n l aparato d
la toma d corri nt ant s d mant n r l aparato.
GUARDE ESTAS INSTRUCCIONES
Ahorre tiempo y dinero. Antes de llamar al servicio post venta,
consulte el guía de reparaciones al final de ese manual. Describe las
causas de los problemas de funcionamiento que podría encontrar y
que puede resolver usted.
Aviso: los cambios o modificacion s h chas al aparato y qu no
fu ron xpr sam nt aprobadas por l fabricant pu d n
imp dir qu l aparato funcionara corr ctam nt , a p sar d
las disposicion s tomadas por l utilizador para hac r
funcionar l aparato.
INFORMACIÓN SOBRE EL ENCHUFE POLARIZADO
Algunos aparatos están provistos con un enchufe polarizado (una
pata es más ancha que la otra). Para reducir el riesgo de choque
eléctrico, este enchufe calza en el tomacorriente polarizado de una
sola manera. Si el enchufe no cabe totalmente en el tomacorriente,
gire el enchufe. Si aún así no calza, consulte a un servicio técnico
cualificado. No int nt anular sta caract rística d s guridad.
Para los aparatos provistos con un enchufe clásico, basta con
insertar el enchufe en la toma de corriente.
All manuals and user guides at all-guides.com

INSTRUCCIONES DEL CABLE
El cable de alimentación del aparato es un cable corto a fin de
disminuir el riesgo de accidentes (caídas al tropezar con él, etc.)
Puede utilizar un alargador si es necesario.
• Asegúrese de que el nivel eléctrico del cable es igual o
mayor que el indicado. Una extensión con un bajo nivel
eléctrico correría el riesgo de sobrecalentarse y de
estropearse.
• Para evitar riesgos colocar de forma tal que los niños no
puedan jalarlo o tropezar con él. Que no arrastre nunca por
el suelo.
D s mbalar l aparato
1. Saque los embalajes interior y exterior
2. Asegúrese que tenga todos las piezas siguientes
a) Un (1) Enfriador de botellas con sistema Perfect emp
b) Un (1) guía de utilización
c) Dos (2) captadores de temperaturas sin hilo.
d) Un (1) cable de alimentación
DESCRIPCION
A. Zona izquierda
B. Captador por la zona
izquierda
C. Pantalla de temperatura por
la zona izquierda
D. Pantalla LCD de la zona
izquierda
E. Botón “WINE YPE” de la
zona izquierda
F. Zona derecha
G. Captador por la zona
derecha
H. Pantalla de temperatura de
la zona derecha
I. Pantalla LCD de la zona
derecha
J. Botón “WINE YPE” de la
zona derecha
K. Botón “POWER”
All manuals and user guides at all-guides.com

Encontrar un lugar ad cuado para instalar su
nfriador d bot llas
• Installa su enfriador de botellas en una superficie llana y
suficientemente sólida para sostenerlo cuando esté lleno.
• Mantenga un espacio de 5 cm (2 in) en la parte trasera y 20 cm
(8 in) en las partes laterales para que haya una buena
ventilación.
• Ese enfriador de botellas fue concebido para estar utilizado de
pie y no debería ser empotrado.
• No instale el aparato en un lugar húmedo.
• No instale el enfriador de botellas en una habitación cuya
temperatura ambiente es de más de 21°C (70°F).
• No exponga el enfriador de botellas directamente a la luz del sol.
• No instale el enfriador de botellas cerca de un electrodoméstico
que emite calor, tal como un lavavajillas, un horno microondas,
un tostador, una cocina, un barbacoa.
• SIEMPRE RETIRE LAS BOTELLAS DEL ENFRIADOR DE BOTELLAS ANTES
DE DESPLAZARLO.
Instalación o r mplazami nto d las pilas n
los captador s d t mp ratura sin hilo.
Los captadores de temperatura sin hilo del enfriador de botellas
incluyen pilas instaladas durante la fabricación. Si hiciera falta
reemplazar la pila de uno de los captadores:
1. Abra el captador removiendo la tapa de la pila con un pequeño
destornillador con cabeza llana.
2. Remueva la pila descargada y reemplácela por una pila
“botón” con litio de tipo “CR2032”
3. Cuando inserta la nueva pila, asegúrese que el signo “+” está
por encima.
4. Vuelva a poner la tapa de la pila.
TENGA CUIDADO CON LA INSTALACIÓN DE LAS PILAS EN EL
CAPTADOR DE TEMPERATURA SIN HILO DEL ENFRIADOR DE BOTELLAS.
UTILIZAR UN TIPO DE PILAS QUE NO CONVIENE O NO OBSERVAR LAS
POLARIDADES INDICADAS PUEDE DAÑAR DE MANERA PERMANENTE EL
APARATO.
All manuals and user guides at all-guides.com

Uso
Modo t mp raturas pr programadas muy fácil d utilizar (utilizar l
nfriador d bot llas con captador s d t mp ratura)
1. Ponga el aparato en marcha pulsando el botón “POWER”
2. Por cada zona (izquierda y derecha), elija el tipo de vino que
desea resfriar pulsando el botón “WINE YPE”. Siga pulsando ese
botón hasta que aparezca el reglaje deseado en la pantalla del
enfriador de botellas.
3. Una vez escogida la temperatura perfect temp apropiada,
ponga el captador de temperatura en marcha e insértelo en la
botella de vino para activar la buena zona (izquierda o
derecha). El lazo wireless se pondrá azul, lo que indica que el
lazo sin hilo está activado en tre el captador de temperatura y el
enfriador de botellas.
4. Desde entoncés, su enfriador de botellas resfriará el vino a la
temperatura deseada preprogramada, y una vez alcanzada esa
temperatura, el enfriador de botellas la mantendrá.
Cómo funciona la pantalla?
Los símbolos abajo aparacen en la pantalla del enfriador de
botellas. Cada uno tiene una temperatura preprogramada para
resfriar su vino a la temperatura apropiada. Las temperaturas
preprogramadas pueden modificarse (véase el párrafo “modo
manual”).
Las líneas abajo aparecen cuando el aparato esté encendido.
Lalínea vacía indica la temperatura deseada (qua ha escogido)
mientras la línea gorda indica la temperatura real indicada por el
captador de temperatura.
All manuals and user guides at all-guides.com

Como indicado previamente, si la luz wireless link (azul) está
encendida, significa que hay un lazo sin hilo entre el captador de
temperatura y el enfriador de botellas.
Si la luz NO READY (roja) está encendida, significa que la
temperatura de su vino no ha alcanzado la temperatura perfect
temp que ha preprogramado.
Si la luz READY (verde) está encendida, significa que la temperatura
de su vino ha alcanzado la temperatura perfect temp según el tipo
de vino que ha preprogramado.
Modo manual (modificación d las
t mp raturas pr programadas)
Su enfriador de botellas está preprogramado durante su fabricación
con las temperaturas siguientes: por el vino tinto (17°C/63°F), rosado
(13°C/55°F), blanco (10°C/50°F) y espumoso (9°C/48°F). Se puede
modificar esas temperaturas para que convengan más a su gusto.
Para modificar la temperatura preprogramada:
1. Enciende el enfriador de botellas pulsando el botón “POWER” y
elija la preprogramación que desea modificar, pulsando el
botón “WINE YPE” en la zona izquierda, derecha o ambas al
mismo tiempo.
2. Pulse y mantenga pulsado el botón “POWER” hasta que la
pantalla LCD parpadee en el aparato.
3. En cuanto papadee la pantalla LCD, pulse el botón “WINE YPE”
para disminuir la temperatura preprogramada grado por grado.
(1,8°F). Puede escoger una temperatura más elevada siguiendo
All manuals and user guides at all-guides.com
all-guides.com

pulsando el botón “WINE YPE”. Una vez escogida la
temperatura deseada, no toque ningún botón durante 5
segundos. Durante ese tiempo, la LED roja y la pantalla de
temperatura deseada se pararán de parpadear y el enfriador
de botellas salvaguardará la nueva temperatura que ha elegido.
*Nota: puede cambiar en cualquier momento las temperaturas
preprogramadas siguiendo las étapas 1-3 arriba.
La nueva temperatura sera salvaguardada hasta que sea
modificada, o si la alimentación eléctrica del enfriador de botellas
se interrumpe (corte de electricidad, etc.). Si ocurre eso, las
temperaturas preprogramadas durante la fabricación serán
reactivadas.
El modo FRIO HELADO
NO A: Utilización del enfriador de botellas sin captadores de
temperatura. Noten que, una vez activado ese modo, el aparato
funcionará de manera ininterrumpida, lo que podría resfriar
demasiado sus botellas.
Pulse y mantenga pulsado el botón “WINE YPE” (zona derecha o
zona izquierda) durante diez (10) segundos hasta que la LED roja
deje de parpadear.
El aparato se encenderá simplemente y empezará a resfriar. Para
dejar el modo “FRIO HELADO”, pulse el botón “POWER” o active el
captador de temperatura.
INSTRUCCIONES DE LIMPIEZA
Encontrará abajo una lista de consejos generales de limpieza. Les
rogamos síguenlos cuando limpia su enfriador de botellas.
Durante la limpieza del enfriador de botellas, tenga cuidado con el
uso de agentes limpiadores, algunas personas pueden presentar
reacciones alérgicas a los productos químicos contenidos en
algunos de los productos limpiadores. ambién les rogamos no
utilicen productos solventes para limpiar su enfriador de botellas,
porqué esos pueden dañar su capa externa. Pues se aconseja
utilicen detergentes suaves, bicarbonato de sosa y agua. No
pulverice nunca líquido hacia el enfriador de botellas. Si se necesita
All manuals and user guides at all-guides.com

un producto disponible en vaporización, vaporice el líquido en un
pañuelo y después utilícelo para limpiar el enfriador de botellas.
• Siempre desenchufe el enfriador de botellas antes de limpiarlo.
• Limpie la superficie interior con una solución de agua tibia y de
bicarbonato de sosa. La solución ideal se compone
apróximadamente de 2 cucharas soperas de bicarbonato de
sosa en un litro de agua.
• Limpie el exterior del enfriador de botellas con una solución
limpiadora dulce.
• Limpie el panel de mandos con una esponja o un pañuelo
humidificado con una solución de limpieza suave.
• Siempre seque bien las piezas con un pañuelo seco y limpio
antes de enchufar de nuevo el enfriador de botellas en la red
eléctrica.
EVITE LOS PRODUCTOS ABRASIVOS TAL COMO LOS ESTROPAJOS Y LOS
POLVOS DETERGENTES. DAÑARON DE MANERA IRREVERSIBLE LA CAPA
EXTERIOR DE SU ENFRIADOR DE BOTELLAS.
Además de los consejos presentados arriba, se aconseja limpien las
rejillas externas de su enfriador de botellas cada seis meses. En
efecto, suciedad, polvo, pelos pueden acumularse y disminuir la
eficacia del sistema de resfriamiento.
SIEMPRE DESENCHUFE EL APARATO ANTES DE LIMPIAR LAS REJILLAS
Existen 2 métodos eficaces para limpiar las rejillas de su enfriador de
botellas.
Un aspirador puede utilizarse para recoger la suciedad, el polvo y los
pelos que se han acumulado.
Eventualmente, se puede utilizar aire comprimido. Asegúrese que
siga las directivas del aparato a aire comprimido para evitar que se
rompa el material o que provoque lesiones corporales.
NO A: Ese dispositivo se conforme al capítulo 15 de las reglas de
FCC. El funcionamiento está sometido a los dos condiciones
siguientes : (1) ese aparato no puede causar interferencias nocivas,
y (2) ese aparato debe aceptar cualquier interferencia recibida,
incluida una interferencia que podría provocar un funcionamiento
no deseado del aparato.
All manuals and user guides at all-guides.com

Ese aparato fue examinado y es conforme a las prescripciones
aplicables a los dispositivos numéricos de la clase B, en acuerdo con
el capítulo 15 de las reglas de FCC. Esas límites están concebidas
para asegurar la protección razonable contra la interferencia
nociva en una instalación residencial. Ese aparato produce, utiliza y
emite energía de frecuencia radio, y si no está instalado y utilizado
conformamente a las instrucciones, puede causar una interferencia
a las comunicaciones por radio.
Por lo tanto, una interferencia puede producirse en una instalación
particular.
Si ese aparato causa una interferencia nociva a la recepción de las
emisiones de radio o de televisión, lo que puede verificarse
encendiendo y apagando el aparato, se aconseja que el utilizador
corrija la interferencia por una o más de las medidas siguientes:
- Reoriente o mueva el aparato
- Aumente la distancia entre el aparato y el receptor.
Enchufe el aparato en un circuito eléctrico diferente
del en el cual está enchufado el receptor.
- Si fuera necesario, consulte a un técnico radio/ V
cualificado.
All manuals and user guides at all-guides.com

Guía d r paracion s
Puede resolver si mismo varios problemas aplicando las sugestiones
abajo:
SÍN OMA CAUSA POSIBLE
El aparato no está
alimentado
• Compruebe la alimentación de la toma
eléctrica. Asegúrese que la toma de corriente
no depende de un interruptor.
Pérdida del lazo sin hilo
• Verifique las pilas en el captador de
temperatura. Si fuera necesario, reemplácelas.
• Interferencia debida al medio ambiente
(microondas, teléfonos móviles, etc.). reoriente
el aparato y intente de nuevo.
La luz “WIRELESS
LINK” está encendida
pero no aparece
ninguna temperatura
en la pantalla.
• Pilas descargadas en el captador de
temperatura sin hilo. Si fuera necesario,
reemplácelas.
• Interferencia debida al medio ambiente
(microondas, teléfonos móviles, etc.). reoriente
el aparato y intente de nuevo.
El enfriador de botellas
no resfría demasiado
• Compruebe que las rejillas de aeración,
porencima y por atrás del enfriador de botellas,
no estén bloqueadas. Guarde al menos 5 cm (2
in) de espacio libre en la parte trasera y al
menos 20 cm (8 in) por los lados para una
ventilación correcta.
Note que ese aparato no puede resfriar el vino a
más de 16°C (29°F) bajo la temperatura
ambiente. Por lo tanto, si la temperatura externa
es de 30°C, la temperatura interna máxima del
aparato será de 14°C (57°F)
Se forma agua en la
cámara de
resfriamiento
• Se debe al funcionamiento normal del aparato
y a la condensación de la humedad en el aire
de la cámara. Elimine el agua con un pañuelo
limpio y seco.
All manuals and user guides at all-guides.com
This manual suits for next models
1
Table of contents
Languages:
Other Kalorik Wine Cooler manuals

Kalorik
Kalorik WCL 43915 User manual

Kalorik
Kalorik USK WCL 32963 User manual

Kalorik
Kalorik USK WCL 20629 User manual

Kalorik
Kalorik Bodega User manual

Kalorik
Kalorik USK WCL 1 User manual

Kalorik
Kalorik USK WCL 2 User manual

Kalorik
Kalorik USK WCL 2 User manual

Kalorik
Kalorik USK WCL 32964 User manual

Kalorik
Kalorik USK WCL 20629 User manual

Kalorik
Kalorik WCL 42513 User manual