KANDA STK200ICE User manual

Quick Start Guide for AVR Trainer, STK200ICE and
STK300ICE
Introduction
This package consists of a number of different elements, each of which has its own
documentation. This guide is an overview of how to setup and use the package. For
details on each part, please consult the relevant documentation on the CD.
Package contents
•Get Going with AVR… book (AVR-TRAIN only)
•AVR Studio development software
•JTAGAVR In Circuit Emulator
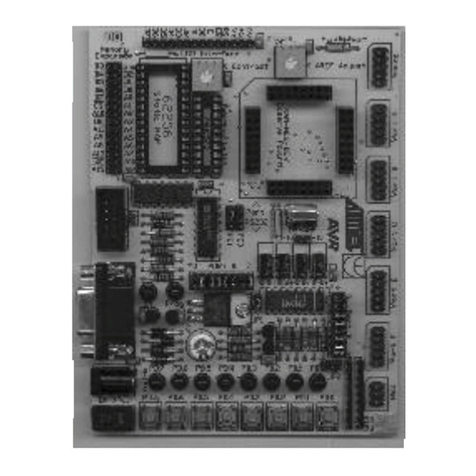
•STK200 AVR training board (STK300 board with STK300ICE)
•AVRISP parallel port programmer
•AVRGCC C Compiler
•AVR Application Builder
•Documentation, schematics and datasheets
Where this guide refers to STK200, substitute STK300 if you have STK300ICE.
References to book only apply to AVR-TRAIN
How these elements fit together
The core of the package around which everything else fits is Atmel’s AVRStudio
Integrated Development Environment or IDE. This is a platform that lets you write code
and assemble it for the microcontroller. It includes a Simulator that allows you to step
through your code to find basic errors.
Once your code is written, the next step is to connect up the JTAGAVR In Circuit
Emulator to the STK200 board, and run the code on the microcontroller in Debug Mode.
Again, this is done from the AVR Studio IDE, which allows you to step through the code
but this time it is running on the AVR instead of being simulated by the PC.
The JTAGAVR will also act as a programmer to download your finished code to the AVR
on the STK200 board. As an alternative the package also contains an In System
Programmer or ISP. This uses the standard ISP header unlike the JTAGAVR emulator
and comes into its own when you build your own circuits or want to program a wider
range of AVR devices. The AVRISP software can run on its own or it can be integrated
into AVR Studio.
The other elements in the package are a standalone Application Builder and a C
Compiler. The application Builder is a wizard that helps set up peripherals such as the

serial port without having to know all the details in the AVR device datasheet. The C
Compiler is included for those who want to progress beyond assembly language but we
recommend that you get a book on using C on the AVR before starting with the
compiler.
Getting Started
The place to start is by reading the book. The first half of the book covers the basics of
numbering systems, boolean algebra, microcontroller structure, types of instruction and
program design. You should make sure you are happy with these concepts before
starting to load software.
The second half of the book is about worked examples, so before starting on these we
need to load some software.
The steps outlined here cover a range of activities. You may find it easier to install
all the software and come back to details later or you may want to work through
each step as you come to it – it is up to you.
1) Open the folder called AVRISP on the CD and run the exe file. This will install the
programmer software.
Notes:
If you change the default install path, make a note of it as you will need it later.
The documents in this folder are not needed now but are useful when you want to
make your own hardware.
2) On the CD, open the folder called Studio4.

The version of AVR Studio may vary as new updates are released so read the install
guide in the directory, which contains instructions on how to install AVR Studio.
3) Once AVR Studio is installed, run the AVR Studio program.
4) Select the folder Studio4 > Documentation on the CD
Open the file ToolsSetupStudio4.pdf and follow the instructions in this document
to add AVRISP to AVR Studio
Now open Getting-started.pdf, which is a guide to using AVR Studio. Follow the
steps in this guide to familiarise yourself with creating projects, writing code and other
basics.
There is another folder here called App Builder. Application Builder is a tool that
creates initialisation code for AVR peripherals and can be a very useful aid in quickly
creating projects. It is not necessary to use it at the moment, but it is available if you
want to play with it. To use this tool, open this folder and copy the exe file to your hard
drive.
5) Now, you have a choice. We recommend that you run some sample programs on the
hardware board (STK200) using the AVRISP programmer to see something
happening. Then we can come back to the In Circuit Emulator later.
Go to Samples >STK200 folder on CD – see picture. (Samples > STK300 for
STK300ICE)
These files run on the STK200 or STK300 board.

Connecting the AVR ISP programmer hardware
•Connect the 10-way lead labelled ISP only to the PC adapter or dongle and plug the
dongle into your printer port.
•Connect the other end of the lead to the ISP header on the STK200 board
•Power the STK200 board – 9-15VDC
Run AVRISP from the Tools menu
PC Printer Port
On- Off Switch
Power Supply connector
ISP Header
AVR

Loading a sample file into AVR Studio
•Create a New Project in AVR Studio, and give it a name. Note the path to the project.
•Uncheck “Create Initial File”
•On next screen, select Debug Program as JTAG AVR and Device as ATmega162
(STK300ICE – Atmega128) and click finish
•Go to Project menu > Add Existing File and open bincount200.asm from CD
(Samples > STK200 > Bincount) or STK300 -bincount300.asm for STK300ICE
•Press F7 or Go to Project menu > Build to assemble the file. The output file is a .hex
file for the programmer – this will be stored in the same folder as the Project.
Programming file into AVR
In AVR Studio, go to Tools Menu > AVRISP (or run AVRISP yourself from programs or
desktop icon)
In AVRISP, change the Device to Atmega162 (or ATmega128 for STK300ICE)
Now select File > Load > Flashand open bincount200.hex (or bincount300.hex) from
the AVR Studio Project folder.
Now select Device > Program > Flash. Press F9 to Run or disconnect the ISP cable and
the file should run on the STK200 board
Using JTAGAVR ICE Tool
The next tool to look at is the In Circuit Emulator. We selected the JTAG AVR as the
debug tool when we created the project, so the AVR Studio is ready to accept it. No
software needs to be installed but there is a lot of documentation about using the
emulator on the CD in Documentation > ICE folder.

This documentation covers breakpoints, emulator use and much more. If you have any
questions about the JTAG AVR, the answer should be in these files.
Connecting the JTAG AVR hardware.
•Connect the serial lead to the PC and the JTAGAVR main board
•Connect Adapter A (the one with the big letter A on it) to the JTAGAVR using 10-
way lead – not lead marked ISP only
•Plug the adapter into the 10-way header labeled Port C on STK200 and AVR-TRAIN
or Port F Analog Port on STK300, with the connectors facing inwards.
•Power the board
To PC Serial Port
AVR
Port C
on STK200
AICE
10-way lead
NOT ISP only lead
Analog Port F
on STK300
STK300ICE Only
The AREF Pot should be turned
fully anticlockwise, as the JTAG
pins are on the Analog header.
This only has AREF pin not
Vcc, so turning pot gives 5V on
pin.

Running JTAGAVR ICE from AVR Studio
This should be really easy. Reopen the Bincount project if you have closed it.
Now go to Debug menu > Start Debugging
You can use Step, breakpoints and run to navigate through the code.
This is just a brief introduction to the ICE. There is more information on the CD in the
ICE directory, and in AVR Studio documentation and help.
Next Steps
We have covered how to use the tools in this guide. The next step is to return to the
book and begin to work through the examples.
Good Luck
FURTHER INFORMATION
support pages for latest software.
See www.kanda.com/support
Contact details
Website: www.kanda.com
email: [email protected]
Phone/Fax: +44 (0)8707 446 807
Atmel, AVR, AVR Studio are registered trade marks of Atmel Corp. San Jose, CA, USA
This manual suits for next models
1
Table of contents
Other KANDA Microcontroller manuals
Popular Microcontroller manuals by other brands

InterNiche Technologies
InterNiche Technologies PIC32MX user guide

Samsung
Samsung ARTIK 530s manual

Silicon Laboratories
Silicon Laboratories C8051F00 DK Series user guide

Atmel
Atmel ATmega645 Application note

Abov
Abov MC80F0304 user manual

NXP Semiconductors
NXP Semiconductors LPC5411 Series Product data sheet