Kaser BW User manual

MAMBO BW MP3 Player
User’s Guide
v1.1

Features
Smart design
Stylish, comfortable and lightweight with easy to use buttons
Supports various formats
MP1, MP2, MP3, WMA, WM , ASF, WA
FM stereo radio
The powerful search function helps you store 40 different stations (20 station of
each mode).
Built-in recording
You can record you favorite radio station to a recording file while listening to a radio
station.
U disc (driver free) function
You can operate in the portable disc directly with no drivers (WIN2000 or more
advanced systems no driving)
“Secure-disk” mode
You can divide the player’s storage disk into two separate disks and encode one of
them to be hidden.
ecording / repeating
You can record voice with microphone and store it in format WMA and ACT;
moreover, you can set repeating sections.
7 EQ modes
Normal, rock, pop, classic, soft, jazz, DBB
7 color backlights
Select from seven different color backlights.
Set power off time
Two convenient modes: sleeping mode and power saving mode
All flash menu
Menu with word display gives you important feedback.
Upgradeable hardware
Upgrade the player’s reprogrammable memory with new drivers (Please check the
Kaser website for latest driver releases.)
Quick Start Guide
Loading your MP3 Player
1) If you are using Windows 2000 or Windows 98 SE or Windows ME, please
insert the Driver CD into your computer’s CD drive and run the installation
application. If you are using Windows XP, proceed to Step 2 as no driver
installation is required.
2) Connect the Mambo to small end of the USB cable included in the package.
3) Connect the other end of the USB cable to your computer.
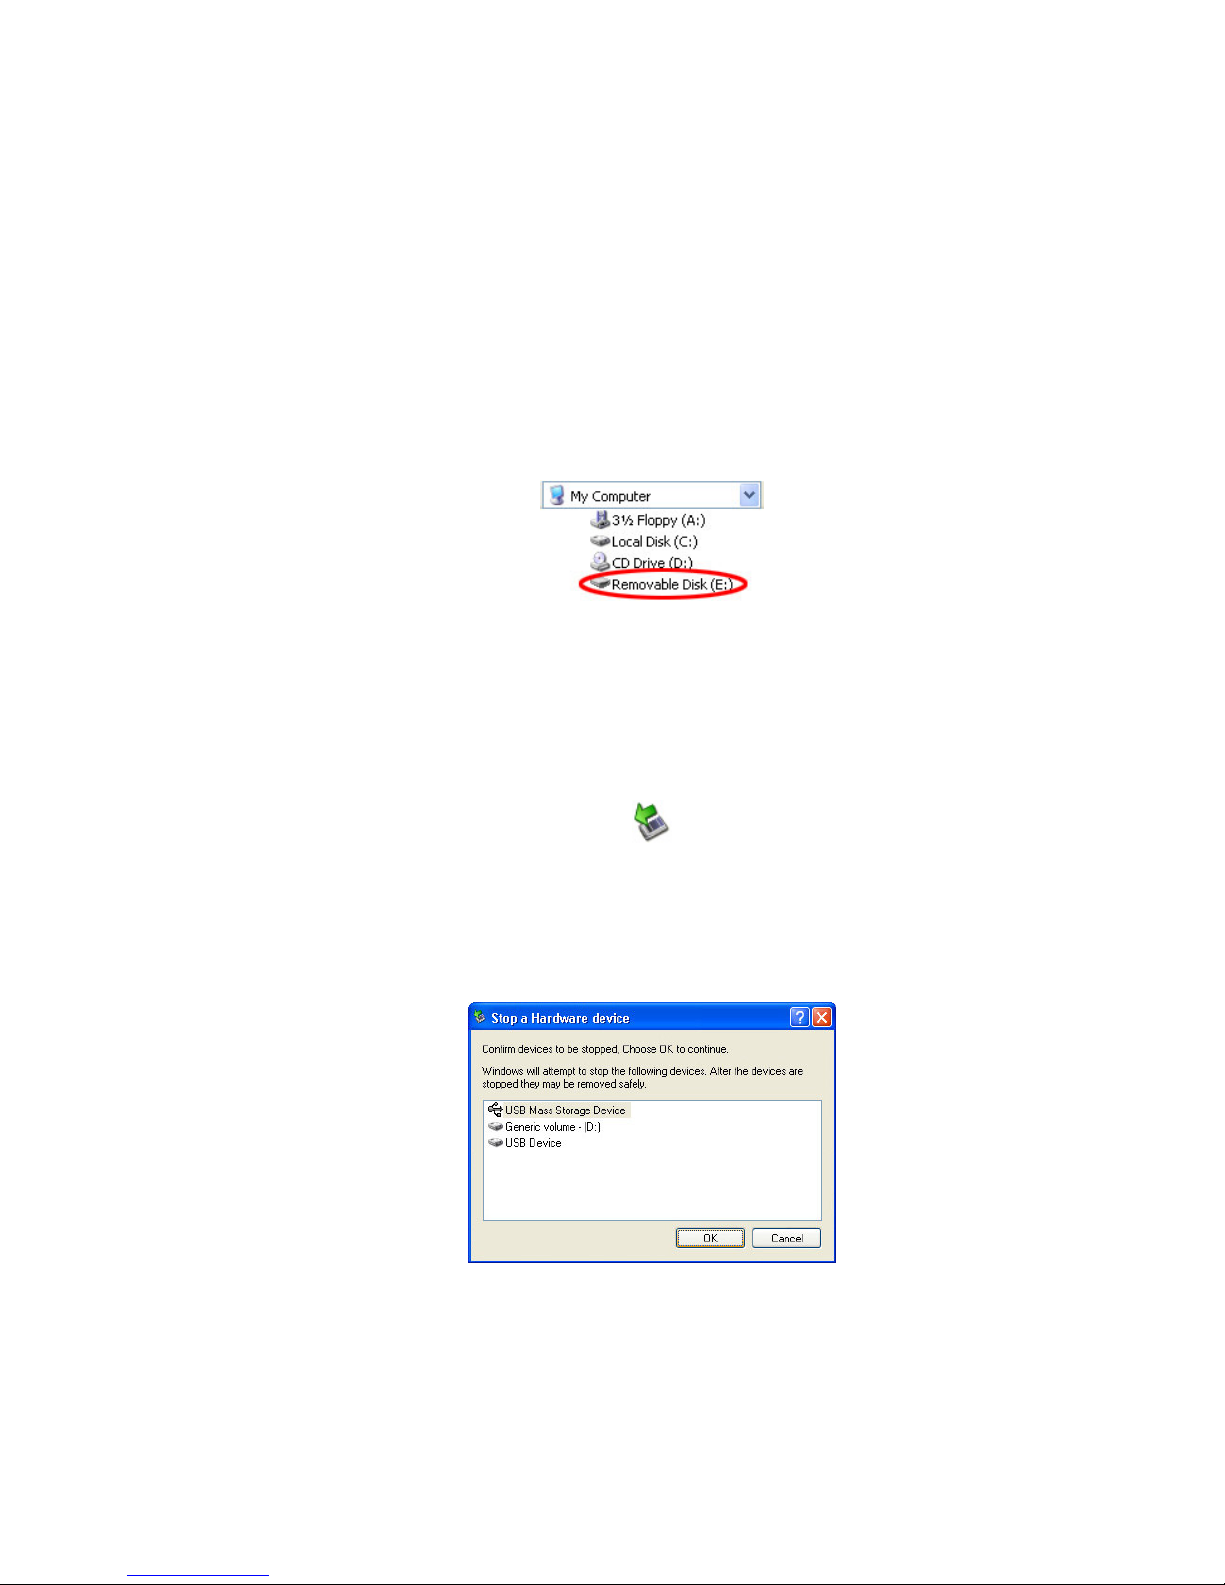
4) The MP3 player will automatically appear as a new Removable Disk.
5) Copy your music files to the Removable Disk icon as you normally copy any
files on your computer.
Disconnecting your MP3 Player
1) Right-click the Remove Hardware icon in the System Tray (next to the clock)
and select Safely Remove Hardware.
2) In the Remove Hardware dialog, click on the appropriate USB drive or mass
storage device and click Stop.
3) In the resulting dialog, click OK to confirm your selection. Click Close to close
the Remove Hardware dialog.

Quick eference Guide
Buttons
Button Summary
Play: Power on or off / play/ pause/ stop
Mode: Enter the menu or escape to the previous menu
VOL+, VOL-: Increase or decrease volume.
Next: select the next item
Prev: select the previous item
EC: Enter the recording mode
Power on / off
Press and hold “Play” button to power on or power off
LCD Display – music mode
Power Display
The player shows a 9-level power indicator. It will show full power if the battery is
1.5 . The indicator will decrease over time as the battery is depleted. The indicator
will be empty if the battery’s charge is used up.

Main menu
You can enter a menu by pressing the “Mode” (M) button. Each menu has further
submenus that allow you to perform various operations (play music, record, change
system setting, etc).
To escape to the Main menu from any submenu, press and hold the Mode button.
Submenus
Music mode
WWAAVV
Recording mode
Playing mode
FM mode
System setting
USB mode (connecting with PC)
Play Button functions
The Play button can play or stop (it can pause when recording).
In the System, Phone Book and Text submenus, pressing the play button takes you
up to the Main menu.
In music mode, press “Play” to play music. When playing, quickly press “Play” to
pause playing. Pressing “Play” and holding it slightly longer will stop playback.
In recording mode, press “Play” to record music. When playing, quickly press “Play”
to pause the recording. Pressing “Play” and holding it slightly longer will stop the
recording and save the file.
Button Actions Note
Button functions can vary with the length of time that the button is held. There are
regular presses, short or quick presses like clicking a mouse button, and presses
where you hold the button until the desired action occurs.

Player Functions
Music Playback
1) Select the Music mode menu and press the “Mode” button.
2) To play the selected file, press the “Play” button.
3) To browse other files, press the “Prev” or “Next” buttons. If a file is already
playing, pressing “Prev” or “Next” will start the next music file. However,
pressing and holding these buttons will fast forward or reverse.
4) When playing, quickly press “Play” to pause playing. Pressing “Play” and
holding it slightly longer will stop playback.
5) To add more music to your MP3, connect the player to your computer with a
USB cable. The player will appear as a removable disk icon. Copy and delete
files as normally done with USB disks or floppy disks.
If using Windows 98, please install the USB driver from the driver CD. This driver
is not needed for Windows 2000/XP users.
Lyrics Display
This player supports simultaneous lyric display using the .LRC text format. To use
this feature, keep the song word name consistent with the music.
For example:
Name of the music: My_Song.mp3
Name of the song word: My_Song.lrc
If your music file has a matching lyric file, the music mode “ ”will become “ ”.
1) Play a music file with a lyric file.
2) Press “Mode” and hold until the lyrics are displayed.
3) Press “Mode” to turn off the lyrics display.
Playing Mode submenu
You can choose different playing mode while playing music or music files such as
repeating and shuffling, or set Equalizer settings, or playback tempo.
epeat
1) Start the Music mode and play a music file.
2) Press “Mode” to open the Playing Mode submenu.
3) Press “Mode” to open the Repeat submenu. From here you can select the
following options
○ REPEAT
(Normal) Play songs in normal mode。
(Repeat One) Repeat one song
(Folder) Play all songs in a folder/directory
(Repeat Folder) Play and repeat all songs in
folder/directory
(Repeat All) Play and repeat all the songs
○ SHUFFLE
(Random) Play the songs in random order
○ INTRO
(Intro) Play the first 10 seconds of all songs in
order.
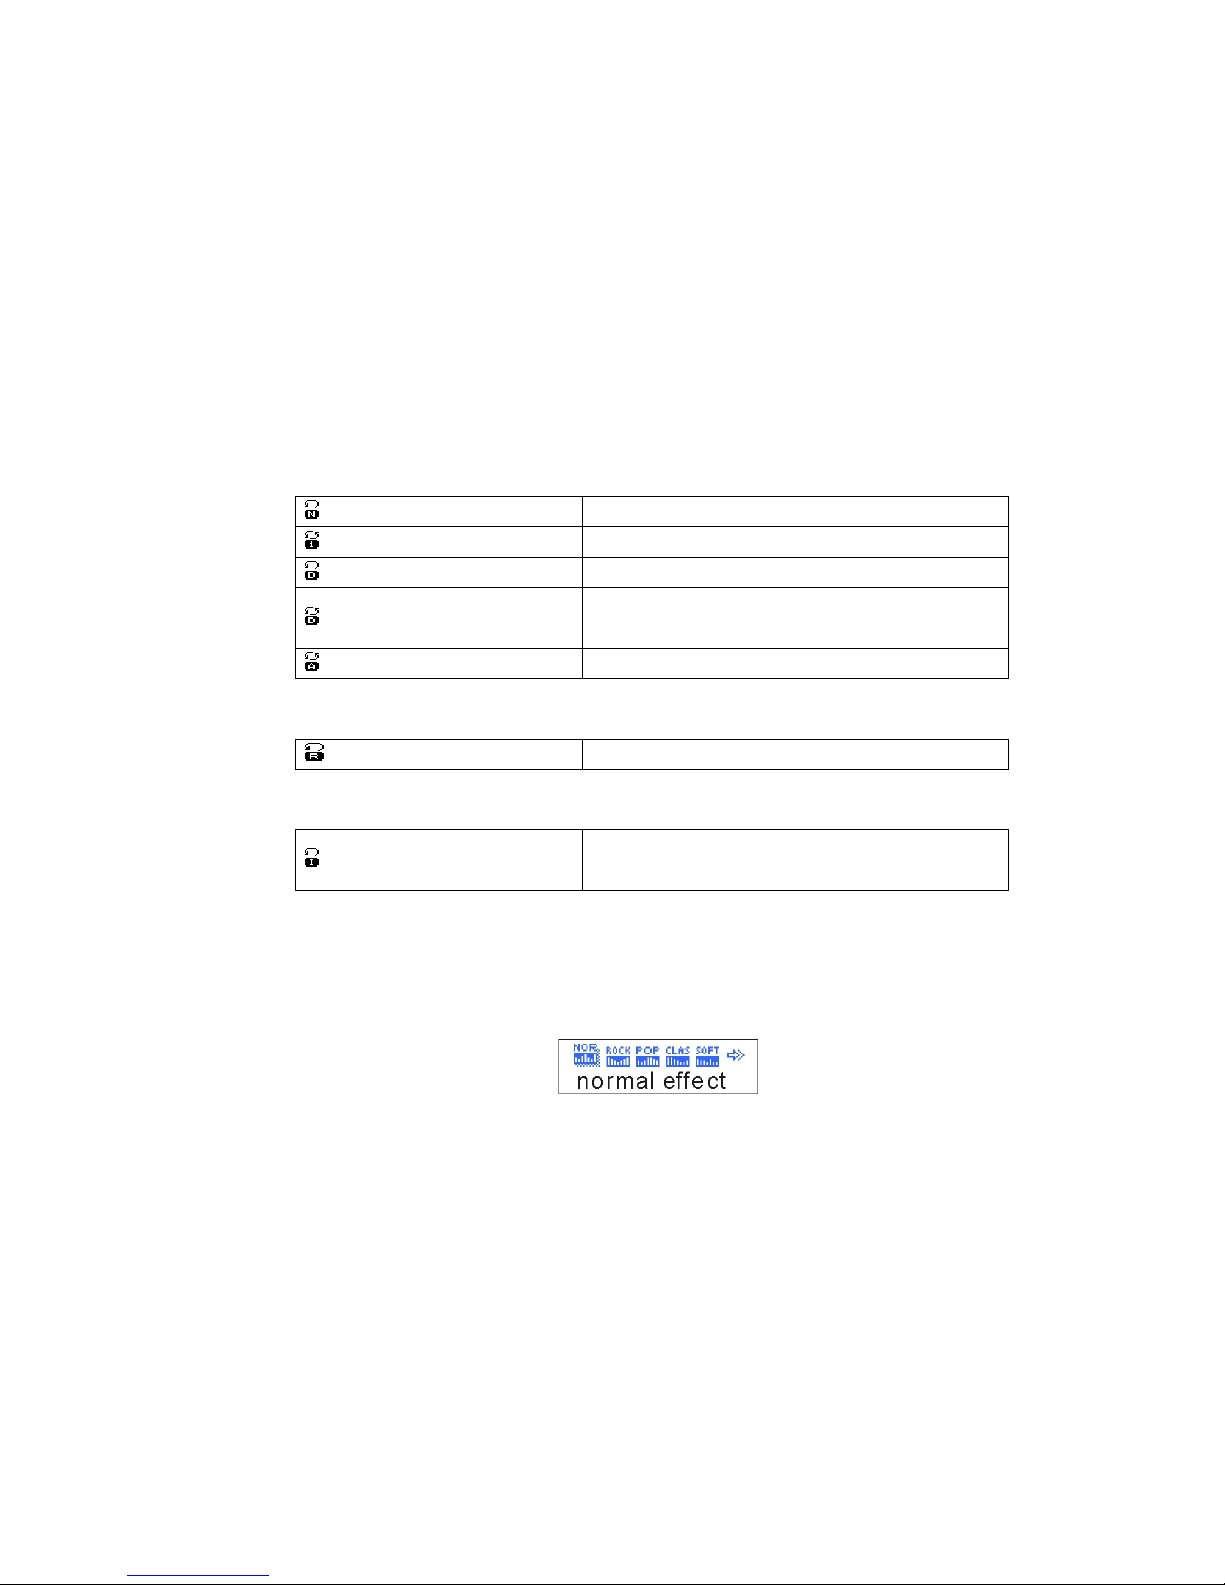
Equalizer
1) Play a music file
2) Press “Mode” to enter Playing Mode submenu.
3) Press “Next” to highlight the Equalizer item and press “Mode.”
4) Press “Next” to select from Natural/Normal, Rock, Pop, Classical, Soft, Jazz
and DBB.
5) Press “Mode” to confirm your selection.
Tempo
1) Play a music file
2) Press “Mode” to enter Playing Mode submenu.
3) Press “Next” to highlight the Tempo item and press “Mode.”
4) Press “Prev” or “Next” to adjust the Tempo slider.
5) Press “Mode” to confirm your selection.

eplay (A-B)
This function lets you set and repeat a particular section of a music file or recording.
1) Play a music file
2) Press “Mode” to enter Playing Mode submenu.
3) Press “Next” to highlight the Replay item and press “Mode.”
4) The display will Music mode and the A in the A-B icon ( ) will be flashing.
5) Press “Next” to set the start point of the repeating section.
6) The B in the A-B icon will start flashing.
7) Press “Next” to set the end point of the repeating section.
8) The section will be repeated the number of times specified in the Replay
Times setting.
9) After repeating the section, normal play will continue.
10) Use the olume buttons to adjust the playback tempo of an A-B section.
eplay Time
Use this slider to set the number of times an A-B section replays.
eplay Gap
Use this slider to set amount of pause between repeating playback.

Voice ecording
The player supports storing 99 text files in each directory. Please make sure the
power is enough when recording.
1) Select the Recording mode from the Main menu
2) Press “Mode” to enter the Recording mode.
3) Press “Play” to start recording.
You can also “hot record” without using this menu by pressing “Rec” in any mode.
The recorded voice file is stored in the current directory selected in “voice
recording” submenu.
If the screen displays “no space,” there is not enough disk space for storing the
recording. Some files may need to be deleted in order to perform further recordings.
If the screen displays “full,” there are already 99 recordings in the current
directory. Create a new directory before continuing.
ecording Settings
From voice recording interface
1) From the Main menu, highlight the recording mode and, press “Mode” to
enter Recording mode
2) Press “Mode” again to enter the Recording submenu.
3) Press “Next” to highlight the Recording Type submenu.
4) Press “Mode” to enter the Recording Type submenu.
5) Press “Next” to choose the recording type, and then shortly press “Mode” to
confirm the selection.
Recording types:
High quality recording; WA format, good sound quality
Long time recording; ACT format, ordinary sound quality
High quality sound control; WA format, (sound control recording, and it will
pause when there is no sound input)
Long time sound controlling ACT format, (sound control recording, and it will
pause when there is no sound input)
ecording Playback
1) From the Main menu, highlight the recording mode, and press “Mode” to
enter Recording Playback mode.
2) To play the selected file, press the “Play” button.
3) To browse other files, press the “Prev” or “Next” buttons. If a file is already
playing, pressing “Prev” or “Next” will start the next recording. However,
pressing and holding these buttons will fast forward or reverse.
4) When playing, quickly press “Play” to pause playing. Pressing “Play” and
holding it slightly longer will stop playback.
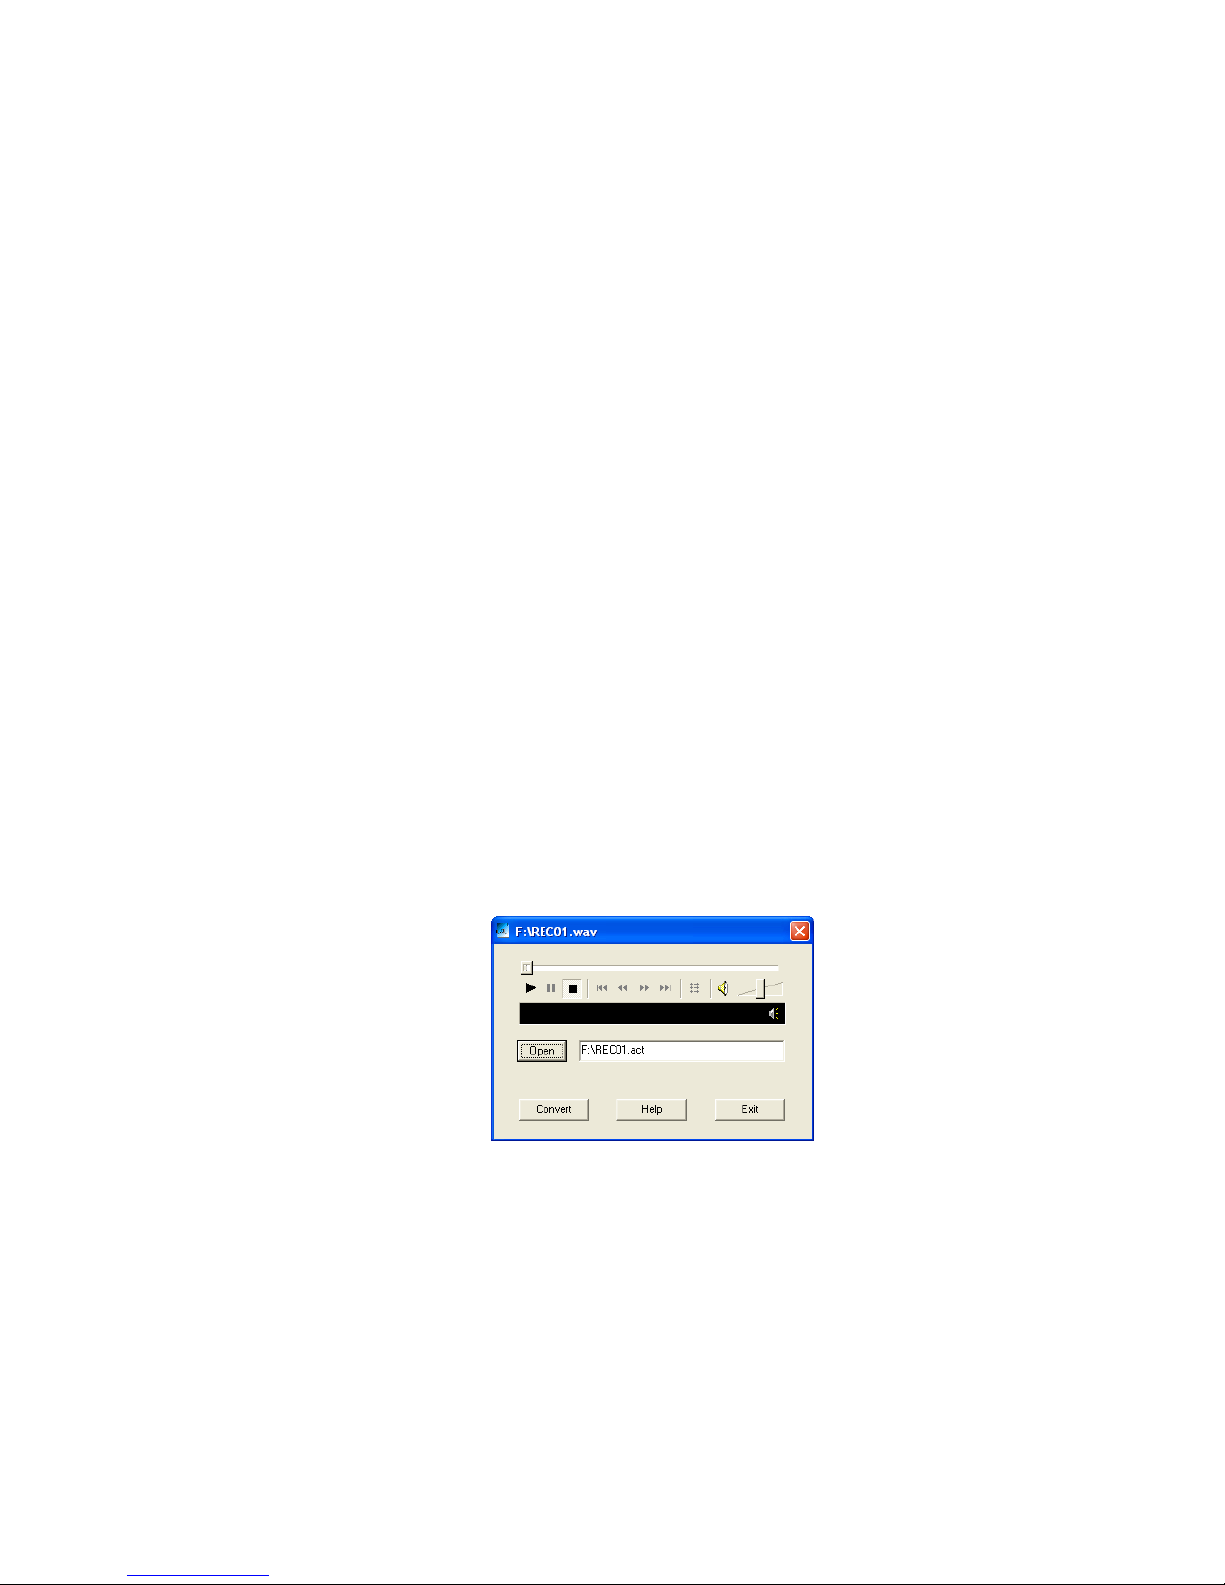
Convert ACT recording into WAV format
An ACT formatted recording can be converted to WA format using the Sound
Convert software included with the player.
1) Insert the driver CD into your computer, navigate to the MP3 Player Utilities
directory and select MSIen.msi, which is the English language installer file.
Double-click the file to start the installer.
2) After installation, connect your player to your computer using a USB cable.
3) From the Start menu, select MP3 Player Utilities > Sound Convert.
4) Click Open to select the ACT file.
5) Use the directory dialog to select your file and click Open.
6) Click Convert to convert your file. The file is automatically converted.
Note: The file created will have the same filename as the selected ACT file. You
should rename files appropriately to avoid accidental deletion of other files.
This manual suits for next models
1
Other Kaser MP3 Player manuals


