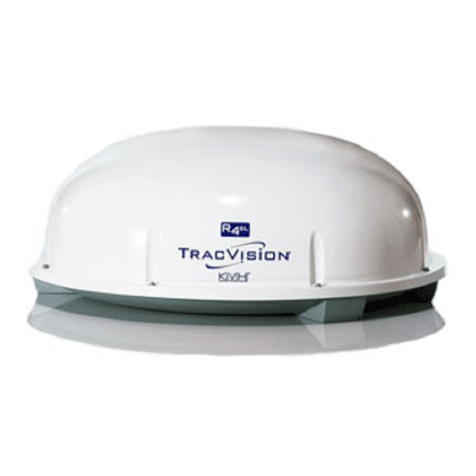
Kathrein MobiSet 4 Twin CAP 950 User manual

Translation of the original
operating manual CAP950
English
MobiSet4 Twin
CAP950
IMPORTANT
Read carefully
before use!

2 of 52
Contents
1 General 4
2 Scope of Delivery 5
3 Intended Use 6
4 Safety Instructions and General Guidelines 7
5 Installation and Connection 12
5.1 Installing and Connecting the Turntable 12
5.1.1 Required Tools and Equipment 12
5.1.2 Unpacking and Preparing 12
5.1.3 Selecting the Installation Location 13
5.1.4 Installing the Cable Gland and Mounting Plate 14
5.1.5 Possibilities of the Turntable Installation 16
5.1.6 Installing the Turntable 19
5.2 Installing and Connecting the CAP Converter 20
5.2.1 Selecting an Installation Location 20
5.2.2 Preparing the CAP Converter for Installation 22
5.2.3 Important Instructions for Installation 22
5.2.4 Installing the CAP Converter on a TV Set 23
5.2.5 Installing the CAP Converter 24
5.2.6 Laying the Cables and Connecting the Turntable 25
5.2.7 Connecting the CAP Converter 25
5.2.8 Functional Instructions for Connection to the On-board Power Supply 27
5.2.9 Connection Example for 12 V Battery Connection 27
6 Reception Range/Footprint 28
7 Dismantling for Servicing 29
7.1 Dismantling the Turntable 29
7.2 Address of the Service Centre 29
8 Polarisation Setting 30
9 Manually Lowering the Antenna to Park Position 30
9.1 Safety Instructions 30
9.2 Manual Lowering 31
10 Technical Data 32
10.1 Technical Data 32
10.2 Dimensions (in mm) 33
11 DEKAsylMS Safety Data Sheet 34
12 DEKYsylMS Technical Data Sheet 41

3 of 52
13 Operating Instructions CAP950 44
13.1 Safety Instructions and General Guidelines 45
13.2 Installing the CAP Converter 46
13.3 Change of Location 46
13.4 Operating the Turntable Using the External Push-button 47
13.4.1 Starting the Turntable 47
13.4.2 Moving the Turntable to the Park Position 47
13.4.3 Resetting the CAP System 47
13.5 Updating Software and Channel List 47
13.5.1 Updating the Channel List 47
13.5.2 Updating Software 47
13.6 LED Status Indicator on the CAP Converter/External Push-button 48
14 Waste Disposal 49
15 Declaration of Conformity 50

4 of 52
General
1 General
Dear Customer, Chère Cliente, Cher Client, Gentile cliente, Estimado cliente,
GB
You can obtain an English version of our mounting instructions from our representatives in your country1) or download
one from our web site2).
F
Vous pouvez obtenir un manuel d‘installation en français chez notre représentant en votre pays1) ou le télécharger de
notre site Web2).
I
Lei puo avere la versione italiana delle istruzioni di montaggio dalla nostra rappresentanza1) piu vicina della sua città,
oppure scaricarla dalla nostra web site2).
E
Para obtener la versión española de nuestro manual de instalación, contacte nuestros representantes en su país1) o
bajela de nuestra página de internet2).
1) https://www.kathrein.com/en/company/kathrein-worldwide/
2) http://www.kathrein.de/en/sat
Company address and accredited representative
KATHREIN-Werke KG
Anton-Kathrein-Straße 1 – 3
83022 Rosenheim, Germany
Anton Kathrein,
Personally liable Managing Director of
KATHREIN-Werke KG

5 of 52
2 Scope of Delivery
①Turntable with integral controls and GPS receiver
②Satellite dish, 75cm
③Twin LNB
④CAP converter
The MobiSet4 CAP950 consists of:
●turntable ①complete with control electronics and GPS receiver, pre-assembled satellite dish ②and Twin LNB③,
automatic skew
●mounting plate
●complete cabling set:
1x master coaxial cable1), marked in red, for connection to the CAP converter2)
1x slave coaxial cable1), for connection to a second receiver or TV with an integrated receiver
1x power supply cable1)
2x coaxial extension cables, 8m each, F-type male connector to F-type male connector, 1xmarked in red
1x power supply extension cable, 10m, incl. blade-type fuse 15A, for connection to the on-board power supply
●roof duct with sealing gasket
●DEKAsylMS adhesive sealant (100ml tube)
●CAP converter ④with a 12V connection cable and LED/push-button cable
●4 x wood screws 4.5 mm x 30mm
●MobiSet4 CAP950 installation manual
1) fixed connection to the turntable
2) In order to connect a TV to the CAP converter, you will need a coaxial cable F-type female connector/F-Type female connector,
the length of which depends on the distance between the TV and the CAP converter. This cable is not included in the scope of
delivery. For more information, see 13.2, p.46
1
2
3
4

6 of 52
Intended Use
3 Intended Use
The MobiSet4 CAP950 is designed to receive digital TV and radio channels via satellite. The automatic positioner is
intended to be used as a turntable for the Kathrein satellite dish.
The turntable can be used to receive digital TV and radio signals in the frequency range from 10.70 to 12.75 GHz; the
antenna cannot receive terrestrial signals (e.g. DVB-T).
The MobiSet4 CAP950 offers a receiver-independent solution and can be used with any SAT compliant end device. The
CAP converter takes over the communication and control of the system and converts signals received by the end device
to CAP compliant signals. This way, it provides for the fully automatic alignment of the planar antenna to receive digital
satellite signals.
The turntable is designed for use on stationary caravans or motor homes.
Any use other than that specified above will invalidate the warranty or guarantee.
The following circumstances result in the loss of all warranty and liability claims towards the manufacturer:
●improper installation
●use of non-specied mounting materials, which cannot guarantee the mechanical reliability of the antenna system
●Impermissible use, e.g. use of the planar antenna for storage
●structural changes or interference with the components and mounting accessories in the set, which could endanger
both the mechanical and functional reliability
●improper or forcible opening of the components
●use of cleaners containing solvents, such as acetone, nitro-cellulose thinners, petrol, etc.
●failure to observe installation and safety instructions in this manual

7 of 52
4 Safety Instructions and General Guidelines
DANGER
Danger to life from electric shock when touching electrical installations!
►Maintain a minimum clearance of 1m from all electrical devices.
►Disconnect the turntable and all the units connected to it from the power supply during installation/repairs/
dismantling.
►Make sure that modications to the electrical installations in the vehicle are only carried out by a specialist
in vehicle electrics. Do not make any unauthorised changes to the turntable!
WARNING
Risk of severe injuries during installation/repairs/dismantling on the vehicle roof!
►Position the vehicle horizontally.
►Wear stable shoes with non-slip soles.
►Use a working platform.
►Make sure that the person carrying out the installation or repair has a secure position to stand and hold on
whilst working.
►Make sure that the person carrying out the installation or repair does not suffer from vertigo and can move
around safely on the roof of the caravan or motor home.
►Make sure that the vehicle roof is sufciently strong and stable. In case of doubt, contact a qualied
specialist retailer or the manufacturer of your vehicle.
►Make sure that there is nobody below the antenna inside the caravan/motor home during installation/
repairs/dismantling.
►Make sure that the roof and climbing aid are dry, clean and non-slip.
WARNING
Risk of severe injuries due to moving parts, especially risk of crushing!
►Make sure that no one, and in particular, no children, is in the immediate vicinity of the turntable and cannot
touch any moving parts.
►Disconnect the turntable and all the units connected to it from the power supply during installation/repairs/
dismantling.
CAUTION
Trip hazard due to cables!
►Lay cables in such a way that no one can tread on them or trip over them.
WARNING
Risk of accidents due to collision of the antenna with objects!
An increase in the normal vehicle height due to the antenna not being lowered can lead to an increased risk
of accidents. The driver bears sole responsibility for the condition of the superstructure and external ttings! If
there is a storm warning, the turntable and the vehicle could be damaged.
►Follow instructions in the installation and operating manuals for the units used and for the external ttings
and superstructures.
►Before commencing a journey or if there is a storm warning, lower the antenna into horizontal position (park
position).
►Do not exceed the maximum permissible speed for vehicles of 130km/h.
NOTICE
Risk of malfunction or material damage due to operation outside the permissible temperature range!
►Operate the turntable in an ambient temperature range from –20°C to +45°C.
►When selecting the installation and setup location, ensure that the receiver is sufciently ventilated.


8 of 52
Safety Instructions and General Guidelines
Proper Installation and Safety
The system may be installed only by qualified specialist personnel!
To prevent hazards during installation, operation or when driving on public highways, the instructions
and information in this manual must be strictly adhered to. Proper installation and connection of the
system are prerequisites for conformity with the corresponding standards.
This is documented in advance by the CE mark and the declaration of conformity in the appendix to
this manual.
Essential information
A crucial safety factor is proper performance of installation and electrical connection work, and the specied alignment
of the turntable in the direction of travel (park position), see Chapter 5, p.12.
►Comply as precisely as possible with the installation conditions and steps described.
Adhesive sealant
The turntable is attached to the roof of the vehicle by adhesive and is secured by additional screws.
Note that the curing of the adhesive sealant is temperature-dependent. It reaches its full strength only after approxi-
mately 2days.
NOTICE
Risk of material damage due to improper use of the adhesive sealant!
►During installation work, comply strictly with the processing and safety instructions for the adhesive
sealant (DEKAsyl MS adhesive sealant safety data sheet and DEKAsyl MS adhesive sealant technical
data sheet).
Road Traffic Licensing Regulations (StVZO)
The applicable regulations of the German StVZO must be observed in respect of xed installation of the turntable on
a vehicle which is driven on public highways. In particular, Articles19/2; 30C; 32(2) and EC directive 74/483EEC are
applicable.
Briey, they state that no endorsement of the vehicle documentation is required unless the antenna unit causes the
height of the laden vehicle to exceed 2m, or the antenna unit projects beyond the outer lateral outline of the vehicle. The
maximum permissible height of 4m for the vehicle and antenna unit must not be exceeded.

9 of 52
Cables
WARNING
Risk of fire!
If the cables are tied with a wire or the like, it could cause re.
►Remove the wire or the like.
CAUTION
Trip hazard due to cables!
►Lay cables in such a way that no one can tread on them or trip over them.
NOTICE
Risk of parasitic induction or interference emissions!
An inappropriate cable or an extension cable can cause parasitic induction or interference emissions, thus
reducing the picture quality.
►When extending the antenna cable, use a 75Ω coaxial cable with a screening factor of at least 75dB.
NOTICE
Risk of material damage due to reversed polarity!
When connecting the power cables, reversed polarity can lead to thermal overload and damage to compo-
nents when the equipment is powered up.
►When connecting the power cables (CAP converter and turntable) to the vehicle electrical system, make
sure that the poles are not reversed.
Supply Voltage, Fusing
WARNING
Risk of severe injuries due to cable fire!
If you remove or bypass the fuse in the cable, it can cause cable re.
►Do not remove or bypass the fuse in the cable.
NOTICE
Risk of material damage due to the absence of a blade fuse in the cable!
►Protect the positive wire (red) of the power supply cable by using a 15A blade fuse.
►The fuse must be installed by a specialist.
►If the fuse is blown, replace it by a fuse of the same rating (15A).
►Eliminate the cause of the fault.
To ensure a reliable function of the connection/control unit:
►Operate the system from your vehicle's battery (12V) or a suitable power supply unit. The power supply unit must
ensure a stable output voltage of 12V, a continuous current of 11A and 15A (300ms) surge current. The short-time
power consumption is up to a maximum of 12A.
►Connect the power supply cable directly to the battery.

10 of 52
Safety Instructions and General Guidelines
Using the cable core marked Ignition,the power supply cable is connected to the ignition current circuit. This way, the
turntable has a function for automatic lowering of the antenna. The lowering takes place as soon as the vehicle ignition
circuit is turned on.
►When connecting the control unit to the on-board power supply, make sure that the 12V, Earth and Ignition wires
cannot be disconnected by intermediate switches, as this could deactivate the automatic lowering function.
The antenna is lowered within 5 seconds of the ignition being switched on, even if the CAP converter is switched off.
The control unit is lowered immediately. Lowering the antenna after the ignition is switched on can take up to
30seconds and it only functions if the turntable is connected to a 12V power supply and to the ignition.
Checks before Commencing a Journey
●Before commencing a journey, always lower the antenna into the horizontal position (park position).
●If the antenna has collided with a xed or movable object, check if the system is still securely attached.
●As the antenna is subjected to vibration loads during driving, check at regular intervals, depending on the frequency
of driving, whether the system is still securely attached and tighten any parts that have worked loose.
●Do not exceed the maximum permissible speed of 130km/h for vehicles with a receiver unit mounted on the roof.
●Lower the antenna if it will not be used for a long period. This makes the securing bolts more difcult to access
(protection against theft).
Antenna in the Park Position whilst Driving
Always lower the antenna into the horizontal position (park position) whilst driving. To remind yourself of
this, place the sticker from the supplementary sheet CAP950 Lowering the antenna while driving in the
visual range of your vehicle ignition switch.

11 of 52
Satellite Configuration in the CAP Converter
Important Note!
By means of a CAP converter, you can directly control 4 satellite positions with the help of a connected
satellite receiver or a TV3). In order to do so, the sequence of the satellite positions in the TV/ receiver must
correspond to the sequence of the satellite positions in the CAP converter.
The CAP converter has the following default standard settings for satellite positions:
●Satellite 1: Astra 19.2°E
●Satellite 2: Hotbird 13°E
●Satellite 3: Astra 23.5°E
●Satellite 4: Astra 28.2°E
Setting the Satellite Position in the CAP Converter
The satellite positions in the CAP converter can be changed as follows:
●Using the free smartphone/tablet CAPcontrol app (available for Android and iOS)
►To change the satellite position, go to Settings▶Satellite selection in the app.
To use the app, you will either need a LAN connection to the router or a wireless USB adapter
UFZ1311) with a wireless hotspot function.
●Using the external operating unit2)
►To change the satellite position, press buttons to set the values.
●Using a software update of the xml le with satellites created on the computer by means of a USB
stick. Ready-made config.xml les are available free of charge at www.kathrein.de/sat.
1. On a USB stick, create a kathrein folder with a capconverter subfolder.
(Use lower case letters for folder names!)
2. Copy the config.xml le to the capconverter subfolder.
3. Connect the USB to the active CAP converter.
➯The config.xml le is installed automatically.
➯During the installation, the LED is lit (yellow). After the successful installation, the LED is lit green
and then yellow for 1 second, respectively.
➯If the installation failed, the LED is lit red and then yellow for 1 second, respectively. Check the
folder structure and make sure that the folder names are spelled in lower case letters.
For more information about setting the satellite positions of your receiver units, see the user manuals or
call the hotline of the corresponding manufacturers.
1) 2) available as accessories 3) TV with a built-in satellite receiver

12 of 52
Installation and Connection
5 Installation and Connection
5.1 Installing and Connecting the Turntable
5.1.1 Required Tools and Equipment
●Circular cutter, Ø 38mm
●Flat-bladed screwdriver for M5 screws
●Power drill
●The following screws, depending on the roof structure:
–galvanised round head screws, Ø 5mm, sheet metal
screws D7981 or
–round head screws D7985 with washers and nuts
●Twist drill, Ø 2.5 or 5.5mm
●Round le and/or emery paper
●Cleaning agent
●Open-ended or ring spanners 10 and 11 mm across ats
●Knife
●Cross-head screwdriver for M3 and M5 screws
●Torque wrench capacity 6 to 11Nm
●Hexagon socket key, 5 mm
●Two wooden beams for supporting the turntable
5.1.2 Unpacking and Preparing
WARNING
Risk of injury due to the heavy weight of the package!
The turntable together with the parabolic reector weighs close to 20 kg.
►If necessary, please seek help from a second person when unpacking and installing the turntable.
NOTICE
Risk of material damage during transportation!
►Never pick up or carry the turntable by the planar antenna.
Unpacking the Turntable
1. Pull the turntable out of the packaging as shown in the illustration below.
2. Remove the packing pieces from the turntable ①before transporting it to the roof of the vehicle.
3. Loosen the 6 fastening screws (spanner size: 10mm) which attach the turntable to the mounting plate.
4. Carefully lift the turntable off the mounting plate and place it onto the two prepared wooden supports. When doing
this, make sure that the cables are not crushed where they emerge from the underside of the turntable.
1
Tip Retain the original packaging, because if it is necessary to send the unit for repair, transport damage cannot
be ruled out and the manufacturer accepts no liability for possible damage.

13 of 52
5.1.3 Selecting the Installation Location
Essentially, the cable lengths and components that are supplied allow you a free choice of installation location on your
caravan or motor home.
When selecting the installation location, take note of the following points:
►Before installation, nd out whether the operating manual for your vehicle permits the tting of non-vehicle-specic
parts or what requirements need to be met in order to do so.
►For direct satellite reception, there should be no obstructions between the antenna and the satellite. Therefore,
make sure that the antenna is not shadowed by roof attachments such as luggage racks, air conditioning units, solar
panels, etc.
►The problem of shadowing applies also when selecting a parking place for your vehicle. For interference-free satellite
reception, the antenna needs a free view to the south at an angle of between 15° and 55° (depending on location) to
the horizontal.
►When selecting the installation location, take into account the range of movement of the turntable, see Chapter 10,
p.32. There must not be any attachments on the roof that would obstruct this range of movement (risk of collision).
To be on the safe side, keep slightly more than the required area free. This allows for an easier installation and any
subsequent dismantling.
►Choose an installation position on the roof that is as horizontal as possible or only slightly sloping, depending on the
location of the vehicle, since roof inclinations greater than 5° may lead to problems when searching for the satellite.
►To ensure secure adhesion, the height difference of the roof curve must not be more than 1cm over a length of 2m,
as otherwise the gap between the roof and the mounting plate would be too great to be lled by the adhesive sealant.
►As the vehicle is constantly subjected to vibration loads during travel, the roof below the antenna unit is also subject
to signicant loads. Please note, given the nature and capacity of your vehicle roof, that the weight of the antenna
unit is approx. 19kg, see the operating manual for the vehicle. In case of doubt, consult a qualied specialist dealer
or your vehicle’s manufacturer.
►The roof duct provides a watertight seal through which the three cables (2 x coaxial cables, one power supply cable)
are fed into the interior of the vehicle directly underneath the turntable. If you prefer a different method of laying the
cables, you can run them out from the rear of the turntable via the channel provided in the mounting plate. The cables
must then be run along the roof of the vehicle in a protective cable duct and through a separate roof duct HDZ100
(neither of them are included in the scope of delivery).
►The HDZ100 roof duct is available as an accessory under part number 20410032 from specialist dealers.
NOTICE
Risk of malfunction or material damage, in particular due to the absence of a blade fuse in the cable!
►Protect the positive wire (red) of the power supply cable by using a 15A blade fuse.
►The fuse must be installed by a specialist.
►If the fuse is blown, replace it by a fuse of the same rating (15A).
►Eliminate the cause of the fault.

14 of 52
Installation and Connection
Turntable movement range with
antenna, viewed from above onto
the vehicle roof.
Roof attachments may
be mounted within the
hatched area.
The safety clearances should be
maintained from the roof attach-
ments (e.g. due to a build-up of ice)
Direction of travel
5.1.4 Installing the Cable Gland and Mounting Plate
Tip If you have previously used a Kathrein HDM140/141 jointed tripod mast or another mast with a diameter of
34mm, you can continue using the existing through hole in the roof.
Fig.AFig.B
1
38
②
①Adhesive ②Arrow in the direction of travel
1. In the centre of the intended position of the turntable, drill the opening for the cable gland with a circular cutter of
Ø38 mm .
2. Deburr the hole with a round le or emery paper.

15 of 52
3. Provisionally insert the roof duct into the drilled hole (Fig.A).
4. Place the mounting plate on the roof of the vehicle such that the centre hole is positioned centrally to the cable gland.
The arrow symbol ③ must be visible from above and point forwards in the direction of travel of the vehicle (Fig.B).
5. Mark the positions of the six fastening holes on the vehicle roof in a pitch circle.
Tip The size of the holes and the choice of fastening screws to be used (not included in the scope of delivery)
depend on the type and thickness of the materials used in the roof structure. If the roof panelling (plastic
roofs) is sufciently strong, it is recommended to always use round head screws, plain washers and self-
locking nuts to secure the glued mounting plate.
6. If the roof panel material is very thin and does not provide adequate holding power within the insulation material,
make through holes of Ø5.5 mm into the interior of the vehicle and use galvanised M5 round head screws of suf-
cient length.
Make sure that you use a sufciently strong support that can withstand the bolt tensile forces (large plain washer or a
complete reinforcing plate).
Fig.C
123*)
*)
*)
*)
①adhesive area between the
grooves
②alternative roof fastening
③washer*)
*)Not included in the scope of delivery
7. Create the holes necessary to secure the mounting plate (Fig.C).
8. In addition to the screw connection, the mounting plate and roof duct must be bonded to the roof with adhesive and
sealed. This is done using the DEKAsyl MS adhesive sealant supplied, which is ideally suited for this purpose due to
its broad range of adhesion. Please note the following points:
–Before you start working with the DEKAsyl MS adhesive sealant, it is essential that you have carefully read
through the safety data sheet for the DEKAsyl MS adhesive sealant and the technical data sheet in this
installation manual!
–The prerequisite for good adhesive properties is a clean, dry and grease-free substrate. Therefore, clean the
roof surface with a suitable cleaning agent within a circumference of 17cm around the drilled hole and allow the
surface to dry thoroughly.
–If the surface is painted, ensure that the paint nish is sufciently well bonded to the substrate.
–If the coat of paint is already loose or peeling, remove it down to a stable layer in the area to which the adhesive
will bond. If you have any doubts concerning the adhesive properties, consult a paint and lacquer specialist or the
manufacturer of your vehicle.
9. The procedure for gluing the mounting plate is as follows:
Fig.D
Adhesive area
within the grooves

16 of 52
Installation and Connection
–Ensure before starting adhesive work that the processing temperature of materials to be glued and the adhesive
sealant is between +5°C and +35°C. Prepare all necessary fastening elements and tools.
–Prepare the tube of adhesive sealant in accordance with the instructions enclosed with the tube.
–Remove the roof duct (Fig.A) and apply the adhesive sealant evenly to the underside of the roof duct ange.
–Place the roof duct in the drilled hole and press it rmly against the roof of the vehicle.
–Apply the adhesive sealant evenly to the underside of the mounting plate, completely covering the area within the
circular groove (Fig.D). This area of the vehicle roof must be completely coated with adhesive in order to achieve
the necessary bonding force.
–Place the mounting plate onto the roof of the vehicle, as you did previously when marking out the drilled holes.
Make sure that the arrow on the mounting plate points forwards in the direction of travel of the vehicle and that
the fastening holes are perfectly aligned with the prepared holes in the roof.
–Fasten the mounting plate in place with the prepared screws, evenly tightening six screws across the diagonals.
NOTICE
Risk of material damage due to applying too much force when tightening the screws!
The adhesive sealant used is capable of lling small gaps caused by the curvature of the vehicle roof. If you
apply too much force when tightening the screws, the mounting plate could be bent.
►Tighten the screws carefully.
–Use a clean colourless cloth to remove any adhesive sealant that leaks out at the sides. Pay attention to the
following:
~Do not use any cleaning agents or thinners containing solvents, as this could damage the adhesive sealant
applied under the mounting plate.
~It is recommended to soak the cloth in acetone or MEK. Apply the cloth soaked in acetone or MEK to an incon-
spicuous area to make sure that it does not adversely affect or damage the surface.
~Use only cleansing paste and water to clean your hands.
–Secure the cable gland from inside the vehicle by tightening the ribbed nut supplied (Fig.A).
–Note that the curing of the adhesive sealant depends on the ambient temperature and the humidity.
The nal strength is reached only after approx.2days. However, this need not restrict further installation work,
since the mounting plate is held in place by the tightened screws.
5.1.5 Possibilities of the Turntable Installation
Variant with Cable Gland underneath the Turntable
1. Lay the cables supplied with the turntable (2 × coax cables and 1 x power supply cable) into the mounting plate as
indicated by the markings on the mounting plate (see Fig.E1).
2. Feed the remaining lengths of cable through the roof gland into the interior of the motor home / caravan.
3. Lift up the turntable and place it carefully on the mounting plate facing in the direction of travel (see Fig.E2). Make
sure not to step on the plug connector and not to kink / crush the cables.
4. Align the through holes on the turntable with the threaded holes on the mounting plate.
5. Allow the turntable to rest on the front edge of the mounting plate.
6. Keep the turntable supported at an angle (see Fig.E1) and insert a suitable piece of wood underneath it.
7. Lay and connect the turntable cables in the mounting plate as indicated on the mounting plate, see Fig. E1. Take
particular care that the two master coaxial cables, marked red, are connected to each other.
8. Tighten the coaxial cable plugs nger-tight, using no tools.
9. Tighten the coaxial cable plugs lightly using an open-ended 11 AF spanner.
10.Lower the turntable back on to the mounting plate. Make sure that the cables are fed through the cable gland and are
not snagged.
11.Apply a little adhesive sealant to the six threaded holes in the mounting plate and screw the fastening screws into the
thread. Tighten the screws to a torque of 6Nm.
12.To prevent water vapour from inside the vehicle reaching the turntable through the roof gland, thread the three cables

17 of 52
through the sealing gasket supplied (see Fig. E2), close the gasket and insert it into the roof gland until it reaches the
stop. Make sure that no tensile load is acting downwards on the sealing gasket as this can cause it to fall out in the
course of time.
Fig.E1
Master coaxial cable
(marked red)
Fig. E2
1
① = sealing gasket
Variant with External Cable Gland
1. Lay the cables supplied with the turntable (2 × coax cables and 1 x power supply cable) into the mounting plate as
indicated by the markings on the mounting plate , see Fig. F1.
2. Feed the remaining lengths of cable through a cable duct and a cable gland¹) into the interior of the motor home /
caravan.
3. Lift up the turntable and place it carefully on the mounting plate facing in the direction of travel, see Fig.F2. Make
sure not to step on the plug connectors and not to kink / crush the cables.
4. Align the through holes on the turntable with the threaded holes on the mounting plate.
5. Allow the turntable to rest on the front edge of the mounting plate.
6. Keep the turntable supported at an angle (see Fig.F1) and insert a suitable piece of wood underneath it.

18 of 52
Installation and Connection
7. Lay and connect the turntable cables on the mounting plate as indicated on the mounting plate, see Fig.F1. Make
sure that the cables are not crossed over and that they are taut so that they cannot be crushed. Take particular care
that the two master coaxial cables, marked red, are connected to each other.
NOTICE
Risk of material damage due to pulling the cables from the turntable!
►Do not try to pull the cables from the unit.
8. Tighten the coaxial cable plugs nger-tight, using no tools.
9. Tighten the coaxial cable plugs lightly using an open-ended 11 AF spanner.
10.Carefully lower the turntable back on to the mounting plate. Make sure that the through holes on the turntable are
perfectly aligned with the threaded holes on the mounting plate.
11.Apply a little adhesive sealant to the six threaded holes in the mounting plate and screw the fastening screws into the
thread. Tighten the screws to a torque of 6Nm.
12.Run the connecting cables through the waterproof HDZ 1001) roof gland into the interior of the vehicle. In doing so,
make sure that the cables are not crushed, kinked or damaged.
*)Not included in the scope of delivery! The HDZ100 roof gland is available as an accessory under part number 20410032 from specialist dealers.
Fig.F1
Master coaxial cable
(marked red)
Fig. F2
1
23
(220)
(450)
①When using a cable duct as a direct extension of the cable exit from the CAP, its height must not exceed
that of the cable feed system hood, i.e. 10mm.
②Cables laid in the cable duct
③Roof gland HDZ100, not included in the scope of delivery

19 of 52
5.1.6 Installing the Turntable
The sequence of pictures shown below illustrates all the necessary installation steps that are required to
install the turntable and the pre-assembled parabolic reector on the roof of the vehicle. However, follow the
other detailed instructions in this installation and operating manual!
1. Determine the installation location. Note the following:
●Swing path of the unit= Ø162cm.
●Drill a hole with Ø38mm for the cable gland.
●Deburr any sharp edges of the hole.
See also 5.1.3, p.13ff and 5.1.4–5.1.5, p.16ff
2. Apply DEKAsyl MS adhesive sealant to the spigot of the
roof duct. Insert the spigot into the hole and secure it from
below with the knurled nut.
3. Unscrew the screws (x 6, 10 AF) from the mounting plate and
remove the mounting plate.
4. Place the turntable on prepared wooden supports to
protect the roof of the vehicle.
5. Align the mounting plate with the arrow in the direction of
travel. The arrow is marked with an ①at step 8 in the illustra-
tion.
6. Mark out the six holes to secure the mounting plate.
7.
WARNING
Risk of skin injuries!
►Avoid any skin contact with the adhesive
sealant.
►For safety information on the adhesive
sealant, see Chapter 11, p.34.
Apply DEKAsylMS adhesive sealant in a wavy line
between the two grooves and spread it with a spatula or
similar.

20 of 52
Installation and Connection
1
8. Place the mounting plate on the roof gland and secure it with
the appropriate screws (choose screws according to thickness/
structure of roof).
9. Screw the turntable onto the mounting plate using the
torque wrench.
NOTICE
Risk of material damage due to an inadmissible
tightening torque!
If the torque is too high,it can destroy the thread in the
mounting plate. If the torque is too low, the screws
can unscrew due to vibrations.
►Comply with the tightening torque of 6Nm.
10. Make the electrical connections.
11. Connect the CAP converter.
12. Connect the turntable to the battery.
5.2 Installing and Connecting the CAP Converter
5.2.1 Selecting an Installation Location
Tip When choosing the installation location, bear in mind that the rear of the CAP converter should always be
accessible. The CAP converter is equipped with a power saving circuit, which means that you do not have
to place it where it is visible. Therefore, you can t the CAP converter out of sight in any location, e.g. on
cupboard walls, side walls or the base of storage compartments.
With the help of the four screw sockets (see Preparing the CAP Converter for Installation,p.22) it is possible
to install the CAP converter on a solid even base or to screw it in any position.
When selecting an installation location, pay attention to the following:
●The wall thickness at the installation location must be at least 15mm, as otherwise the screws will break through on
the other side or damage the surface.
●Ensure that the cupboard or storage compartment in which the unit is housed is adequately ventilated, to prevent a
build up of heat. Carpet-covered walls are unsuitable for installation.
●Take care when tightening the screws not to damage any cables or similar behind or in the wall.
●The CAP converter is designed for installation in exclusively dry, interior locations.
●Take into account the cable lengths.
●The connecting cables must be provided with strain reliefs.
Table of contents
Other Kathrein Satellite TV System manuals

Kathrein
Kathrein CAP 650 GPS User manual

Kathrein
Kathrein EXI 3508 User manual

Kathrein
Kathrein MobiSet 3 digital CAP 710 Installation instructions

Kathrein
Kathrein MobiSet 2 Digital CAP 600 User manual

Kathrein
Kathrein MobiSet 3 Twin CAP 650 Operational manual

Kathrein
Kathrein UFS 922 si User manual

Kathrein
Kathrein CAP 910 User manual

Kathrein
Kathrein MobiSet 4 digital CAP 900 User manual

Kathrein
Kathrein CAP 200 Product information sheet

Kathrein
Kathrein CAP 200 Product information sheet