KC 71.500 User manual

KC Multi-corer, 4 x Ø100 mm
Model 71.500
Manual
KC Denmark
Research Equipment
Limnology ⚫Oceanography ⚫Hydrobiology

71.500 - Multi corer - Manual
2
Contents
Item
Description
Page
Attention –A word of safety
3
1-4
Preparation
4-5
5
Securing the lid
5
6-8
Loading the closing mechanism
5-6
9-11
Attaching the sample tubes
6-7
12
Lead weights
8
13-16
Adjustable penetration depth
8-9
17
Extending the corers footprint
9
18
The hydraulic damper
10
19-20
Deploying the multi corer
10
21-23
Securing and ejecting the sample
11
24
The Sample ejecting aggregate
11-12
25
Storing
12
26
Troubleshooting and maintenance
13
Other parts recommended (accessories)
14

Manual for
multi corer, 4 x Ø100 mm
Model no.
71.500
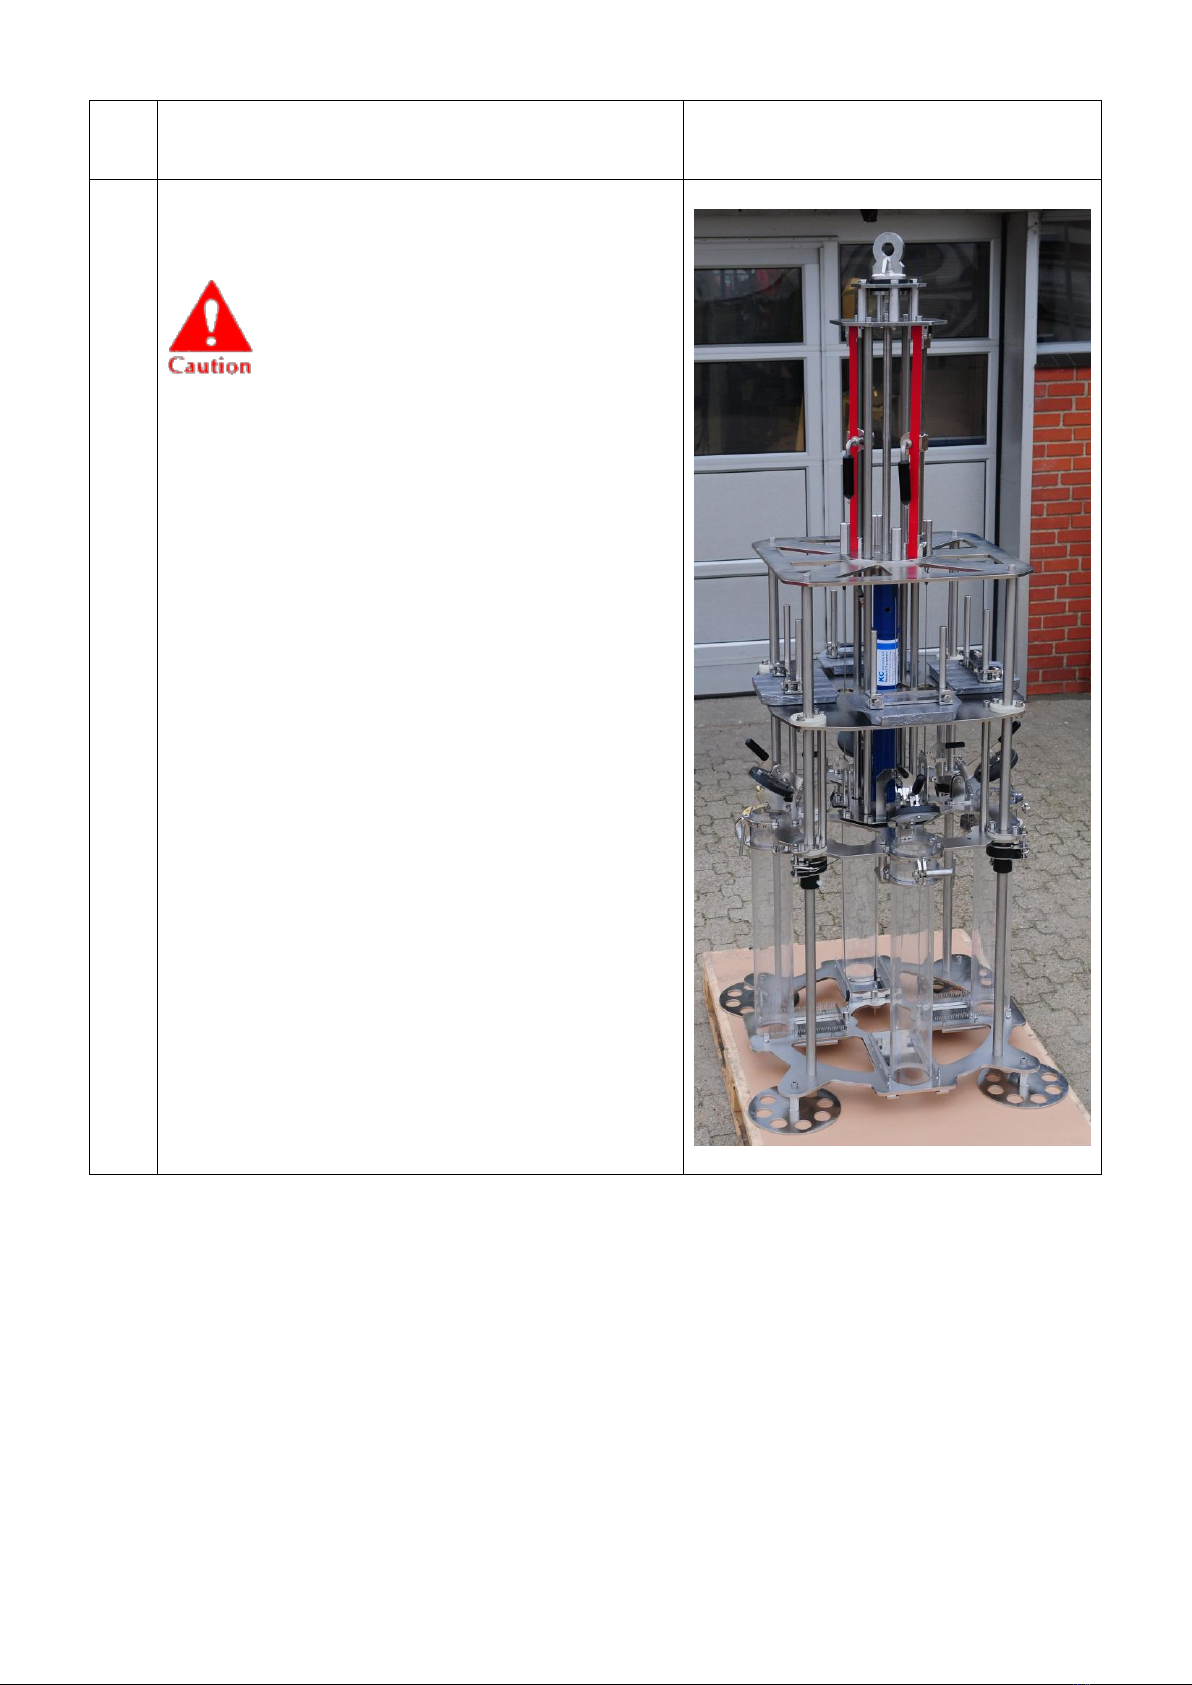
This multi corer is very dangerous in
unskilled hands and serious
precautions must be taken to avoid
accidents.
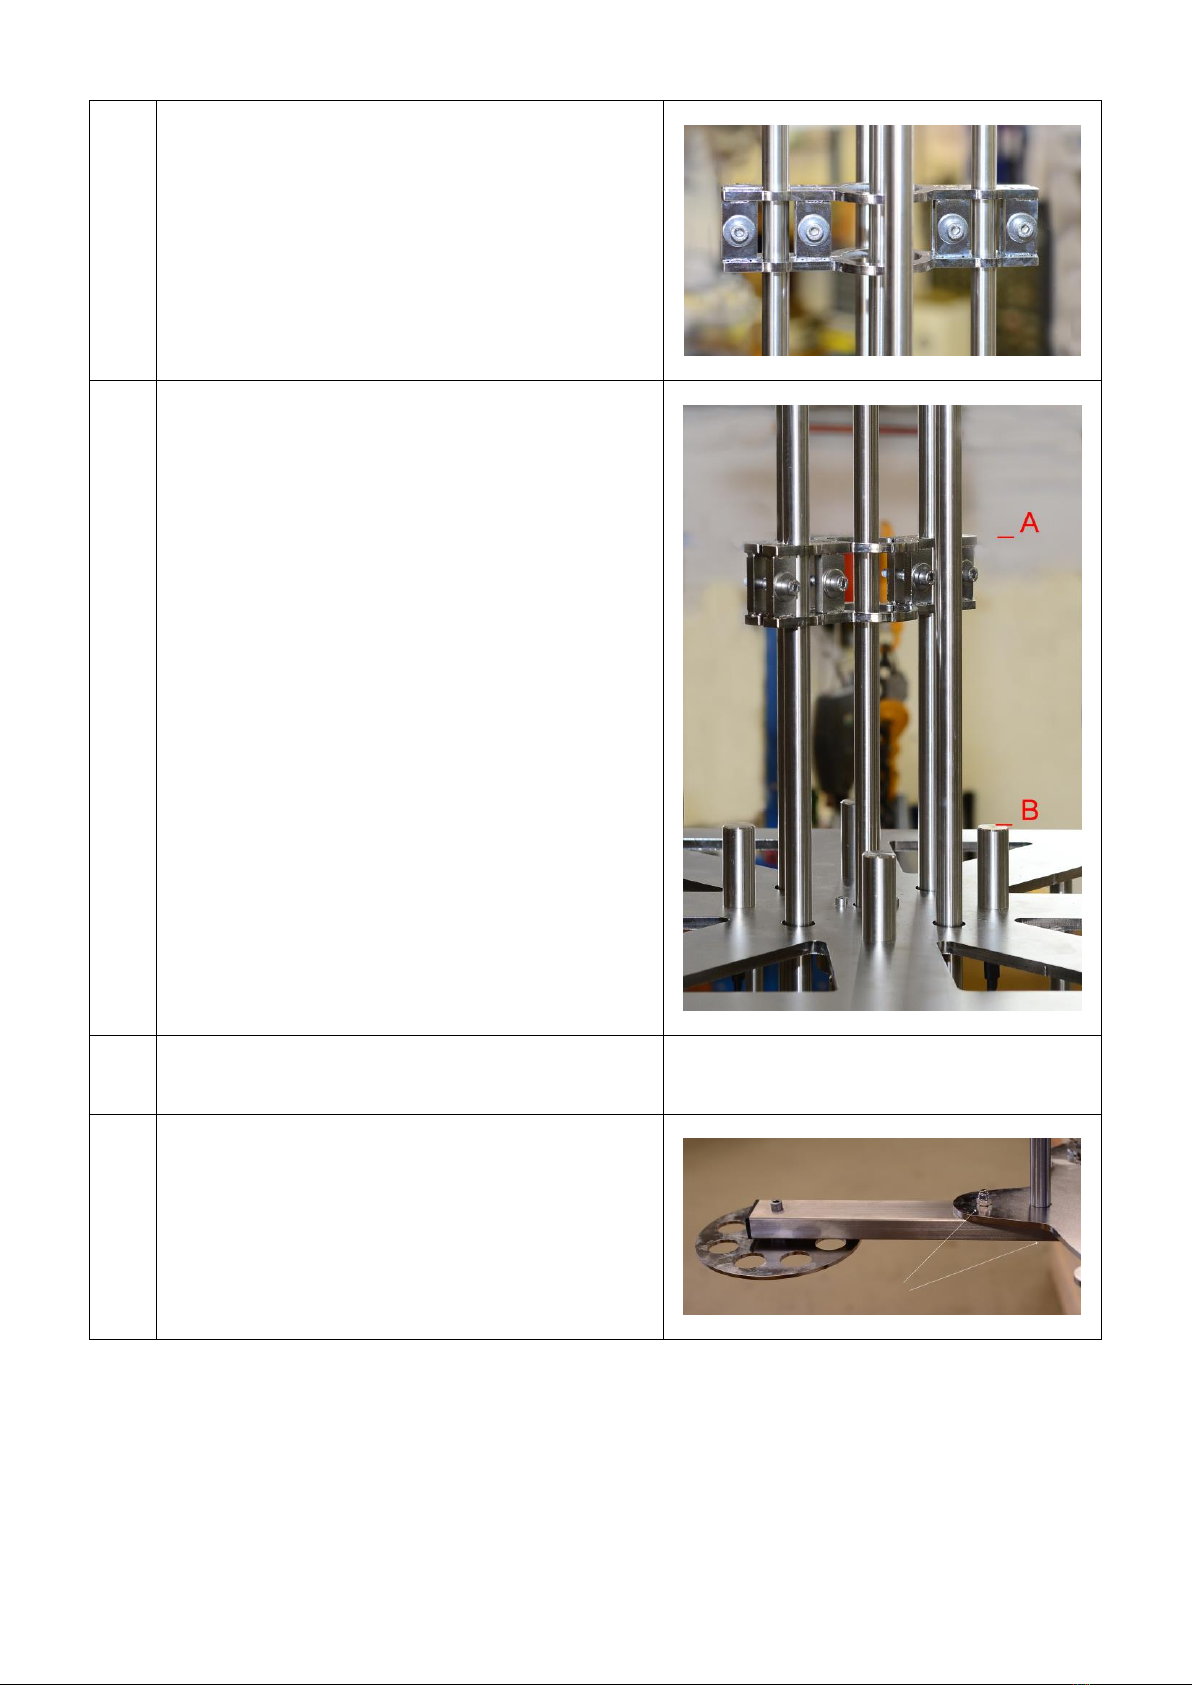
The safety clamp must always be in
the secured position and must be
released only, when the multi corer
is outside the rail of the boat. Except
for item #5 (water filling of
hydraulic damper).
KC Denmark A/S is not, and cannot
be held, responsible for any
damage(s) made to equipment or to
operators who ignore safety
precautions or because of misuse or
wrong operation.
Never walk under the multi corer,
when lifted up by the winch.
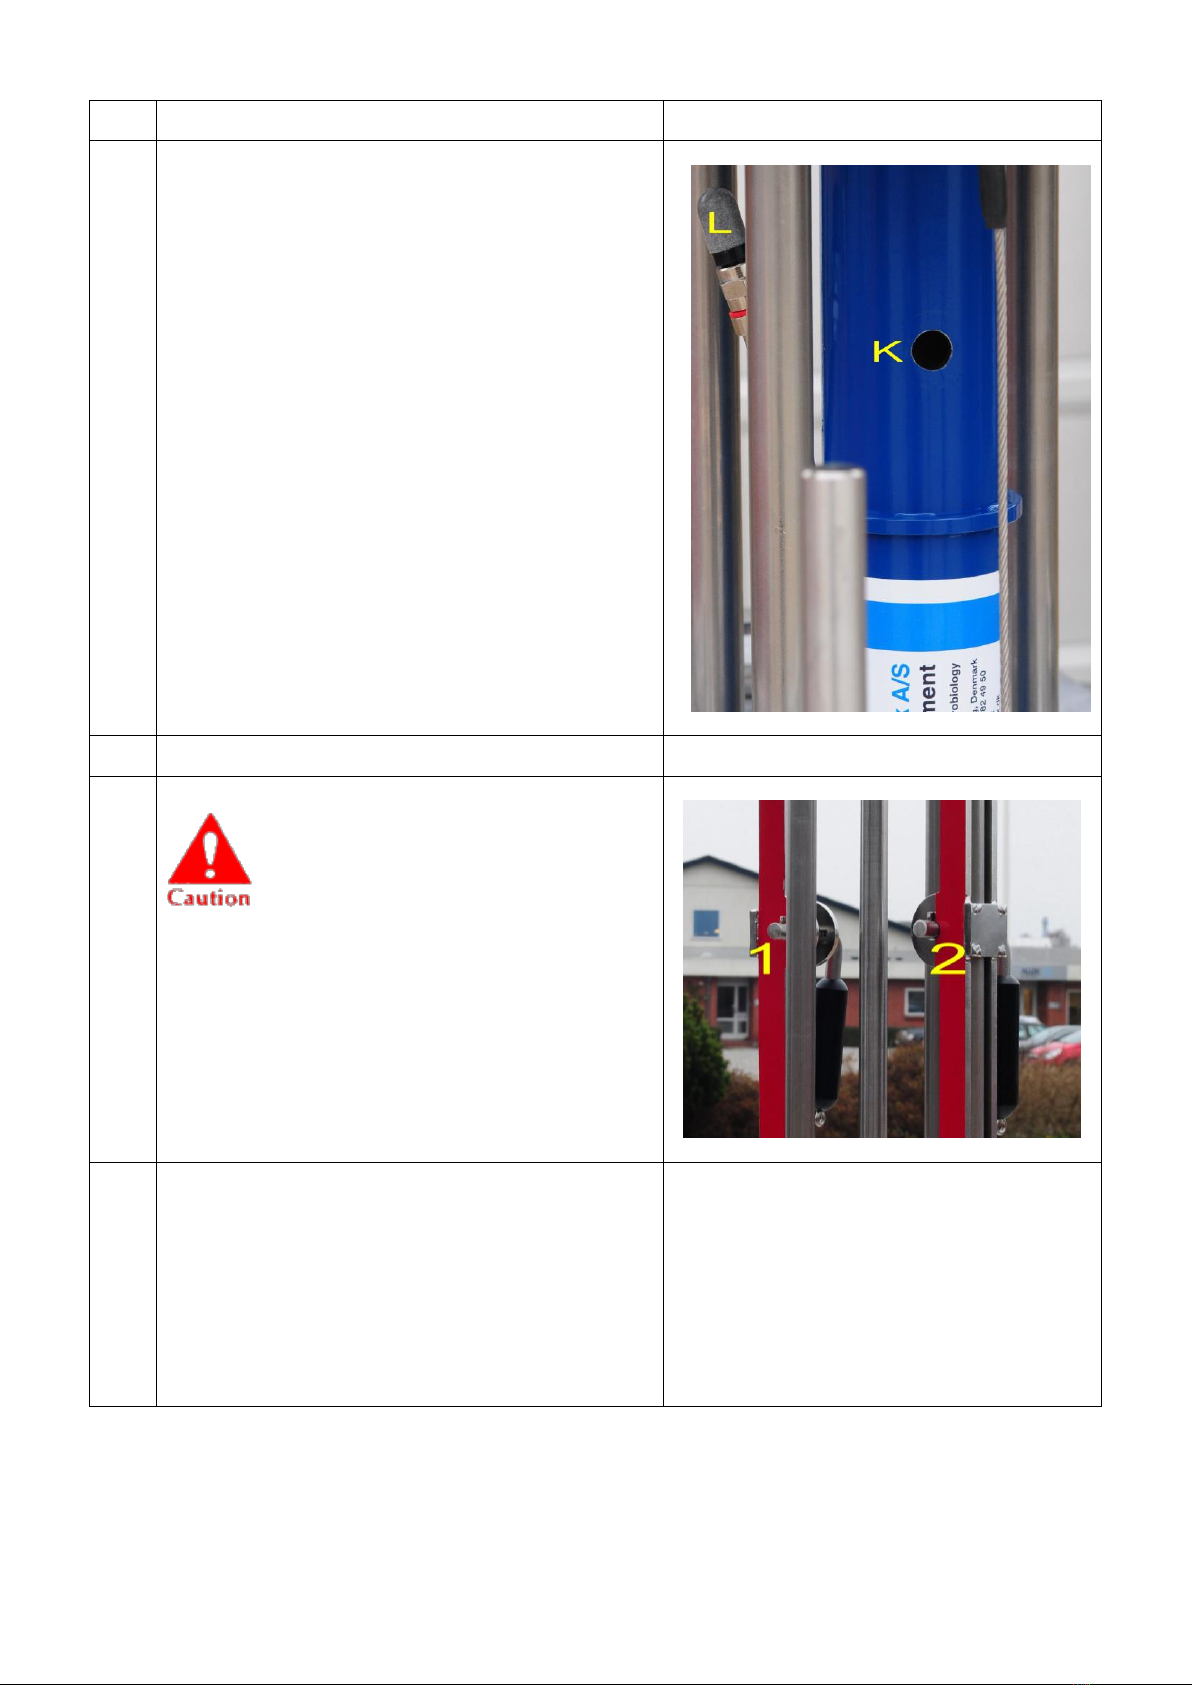
The photo shows another model with
2 pcs of safety clamps.

71.500 - Multi corer - Manual
4
Preparation
1
The actual design comes with only one safety
clamp.
Attach the safety clamp at the top of the corer,
ensuring the handle is locked properly at “1”.
The photo shows an old model with 2 safety
clamps.
2
Push up the lid. The wire from “A” goes through
the hole at “B” and the end is secured at “C”

71.500 - Multi corer - Manual
5
3
Lift up the unit and secure the snap hook at “D”,
while pressing the unit upwards tighten the screw
“E”. Don’t use any tools, as the unit must glide
over the bar during release of the sampler.
4
It is very important to attach the snap hook at
“F”. Attaching at “G” will cause malfunction to
the lid.
5
The handle behind the lid will secure the steel
wire from top of sampler to the bottom release
system.
Press down the handle, ensure the wire is taut
and release the handle.

71.500 - Multi corer - Manual
6
6
The spring loaded bottom lid “H” is pressed
toward the centre of the sampler.
The security pin “I” at the end of the steel wire is
inserted into “J”, so the bottom lid is locked in
open position.
When loaded, you must avoid an unattended
release as the mechanism may cause injury to
people.
7
Open the quick release bracket for the tube
8
Tilt the sample tube to the side, so you can insert
it into the hole, lower the tube for 1 cm, approx.
Align the tube to vertical position.

71.500 - Multi corer - Manual
7
9
The sample tube has a reinforcement at the top
10
The reinforcement of the tube is aligned at the
quick release.
Check, if the lower end of the tube is inserted
correct (item 8).
11
Tighten the handle to secure the tube.
Do not over tighten the handle, as you may
damage the tube

71.500 - Multi corer - Manual
8
12
After attaching the required numbers of lead
weight, you must tighten all locks for the lead
weights.
Adjustable penetration
depth
13
Before mounting the bracket for adjustable
penetration depth (optional), you must ensure,
that the security clamp is placed correctly (see
item 1).
14
The bracket is attached to the bars. For full
penetration, leave the bracket as shown.
Fasten the 4 bolts firmly to keep the bracket in
place.

15
For a shorter penetration move the bracket in
vertical position and fasten by means of the 4
bolts.
16
Extending the corers
footprint
17
Four extension legs (optional) can be added for
better stability in strong currents or for larger
depths.

The hydraulic damper
18
The multi corer has an automatic, hydraulic
damper located at the centre.
Upon lowering to the sea, the damper is filled
up with water through the inlet “K”
When the multi corer hits the seabed, the water
is forced through the outlet “L”, causing a delay
before the tubes penetrate the sediment.
Deployment
19
The multi corer is now ready for deployment.
When the rack is outside the bulwarks, you can
remove the safety clamps “1”.
The photo shows an old model with 2 safety
clamps.
If you must remove the security clamp while
the sampler is on deck, you must avoid an
unattended release to protect against injury.
20
The sampler can now be deployed to the
seabed, and the hydraulic damper will ensure a
smooth sample taking to avoid a shock wave
during penetration.
When hoisting the sampler the sediment tubes
will be withdrawn from the sediment, and the
lids will close to protect the samples from exit.

Securing the multi corer
21
After the sample has been taken and you hoist
the multi corer, it is very important to mount the
safety clamp before doing any job on the
sampler.
The photo shows an old model with 2 safety
clamps.
Securing and ejecting the
sample
22
For emptying the sample tube, you must hold a
thin plate at the end of the tube to keep the
sample while removing the tube.
23
The sample ejection aggregate is optional.
1. The sample tube is placed on the piston
(D)
2. Tighten the handle (C) to fasten the tube.
3. Turn the handle (E) and remove the
desired height of sample.
4. To lower the piston at its start position,
you must lift the pawl, (F) and turn the
handle backwards.

24
A complete unit, ready for ejecting the sample.
Storing the multi corer
25
Before storing the sampler all parts must be
rinsed carefully with fresh water to avoid rust
and corrosion.
You can store the sampler in two ways:
1. In loaded position having both safety clamps
attached.
2. You may remove the safety clamps and the
sample tubes. By use of the winch, lower the
multi corer slowly, so it will empty the
hydraulic damper.

71.500 - Multi corer - Manual
13
Troubleshooting and maintenance
26
When using the corer, you might encounter problems with the sampling.
If the sediment is too soft, it will not be able to take a correct sample, as you will need a
"bung" of hard(er) sediment to hold the sample inside the core tube. Otherwise the soft
sample will seep away because of the small space of app. 1 - 2 mm between the bottom of
the sample tube and the moveable closing mechanism. (Will depend on the change of
temperature from sea deck to bottom of the sea).
If the depth of penetration is too low, it will be necessary to add more weights to the
weight station at the top of the rack.
When you raise the sampler, it is important to have a reasonable weight on the rack to
ensure the closing mechanism will work correctly. If the weight of the rack is too small and
you raise the sampler, the rack will begin to rise before the closing mechanism has locked
and secured the sample. Please add more weights to the rack.
For a smoother operation we recommend regularly use of silicone grease on the vertical
bars, where the parts move up and down.
Rev. January 23, 2020 - lkj
KC Denmark
Research Equipment
Limnology ⚫Oceanography ⚫Hydrobiology
E-mail: [email protected] website: http://www.kc-denmark.dk/
Holmbladsvej 17-19, DK 8600 Silkeborg, Denmark. Tel. +45 86 82 83 47. Fax +45 86 82 49 50
Bank: Sydbank. SWIFT: SYBKDK22 IBAN DK5070460000104832
VAT no. DK 29 61 96 62
Table of contents
Other KC Sampler manuals