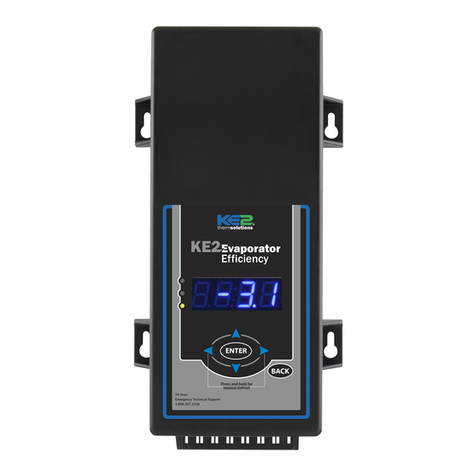
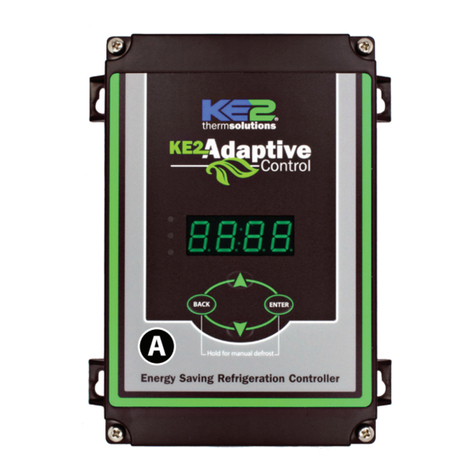
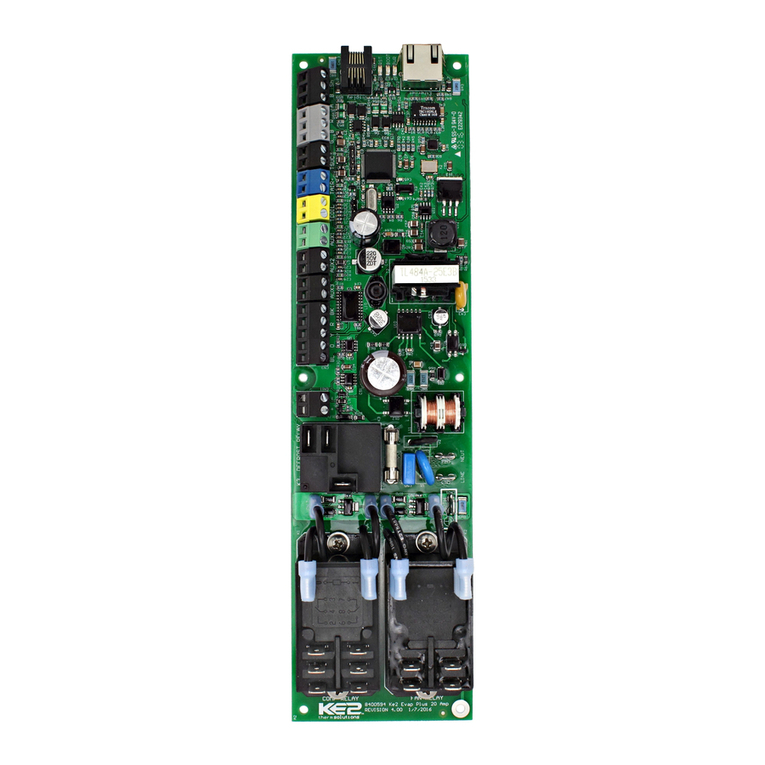
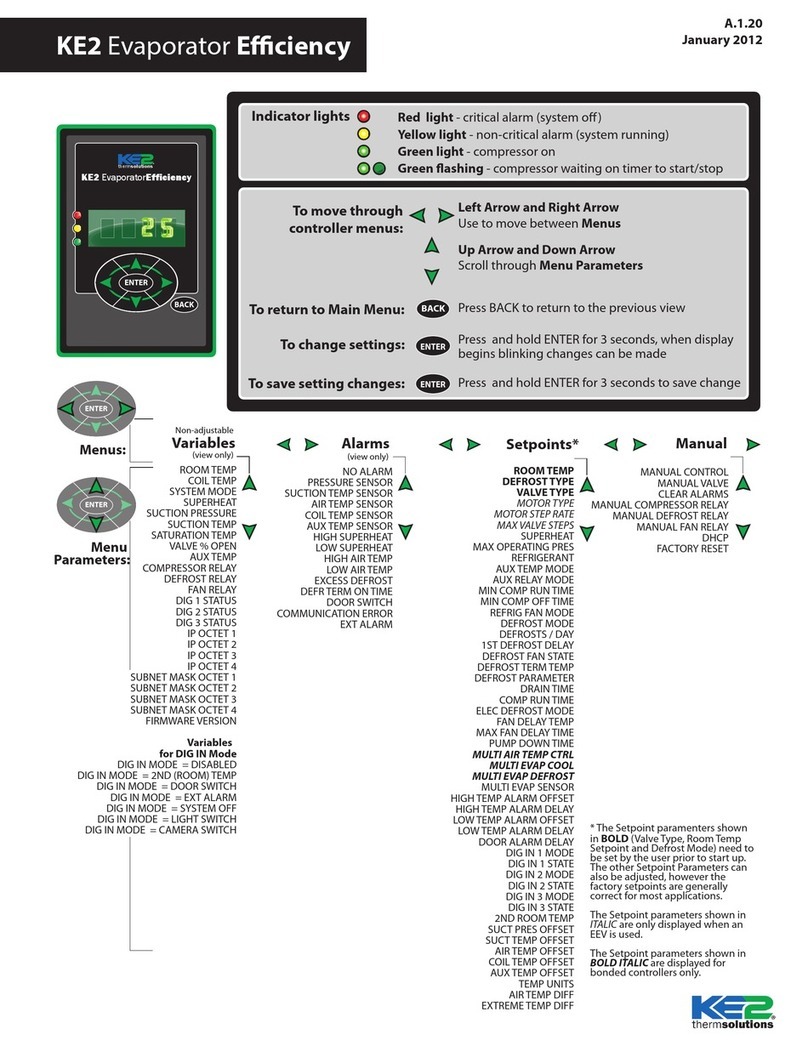
KE2 AdaptiveControl User manual

Parts List
The following parts are included in the KE2 Adaptive Control
controller kits:
Kit # 21177 with 120/208-240 VAC controller
(1) KE2 Adaptive Control controller
(1) high voltage safety shield
(1) 3-pack of colored 15’temperature sensors
(6) 90°spade connectors
(2) straight spade connectors
(5) self-tapping screws
(2) 1/2” plastic knockout plug
(1) air sensor mount
(3) course thread screws
(1) KE2 Terminal Board*
(1) Warranty card (not shown)
© Copyright 2016 KE2 Therm Solutions, Inc., Washington, Missouri 63090
Q.1.35
January 2016
KE2 AdaptiveControl (pn 21177)
Quick Start Guide
Supplies List
The KE2 Adaptive Control is supplied with all of the accessories re-
quired for the controller to work, however, standard truck stock items
will also be required to install the controller. To simplify the installa-
tion, a list of items has been provided.
Conduit to go between the controller and the evaporator
(2) Conduit connectors (straight or elbow as required)
(8) High voltage wires matched to the load of the heaters,
fans, liquid line solenoid, and the controller.
(8) Spade Connectors matched to the gauge of high volt-
age wires
Wire labeling (numbers, colors, etc.)
Wire ties
18 gauge twisted shielded pair (if extending sensor wires)
Foam insulation if running wires outside the space.
Silicone (for sealing any box penetrations)
Accessories to Aid in Installation
The following parts are available separately:
10’Wire Harness pn 20736, 25’Wire Harness pn 20670, or 40’Wire
Harness pn 20737
Further information on the Wire Harness can be found in literature
Q.1.21.
* When used with the KE2 Adaptive Control controller, the fuses must be sized to
match the application (i.e. Replace existing fuses with 30 Amp Time Delay fuses
for fans and compressor)
D E F
G
H
BC
A
I
J
This reference should remain on site with the installed KE2 Adaptive Control controller.
A
C
D
E
F
G
H
I
B
J

© Copyright 2016 KE2 Therm Solutions, Inc., Washington, Missouri 63090
Q.1.35 January 2016
Page 2
KE2 AdaptiveControl
Quick Start Guide
for low temperature applications, and 8-10 degrees for medium
temperature.
Subcooling - There should be a solid column of liquid at the inlet of
the valve. This can be veried by looking at the sight glass, however,
the proper method requires measuring the subcooling of the liquid
entering the valve.
Verify Temperature Dierence
A typical Temperature Dierence (TD) between the coil temperature
and the air temperature is between 5 and 15°F. An insucient TD,
between the coil and air temperature, indicates a system issue that
needs to be addressed before installing the KE2 Adaptive Control.
Understanding Frost
The air exiting side of the evaporator is often the coldest spot on
the coil. As air travels through the ns of the evaporator, the Relative
Humidity will reach 100%. Moisture will begin to drop out of the air
and deposit on the coil surfaces to form frost. Although frost typi-
cally has a negative connotation when discussed in refrigeration,
initial frost formation has a positive eect. Some may even say “frost
is our friend.” It is not uncommon to see a small amount of frost on
the coils that have KE2 Adaptive Control controllers installed. The KE2
Adaptive Control is continually measuring, monitoring, and manag-
ing the frost to assist in maximum energy eciency. When the ef-
ciency of the coil is reduced due to excessive frost, the KE2 Adaptive
Control will initiate a defrost.
Liquid/Vapor Mix
Restrictor,
TEV or EEV
Warm Liquid
Cold Vapor
Hot Vapor
Warm Air
Cold Air
Evaporator
Compressor
Condenser
Saturation Temp °F
(from receiver pressure)
Liquid Temp at Valve °F
Subcooling °
Suction Pressure PSI
Suction Temp °F
(evaporator outlet)
Saturation Temp °F
(calculated from Suct. Pressure)
Superheat °
Temp Dierence (TD) °F
(return air minus coil temp)
Coldest point in evap °F
AMPS
Trouble Shooting Diagram
Discharge Pressure PSI
Refrigerant
Arriving at the Jobsite
When arriving at any jobsite, it is good practice to verify the correct
operation of the system. Even systems running for a considerable
amount of time without requiring a service call may not be running
properly.
Inspect the coil to see the current frost pattern. If the unit has not
recently performed a defrost, look for the heaviest area of frost. This
will be used to locate the coil sensor.
Installers should account for a full system diagnostic in the installa-
tion estimate for the controller.
Although it may seem unnecessary, identifying system issues before
the controller is installed will save time overall. It will also allow the
controller to provide the highest energy savings.
Verify the system is running correctly. Taking several measurements
will help determine the current health of the system. Using the dia-
gram below, ll in the necessary information.
Two of the most critical indicators of system health are the super-
heat and subcooling.
Superheat - Superheat is the most overlooked ineciency in exist-
ing systems. Typically the superheat on a TEV is set when there is not
product in the controlled space, if it is set at all.
When applying the controller to an existing system with a mechani-
cal expansion valve, the superheat should be between 6-8 degrees

Q.1.35 January 2016
Page 3
© Copyright 2016 KE2 Therm Solutions, Inc., Washington, Missouri 63090
A
IMPORTANT Preliminary Steps
Determine the coil sensor location
To determine the most appropriate sensor location, when arriving on
site, put the system into defrost.
The location where frost is last to disappear is where the coil sensor
should be placed. Monitor both the air entering side, as well as the air
exiting side, of the evaporator coil. Don’t be surprised if the last place
for frost to disappear is on the air exiting side. It is usually near the
right or left end of the coil.
It is important to verify all heating elements are working properly.
B
C
Steps to Ensure Proper Coil Sensor Location
KE2 Therm recommends locating the coil sensor as described above.
Typically the coldest spot is on the side of the suction header/expan-
sion valve side of the evaporator. Select two places that are the last to
defrost, preferably at each end of the evaporator.
More often than not on coils, the location of the sensor is a short
distance from the end, approximately 1 to 1-1/2”away from the right
and left edges of the active coil surface. The ice tends to grow from
these edges towards the center. Therefore, the sensor location is best
situated approximately 1 to 1-1/2”from the outer edges and typically
near the bottom 1/3rd portion of the evaporator. The sensor needs to
be as far away from the defrost heat sources as possible.
Note: Insert plug (Item G from parts list) into coil housing when
mounting sensor wire to prevent damage to the sensor from
sharp edges. The plug provided should be inserted into the inner
housing to access the coil. Installer must puncture plug to insert
sensor.
DMake note of the location you have determined for placement of
the coil sensors.
Typically last spots to defrost
B
Locate sensor approx.
1-1/2” from end, in the
bottom third of coil
Item G from Parts List on page 1
C
KE2 AdaptiveControl
Quick Start Guide

© Copyright 2016 KE2 Therm Solutions, Inc., Washington, Missouri 63090
Q.1.35 January 2016
Page 4
thermsolutions
EnergySaving Refrigeration Controller
Adaptive
Control
.
thermsolutions
EnergySaving Refrigeration Controller
Adaptive
Control
.
thermsolutions
EnergySaving Refrigeration Controller
Adaptive
Control
.
At the entrance
On the wall
On the evaporator
11 Determining Location
The controller is designed to be as versatile as possible. The loca-
tion should be discussed with the end users to determine if they
have a preference. It is designed so it can be installed inside or
outside the controlled space.
The controller can also be located at the condenser, but should not
be installed outdoors without an enclosure to protect it from sun-
light and moisture (must be within operating range -40°F to 120°F)
Evaporator
?
thermsolutions
Energy Saving Refrigeration Controller
Adaptive
Control
.
Cut a length of conduit to go from the controller to the evaporator
Measure the distance between the controller and evaporator to
account for the extra length necessary to properly route conduit.
Determine the number of wires to go to the controller.
Controller power (2 wires)
Fan control (2 wires)
Defrost (heater) control (2 wires)
Liquid line solenoid (2 wires)
Note: Install in accordance with local wiring codes. KE2 Therm
does not accept responsibility for incorrect or unsafe wiring.
22
Cut wires to length
Once the number of wire is determined, cut the wires to length.
The wire should be long enough to account for the necessary con-
nections in the controller and evaporator.
Use the optional KE2Wire Harness, or select dierent colored wires,
(blue - fan, orange - heaters, yellow - solenoid, purple - alarm). This
will simplify the installation and troubleshooting. If only a single
color is available, both ends of the wires should be labeled with a
matching number. This will save time when wiring the evaporator.
33
Walk-in
Under Counter
Commercial
Reach-In
KE2 AdaptiveControl
Quick Start Guide

Q.1.35 January 2016
Page 5
© Copyright 2016 KE2 Therm Solutions, Inc., Washington, Missouri 63090
Determine the current draw of the unit.
Use the nameplate to determine the Amp rating of the unit.This in-
formation should be used to select the proper sized wire. It should
also be used to verify the unit does not exceed the relay rating on
the KE2 Adaptive Control controller.
44
Preparing conduit
Feed the wires through the conduit.
The conduit connectors can be added at this time. Determine if a
straight or 90 degree connector is most appropriate for the instal-
lation, and attach to the conduit.
Securely connect one end of the conduit to the controller.
55
115V 208-240V
Wiring the controller
Locate the Voltage Selector Switch.
It is a 2 position switch with red indicator.
The selected voltage will be displayed on the face of the switch.
The controller will still illuminate the display when 115V is ap-
plied with 208-240V selected, however the controller may not
function properly. If 208-240V is applied with 115V selected the
controller’s display will cycle.
66
Controller Power
Strip the end of the wires used to provide power to the controller
(If using the KE2 Wire Harness the wires are pre-stripped)
Crimp on female spade connectors (Item E from list on page 1)
Plug into the board as indicated in Wiring Schematic.
Note: All terminals should be crimped to withstand 30 lb pull test.
77
KE2 AdaptiveControl
Quick Start Guide

Q.1.35 January 2016
Page 6
© Copyright 2016 KE2 Therm Solutions, Inc., Washington, Missouri 63090
88
9
Defrost (Heater) Relay
Strip the end of the 2 wires used for the defrost control.
Locate (2) 90° female spade connectors in the accessories kit.
Crimp on the female connectors.
Plug the connectors to the COM and NO positions of the Defrost
Relay.
Defrost (Heater) Relay Using the KE2 Wire Harness
The orange wires are used for the heater control.
Locate the orange with black stripe, and black with orange stripe.
Plug the black with orange stripe to the COM terminal.
Plug the orange w. black stripe to the NO position of Defrost Relay.
Conrm combined heater load is not over 30 amps.
9
10
Liquid Line Solenoid /Compressor Relay
Strip the end of the 2 wires used for the liquid line solenoid.
Locate 2 90° female spade connectors in the accessories kit.
Crimp on the female connectors.
Plug the connectors to the COM and NO positions of the Liquid
Line Solenoid /Compressor Relay
Liquid Line Solenoid (LLS)/Comp. Relay Using KE2 Wire Harness
The yellow wires are used for Liquid Line Solenoid control.
Locate a 3-position connector from the accessories kit.
Fasten the black with yellow stripe to the fused lead.
Fasten yellow w. black stripe from the LLS to NO terminal position.
Plug into the location as indicated in Wiring Schematic.
Conrm compressor load is not over 30 FLA.
Fan Relay
Strip the end of the 2 wires used for fan control.
Locate 2 90° female spade connectors in the accessories kit.
Crimp on the female spade connectors.
Plug the connectors to the COM and NO positions of the Fan Relay.
Fan Relay Using the KE2 Wire Harness
The blue wires are used for fan control.
They are blue with a black stripe, and the black with a blue stripe.
Plug the black with a blue stripe to the COM terminal.
Plug the blue with a black stripe to the NO position of the Fan
Relay
Conrm combined fan motor load is not over 30 FLA.
10
KE2 AdaptiveControl
Quick Start Guide

Q.1.35 January 2016
Page 7
© Copyright 2016 KE2 Therm Solutions, Inc., Washington, Missouri 63090
Preparing the Evaporator
The evaporator wiring will require access to the high voltage ter-
minal block on the coil.
Turn o power to the system.
Verify power is no longer present using a multimeter.
Install Safety cover
Once all of the high voltage wiring is complete, install the plastic
cover on the controller.
Locate the cover and 3 small screws from the accessories kit.
Position the cover over the 3 mounting posts.
Using the 3 small coursely threaded screws attach the controller to
the plastic posts.
Connecting sensor wires to controller
The temperature sensors are designed to be attached to the con-
troller using 2 position screw terminals. The terminals are located
on the controller’s lid, on the bottom side of the display.
Connect all sensors to the appropriate locations, which can be de-
termined from the label on the circuit board or from the Wiring
Schematic.
The sensors are not polarized, so wire location does not eect sen-
sor performance.
Set the controller in a safe place.
11
11
12
12
Evaporator wiring
Now that the conduit is prepared, it can be connected to the
evaporator.
Locate the proper sized knockout and carefully remove knockout.
Connect conduit to the evaporator
1313
KE2 AdaptiveControl
Quick Start Guide

Q.1.35 January 2016
Page 8
© Copyright 2016 KE2 Therm Solutions, Inc., Washington, Missouri 63090
Existing wiring.
Start by removing all of the exist-
ing wires from the terminal strip.
Determine the location of the fol-
lowing: incoming power, fan leads,
heater leads, defrost termination
leads, and fan delay leads.
14
Evaporator wiring – Controller
Strip the end of the wires used to
power the controller.
Attach to the line power to provide
continuous power to the controller.
15
Evaporator wiring – Fans
Strip the ends of the wires (con-
nected to the KE2 Adaptive
Control) used to control the evapo-
rator fans.
The fan wires from the controller
can be attached to the terminal
block using either screw down ter-
minals or spade connectors.
Attach the black wire with blue
stripes to the L1/Line. This wire
will be connected to COM of fan
relay on the controller.
Attach blue wire with black
stripes to the NO terminal on
the Fan Relay to one set of the fan
leads. This wire will be connected
to the NO of the fan relay on the
controller.
Connect L2/Neutral to remaining
fan leads.
16
15
16
KE2 AdaptiveControl
Quick Start Guide

Q.1.35 January 2016
Page 9
Evaporator wiring – Heater
Strip the ends of the wires being
used for heater control.
The heater wires can be attached
to the terminal block using either
screw down terminals or spade
connectors.
17
Remove defrost termination
(Klixon®) from circuitry
Attach the black wire with orange
stripe to the L1/Line. This wire will
be connected to COM of defrost re-
lay on the controller.
Attach the orange wire with the
black stripe to the NO terminal
on the Defrost Relay to one of each
of the defrost leads.
Connect L2/Neutral to the remain-
ing defrost leads.
The defrost safety should not be re-
moved from the circuit. Its purpose
is to prevent the heaters from over
heating and causing damage.
18
© Copyright 2016 KE2 Therm Solutions, Inc., Washington, Missouri 63090
Evaporator wiring – Liquid Line
Solenoid /Compressor
Strip the ends selected to control
the liquid line solenoid.
Attach the black wire with the yel-
low stripe to the L1. This wire will
be connected to the COM of the
L.L. Solenoid/Compressor.
Attach the yellow wire with
black stripe connects to the NO
terminal on the L.L. Solenoid/
Compressor relay to a solenoid
lead
Connect L2/Neutral to the remain-
ing L.L. Solenoid/Compressor lead.
19 19
17
KE2 AdaptiveControl
Quick Start Guide

Q.1.35 January 2016
Page 10
© Copyright 2016 KE2 Therm Solutions, Inc., Washington, Missouri 63090
Figure 8 - Wiring Schematic - Ladder Diagram
Figure 8 - Wiring Schematic - Using KE2 Terminal Board
KE2 AdaptiveControl
Quick Start Guide

© Copyright 2016 KE2 Therm Solutions, Inc., Washington, Missouri 63090
Q.1.35 January 2016
Page 11
20 20
Installing the sensors
Although not required, sensors should be labeled with their func-
tion. This will eliminate confusion when connecting the sensors to
the controller.
Air Sensor Bracket
Install the Air Temperature Sensor using the Stainless Steel self-
piercing screw and bracket from the accessory kit.
The end with the single loop is designed to be mounted with the
screw included.
The end with multiple loops is designed to hold the sensor.
Locate the best place to install the sensor.
The sensor should be located between 6 and 12 inches away from
the face of the evaporator. This distance prevents the sensor from
sensing heat from the heating elements during the defrost cycle,
but close enough to accurately sense the return air temperature.
The sensor bracket may be bent as necessary to locate the sensor
in the proper position.
WARNING!
Do not allow the metal portion of the air sensor to touch any-
thing other than air. It should not touch the bracket, nylon cable
tie, or any other solid surface.
21 21
KE2 AdaptiveControl
Quick Start Guide

A B
Q.1.35 January 2016
Page 12
© Copyright 2016 KE2 Therm Solutions, Inc., Washington, Missouri 63090
Coil Sensor
The coil sensor location is of the utmost importance for the
proper operation of the controller. It is essential that the sen-
sor is in the coldest location on the coil at the end of the de-
frost cycle, to ensure a complete defrost. See preliminary steps
A-D on page 3 to determine the coldest location on the coil.
Once you have determined the proper sensor location as described
in preliminary steps A-D on page 3, the sensor can be installed.
Alternate method - As the defrost termination sensor, it is important
to ensure the sensor does not terminate defrost before all frost has
been removed from the coil. In some installations, inserting the sen-
sor into the coil may position it too close to the defrost heat source.
An alternate method of positioning places the sensor vertically be-
tween the coil ns. This shows the coil sensor properly secured.
Extending sensor wires
After the sensors are mounted, they are routed back to the control-
ler. If the wires must be extended, use 18 gauge twisted shielded
pair. Maximum length for 18 gauge: 100ft.
When running the wires back to the controller care must be tak-
en to avoid interference being introduced into the sensor wires.
Interference can be introduced when sensor wires are located
near high voltage lines. High voltage is dened by Underwriter’s
Laboratories as above 30V. The higher voltage the more likely it is
to introduce interference, and the more important to avoid.
If crossing a high voltage line is necessary, the sensor wiring should
be run at right angles to prevent noise.
1.5”
Thermistor
Epoxy
.5”
22
23
24
Installing the Sensor Properly
Note, the most active portion of the sensor is the rst 1/2” of the
1-1/2” long stainless steel probe. Figures 23 and 24 show two meth-
ods for installing the sensor in the coil. The method shown in 23 will
work in most applications, however in some cases inserting the sen-
sor into the coil may position it too close to the defrost heat source. In
these instances, the method shown in Figure 24 can be used.
22
Figure 23A shows the sensor touching two circuit tubes. When in-
serting the sensor into the coil, the tip should touch one of the cir-
cuit tubes. It should not be located adjacent to the electric heating
elements. It should be about half the distance between the heat-
ers if possible. In Figure 23B the probe is inserted into the ns ap-
proximately 1/16” deeper than the stainless shielding. Pinch the ns
gently together, securing the sensor in place. This provides thermal
ballast to ensure a complete defrost.
23
24
KE2 AdaptiveControl
Quick Start Guide

© Copyright 2016 KE2 Therm Solutions, Inc., Washington, Missouri 63090
Q.1.35 January 2016
Page 13
25 25
Controller Mounting
Locate the 4 stainless steel screws in the accessories kit
Install the 4 screws
Place the controller on the mounting screws and tighten down the
screws.
26 26
Final Step
Leave these installation instructions onsite in a convenient loca-
tion, where it can be easily located, for future service.
27
Setting the dip switch to activate on board buzzer
To disable the audible alarm buzzer feature of the KE2 Adaptive
Control the dip switch must be switched to OFF (default from the
factory is ON)
The red dip switch is located at the bottom of the controller, and is
equipped with a switch that indicates ON or OFF.
By selecting OFF, the buzzer will be in an inactive state, and will not
sound when any type of alarm occurs.
Buzzer
dip switch
KE2 AdaptiveControl
Quick Start Guide

Q.1.35 January 2016
Page 14
© Copyright 2016 KE2 Therm Solutions, Inc., Washington, Missouri 63090
Controller Navigation - Menu Structure
Access Setpoint mode by pressing and holding the button until
tS (temperature setpoint) displays on the screen
ENTER
Use the up and down arrows to scroll through the available setpoints.
ENTER
Press to view the current setting.
Indicator lights Red light - Basic Menu - not used
Yellow light - non-critical alarm (system running)
Green light - compressor on
Green ashing - compressor waiting on timer to start/stop
Use the up and to change the setpoint
ENTER
Press to move between the digits to accelerate the changes.
ENTER
Press and hold to conrm each setpoint change
BACK
Press to escape.
thermsolutions
Energy Saving Refrigeration Controller
Adaptive
Control
.
Accessing the Menus
Press and hold
for 3 seconds
BASIC MENUS
ADVANCED MENUS
Press and hold
for 3 seconds
rtP
Clt
SySt
CPrl
dFrl
Fnrl
ALSt
Default menu -
Non Adustable (view only)
VARIABLES MENU
tS
dtyP
dFit
dPd
dFt
diF
OFFt
Runt
FrEF
AU1
StA1
AU2
StA2
tS2
tOd
d1
d2
d3
d4
d5
d6
d7
d8
d9
d10
d11
d12
dtSP
drnt
fdSP
Fndt
FndF
Pdt
HAO
LAO
tAd
Adr
Unt
CLAL
Schedule Defrost w.
Custom Defrost Per Day
tS
dtyP
dFit
dPd
dFt
diF
OFFt
Runt
FrEF
AU1
StA1
AU2
StA2
tS2
dtSP
drnt
fdSP
Fndt
FndF
Pdt
HAO
LAO
tAd
Adr
Unt
CLAL
Schedule
Defrost
tS
dtyP
dFit
dPd
dFt
diF
OFFt
Runt
FrEF
AU1
StA1
AU2
StA2
tS2
dPtr
HEtr
EdiF
dtSP
drnt
fdSP
Fndt
FndF
Pdt
HAO
LAO
tAd
Adr
Unt
CLAL
Demand
Defrost
tS
dtyP
dFit
HAO
LAO
tAd
Demand
Defrost
tS
dtyP
dFit
dPd
dFt
HAO
LAO
tAd
Schedule
Defrost
tS
dtyP
dFit
dPd
dFt
tOd
d1
d2
d3
d4
d5
d6
d7
d8
d9
d10
d11
d12
HAO
LAO
tAd
Schedule Defrost w.
Custom Defrost Per Day
dPd & dFt only
visible if ScHd
(schedule) is selected
for DFit (defrost
initiation mode)
dPd & dFt only
visible if ScHd
(schedule) is
selected for DFit
(defrost initiation
mode)
tOd only visible if
CUS (custom) is
selected for dPd
(defrosts per day)
rtP
Clt
rt1 or Ct1 or tp1 or din1
SyOn
SyOF
drOn
drCL
diOn
diOF
dLOC
dAUt
inid
tErd
T2OF
t2On
SySt
CPrl
dFrl
Fnrl
ALSt
depending on the
use of the digital
input (din1),
controller will
display one of these:
Basic Menu If Auxiliary
Input(s) Used
KE2 AdaptiveControl
Quick Start Guide

Q.1.35 January 2016
Page 15
© Copyright 2016 KE2 Therm Solutions, Inc., Washington, Missouri 63090
User Interface
The KE2 Adaptive Control’s onboard user interface uses the familiar
4- button arrangement to simplify navigation through the control-
ler’s menus.
To provide the most pleasant user experience, the menu structure
has been split into 2 groups: Basic and Advanced.
Basic Menu
For the majority of users, the Basic menu will provide the necessary
parameters to setup the controller.
The Table – Basic Menu provides a listing of the abbreviations for the
controller.
Advanced Menu
Some users will require more complex congurations to achieve the
desired product performance. These more in depth applications re-
quire additional parameters found under the Advanced Menu.
Due to the vast number of potential congurations, users must inves-
tigate the proper setup independently of these instructions.
The Table – Advanced Menu provides a listing of the abbreviations
and descriptions of available options. For a more in depth description
of each parameter contact your KE2 Therm Sales Engineer.
Navigating Setpoints
To move between the setpoint displayed and its associated value, re-
quires a momentary press of the Enter button. To return to the value
press the BACK button.
Specications
Controller
Input Voltage: 120V / 208-240V
Storage Temp: -40° to 120°F (-40° to 49°C)
Operating Temp: -40° to 120°F (-40° to 49°C)
Display: 4 digit 7-segment LED
IP Rating: IP65
Inputs (4): 3 colored 15’temp sensors (KE2 SKU 21151)
2 dual purpose temperature or digital inputs
Outputs:
(3) Relays
Single Pole
Double
Throw
Normally Open Normally Closed
120V 240V 120V 240V
FLA 30A 30A N/A 12A
LRA 98A 80A N/A 24A
Resistive N/A 30A N/A 30A
Horsepower 1 hp 2 hp 1/4 hp 1/2 hp
Pilot Duty 800VA 720VA 290VA 360VA
Communication: RS-485 (Modbus)
Temperature Sensor
Sensor Specs: -60° to 150°F (-51°C to 66°C)
moisture resistant package
Changing Setpoints
When the parameter value is displayed it may be changed by using
the Up, Down, and ENTER buttons.
The Up and down buttons will increase or decrease numerical values
and scroll through the available options on the non-numerical op-
tions.
Pressing and holding the ENTER button for 3 seconds will save the
displayed value.
To abort changes pressing the BACK button will return the parameter
abbreviation.
Advanced Defrost Heater Management:
The KE2 Adaptive Control incorporates heater management to re-
duce fogging associated with excessive defrost heat when applied in
demand defrost mode.
Manual Defrost
To enter Manual Defrost mode, press and hold the BACK and the EN-
TER buttons simultaneously for three seconds. dEFr will appear on
the display.
thermsolutions
Energy Saving Refrigeration Controller
Adaptive
Control
thermsolutions
Energy Saving Refrigeration Controller
Adaptive
Control
KE2 AdaptiveControl
Quick Start Guide

© Copyright 2016 KE2 Therm Solutions, Inc., Washington, Missouri 63090
Q.1.35 January 2016
Page 16
Table 3 - Controller Menus and Menu Parameters
Alarms Non Adjustable (view only)
When the KE2 Adaptive Control is in alarm, it noties the user by illuminating the amber LED, and displaying the appropriate Alarm Code:
Alarm
Code Alarm Name Description
nOAL No Alarm
AtSA Air Sensor Return air temperature sensor is shorted or open
CLSA Coil Sensor Coil temperature sensor is shorted or open
AU1A Auxiliary Input 1 Alarm Auxiliary temperature sensor is shorted or open
AU2A Auxiliary Input 2 Alarm Auxiliary temperature sensor is shorted or open
HtA High Temperature Alarm Temperature is above temperature setpoint (tS) + temperature dierential (diF) + high temp alarm oset (HAO) for
longer than temperature alarm delay (tAd)
LtA Low Temperature Alarm Temperature is below temperature setpoint (tS) - low temp alarm oset (LAO) for longer than temperature alarm
delay (tAd)
dOOr Door Open If door is open and room temperature is 5 degrees above temperature setpoint (tS) + temperature dierential (diF)
and input stays active for 90 minutes, ignores temperature alarm delay (tAd)
dttA Defrost Term on Time Defrost terminated on time instead of temperature for two consecutive cycles
ECdF Excessive Defrost Controller has performed 11 consecutive defrost cycles without terminating on temperature
PF Power Failure Indicates power has been o and just turned on (only when dPd = CUS)
Setpoints - Basic Menu
DEMAND DEFROST
Setpoints - Basic Menu
SCHEDULE DEFROST
Setpoints - Basic Menu
SCHEDULE DEFROST
w. CUSTOM DEFROST
PER DAY
Description Minimum Default Maximum
tS tS tS Temperature Setpoint -50°F0°F100°F
dtyP dtyP dtyP Type of Defrost, Air or Electric Air ELEc ELEc
dFit dFit dFit Defrost Initiation Mode dEnd dEnd ScHd, FSCH
dPd dPd Number of Defrost Per Day 0 4 12, CUS
dFt dFt Defrost Time 0 45 min 720 min
tOd Time of day 0:00 12:00 23:59
d1 Start time of Defrost #1 0:00, diS diS 23:59
d2 Start time of Defrost #2 0:00, diS diS 23:59
d3 Start time of Defrost #3 0:00, diS diS 23:59
d4 Start time of Defrost #4 0:00, diS diS 23:59
d5 Start time of Defrost #5 0:00, diS diS 23:59
d6 Start time of Defrost #6 0:00, diS diS 23:59
d7 Start time of Defrost #7 0:00, diS diS 23:59
d8 Start time of Defrost #8 0:00, diS diS 23:59
d9 Start time of Defrost #9 0:00, diS diS 23:59
d10 Start time of Defrost #10 0:00, diS diS 23:59
d11 Start time of Defrost #11 0:00, diS diS 23:59
d12 Start time of Defrost #12 0:00, diS diS 23:59
HAO HAO HAO High Alarm Oset 0°10°if tS < 32°;
3 if ts > 32°50°
LAO LAO LAO Low Alarm Oset 0°4°10°
tAd tAd tAd High and LowTemp Alarm Delay 1 min 60 min 180 min
KE2 AdaptiveControl
Quick Start Guide

© Copyright 2016 KE2 Therm Solutions, Inc., Washington, Missouri 63090
Q.1.35 January 2016
Page 17
Setpoints - Advanced Menu
DEMAND DEFROST
Setpoints - Advanced Menu
SCHEDULE DEFROST
Setpoints - Advanced Menu
SCHEDULE DEFROST
w. CUSTOM DEFROST
PER DAY
Description Minimum Default Maximum
tS tS tS Temperature Setpoint -50°F 0°F 100°F
dtyP dtyP dtyP Type of Defrost, Air or Electric Air ELEc ELEc
dFit dFit dFit Defrost Initiation Mode dEnd dEnd ScHd
dPd dPd Defrost Per Day 0 4 12, CUS
dFt dFt Defrost Time 0 min 45 min 720 min
diF diF diF Temperature Dierential 1° 1° 30°
OFFt OFFt OFFt Minimum Compressor Otime 0 min 5 min 10 min
rUnt rUnt rUnt Minimum Compressor Runtime 0 min 2 min 10 min
FrEF FrEF FrEF Fan mode during refrigeration
mode - ti24, OnCP, PErn PErn OnCP ti24
AU1 AU1 AU1
Type of 1st Auxiliary input -diS,
COiL, rtP,SyOf, dOOr, t2nd, trdF,
indF, dFin, dFLO
COiL
StA1 StA1 StA1 Digital input active state for 1st
Aux input OPEn SHrt SHrt
AU2 AU2 AU2
Type of 2nd Auxiliary input -diS,
COiL, rtP,SyOf, dOOr, t2nd, trdF,
indF, dFin, dFLO
diS
StA2 StA2 StA2 Digital input active state for 2nd
Aux input OPEn SHrt SHrt
tS2 tS2 tS2 2nd room temp setpoint -50 -50 100
tOd Time of day 0:00 12:00 23:59, diS
d1 Start time of Defrost #1 0:00 diS 23:59, diS
d2 Start time of Defrost #2 0:00 diS 23:59, diS
d3 Start time of Defrost #3 0:00 diS 23:59, diS
d4 Start time of Defrost #4 0:00 diS 23:59, diS
d5 Start time of Defrost #5 0:00 diS 23:59, diS
d6 Start time of Defrost #6 0:00 diS 23:59, diS
d7 Start time of Defrost #7 0:00 diS 23:59, diS
d8 Start time of Defrost #8 0:00 diS 23:59, diS
d9 Start time of Defrost #9 0:00 diS 23:59, diS
d10 Start time of Defrost #10 0:00 diS 23:59, diS
d11 Start time of Defrost #11 0:00 diS 23:59, diS
d12 Start time of Defrost #12 0:00 diS 23:59, diS
dPtr Defrost Parameter 0 30 if ELEc
40 if Air 90
HEtr Heater Mode - Permanent or Pulse Pern PuLS if ELEc
Pern if Air PuLS
EdiF Extreme Dierential 0 20 200
dtSP dtSP dtSP Defrost Term Temperature
Setpoint 35°F 50°F if ELEc
40°F if Air
90°F if ELEc
89.9°F if Air
drnt drnt drnt Drain Time 0 min 2 min 15 min
FdSP FdSP FdSP Fan delay temp -40°F 20°F if Elec
35°F if Air 35°F
Fndt Fndt Fndt Max fan delay time 0 min 2 min 20 min
FndF FndF FndF Fan State During Defrost OFF OFF if Elec;
On if Air On
Pdt Pdt Pdt Defrost pump down time 0 min 0 min 10 min
HAO HAO HAO High Alarm Oset 0° 10° if tS <32
3° if tS >32 50°
LAO LAO LAO Low Alarm Oset 1° 4° 10°
tAd tAd tAd Temp Alarm Delay 1 min 60 min 180 min
Adr Adr Adr Modbus address 1 1 247
Unt Unt Unt Temp units FAH or CEL FAH FAH CEL
CLAL CLAL CLAL Not a setpoint, press“Enter”and hold until display changes. All Alarms Cleared
KE2 AdaptiveControl
Quick Start Guide

Q.1.35 January 2016
Page 18
© Copyright 2016 KE2 Therm Solutions, Inc., Washington, Missouri 63090
Abbreviations - Alphabetical Listing
Abbreviation Name Type Description
Adr Modbus Address Setpoint Controller’s address for communications
Air Air Defrost Setpoint Air Defrost option
ALSt Alarm State Variable Pressing ENTER from ALSt will show alarm menu
AtSA Air Sensor Alarm Alarm Displays when air sensor is shorted or open
AU1 Type of 1st Auxiliary input Setpoint diS, SYOF, dOOr, t2nd, dFin, dFLo, indF, trdF, COiL, rtP
AU1A Auxiliary Input 1 Alarm Alarm Displays if type of 1st Auxiliary input (AU1) is set to coil (COiL) or room temp (t2nd) and sensor is shorted or open
AU2 Type of 2nd Auxiliary input Setpoint diS, SYOF, dOOr, t2nd, dFin, dFLo, indF, trdF, COiL, rtP
AU2A Auxiliary Input 2 Alarm Alarm Displays if type of 2nd Auxiliary input (AU2) is set to coil (COiL) or room temp (t2nd) and sensor is shorted or open
CEL Celsius Setpoint Option for temperature units
CLAL Clear Alarms Setpoint Clears all alarms
CLSA Coil Sensor Alarm Alarm Displays when coil sensor is shorted or open
CLt Coil Temp Variable Temperature of the coil
COiL Coil Setpoint Choice for input type for 1st or 2nd Auxiliary input (AU1 or AU2)t - input is to be used as an additional CoilTemperature for
defrost termination and fan delay termination
CPrL Compressor Relay Variable Status of whether compressor relay is energized or de-energized
CSH Compressor Starts/Hour Setpoint Maximum number of compressor starts per hour
Ct1 Coil Temperature 1 Variable Coil temperature if AU1 (1st Auxiliary input) is set to Ct1
Ct2 Coil Temperature 2 Variable Coil temperature if AU2 (2nd Auxiliary input) is set to Ct2
CUSt Custom Setpoint Option under defrosts per day (dPd)
d1 Defrost #1 Setpoint Start time of Defrost #1 when in defrosts per day (dPd) is custom (CUSt); based on 24-hour clock
d2 Defrost #2 Setpoint Start time of Defrost #2 when in defrosts per day (dPd) is custom (CUSt); based on 24-hour clock
d3 Defrost #3 Setpoint Start time of Defrost #3 when in defrosts per day (dPd) is custom (CUSt); based on 24-hour clock
d4 Defrost #4 Setpoint Start time of Defrost #4 when in defrosts per day (dPd) is custom (CUSt); based on 24-hour clock
d5 Defrost #5 Setpoint Start time of Defrost #5 when in defrosts per day (dPd) is custom (CUSt); based on 24-hour clock
d6 Defrost #6 Setpoint Start time of Defrost #6 when in defrosts per day (dPd) is custom (CUSt); based on 24-hour clock
d7 Defrost #7 Setpoint Start time of Defrost #7 when in defrosts per day (dPd) is custom (CUSt); based on 24-hour clock
d8 Defrost #8 Setpoint Start time of Defrost #8 when in defrosts per day (dPd) is custom (CUSt); based on 24-hour clock
d9 Defrost #9 Setpoint Start time of Defrost #9 when in defrosts per day (dPd) is custom (CUSt); based on 24-hour clock
d10 Defrost #10 Setpoint Start time of Defrost #10 when in defrosts per day (dPd) is custom (CUSt); based on 24-hour clock
d11 Defrost #11 Setpoint Start time of Defrost #11 when in defrosts per day (dPd) is custom (CUSt); based on 24-hour clock
d12 Defrost #12 Setpoint Start time of Defrost #12 when in defrosts per day (dPd) is custom (CUSt); based on 24-hour clock
dAUt Defrost Auto Variable Defrost is in Automatic mode, i.e. normal operation
dEFr Defrost System State Displays when system is in defrost mode
dEnd Demand Defrost Setpoint Choice for Defrost Initiation Mode (dFit)
dFin Defrost Interlock Setpoint Choice for input type for 1st or 2nd Auxiliary input (AU1 or AU2) - digital input that immediately turns o defrost heaters
dFit Defrost Inititation Mode Setpoint Selects defrost mode - Demand Defrost (DEnd) or Schedule (ScHd)
dFLo Defrost Lockout Setpoint Choice for input type for 1st or 2nd Auxiliary input (AU1 or AU2) - digital input that prevents controller from going into
defrost mode
dFt Defrost Time Setpoint Maximum time system is allowed in defrost
dFrL Defrost Relay Variable Status of whether defrost relay is energized or de-energized
diF Dierential Setpoint Number of degrees air temp must be above room temp setpoint (tS) to return system to refrigeration mode
din1 Digital Input 1 Variable 1st Auxiliary input (AU1) is congured as one of the digital input options
din2 Digital Input 2 Variable 2nd Auxiliary input (AU2) is congured as one of the digital input options
diOn Defrost Inertock On Variable In variables menu, display when 1st or 2nd Auxiliary input (AU1 or AU2) set to dFin (Defrost Interlock) and is active
diOF Defrost Interlock O Variable In variables menu, display when 1st or 2nd Auxiliary input (AU1 or AU2) set to dFin (Defrost Interlock) and is inactive
diS Disabled Setpoint Choice for input type for 1st or 2nd Auxiliary input (AU1 or AU2)- input is not in use
Variables Menu Non Adjustable (view only)
Parameter Name Status Displayed on Controller
rtP Room temperature
Clt Coil temperature
Only visible if
AU1 is used
rt1 or Ct1 or
tp1 or din1
rt1 = room temperature is displayed ; Ct1 = coil temperature is displayed; tp1 = monitor temperature only;
din1 = digital input 1(depending on the use of the digital input will display: SyOn (system on), SyOF (system o), drOn (door open),
drCL (door closed), diOn (defrost interlock on), diOF (defrost interlock o), dLOC (defrost lockout), dAUt (defrost auto), inid (initiate
defrost), tErd (terminate defrost), t2OF (use main air setpoint), t2On (use second air setpoint)
Only visible if
AU2 is used
rt2 or Ct2 or
tp2 or din2
rt2 = room temperature is displayed ; Ct2 = coil temperature is displayed; tp2 = monitor temperature only;
din2 = digital input 2(depending on the use of the digital input will display: SyOn (system on), SyOF (system o), drOn (door open),
drCL (door closed), diOn (defrost interlock on), diOF (defrost interlock o), dLOC (defrost lockout), dAUt (defrost auto), inid (initiate
defrost), tErd (terminate defrost), t2OF (use main air setpoint), t2On (use second air setpoint)
SySt System state - dEFr (defrost), drAn (drain), FndL (fan delay), rEFr (refrigerate), OFF (system o)
CPrl Compressor relay
dFrl Defrost relay
Fnrl Fan relay
ALSt Alarm state: noAL (no alarm), AtSA (air sensor), CLSA (coil sensor), AU1A (aux input 1 alarm), AU2A (aux input 2 alarm), HtA (high
temp alarm), LtA (low temp alarm), dOOr (door open), dtta (defrost term on time), ECdF (excessive defrost), PF (power failure)
KE2 AdaptiveControl
Quick Start Guide

Q.1.35 January 2016
Page 19
© Copyright 2016 KE2 Therm Solutions, Inc., Washington, Missouri 63090
dLOc Defrost Lockout Variable In variables menu, display when1st or 2nd Auxiliary input (AU1 or AU2)set to Defrost Lockout (dFLO) and is active
dOOr Door Open Alarm Alarm If door is open and room temperature is 5 degrees above temperature setpoint (tS) + temperature dierential (diF) and input
stays active for 90 minutes, ignores temperature alarm delay (tAd)
Door Input Setpoint Choice for input type for 1st or 2nd Auxiliary input (AU1 or AU2) - is used to determine if the door is open or closed
dPd Defrost Per Day Setpoint Number of defrosts per day 0-12, Custom (CUS)
dPTR Defrost parameter Setpoint If Defrost Initiation mode (dFit) = Demand Defrost (dEnd); Coecient to KE2 Defrost algorithm
drAn Drain System State Displays when system is in drain mode
drCL Door Closed Variable In Variables menu, display when AU1 and AU2 set to dOOr and is inactive
drOn Door Open Variable InVariables menu, display when AU1 and AU2 set to dOOr and is active
drnt Drain Time Setpoint Amount of time in drain mode
dtSP Defrost Term Temperature Setpoint Setpoint Coil temperature reaches defrost term temperature setpoint to terminate defrost
dttA Defrost Termination on Time Alarm Defrost terminated on time instead of temperature for two consecutive cycles
dtyP Type of Defrost Setpoint Air or Electric
ECdF Excessive Defrost Alarm Controller has performed 11 consecutive defrost cycles without terminating on temperature
EdiF Extreme Dierential Setpoint ADVANCEDTOPIC: Contact KE2 Therm for assistance
ELEC Electric Setpoint Defrost option
FAH Fahrenheit Setpoint Default for all temperatures displayed
FdSP Fan delay temp Setpoint Setpoint Coil temp must reach this setpoint to turn fans back on after defrost
FndF Fan State During Defrost Setpoint Fans on or o during defrost
FndL Fan Delay System State Displays when system is in fan delay mode
Fndt Max fan delay time Setpoint Maximum time system can stay in fan delay (FndL) mode
FnrL Fan Relay Variable Status of whether fan relay is energized or de-energized
FrEF Fan mode during refrigeration Setpoint Determines how fan operates during refrigeration mode -- permanent (PErn), On with compressor (OnCp)Title 24 (ti24)
FSCH Forced schedule Setpoint Controller automatically changed from demand defrost to schedule defrost due to excessive defrost alarm
HEtr Heater mode Setpoint If defrost mode = ELEC: whether to leave the defrost relay energzied during defrost cycle or to utilze advanced heater mgmnt.
HtA High Temperature Alarm Alarm Average temperature is above the Temperature Setpoint (tS) + Temperature Dierential Setpoint diF + High Alarm Oset
(HAO) for the amount of time in the Temperature Alarm Delay (tAd)
HAO High Alarm Oset Setpoint Number of degrees above theTemperature Setpoint (tS) for a HighTemp Alarm (HtA) condition.
inid Inititate Defrost Variable Choice for input type for 1st or 2nd Auxiliary input (AU1 or AU2) - digital input that will initiate defrost
LAO Low Alarm Oset Setpoint Number of degrees below theTemperature Setpoint (tS) for a Adaptive Control Alarm (LtA) condition.
LtA Low Temperature Alarm Alarm Average temperature is below the Temperature Setpoint (tS) - Low Alarm Oset (LAO) for the amount of time in the Tempera-
ture Alarm Delay (tAd)
NOAL No Alarm Alarm System is clear of alarms
OFF System O System State The system is currently not running
OFFt Minimum Compressor OTime Setpoint Minimum time the liquid line solenoid/compressor relay must remain o before it can be energized again
OnCP On with compressor Setpoint Fans are on when compressor is running
OPEn Open Setpoint Digital input is active/inactive when open
Pdt Defrost pump down time Setpoint Amount of time to pump down the system before defrost
PErn Permanent Setpoint Fans on permanently
PF Power Failure alarm Alarm Alarm indicates that there was an interruption in the power supply to the controller
rEFr Refrigerate Mode System State System mode displayed when controller is in cooling mode
rt1 Room Temperature 1 Variable Room temperature displayed if AU1 (1st Auxiliary input) is set to rtP (Room Temp)
rt2 Room Temperature 2 Variable Room temperature displayed if AU2 (2nd Auxiliary input) is set to rtP (Room Temp)
rtP Room Temp Variable Choice for input type for 1st or 2nd Auxiliary input (AU1 or AU2) - input is used as an additional room temperature averaged in
with the other room temperature inputs
rUnt Minimum Compressor Run Time Setpoint Minimum amount of time the liquid line solenoid/compressor relay must remain on after it is energized
ScHd Schedule Defrost Setpoint Choice for Defrost Initiation Mode (dFit)
SHrt Short Setpoint Digital input is active/inactive when short
StA1 State of 1st Auxiliary Input Setpoint Digital input active state for 1st Auxiliary input (AU1) - set whether it is open or short
StA2 State of 2nd Auxiliary Input Setpoint Digital input active state for 2nd Auxiliary input (AU2) - set whether it is open or short
SYOF System O Variable Choice for input type for 1st or 2nd Auxiliary input (AU1 or AU2)- digital input that puts the controller into System O Mode
SYOn System On Variable Choice for input type for 1st or 2nd Auxiliary input (AU1 or AU2)- digital input that puts the controller into System On Mode
SYSt System State Variable Displays mode of system operation
t2nd 2nd Room Temp Setpoint Setpoint Choice for input type for 1st or 2nd Auxiliary input (AU1 or AU2) - input is used to switch between the main Room Temp
Setpoint and the 2nd Room Temp Setpoint
t2Of 2nd Air O Variable Use main air temperature setpoint
t2On 2nd Air On Variable Use second air temperature
tAd Temp Alarm Delay Setpoint Amount of time to delay a high temp or low temp alarm
tErd Terminate Defrost Variable InVariables menu, display when 1st or 2nd Auxiliary input (AU1 or AU2) set to trdF (terminate defrost) and is active
ti24 Title 24 Setpoint Congure the controller to beTitle 24 for runtime compliant during refrigeration system’s o cycle
tOd Time of day Setpoint Time is displayed based on 24 hour clock
tP1 Monitor Temperature 1 Variable When AU1 is set to tP1 controller is monitoring temperature only
tP2 Monitor Temperature 2 Variable When AU2 is set to tP1 controller is monitoring temperature only
trdF Terminate Defrost Setpoint Choice for input type for1st or 2nd Auxiliary input (AU1 or AU2) - digital input that will terminate defrost
tS Temperature Setpoint Setpoint Room temperature to be maintained
tS2 Temperature Setpoint 2 Setpoint Alternate room temperature setpoint
Unt Temp units Setpoint Fahrenheit (FAH) or Celsius (CEL)
KE2 AdaptiveControl
Quick Start Guide

4:32 pm would be 16.3 on
the controller’s display.
© Copyright 2016 KE2 Therm Solutions, Inc., Washington, Missouri 63090
Q.1.35 January 2016 supersedes Q.1.35 October 2015and all prior publications,
Q.1.35 January 2016
Page 20
s
di
2
St
STEP 1 - Press and hold the but-
ton, tS is displayed on the LEDs
d
dp
60 00
STEP 2 - Press the up arrow until
dPd is displayed,
then press , 6 (default) will be
displayed.
Press and hold the button for 3
seconds until the dPd is displayed.
After the time is set, press and hold the
button for 3 seconds, until tod is
displayed
Use the down arrow to set the de-
frost time.
Note: Defrost times may only be set on
the hour.
Example:
2:00 am would be 2
Once the correct time is displayed, press
and hold the button until d1 is
displayed.
2d
2
d1
STEP 6 - Repeat steps as necessary for
d2 to d12.
31 6
1
8
STEP 4 - Press the up arrow until tod
(time of day) is displayed,
d
to
Note: The time is displayed in military
time (24-hr clock) The 1st 2 digits are the
hour. The minutes are after the decimal.
Since there are only 3 digits, the time will
be set to the nearest 10 minutes. See ex-
amples below.
Examples:
8:10 am would be 8.1 on the
controller’s display
then press
Use the up arrow and down ar-
row to set the time.
STEP 7 - Press the button to save
settings, and return to the main screen
(room temp will be displayed).
Custom Defrost Setup
The following steps will guide you
through the setup of the custom de-
frost feature.
Abbreviations: CUS = custom
d1 = custom defrost 1
diS = disabled
dPd = defrosts per day
ts = temperature setpoint
tod = time of day
Access Setpoint mode by pressing and holding the button until
tS (temperature setpoint) displays on the screen
ENTER
Use the up and down arrows to scroll through the available setpoints.
ENTER
Press to view the current setting.
Indicator lights Red light - Basic Menu - not used
Yellow light - non-critical alarm (system running)
Green light - compressor on
Green ashing - compressor waiting on timer to start/stop
Use the up and to change the setpoint
ENTER
Press to move between the digits to accelerate the changes.
ENTER
Press and hold to conrm each setpoint change
BACK
Press to escape.
thermsolutions
Energy Saving Refrigeration Controller
Adaptive
Control
.
d
dp
d
to
1
d
S
CU
STEP 3 - Press the up arrow until
CUS is displayed.
1
d
STEP 5 - Press the up arrow to dis-
play Defrost 1 (d1).
To set the rst defrost, press
button.
diS (disabled) will be displayed.
KE2 Therm Solutions
12 Chamber Drive . Washington, MO 63090
636.266.0140 . www.ke2therm.com
KE2 AdaptiveControl
Quick Start Guide
Other manuals for AdaptiveControl
1
Table of contents
Other KE2 Controllers manuals