manuals.online logo
Brands
  1. Home
  2. •
  3. Brands
  4. •
  5. Keg King
  6. •
  7. Brewing System
  8. •
  9. Keg King King Junior User manual

Keg King King Junior User manual

FERMENTER
KING JUNIOR
20L PRESSURE FERMENTER KEG
INSTRUCTION MANUAL
Fermenter King Junior is a 20L Pressure
Fermenter and Keg capable of fermenting up to
18L of wort under pressure. Junior can also be
used as a gravity fermenter by attaching a blow
off tube or airlock. Junior comes from the same
tank mold as our King Kegs but utilises the clear
PET material of our 35L and 60L Fermenter King
Unitanks.
With crystal clear PET tank, the Fermenter King
Junior comes complete with a pressure lid tted
with a pressure relief valve and stainless steel
ball lock gas and liquid posts.
The liquid ball lock post attaches to a silicone
diptube that oats internally on a stainless steel
oat ball so you always pick up bright beer from
the top of the keg. Fermenter King Junior is a
great way to ferment Fresh Wort Kits.
It’s relatively small size makes fermenting up to
18L of wort simple. Just attach a spunding valve
onto an MFL type gas disconnect (not supplied)
and you’ll be able to control the internal pressure
of your fermenter. After fermentation, you can
carbonate your beer in the Fermenter King Junior,
attach it to your tap system or any hand held tap
and serve directly out of the fermenter.
Alternatively, you can easily transfer carbonated
beverages from Fermenter King Junior to kegs,
mini kegs and growlers.
This manual will provide users with information
regarding the safe operation, handling and
maintenance of the Fermenter King Junior.
1. Clean wash and sanitise the tank at
temperatures below 50°C (122F). Do not
ll the tank with wort or liquid above 50°C
(122F)
2. Cleaners must be diluted to suitable
concentrations before use. If extended
contact time is expected, then users
must ensure that cleaners are chemically
compatible with PET, Silicone, EPDM,
Polypropylene and Stainless Steel.
Approved cleaners and sanitisers for use
on this fermenter include: ABC (Part code
9006) Sodium Percarbonate (Part codes
6172, 6141) Sodium Metasilicate (Part
code RET4533) Atomic 15 Foaming (Part
code 9001) Atomic 15 Annihilator (Part
code 9002) or Phosphoric acid-based
sanitisers.
3. Do not apply more than 2.4 bar (35 psi) to
the tank under any circumstance.
4. NEVER connect to an unregulated
pressure source.
5. If you connect an external pressure
source; ensure it has an independent
pressure release valve (PRV) pre-set
to below 2.4 bar (35 psi).
6. Use only the RED pressure release
valve supplied by MCH Australia Pty
Ltd on the pressure lid.
7. Do not tamper with the pressure relief
valve.
8. Do not use the tank under pressure
if it has been physically damaged i.e.
dropped on the ground
9. Do not expose to temperatures below
-2°C (28.5°F).
10. Keep the tank out of direct sunlight
and other sources of UV radiation.
11. The tank is pressure tested at
production and is marked with a date
for retesting. If it is being used under
pressure, then a hydrostatic test must
be conducted after every 24 months of
use to ensure that it is safe for reuse.
WARNINGS
PRESSURE LID ASSEMBLY INSTRUCTIONS
1. Clean and sanitise all components prior to
assembly.
2. Thread the red pressure release valve into
the pressure lid. Screw down rmly.
3. Ensure that the gas and liquid bulkhead
ttings are correctly assembled with the
post fully tightened onto the Pressure Lid.
Insert the bulkhead ttings into the holes in
the pressure lid and tighten the locknuts.
O-rings should be located on the top
surface of the lid for correct sealing.
4. Lubricate the silicone dip tube with some
non-rinse sanitiser and slide one end over
the stem of the liquid post bulkhead tting.
Slide the other end of the silicon tube over
the oating pickup tube.
5. Lubricate the entire silicone lid seal
with some food grade lubricant and t
to the underside of the Gravity Lid.
6. Place the pressure lid on the mouth
of the Fermenter and ensure that the
seal seats correctly.
7. Put a small amount of food grade
lubricant on the top outer ring of the
cap.
8. Place the top thread ring over the lid
and tighten rmly.
Attention: Ensure the ring pull on your
PRV is lying out of the way and not
against the posts on the lid as this could
result in a poor connection when attaching
disconnects.
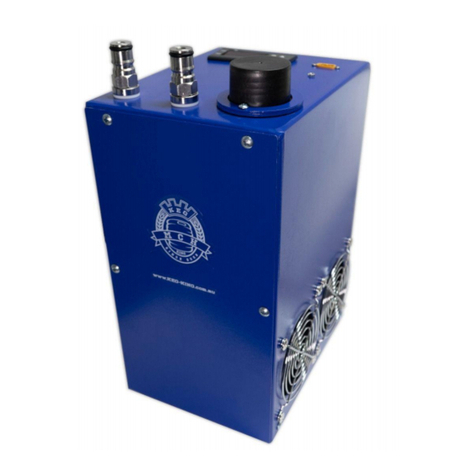
PRODUCT IMAGE DETAILED
Place bung inside of
tank.
FERMENTATION TIPS
Fermenting beverages under pressure
provides brewers with the ability to reduce
unwanted esters and speed up fermentation
times with the capacity to ferment at higher
temperatures with fewer off avours.
To control the tank’s internal pressure,
brewers will need to attach our spunding valve
(part 9161) to either a stainless steel m type
gas disconnect (part 7797) or premium plastic
m type gas disconnect (part 8282). Attach
the spunding valve to the m disconnect, set
the adjustable valve to your desired pressure,
then attach the disconnect to the gas post
of the tank’s pressure lid. The gas post is
identied by a notch at the base of the post to
help differentiate it from the liquid post.
Your liquid post should have the silicone dip
tube attached to the oat ball inside the
tank. You are now able to hold pressure
within your tank while releasing excess
pressure. If your gauge indicates a slightly
different pressure than your desired setting,
you can easily readjust the valve pressure.
We recommend 5 to 10psi on ales and
15psi on lagers.
Be careful when releasing pressure on any
beer still fermenting under pressure. The
headspace of your fermenter will ll with
the fermenting beer’s krausen (foam) and
could potentially clog your PRV and gas
post dip tube.
CONTACT US
MCH Australia P/L Trading as Keg
King
48 Smith Road
Springvale VIC 3171
Australia

Other Keg King Brewing System manuals

Keg King KEGMASTER XL User manual

Keg King

Keg King KEGMASTER XL User manual

Keg King KegMaster 4 Series User manual

Keg King

Keg King KegMaster 4 Series User manual

Keg King APOLLO SNUB NOSE User manual

Keg King

Keg King APOLLO SNUB NOSE User manual

Keg King Fermenter King Junior User manual

Keg King

Keg King Fermenter King Junior User manual

Keg King Guten Nanobrewery User manual

Keg King

Keg King Guten Nanobrewery User manual

Keg King Thermentor King Operator's manual

Keg King

Keg King Thermentor King Operator's manual

Keg King KegMaster Solstice User manual

Keg King

Keg King KegMaster Solstice User manual

Popular Brewing System manuals by other brands

Curtis G4RTB user guide

Curtis

Curtis G4RTB user guide

RAPIBREW FREDDA 1.0 quick start guide

RAPIBREW

RAPIBREW FREDDA 1.0 quick start guide

VKI Technologies Zuma Brewer Operation and service guide

VKI Technologies

VKI Technologies Zuma Brewer Operation and service guide

Brew Monk 057.700.30 instruction manual

Brew Monk

Brew Monk 057.700.30 instruction manual

BrewBuilt X1 UNI Assembly and Instruction Guide

BrewBuilt

BrewBuilt X1 UNI Assembly and Instruction Guide

Newco DB2A Installation & operating manual

Newco

Newco DB2A Installation & operating manual

Bloomfield 8740 owner's manual

Bloomfield

Bloomfield 8740 owner's manual

Curtis RTB user guide

Curtis

Curtis RTB user guide

WILLIAMSWARN BrewKeg10 user manual

WILLIAMSWARN

WILLIAMSWARN BrewKeg10 user manual

Coobra CB5PRO-SV manual

Coobra

Coobra CB5PRO-SV manual

KegLand Fermzilla instruction manual

KegLand

KegLand Fermzilla instruction manual

KegLand Fermzilla All-Rounder Starter Kit instruction manual

KegLand

KegLand Fermzilla All-Rounder Starter Kit instruction manual

Blichmann BrewMometer Hole Plug quick guide

Blichmann

Blichmann BrewMometer Hole Plug quick guide

Bunn TITAN SINGLE Service & repair manual

Bunn

Bunn TITAN SINGLE Service & repair manual

Grindmaster Crathco G235-2B Operation and instruction manual

Grindmaster

Grindmaster Crathco G235-2B Operation and instruction manual

manuals.online logo
manuals.online logoBrands
  • About & Mission
  • Contact us
  • Privacy Policy
  • Terms and Conditions

Copyright 2025 Manuals.Online. All Rights Reserved.