manuals.online logo
Brands
  1. Home
  2. •
  3. Brands
  4. •
  5. Keller
  6. •
  7. Measuring Instrument
  8. •
  9. Keller LEO RECORD User manual

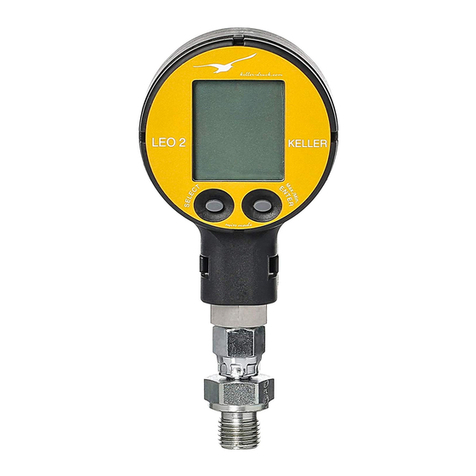
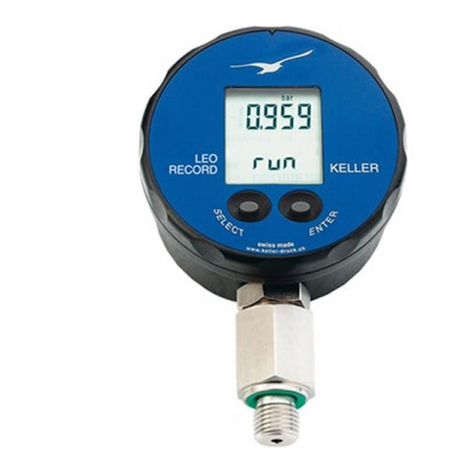
Keller LEO RECORD User manual

Aktueller Wert
Actual Value
Valor Actual
Statusanzeige
Status Indication
Indicacion de estado
SELECCIONAR ENTER
G1/4”
Digitales Manometer mit Speicherfunktion
Digital Manometer with Record Function
Manometro Digial con Funcion de Registro
- 2
-
Beschreibung
Digitales Manometer mit Spei-
cherfunktion.
Die technischen Daten des di-
gitalen Manometers entnehmen
Sie bitte dem entsprechenden
Datenblatt und den vereinbarten
Spezifikationen.
Inbetriebnahme und
Funktionen
Das LEO RECORD hat zwei Be-
dientasten. Mit der linken Taste
(SELECT) werden die Funk-
tionen sowie die Druckeinheiten
angewählt. Die rechte Taste
(ENTER) aktiviert die angewähl-
te Funktion oder Druckeinheit.
Einschalten:
Ein Druck auf SELECT schal-
tet das Gerät ein. Das Gerät
zeigt erst den werkseitig abge-
glichenen Druckbereich (oben)
und die Softwareversion (un-
ten). Danach ist das Gerät be-
triebsbereit und zeigt im oberen
Display den aktuellen Druck, im
unteren Display den Record-
Status.
Das Gerät verfügt über
folgende Funktionen:
OFF:
Schaltet das Gerät aus und be-
endet einen aktiven Record
MANO:
Gibt nachstehende Funktionen
frei:
rEC Strt:
Startet einen Record mit der
ak-
tuellen
Konfiguration,
die über
die Software eingestellt
wurde
rEC StoP:
Beendet einen aktiven Re-
cord
Description
Digital pressure manometer with
record function.
The technical data of the digital
manometer can be taken from
the corresponding data sheet or
from the agreed specifications.
Turn-On and
Functions
LEO RECORD has two opera-
ting keys. The left key (SELECT)
serves to select the functions
and the pressure units. The
right key (ENTER) activates the
selected function or pressure
unit.
Turn-on:
Pressing the SELECT key turns
the instrument on. It first shows
the full-scale pressure range
(top display) and the software
version (bottom display). The
instrument is then ready for use
and indicates the actual pres-
sure (top display) and the record
status (bottom display).
The instrument has the
following functions:
OFF:
Turns off the instrument and
ends an active record
MANO:
Releases the following func-
tions:
rEC Strt:
Starts a record with the ac-
tual configuration (set via the
software)
rEC StoP:
Ends an active record
Descripción
Manómetro de presión digital con
función de registro.
Los datos técnicos del manómetro
digital se pueden tomar de la hoja
de datos correspondiente o de las
especificaciones acordadas.
Turn-On y
Funciones
LEO RECORD tiene dos teclas
operativas. La tecla izquierda
(SELECT) sirve para seleccionar
las funciones y las unidades de
presión. La tecla de la derecha
(ENTER) activa la función o la
unidad de presión seleccionada.
Encendido:
Al pulsar la tecla SELECT se
enciende el instrumento. En primer
lugar, se muestra el rango de
presión a gran escala (pantalla
superior) y la versión del software
(pantalla inferior). El instrumento
está entonces listo para su uso e
indica la presión real (pantalla
superior) y el estado de registro
(pantalla inferior).
El instrumento tiene las
siguientes funciones:
OFF:
Se apaga el instrumento y termina
un registro activo
MANO:
Libera las siguientes funciones:
rEC Strt:
Inicia una registro con la
configuración actual
(establecida a través del
software)
rEC StoP:
Termina un registro
activo
- 3
-
2
2
ZERO SEt:
Setzt einen neuen Nullpunkt
ZERO rES:
Setzt den Nullpunkt auf
Werkseinstellung
danach folgt die Einheiten-
wahl: bar, mbar/hPa, kPa,
MPa, PSI, kp/cm2, (m)H O
Beispiel: Setzen eines neuen
Nullpunktes:
Einschalten des Gerätes
durch kurzes Drücken von
SELECT
Warten, bis das Gerät im
Messmodus ist (≈ 3 s)
2 x drücken der SELECT-
Taste: MANO erscheint
ENTER-Taste drücken: rEC
Strt
erscheint
inder Anzeige
2 x drücken der SELECT-
Taste: ZERO SEt erscheint
Druck auf ENTER:Der neue
Nullpunkt ist gesetzt. Das
Gerät befindet sich wieder
im Messmodus
Hinweise
1) Die Funktionen und Ein-
heiten können auch durch
konstantes Drücken der
SELECT-Taste angewählt
und durch Loslassen
zur Aktivierung freigegeben
werden.
2) Wird die angewählte Funk-
tion oder Einheit nicht inner-
halb von 5 Sekunden durch
die ENTER-Taste akti-
viert, kehrt LEO RECORD
ohne Änderung einer Ein-
stellung in den Messmodus
zurück.
3) Beim Ein- und Ausschalten
bleiben die zuvor getätigten
Einstellungen erhalten.
ZERO SEt:
Sets a new Zero reference
ZERO rES:
Sets the Zero to factory set-
ting
followed by the unit selection:
bar, mbar/hPa, kPa, MPa,
PSI, kp/cm2, (m)H O
Example: Setting a new Zero
Reference:
Turn on the instrument by
shortly pressing the SELECT
-
key
Wait for the instrument’s
measuring mode (≈ 3 s)
Press the SELECT-key 2
times: MANO appears
Press ENTER: rEC Strt
appears
Press SELECT-key 2 times:
ZERO SEt appears
Press ENTER: The new
Zero reference is set.
The instrument returns to
the measuring mode
Notes
1) The functions and units
can also be called up by
keeping the SELECT-key
depressed. Releasing the
key enables the displayed
function or unit to be activa-
ted with the ENTER-key.
2) If the selected function or
unit is not activated within
5 seconds with the ENTER-
key, LEO RECORD returns
to the measuring mode
without changing any set-
tings.
3) Turning LEO RECORD on
and off does not influence
any of the previous set-
tings.
ZERO SEt:
Establece una nueva
referencia Cero
ZERO rES:
Establece el Cero al ajuste de
fábrica
seguido de la selección de la
unidad: bar, mbar/hPa, kPa,
MPa, PSI, kp/cm2, (m)H2O
Ejemplo: Configuración de un nuevo
Cero
Referencia:
Encienda el instrumento
pulsando brevemente la tecla
SELECT
Espere el modo de medición del
instrumento (≈ 3 s)
Pulse la tecla SELECT 2 veces:
MANO aparece
Presione ENTER: rEC Strt
aparece
Pulse la tecla SELECT 2veces:
ZERO SEt aparece
Pulse ENTER: Se ajusta la
nueva referencia Cero. El
instrumento vuelve al modo de
medición
Notas
1) Las funciones y unidades
también pueden ser
desplegadas manteniendo la
tecla SELECT pulsada. Al
soltar la tecla se habilita la
función o unidad mostrada
para que se puedan activar
con la tecla ENTER.
2) Si la función o unidad
seleccionada no se activa
dentro de 5 segundos con la
tecla ENTER, LEO RECORD
vuelve al modo de medición
sin cambiar los ajustes.
3) Encender o apagar LEO
RECORD no influye en
cualquiera de los ajustes
anteriores.
- 4
-
4) Der Record-Zustand wird
im Messmodus immer im
unteren Display angezeigt
(run = Aufzeichnung läuft,
PrEP = warten auf Startbe-
dingung, End = Aufzeich-
nung gestoppt).
5) Kann ein Druck auf dem
Display nicht dargestellt
werden, erscheint OFL
(overflow) oder UFL (under-
flow) auf der Anzeige.
6) Wird ein Druck ausserhalb
des Messbereiches des
Gerätes angelegt, wird der
letzte gültige Druckwert
blinkend angezeigt.
7) Die PC-Software und das
LEO RECORD zeigen
nur 2 Batteriezustände:
0% (BatLow Anzeige) und
100%.
8) Die interne Uhr bei LEO
RECORD wird auch im
ausgeschalteten Zustand
nachgeführt. Das Stellen
der Uhr erfolgt automatisch
bei einer Konfiguration mit
der PC-Software (Logger
4.x).
9) Nach einem Batterie-
wechsel ist eine Neukonfi-
guration des LEO RECORD
mitder
PC-Software
(Logger
4.x) nötig.
10) Ist ein Record aktiv, wird
die Anzeige des Druckes
entsprechend dem Record-
Intervall nachgeführt (spä-
testens jedoch alle 5 Se-
kunden).
Installation
Das LEO RECORD in den
Druckstutzen drehen und über
den Sechskant des Aufneh-
mers (Druckanschluss) anzie-
hen. Ausrichten der Frontseite:
Lösen der Gegenmutter am
4) In the measuring mode, the
record status is always indi-
cated on the bottom display
(run = record is running,
PrEP = waiting for start
condition, End = recording
stopped).
5) If a pressure can not be
represented on the display,
OFL (overflow) or UFL
(underflow) appears on the
display.
6) If the actual pressure goes
beyond the measuring ran-
ge, the last valid pressure
value starts flashing on the
display.
7) Both the PC-Software and
the LEO RECORD indicate
the battery condition in only
2 ways: 0% (BatLow dis-
play) and 100%.
8) The internal clock of LEO
RECORD is also upda-
ted when the instrument
is turned off. The clock is
automatically upated by the
PC-software (Logger 4.x)
when writing a record con-
figuration.
9) After a battery change, LEO
RECORD has to be recon-
figured with the PC-Soft-
ware (Logger 4.x).
10) If a record is active, the
display of the pressure is
updated according to the
set record interval (at least
every 5 seconds)
Installation
Screw the G1/4” male port
of LEO RECORD into the fe-
male pressure port and tighten
using the lower hexagon of the
transducer. Loosen the upper
hexagon and rotate the LEO
4) En el modo de medición, el
estado de registro siempre se
indica en la pantalla inferior
(ejecutar = el registro se está
ejecutando, PrEP = espera de
condición de arranque, Fin = el
registro se detuvo).
5) En caso de que una presión que
no se pueda representar en la
pantalla, OFL (Sobreflujo) o
UFL (Subflujo) aparece en la
pantalla.
6) Si la presión real va más allá del
rango de medición, el último
valor de la presión válida
comienza a parpadear en la
pantalla.
7) Tanto el software para PC y el
registro LEO indican el estado
de la batería en solo
2 maneras: 0% (BatLow
pantalla) y el 100%.
8) El reloj interno de LEO RECORD
también se actualiza cuando el
instrumento está apagado. El
reloj es actualizado
automáticamente por el
software de PC (Logger 4.x)
cuando se escribe una
configuración de registro.
9) Después de un cambio de
batería, el LEO RECORD tiene
que ser reconfigurado con el
Software de PC (Logger 4.x).
10) Si un registro está activo, la
pantalla de la presión se
actualiza de acuerdo con el
intervalo de registro fijado (al
menos cada 5 segundos
Instalación
Atornille el puerto macho G1/4" del
LEO RECORD en el puerto de
presión hembra y apriete utilizando
el hexágono inferior del
transductor. Afloje el hexágono
superior y gire el LEO
- 5
-
Gehäuse mit zwei Gabelschlüs-
seln. Die Anzeige des LEO
RECORD lässt sich jetzt gegen
den Aufnehmer verdrehen. Aus-
richten der Frontseite in die op-
timale Richtung und Anziehen
der Gegenmutter.
Die Anzeige des LEO RECORD
lässt sich um 355° drehen. Hori-
zontaler oder umgekehrter Ein-
bau möglich.
RECORD to the desired posi-
tion. Retighten.
The face of LEO RECORD
can be rotated through 355°.
This feature allows the LEO
RECORD to be mounted in all
possible positions; vertical, hori-
zontal or upside down.
RECORD a la posición deseada.
Vuelva a apretar.
La cara del LEO RECORD se
puede girar hasta 355 °. Esta
característica permite que el
LEO RECORD sea montado en
todas las posiciones posibles;
vertical, horizontal o al revés.
KE LLER
Batteriewechsel /
Batterie-Lebensdauer
Bei schwacher Batterie leuchtet
im Display das Batteriesymbol
(BAT LOW) auf.
Batteriewechsel: Bitte Gerät
ausschalten. Drehen Sie den
Anzeigeteil-Ring über den An-
schlag hinaus, bis er sich aus
dem Gehäuseteil löst. Stecken
Sie die Batterieanschlüsse aus.
Nach dem Entfernen der Bat-
terie setzen Sie die neue Bat-
terie ein. Das Anzeigeteil kann
einfach wieder in das Gehäuse
eingesetzt werden.
Die Batterie-Lebensdauer ist
je nach Messintervall bis zu
5 Jahre.
Batterie-Typ: 3,6 V Lithium Bat-
terie, Typ SL-760 .
Battery Change /
Battery Life
When the battery starts weak-
ening, a low battery warning
(BAT LOW) will appear in the
display.
Battery change: Please turn off
the instrument. Open the instru-
ment by turning the display ring
beyond the limit stop. Discon-
nect the battery. Remove weak
battery and insert new one. Clo-
se the instrument.
The battery life is up to 5 years,
depending on measuring cycle.
Battery-type: 3,6 V Lithium Bat-
tery, type SL-760.
Cambio de Batería /
Duración de Batería
Cuando la batería comienza a
debilitarse, una advertencia de
batería baja (BAT LOW) aparecerá
en la pantalla.
Cambio de batería: Por favor,
apague el instrumento. Abra el
instrumento girando el anillo de la
pantalla más allá del final del
recorrido. Desconecte la batería.
Retire la batería débil e inserte una
nueva. Cierre el instrumento.
La duración de la batería es de
hasta 5 años, dependiendo del
ciclo de medición.
Tipo de Batería: 3,6 V batería de
Litio, tipo SL-760.
.
- 6
-
Bereich / Abgleich
Die ZERO-Funktion erlaubt es,
einen beliebigen Druckwert als
neue Nullpunktsreferenz fest-
zulegen.
Die Werkseinstellung des Null-
punktes für Bereiche ≤ 61 bar
absolut ist bei Vakuum (0 bar
absolut). Für Relativdruckmes-
sungen ist “ZERO SEt” bei Um-
gebungsluftdruck zu aktivieren.
Geräte > 61 bar absolut oder
Geräte mit relativem Drucksen-
sor (Bezeichnung auf Etikette:
Range: rel) werden mit Umge-
bungsluftdruck als Nullpunktsre-
ferenz abgeglichen.
Schnittstelle (RS485)
Auf der Rückseite befindet sich
die Schnittstelle (Flanschdose
Fischer Serie 103).
Das Übertragen der Messwerte
auf den PC erfolgt über den
Schnittstellenkonverter K103A
(RS232) oder K104A (USB).
Die PC-Software dazu finden
Sie auf unserer Homepage.
Ranges / Calibration
The ZERO-function allows to
set any pressure value as a zero
reference.
The factory setting of the zero for
the ranges ≤ 61 bar absolute is
at vacuum (0 bar absolute).
For relative pressure measure-
ments, activate “ZERO SEt” at
ambient pressure.
Instruments > 61 bar absolute
or instruments with a relative
pressure sensor (label marked
with: Range: rel) are calibrated
with the zero at atmospheric
pressure.
Interface (RS485)
The interface converter K103A
(RS232) or K104A (USB) can
be connected at the back of the
manometer (Fischer plug Series
103), allowing the data transfer
to the PC.
The corresponding PC software
can be found on our web site.
Rangos / Calibración
La función CERO permite
establecer cualquier valor de
presión como una referencia cero.
El ajuste de fábrica del cero para
los rangos de ≤ 61 bares absolutos
está en vacío (0 bar absoluto).
Para las mediciones de presión
relativa, active "ZERO SEt" a la
presión ambiente.
Instrumentos> 61 bar absolutos o
instrumentos con un sensor de
presión relativa (marcado con la
etiqueta: Rango: rel) están
calibrados con el cero a presión
atmosférica.
Interfaz (RS485)
El convertidor de interfaz K103A
(RS232) o K104A (USB) se puede
conectar en la parte trasera del
manómetro (Fischer plug Series
103), lo que permite la
transferencia de datos a la PC.
El software para PC
correspondiente se pueden
encontrar en nuestro sitio web.
- 7
-
Allgemeine
Sicherheitshinweise
Bitte beachten Sie bei Montage
und Betrieb des digitalen Mano-
meters die entsprechenden
Sicherheitsvorschriften.
Montieren Sie das digitale Ma-
nometer nur an Systeme, wel-
che sich in drucklosem
Zustand
befinden.
Bei Druckbereichen ≥ 61 bar
können die Druckanschlüsse
produktionsbedingt Restmengen
an Hydrauliköl aufweisen.
Bitte beachten Sie auch das
zugehörige Datenblatt.
Bei Temperaturen ausserhalb
0…60
°C
kann
die
Lesbarkeit
des
Displays beeinträchtigt
werden.
General Safety
Instructions
When installing and operating
the digital manometer, attention
should be paid to the correspon-
ding safety regulations.
Only mount the digital mano-
meter onto unpressurized sy-
stems.
On pressure ranges ≥61 bar,
the pressure connections could
show residual hydraulic oil.
Please also note the correspon-
ding data sheet.
Temperatures outside
of
0…60
°C
could impair the readability of
the display.
Instrucciones Generales
de Seguridad
Al instalar y operar el manómetro
digital, se debe prestar atención a
las normas de seguridad
correspondientes.
Sólo monte el manómetro digital en
sistemas despresurizados.
En rangos de presión ≥ 61 bar, las
conexiones de presión podrían
mostrar aceite hidráulico residual.
Tenga en cuenta también la ficha
de datos correspondientes.
Las temperaturas fuera de 0 ... 60 °
C podrían dañar la legibilidad de la
pantalla.
.
Zubehör, Ersatzteile / Accessories, Spare Parts / Accesorios, Repuestos
•Battery Tadiran SL-760, Lithium 3,6 V AA
Order
Number
557005.0006
•
Interface
Cable K-104A (USB -
RS485)
Order
Number
309010.0009
•
Interface
Cable K-103A
(RS232
-
RS485)
Order
Number
309010.0002
•
Software-CD:
Logger
4.x
Order
Number
239005.0003
Konformitätserklärung
Für das
folgende
Produkt…
Digitales Manometer
LEO RECORD
…wird hiermit bestätigt, dass es
den Anforderungen folgender
EG-Richtlinien entspricht:
EMV-Richtlinie 89/336/EWG
Dieses digitale Manometer LEO
RECORD wurde entsprechend
den folgenden Normen geprüft:
Declaration of Conformity
Herewith we declare that the
following product…
Digital Manometer
LEO RECORD
…meets the basic
requirements,
which are established
in
the guide-
lines
of
the European Community:
Directive EMC 89/336/EEC
As criteria, the following norms
for this digital manometer LEO
RECORD
areapplied:
Declaración de Conformidad
Por la presente declaramos que el
siguiente producto ...
Manómetro Digital
LEO RECORD
... cumple con los requisitos básicos,
que se establecen en las directrices
de la Comunidad Europea:
Directiva EMC 89/336 / CEE
Como criterios, se aplican las
siguientes normas de este
registro para el manómetro
digital de LEO RECORD:
EN 61000-6-1:2007 EN 61000-6-2:2005 EN 61000-6-3:2007 EN 61000-6-4:2007
EN 61326-2-3:2006
Diese Erklärung wirdverant-
wortlich für den Hersteller: This declaration is given for the
manufacturer: Esta declaraci[on se da para el
fabricante :
KELLER AG für Druckmesstechnik, St. Gallerstrasse 119, CH-8404 Winterthur
abgegeben durch die in full responsibility by en plena responsabilidad de:
KELLER GmbH, Schwarzwaldstrasse 17, D-79798 Jestetten
Jestetten, 2. April 2009
Hannes W. Keller
Geschäftsführender Inhaber | Managing Owner | Président Directeur Général
mit rechtsgültiger Unterschrift | with legally effective signature | dûment autorisé à signer
www.keller-druck.com 07/2009
KELLER AG St. Gallerstrasse 119 CH-8404 Winterthur Tel. 052 235 25 25 Fax 052 235 25 00
KELLERGmbH Schwarzwaldstrasse 17 D-79798 Jestetten Tel. 07745 9214 0 Fax 07745 9214 50

Other Keller Measuring Instrument manuals

Keller LEO RECORD Ei User manual

Keller

Keller LEO RECORD Ei User manual

Keller LEO 1 User manual

Keller

Keller LEO 1 User manual

Keller CellaCast PA8 Series User manual

Keller

Keller CellaCast PA8 Series User manual

Keller MANO GAUGE User manual

Keller

Keller MANO GAUGE User manual

Keller ITS CellaPort PT 11 Series User manual

Keller

Keller ITS CellaPort PT 11 Series User manual

Keller LEO-Record-Ei User manual

Keller

Keller LEO-Record-Ei User manual

Keller CellaTemp PX 4 Series User manual

Keller

Keller CellaTemp PX 4 Series User manual

Keller LEO 1 Ei User manual

Keller

Keller LEO 1 Ei User manual

Keller LEO-Record User manual

Keller

Keller LEO-Record User manual

Keller EV-97 User manual

Keller

Keller EV-97 User manual

Keller ECO2-Ei User manual

Keller

Keller ECO2-Ei User manual

Keller LEX 1 Ei User manual

Keller

Keller LEX 1 Ei User manual

Keller LEO 5 User manual

Keller

Keller LEO 5 User manual

Keller ADT1-LR User manual

Keller

Keller ADT1-LR User manual

Keller LEX 1 User manual

Keller

Keller LEX 1 User manual

Keller LEX 1 Ei User manual

Keller

Keller LEX 1 Ei User manual

Keller Lex 1 User manual

Keller

Keller Lex 1 User manual

Keller LEO 1 User manual

Keller

Keller LEO 1 User manual

Keller CellaTemp PX 21 User manual

Keller

Keller CellaTemp PX 21 User manual

Keller ITS CellaCast PT 18 Series User manual

Keller

Keller ITS CellaCast PT 18 Series User manual

Keller LEO 5 User manual

Keller

Keller LEO 5 User manual

Keller CellaCast PA 80-K002 User manual

Keller

Keller CellaCast PA 80-K002 User manual

Keller LEO 2 User manual

Keller

Keller LEO 2 User manual

Keller ECO 1 User manual

Keller

Keller ECO 1 User manual

Popular Measuring Instrument manuals by other brands

Mikro DPM380 user manual

Mikro

Mikro DPM380 user manual

Knick 830 R manual

Knick

Knick 830 R manual

Endress+Hauser Levelflex M Brief operating instructions

Endress+Hauser

Endress+Hauser Levelflex M Brief operating instructions

Linear Technology ANALOG DEVICES DC2608 manual

Linear Technology

Linear Technology ANALOG DEVICES DC2608 manual

PCB Piezotronics 393B31 Installation and operating manual

PCB Piezotronics

PCB Piezotronics 393B31 Installation and operating manual

Endress+Hauser QG2000 Technical information and operating instructions

Endress+Hauser

Endress+Hauser QG2000 Technical information and operating instructions

Vaisala GMP252 user guide

Vaisala

Vaisala GMP252 user guide

Emerson ControlWave EFM instruction manual

Emerson

Emerson ControlWave EFM instruction manual

Ametek Ortec 994 quick start guide

Ametek

Ametek Ortec 994 quick start guide

Fluke 434/PWR datasheet

Fluke

Fluke 434/PWR datasheet

Siemens SITRANS F operating instructions

Siemens

Siemens SITRANS F operating instructions

Kencove VPK user manual

Kencove

Kencove VPK user manual

A.R.C. Laser FOX IV 810 user manual

A.R.C. Laser

A.R.C. Laser FOX IV 810 user manual

socomec COUNTIS E43 operating instructions

socomec

socomec COUNTIS E43 operating instructions

Genius GE-BIN4 manual

Genius

Genius GE-BIN4 manual

Electro Industries/GaugeTech Shark 100T quick start guide

Electro Industries/GaugeTech

Electro Industries/GaugeTech Shark 100T quick start guide

WEHRLE WECOUNT-S ETK-EAM operating instructions

WEHRLE

WEHRLE WECOUNT-S ETK-EAM operating instructions

Common CGR-FX operating manual

Common

Common CGR-FX operating manual

manuals.online logo
manuals.online logoBrands
  • About & Mission
  • Contact us
  • Privacy Policy
  • Terms and Conditions

Copyright 2025 Manuals.Online. All Rights Reserved.