Loslassen zur Aktivierung frei-
gegeben werden.
2) Wird die angewählte Funk-
tion oder Einheit nicht inner-
halb von 5 Sekunden durch
die ENTER-Taste aktiviert,
kehrt LEX 1 Ei ohne Ände-
rung einer Einstellung in den
Messmodus zurück.
3) Beim Ein- und Ausschalten
bleiben die zuvor getätigten
Einstellungen erhalten.
4) Ist die CONT on Funktion
aktiviert, wird dies im Display
blinkend (cont) angezeigt.
5) Kann ein Druck auf dem
Display nicht dargestellt wer-
den, erscheint OFL (over-
ow) oder UFL (underow)
auf der Anzeige.
6) Wird ein Druck ausserhalb
des Messbereiches des
Gerätes angelegt, wird der
letzte gültige Druckwert blin-
kend angezeigt (Überlast-
warnung).
7) Bei Temperaturen ausser-
halb 0…60 °C kann die Les-
barkeit des Displays beein-
trächtigt werden.
Installation
Die Installation darf nur durch
autorisiertes Fachpersonal er-
folgen.
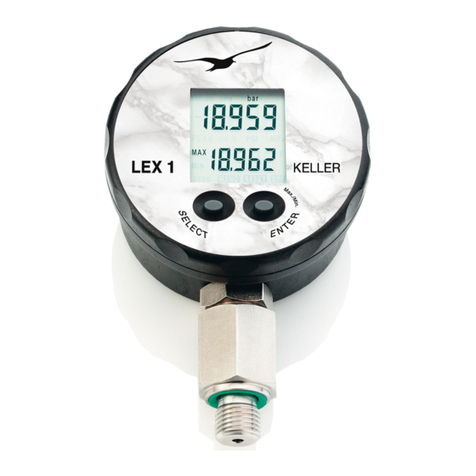
Das LEX 1 Ei in den Druckstutzen
drehen und über den Sechskant
des Aufnehmers (Druckan-
schluss) anziehen (max.
Drehmoment 50 Nm). Eine
Gegenmutter sichert den Auf-
nehmer gegen das Gehäuse.
Ausrichten der Frontseite:
Lösen der Gegenmutter am
Gehäuse mit zwei Gabelschlüs-
seln. Die Anzeige des LEX 1 Ei
lässt sich sich jetzt gegen den
Aufnehmer verdrehen. Aus-
richten der Frontseite in die
optimale Richtung und Anzie-
hen der Gegenmutter.
Die Anzeige des LEX 1 Ei
lässt sich knapp 180° nach
links und nach rechts dre-
hen. Danach öffnet sich der
Deckel aus dem Gehäu-
displayed function or unit to be
activated with the ENTER-key.
2) If the selected function or
unit is not activated within
5 seconds with the ENTER-
key, LEX 1 Ei returns to the
measuring mode without
changing any settings.
3) Turning LEX 1 Ei on and off
does not inuence any of the
previous settings.
4) If the CONT on function is
activated, it is indicated with
a ashing sign (cont) on the
display.
5) If a pressure can not be
represented on the display,
OFL (overow) or UFL (un-
derow) appears on the dis-
play.
6) If the actual pressure goes
beyond the measuring range,
the last valid pressure value
starts ashing on the display
(overload warning).
7)
Temperatures outside of
0…60 °C
could impair the
readability of the display.
Installation
The installation must be carried
out by authorized qualied per-
sonnel only.
Screw the LEX 1 Ei into the female
pressure port and tighten using
the hexagon of the transducer
(pressure connection) (max.
torque 50 Nm). The transducer
is secured to the housing by a
lock nut.
Aligning the face:
Slacken the lock nut at the
housing using two open-ended
spanners. The display of the
LEX 1 Ei can now be rotated
in relation to the transducer.
Move the face to the desired
position and tighten the lock
nut.
The LEX 1 Ei’s display can be
turned almost 180° to the left
and right. The lid of the lower
housing can then be opened.
ATTENTION: Turning the display
dès relâchement de la
touche.
2) Si la fonction ou l’unité choi-
sie n’est pas validée dans les
5 secondes avec la touche
ENTER, le LEX 1 Ei bascule
automatiquement, sans mo-
dication des réglages, en
mode mesure.
3) La mise en route et l’arrêt de
l’instrument ne modient pas
les réglages précédemment
validés.
4) La fonction CONT on active
est indiquée par un clignote-
ment (cont) à l’écran.
5) Si une pression ne peut être
afchée, le message OFL
(overow) ou UFL (under-
ow) apparaît à l’écran.
6) Si une pression mesurée est
en dehors de l’étendue de
mesure, la dernière valeur
de pression valide est af-
chée clignotante (avertisse-
ment de surcharge).
7) La lisibilité de l’afchage peut
être affectée par une tempé-
rature excédant 0…60 °C.
Installation
L’installation doit être effectuée
uniquement par du personnel
qualié et autorisé
.
Les transmetteurs de pression
de sécurité intrinsèque doivent
être installés uniquement par du
person nel qualié et autorisé.
Visser LEX 1 Ei sur l’installation
et le serrer à l’aide de l’écrou
6 pans (couple serrage max.
50 Nm).
Un contre-écrou main-
tient le capteur sur le boîtier.
Orientation du plan de la face
avant :
Desserrer le contre écrou
du boîtier à l’aide de deux
clés plates. Le boîtier peut
alors tourner par rapport au
capteur. Orienter la face
avant et resserrer le contre
écrou.
L’afchage du LEX 1 Ei peut
être tourné presque 180° vers
la gauche et vers la droite.
- 4 -
