manuals.online logo
Brands
  1. Home
  2. •
  3. Brands
  4. •
  5. Keller
  6. •
  7. Measuring Instrument
  8. •
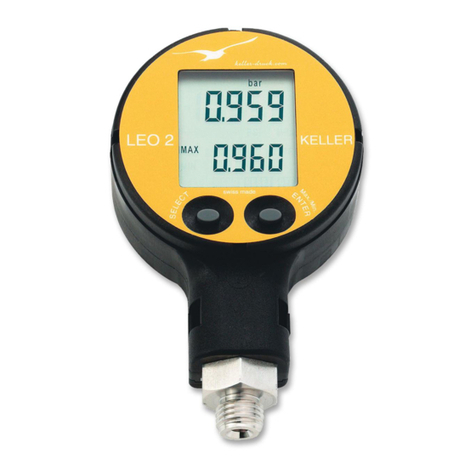
  9. Keller LEO 2 User manual

Keller LEO 2 User manual

Digitales Manometer mit Min.-/Max.-Anzeige.
Digital Manometer with Min.-/Max.-Display.
Manomètre numérique avec afchage Min./Max.
Min.-/Max.-Druckwert
Min.-/Max. Pressure Value
Valeur de pression Min./Max.
Aktueller Druckwert
Actual Pressure Value
Valeur de pression actuelle
SELECT
ENTER
Min./Max.
Druckanschluss
Pressure Connection
Raccord pression
LEO 2
Beschreibung
Digitales Manometer mit Min.-/
Max.-Druckanzeige.
Die technischen Daten des digi-
talen Manometers entnehmen
Sie bitte dem entsprechenden
Datenblatt oder den vereinbar-
ten Spezikationen.
Inbetriebnahme und
Funktionen
Das LEO 2 hat zwei Bedien-
tasten.
Mit der linken Taste
(SELECT) werden die Funk-
tionen sowie die Druckeinheiten
angewählt. Die rechte Taste
(ENTER) aktiviert die angewähl-
te Funktion oder Druckeinheit.
Über die rechte Taste kann auch
zwischen dem Min.- und Max.-
Druckwert gewechselt werden.
Einschalten:
Ein Druck auf SELECT schaltet
das Gerät ein. Das Gerät zeigt
zuerst
den werkseitig abge-
glichenen Druckbereich (oben)
und die Softwareversion (Jahr/
Woche).
Danach ist das Gerät
betriebs
bereit und zeigt im obe-
ren Display
den aktuellen Druck,
im unteren Display den zuletzt
gemessenen Max.-Druckwert an.
Das Gerät verfügt über
folgende Funktionen:
RESET:
Min.-/Max.-Wert werden dem
aktuellen Druck gleichgesetzt.
OFF:
Schaltet das Gerät aus.
MANO:
Gibt nachstehende Funktionen
frei:
Description
Digital manometer with Min.-/
Max.-pressure indication.
The technical data of the digital
manometer can be taken from
the corresponding data sheet or
the agreed specications.
Turn-On and
Functions
LEO 2 has two operating keys.
The left key (SELECT) serves
to select the functions and
pressure units. The right key
(ENTER) activates the selected
function or pressure unit. The
right key is also used to switch
between the Min.- and Max.-
pressure value.
Turn-on:
Pressing SELECT turns the in-
strument on. The instrument rst
displays the full-scale pressure
range (top display) and software
version (year/week). The instru-
ment is then ready for use and
indicates both the actual pres-
sure (top display) and the last
measured Max. pressure value
(bottom display).
The instrument has the
following functions:
RESET:
Min.-/Max.-value are set to the
actual pressure.
OFF:
Turns the instrument off.
MANO:
Releases the following func-
tions:
Description
Manomètre numérique avec af-
chage de pression Min./Max..
Les spécications techniques
du manomètre sont celles
gu rant sur la che technique
correspondante ou les spéci-
cations convenues.
Mise en route et
fonctions
LEO 2 possède 2 touches. La
touche de gauche (SELECT)
permet de sélectionner les fonc-
tions et l’unité de pression. La
touche de droite (ENTER) valide
la fonction ou l’unité de mesu-
re
sélectionnée. Cette même
touche permet également de
basculer entre les valeurs de
pression Min. et Max.
Démarrage :
Une action sur SELECT met en
route l’instrument. L’instrument
afche d’abord le type
d’étendue de mesure calibrée
(en haut) et la version du logiciel
(année/semaine). L’instrument
est alors en service. Il indique
la pression actuelle (en haut) et
la dernière valeur de pression
Max. mesurée (en bas).
L’instrument dispose des
fonctions suivantes :
RESET :
Les valeurs Min. et Max. sont ré-
initialisées à la pression actuelle.
OFF :
Arrête l’instrument.
MANO :
Donne accès aux fonctions
suivantes :
- 2 -
ZERO SET:
Setzt einen neuen Druck-
Nullpunkt.
ZERO RES:
Setzt den Druck-Nullpunkt
auf Werkseinstellung.
CONT on:
Deaktiviert die automatische
Ausschaltfunktion.
CONT off:
Aktiviert die automatische
Ausschaltfunktion (das Ge-
rät schaltet sich 15 Min. nach
der letzten Tastenbetätigung
automatisch aus),
…danach folgt die Einheiten-
wahl: bar, mbar, hPa, kPa,
MPa, PSI, kp/cm2
Beispiel: Setzen einer neuen
Druckeinheit (mbar):
Einschalten durch kurzes
Drücken von SELECT.
Warten, bis Gerät im Mess-
modus ist (≈3 s).
3 x drücken der SELECT-
Taste: MANO erscheint.
Druck auf ENTER: ZERO
SEt erscheint.
Druck auf SELECT: ZERO
rES erscheint.
Druck auf SELECT: CONT
on oder CONT off
erscheint.
Druck auf SELECT: bar er-
scheint.
Druck auf SELECT: mbar
erscheint.
Druck auf ENTER: Die
neue Druckeinheit (mbar)
ist gesetzt. Das Gerät be-
ndet sich wieder im Mess
modus.
ZERO SET:
Sets a new zero point
reference.
ZERO RES:
Sets the zero point to factory
setting.
CONT on:
Deactivates the automatic
turn-off function.
CONT off:
Activates the automatic turn-
off function (the instrument
switches off automatically
15 minutes after the last key
operation),
…followed by the unit selec
-
tion: bar, mbar, hPa, kPa,
MPa, PSI, kp/cm2
Example: Setting a new pressure
unit (mbar):
Turn on the instrument by
pressing SELECT.
 Wait for the instrument’s
measuring mode (≈3 s).
Press the SELECT-key
3 times: MANO appears.
Press ENTER: ZERO SEt
appears.
Press SELECT: ZERO rES
appears.
Press SELECT: CONT on or
CONT off appears.

Press SELECT: bar ap-
pears.

Press SELECT: mbar ap-
pears.
Press ENTER: The new
pressure unit (mbar) is set.
The instrument returns to
measuring mode.
ZERO SEt :
Enregistre un nouveau zéro
de pression de référence.
ZERO RES :
Restaure le zéro de pression
réglé en usine.
CONT on :
Désactive la fonction arrêt
automatique de l’instrument.
CONT off :
Active la fonction arrêt
automatique de l’instrument
(l’appa reil s’arrête automa
tiquement 15 min après la der-
nière action sur une touche),
…puis suit la sélection de
l’unité : bar, mbar, hPa, kPa,
MPa, PSI, kp/cm2
Exemple : Sélection d’une
nouvelle unité (mbar) :
Mise en route par une
action brève sur SELECT.

Attendre que l’instrument
passe en mode mesure (≈3 s).
Appuyer 3 fois sur la touche
SELECT : MANO s’afche.

Appuyer sur ENTER :
ZERO SEt s’afche.
Appuyer sur SELECT :
ZERO rES s’afche.
Appuyer sur SELECT :
CONT on ou CONT off
s’afche.
Appuyer sur SELECT : bar
s’afche.
AppuyersurSELECT: mbar
s’afche.

Appuyer sur ENTER : La
nouvelle unité (mbar) est
enregistrée. L’instrument se
trouve à nouveau en mode
mesure.
- 3 -
oder
or
ou
Anzeige des Minimalwertes
Bendet sich das Gerät im
Messmodus (Anzeige: Aktueller
Druck und Max.-Druckwert),
wird durch Drücken der ENTER-
Taste der Min.-Druckwert für
5 Sekunden angezeigt.
Hinweise
1) Die Funktionen und Ein-
heiten können auch durch
konstantes Drücken der
SELECT-Taste angewählt
und durch Loslassen zur Akti-
vierung freigegeben werden.
2) Wird die angewählte Funk-
tion oder Einheit nicht inner-
halb von 5 Sekunden durch
die ENTER-Taste aktiviert,
kehrt LEO 2 ohne Änderung
einer Einstellung in den
Messmodus zurück.
3) Beim Ein- und Ausschalten
bleiben die zuvor getätigten
Einstellungen erhalten.
4) Ist die CONT on Funktion
aktiviert, wird dies im Dis-
play blinkend angezeigt
(OFF blinkt bei aktiviertem
CONT on).
5) Kann ein Druck auf dem
Display nicht dargestellt
werden, erscheint OFL
(overow) oder UFL (under-
ow) auf der Anzeige.
6) Wird ein Druck ausserhalb
des Messbereiches des
Ge
rätes angelegt, wird der
letzte
gültige Druckwert blin-
kend angezeigt (Überlast-
warnung).
7) Bei Temperaturen ausser-
halb 0…60 °C kann die Les-
barkeit des Displays beein-
trächtigt werden.
Display of the Minimum Value
When in measuring mode (Dis-
play: Actual Pressure and Max.
pressure value), the Min. pres-
sure value can be displayed
for
5 seconds by shortly pressing
the
ENTER-key.
Notes
1) The functions and units can
also be called up by keeping
the SELECT-key pressed
down. Releasing the key ena-
bles the displayed function or
unit to be activated with the
ENTER-key.
2) If the selected function or
unit is not activated within
5 seconds with the ENTER-
key, LEO 2 returns to the
measuring mode without
changing any settings.
3) Turning LEO 2 on and off
does not inuence any of
the previous settings.
4) If the CONT on function is
activated, it is indicated with
a ashing off on the display.
5) If a pressure can not be
represented on the display,
OFL (overow) or UFL
(underow) appears on the
display.
6) If the actual pressure goes
beyond the measuring range,
the last valid pressure value
starts ashing on the display
(overload warning)
.
7)
Temperatures outside of
0…60 °C
could impair the
readability of the display.
Afchage de la valeur mini
Si l’instrument se trouve en mode
mesure (afchage : pression ac tu
elle et valeur de pression Max.),
une action sur la touche ENTER
permet d’afcher la valeur de pres-
sion Min. pendant 5 secondes.
Remarques
1) Les fonctions et unités peuv-
ent également être appelées
par une action maintenue
sur la touche SELECT et
sélectionnées dès relâche-
ment de la touche.
2) Si la fonction ou l’unité
choisie n’est pas validée
dans les 5 secondes avec la
touche ENTER, le manomè-
tre bascule automatique-
ment sans modication des
réglages en mode mesure.
3) La mise en route et l’arrêt
de l’instrument ne modient
pas les réglages précédem-
ment validés.
4) Les fonctions CONT on ac-
tives sont indiquées par un
clignotement à l’écran (OFF
clignote quand CONT on est
activé).
5) Si une pression ne peut être
afchée, le message OFL
(overow) ou UFL (under-
ow) apparaît à l’écran.
6) Si une pression mesurée
est en dehors de l’étendue
de mesure, la dernière va-
leur valide de pression est
afchée clignotante (avertis-
sement de surcharge).
7) La lisibilité de l’afchage peut
être affectée par une tempé-
rature excédant 0…60 °C.
- 4 -
Installation
Das digitale Manometer LEO 2
hat ein 7/16”-20 UNF Gewinde.
Mit jedem LEO 2 wird eine
“Swivel”-Verschraubung mit
druckseitigem G1/4” Anschluss
mitgeliefert. Der “Swivel” ist ein
Zylinder, der beidseitig mit O-
Ringen versehen ist. Er erlaubt
die Ausrichtung des Messge-
rätes in die optimale Position.
Der Swivel-Adapter darf mit
einem maximalen Drehmoment
von 50 Nm angezogen werden.
Batteriewechsel /
Batterie-Lebensdauer
In diesem Manometer ist bereits
eine Batterie (Typ CR2430) ein-
gesetzt.
Bei schwacher Batterie leuchtet
im Display das Batteriesymbol
(BAT LOW) auf.
Batteriewechsel:
Zum Öffnen
des Batteriefachs bitte eine pas-
sende Münze verwenden, um
den Batteriefachdeckel nicht zu
beschädigen.
Entladene Batterie entfernen
und einer geeigneten Entsor-
gungsstelle zuführen.
Neue Batterie zwischen die
Kontaktfedern schieben, dabei
Installation
LEO 2 has a 7/16”-20 UNF male
thread and is delivered com-
plete with an O-ring seal swivel
tting which allows the LEO 2 to
rotate 360°.
Only minimal tightness is
needed to seal the instrument
up to 700 bar. The process pres-
sure connection is G1/4” male.
The swivel adapter can be
tightened
with a max. torque
of 50 Nm.
Battery Change /
Battery Life
This manometer is equipped
with a battery (Type CR2430)
installed.
When the battery starts weak-
ening, a low battery warning (BAT
LOW) will appear on the display.
Battery change: Please use
a coin to open the battery box
to avoid damaging the battery
cover.
Dispose of discharged batte-
ries properly. A qualied waste
management company can be
used.
Place replacement battery
between the contact springs,
Montage
LEO 2 possède un raccord
7/16”-20 UNF mâle. Chaque
manomètre est livré avec un
adaptateur 1/4” gaz mâle.
Le coupleur d’étanchéité
“swivel” est un cylindre équipé
de 2 joints toriques. Il permet
une orientation optimale de
l’appareil.
L’adaptateur doit être serré avec
un couple maximum de 50 Nm.
Remplacement de la batterie /
Durée de vie de la batterie
Ce manomètre est équipé d’une
pile de type CR2430.
L’indication batterie faible est
signalée par l’apparition d’un pic-
togramme batterie (BAT LOW) à
l’écran.
Remplacement de la batterie :
Pour la remplacer, merci
d’utiliser une pièce de monnaie
adéquate pour ouvrir le compar-
timent renfermant la pile, ceci
an d’éviter tout dommage à
l’appareil.
Sortir la pile usagée et la recy-
cler dans un point de collecte
approprié.
Insérer une nouvelle pile ent-
re les 2 lames de contact, en
- 5 -
Adapter G1/4”
Adaptateur G1/4”
“Swivel”
auf die Polarität der Batterie
achten (Pluspol ist oben).
Achten Sie bei der Montage
des Batteriefachdeckels darauf,
dass der O-Ring richtig positio-
niert im Verschlussdeckel liegt.
Den Deckel des Batteriefachs
möglichst von Hand verschlies-
sen.
Die Batterie-Lebensdauer be-
trägt
1000 Stunden bei kontinu-
ierlichem Betrieb.
Bereich / Abgleich
Die ZERO-Funktion erlaubt es,
einen beliebigen Druckwert als
neue Nullpunktsreferenz fest-
zulegen.
Die Werkseinstellung des Druck-
Nullpunktes für Bereiche ≤ 61 bar
absolut ist bei Vakuum (0 bar
absolut). Für Relativdruckmes-
sungen ist “ZERO SEt” bei Um-
gebungsluftdruck zu aktivieren.
Geräte > 61 bar absolut oder
Geräte mit relativem Drucksen-
sor (Bezeichnung auf Etikette:
Range: rel) werden mit Umge-
bungsluftdruck als Nullpunkts-
referenz abgeglichen.
Allgemeine
Sicherheitshinweise
Bitte beachten Sie bei Montage
und Betrieb des digitalen Mano-
meters die entsprechenden
Sicherheitsvorschriften.
Montieren Sie das digitale Ma-
nometer nur an Systeme, wel-
che sich in drucklosem Zustand
benden.
paying attention to the polarity
(positive pole facing up).
When reassembling the battery
cover, make sure that the O-ring
remains imbedded in the cover.
Close the cover plate by hand,
if possible.
The battery life is 1000 hours at
continuous operation.
Ranges / Calibration
The ZERO-function allows the
user to set any pressure value
as a zero reference.
The factory set zero point for
ranges ≤61 bar abs. is at va-
cuum (0 bar abs.). For relative
pressure measurements, ac-
tivate “ZERO SEt” at ambient
pressure.
Instruments > 61 bar absolute
or instruments with a relative
pressure sensor (label marked
with: Range: rel) are calibrated
with the zero at atmospheric
pressure.
General Safety
Instructions
When installing and operating
the digital manometer, atten-
tion should be paid to the safety
regulations.
Only mount the digital mano-
meter onto unpressurized sys-
tems.
prêtant attention à la polarité. Le
pôle positif (+) doit être tourné
vers le haut.
Lors du montage du couvercle
de la batterie, assurez-vous que
le joint d’étanchéité est bien en
place.
Revisser le couvercle du com-
partiment de préférence à la
main, sans outil.
La durée de vie de la batterie
est d’environ 1000 heures en
fonctionnement continu.
Etendues de mesure / Calibration
La fonction ZERO permet de
dénir un nouveau zéro à la
pression appliquée.
Le réglage usine du zéro pour
les étendues de mesure ≤61
bar absolu est effectué au vide
(0 bar absolu). Pour les mesures
de pression nécessitant une
référence à la pression atmos-
phérique, activer “ZERO Set” à
la pression atmosphérique.
Pour les étendues de mesure
> 61 bar absolu ou pour les in-
struments avec un capteur de
pression relative (étiquette mar-
quée avec: Range: rel), le ré-
glage usine du zéro est effectué
à la pression atmosphérique.
Consignes de
sécurité
Lors du montage et de
l’utilisation du manomètre nu-
mérique veiller à respecter les
réglementations de sécurité.
L’installation du manomètre nu-
mérique doit être effectuée sur
des systèmes hors pression.
- 6 -
Bei Druckbereichen ≥61 bar
können die Druckanschlüsse
produktionsbedingt Restmen-
gen an Hydrauliköl aufweisen.
Bitte beachten Sie auch das zu-
gehörige Datenblatt.
On pressure ranges ≥61 bar,
the pressure connections could
show residual hydraulic oil.
Please consult the correspon-
ding data sheet for further infor-
mation.
Pour des pressions ≥61 bar, le
raccord pression peut présenter
des traces d’huile hydraulique
d’étalonnage.
Veuillez également consulter la
che technique du manomètre.
- 7 -
Zubehör, Ersatzteile / Accessories, Spare Parts / Accessoires, Pièces Détachées
• Battery Renata CR2430, Lithium 3,0 V Order Number 557005.0001
• Gummischutzhülle / Protective rubber covering /
Coque de protection en caoutchouc Order Number 309030.0001
• Tragetasche / Carrying bag / Sacoche de transport Order Number 309030.0003
309030.0001 309030.0003
Konformitätserklärung
Für die folgenden Erzeugnisse…
Digitales Manometer
LEO 2
…wird hiermit bestätigt, dass es
den Anforderungen folgender
EU-Richtlinien entspricht:
EMV-Richtlinie 2014/30/EU
RoHS-Richtlinie 2011/65/EU
Dieses digitale Manometer LEO
2 wurde entsprechend den fol-
genden Normen geprüft:
Diese Erklärung wird verant-
wortlich für den Hersteller:
abgegeben durch die
Jestetten, 10. Juli | July | juillet 2017
Hannes W. Keller
Geschäftsführender Inhaber | Managing Owner | Président Directeur Général
mit rechtsgültiger Unterschrift | with legally effective signature | dûment autorisé à signer
Declaration of Conformity
We herewith declare the following
product
Digital Manometer
LEO 2
meet the basic requirements
laid out in EU guidelines:
Directive EMC 2014/30/EC
Directive RoHS 2011/65/EC
The LEO 2 adheres to the follow-
ing
norms:
This declaration is issued by
for
Déclaration de Conformité
Nous attestons que les pro-
duits…
Manomètre numérique
LEO 2
répondent aux exigences pré-
vues par les directives de la
Union Européenne :
Directive CEM 2014/30/CE
Directive RoHS 2011/65/CE
Le manomètre numérique LEO
2 répond aux normes:
La présente déclaration est
fournie pour le fabricant :
par :
KELLER AG für Druckmesstechnik, St. Gallerstrasse 119, CH-8404 Winterthur
KELLER GmbH, Schwarzwaldstrasse 17, DE-79798 Jestetten
EN 61000-6-1:2007 EN 61000-6-2:2005 EN 61000-6-3:2011 EN 61000-6-4:2011
EN 61326-1:2013 EN 61326-2-3:2013
KELLER AG für Druckmesstechnik
CH-8404 Winterthur
+41 52 235 25 25
[email protected]
KELLER Ges. für Druckmesstechnik mbH
DE-79798 Jestetten
+49 7745 9214 0
[email protected]
Version | Edition
07/2017
www.keller-druck.com

Other Keller Measuring Instrument manuals

Keller CellaTemp PX 41 User manual

Keller

Keller CellaTemp PX 41 User manual

Keller CellaCast PA8 Series User manual

Keller

Keller CellaCast PA8 Series User manual

Keller LEO2-Ei User manual

Keller

Keller LEO2-Ei User manual

Keller CellaTemp PX 21 User manual

Keller

Keller CellaTemp PX 21 User manual

Keller LEO-Record-Ei User manual

Keller

Keller LEO-Record-Ei User manual

Keller ITS CellaCast PX 8 Series User manual

Keller

Keller ITS CellaCast PX 8 Series User manual

Keller ITS CellaPort PT 11 Series User manual

Keller

Keller ITS CellaPort PT 11 Series User manual

Keller CellaTemp PA 1 Series User manual

Keller

Keller CellaTemp PA 1 Series User manual

Keller CellaTemp PA 4 Series User manual

Keller

Keller CellaTemp PA 4 Series User manual

Keller MANO GAUGE User manual

Keller

Keller MANO GAUGE User manual

Keller ECO 1 User manual

Keller

Keller ECO 1 User manual

Keller LEO 5 User manual

Keller

Keller LEO 5 User manual

Keller ADT1 User manual

Keller

Keller ADT1 User manual

Keller CellaTemp PR11 User manual

Keller

Keller CellaTemp PR11 User manual

Keller LEO1-Ei User manual

Keller

Keller LEO1-Ei User manual

Keller dV-2 PS User manual

Keller

Keller dV-2 PS User manual

Keller CellaTemp PK Series User manual

Keller

Keller CellaTemp PK Series User manual

Keller LEO 5 User manual

Keller

Keller LEO 5 User manual

Keller LEO 2 Ei User manual

Keller

Keller LEO 2 Ei User manual

Keller dV-2 Cool User manual

Keller

Keller dV-2 Cool User manual

Keller Lex 1 User manual

Keller

Keller Lex 1 User manual

Keller dv-2 User manual

Keller

Keller dv-2 User manual

Keller ITS CellaCast PT 18 Series User manual

Keller

Keller ITS CellaCast PT 18 Series User manual

Keller LEO 1 User manual

Keller

Keller LEO 1 User manual

Popular Measuring Instrument manuals by other brands

Leupold RX-1300i TBR Complete operating instructions

Leupold

Leupold RX-1300i TBR Complete operating instructions

Crystal 235 Series operating manual

Crystal

Crystal 235 Series operating manual

ENMET MED AIR 2000 Operation and maintenance manual

ENMET

ENMET MED AIR 2000 Operation and maintenance manual

Fluke NORMA 6003 user manual

Fluke

Fluke NORMA 6003 user manual

Amprobe CO2-100 user manual

Amprobe

Amprobe CO2-100 user manual

Honeywell Morley-IAS MI-IM10 Installation and maintenance instructions

Honeywell

Honeywell Morley-IAS MI-IM10 Installation and maintenance instructions

MARTINDALE CM87 instruction manual

MARTINDALE

MARTINDALE CM87 instruction manual

ROOTECH ACCURA 3000 user guide

ROOTECH

ROOTECH ACCURA 3000 user guide

BAFANG DP C263.CAN user manual

BAFANG

BAFANG DP C263.CAN user manual

UEi DL479 instruction manual

UEi

UEi DL479 instruction manual

DAE DEM720 installation guide

DAE

DAE DEM720 installation guide

Tenma 72-7224 user manual

Tenma

Tenma 72-7224 user manual

Endress+Hauser Silopilot FMM50 operating instructions

Endress+Hauser

Endress+Hauser Silopilot FMM50 operating instructions

BioSensory SD A1cCare User instruction guide

BioSensory

BioSensory SD A1cCare User instruction guide

Zircon SuperScan H1 user manual

Zircon

Zircon SuperScan H1 user manual

Tektronix PQA600C Software upgrade instructions

Tektronix

Tektronix PQA600C Software upgrade instructions

PCB Piezotronics 117B232 Installation and operating manual

PCB Piezotronics

PCB Piezotronics 117B232 Installation and operating manual

Multicam 2000L Series Alignment procedure

Multicam

Multicam 2000L Series Alignment procedure

manuals.online logo
manuals.online logoBrands
  • About & Mission
  • Contact us
  • Privacy Policy
  • Terms and Conditions

Copyright 2025 Manuals.Online. All Rights Reserved.