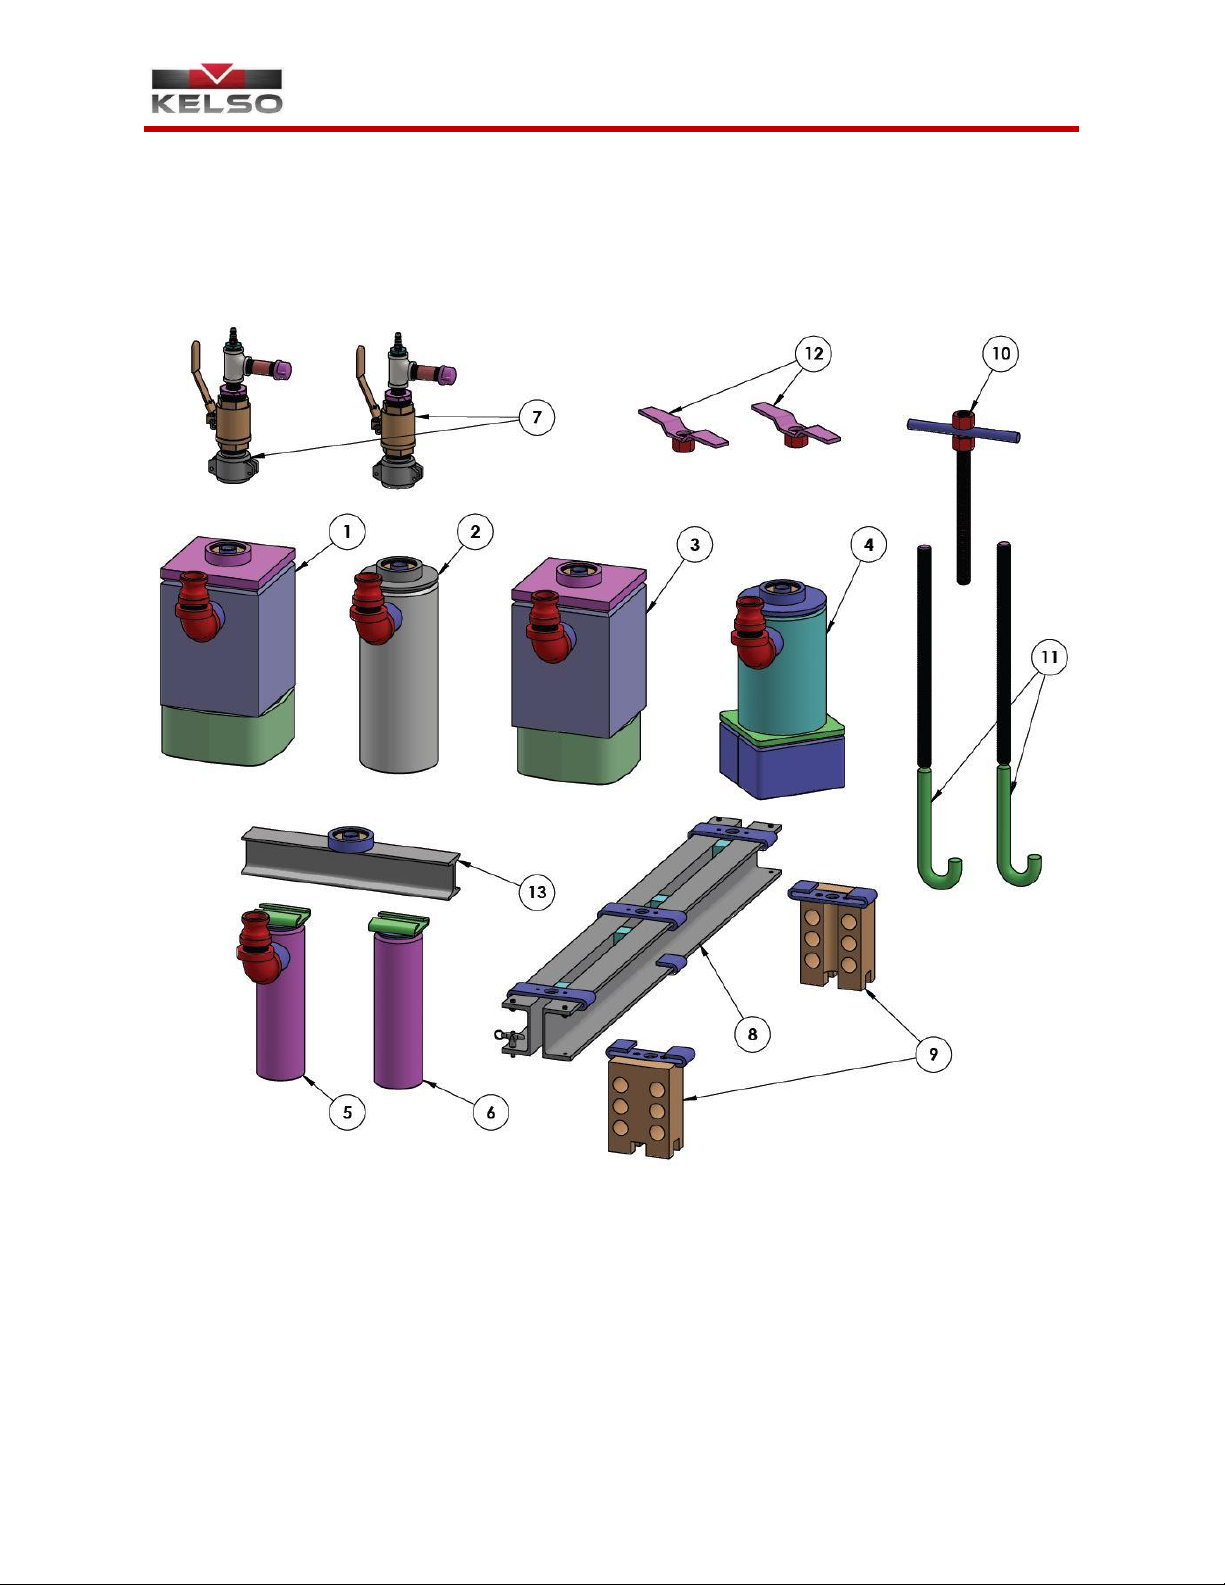
Kelso EMERGENCY RESPONSE KIT Instruction Manual

Installation, Operation,
Inspection and Maintenance
Manual
EMERGENCY RESPONSE KIT

1
EMERGENCY RESPONSE KIT
© 2019 Kelso Technologies (USA) Inc. All Kelso Products Patent Protected. Detailed designs are subject to change without notice.
Kelso Technologies Inc. 1526 Texas Ave, Bonham, TX. 75418, Phone: (903) 583-9200
Document No. IOIM011
Revision 0 –(Original Release 11/1/2019)
www.kelsotech.com
Printed in U.S.A. 2019
Table of Contents
1.0 Introduction...........................................................................2
1.1 Precautions............................................................................................2
1.2 Regulations............................................................................................2
1.3 Technical Specifications.........................................................................3
1.4 Hand Tools.............................................................................................5
2.0 Installation and Operation.....................................................6
2.1 Components...........................................................................................6
2.2 Procedure ..............................................................................................6
3.0 Inspection.............................................................................15
3.1 Components ........................................................................................15
3.2 Cleaning ..............................................................................................15
4.0 Maintenance.........................................................................16
4.1 Components ........................................................................................16
5.0 Warranty Information...........................................................16
6.0 Revision Log ........................................................................16
7.0 Appendix ..............................................................................17
7.1 ERK Packing Checklist .......................................................................17
7.2 ERK Packing Schematic .....................................................................18
7.3 Gasket Chemical Compatibility Chart ..................................................19

2
EMERGENCY RESPONSE KIT
© 2019 Kelso Technologies (USA) Inc. All Kelso Products Patent Protected. Detailed designs are subject to change without notice.
Kelso Technologies Inc. 1526 Texas Ave, Bonham, TX. 75418, Phone: (903) 583-9200
Document No. IOIM011
Revision 0 –(Original Release 11/1/2019)
www.kelsotech.com
Printed in U.S.A. 2019
1.0 Introduction
Kelso Emergency Response Kit (ERK) offers performance and reliability with today’s
Best Available and Safest Technology. The ERK was developed with hazardous
material specialists from a Class I railroad company. The Kit delivers a technical
superior product which includes features such as; components built using lightweight
material, containment cans pressure-tested, color-coded cans to properly select can
under emergency conditions, non-slip exterior and Teflon interior coatings applied to the
cans, high-strength aluminum bridges, a friction-reduction system that lowers torque
required to apply cans.
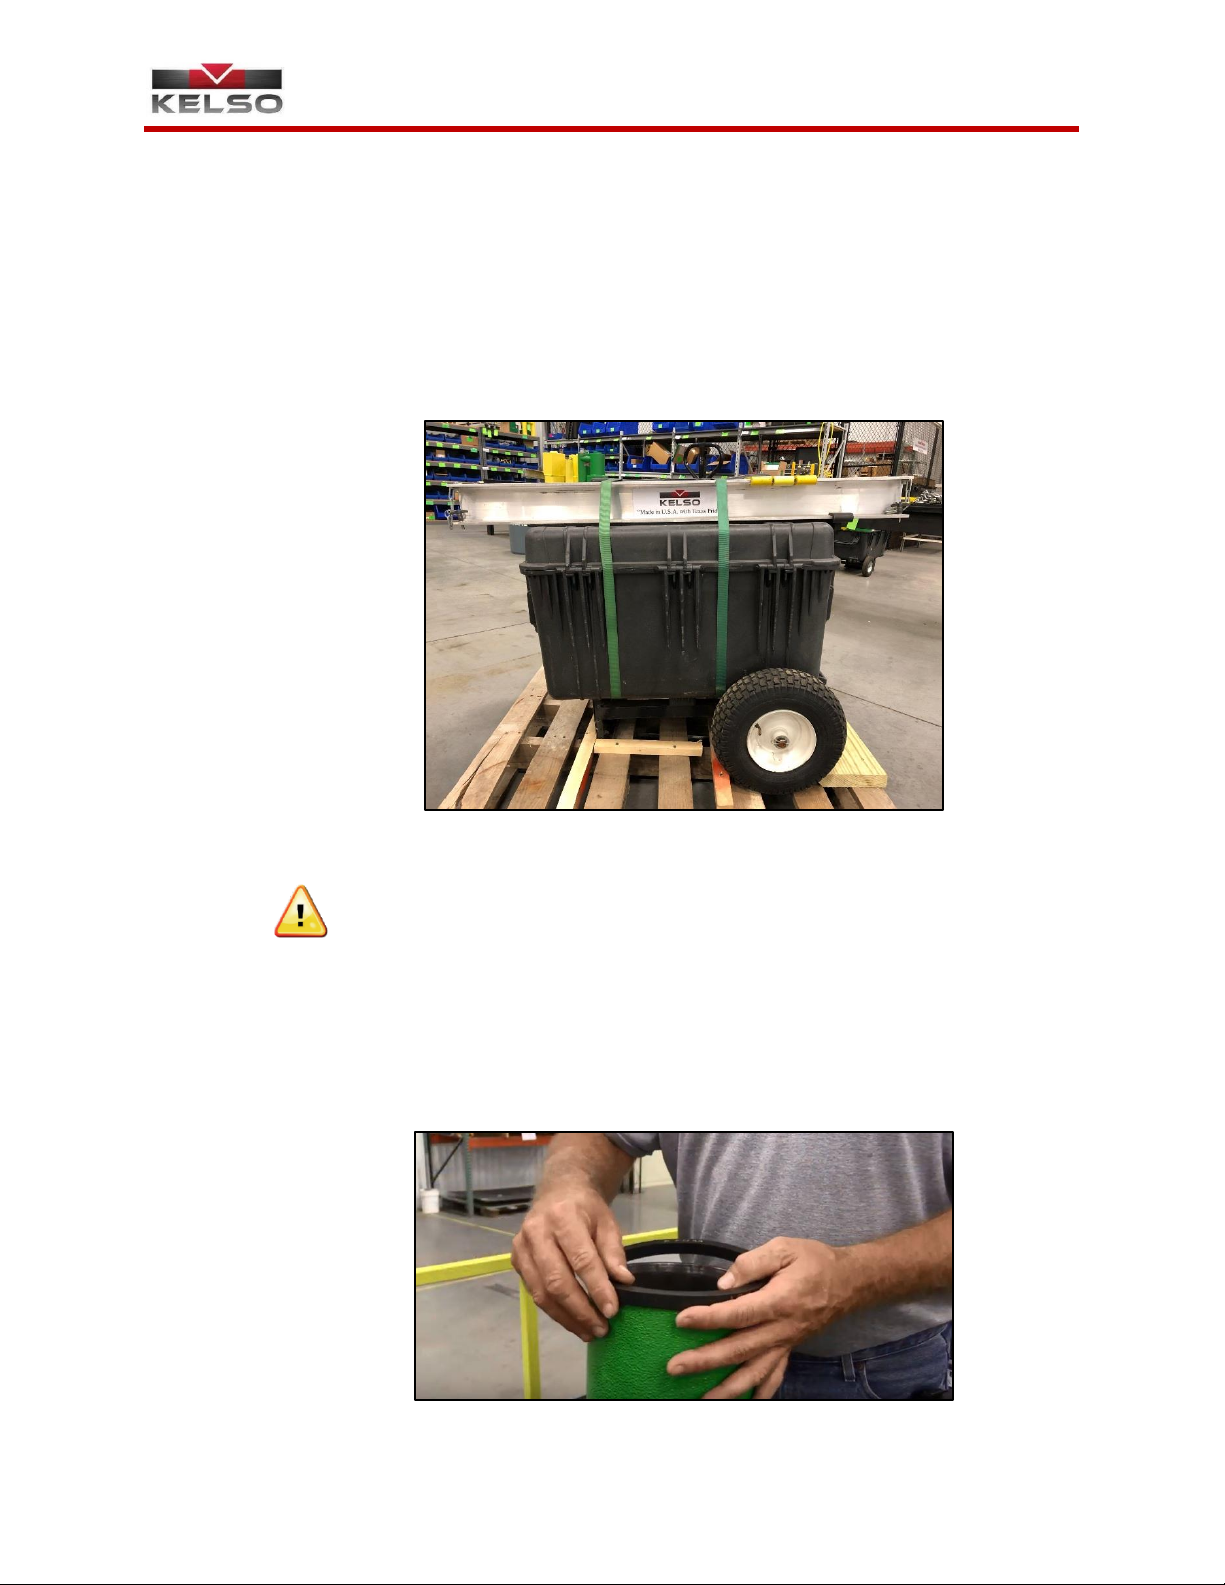
1.1 Precautions
The ERK has been designed to allow for a quick and easy way of
containing leaking valves on tank cars. Use extreme caution when
involved with hazardous materials that could cause serious injury or
damage.
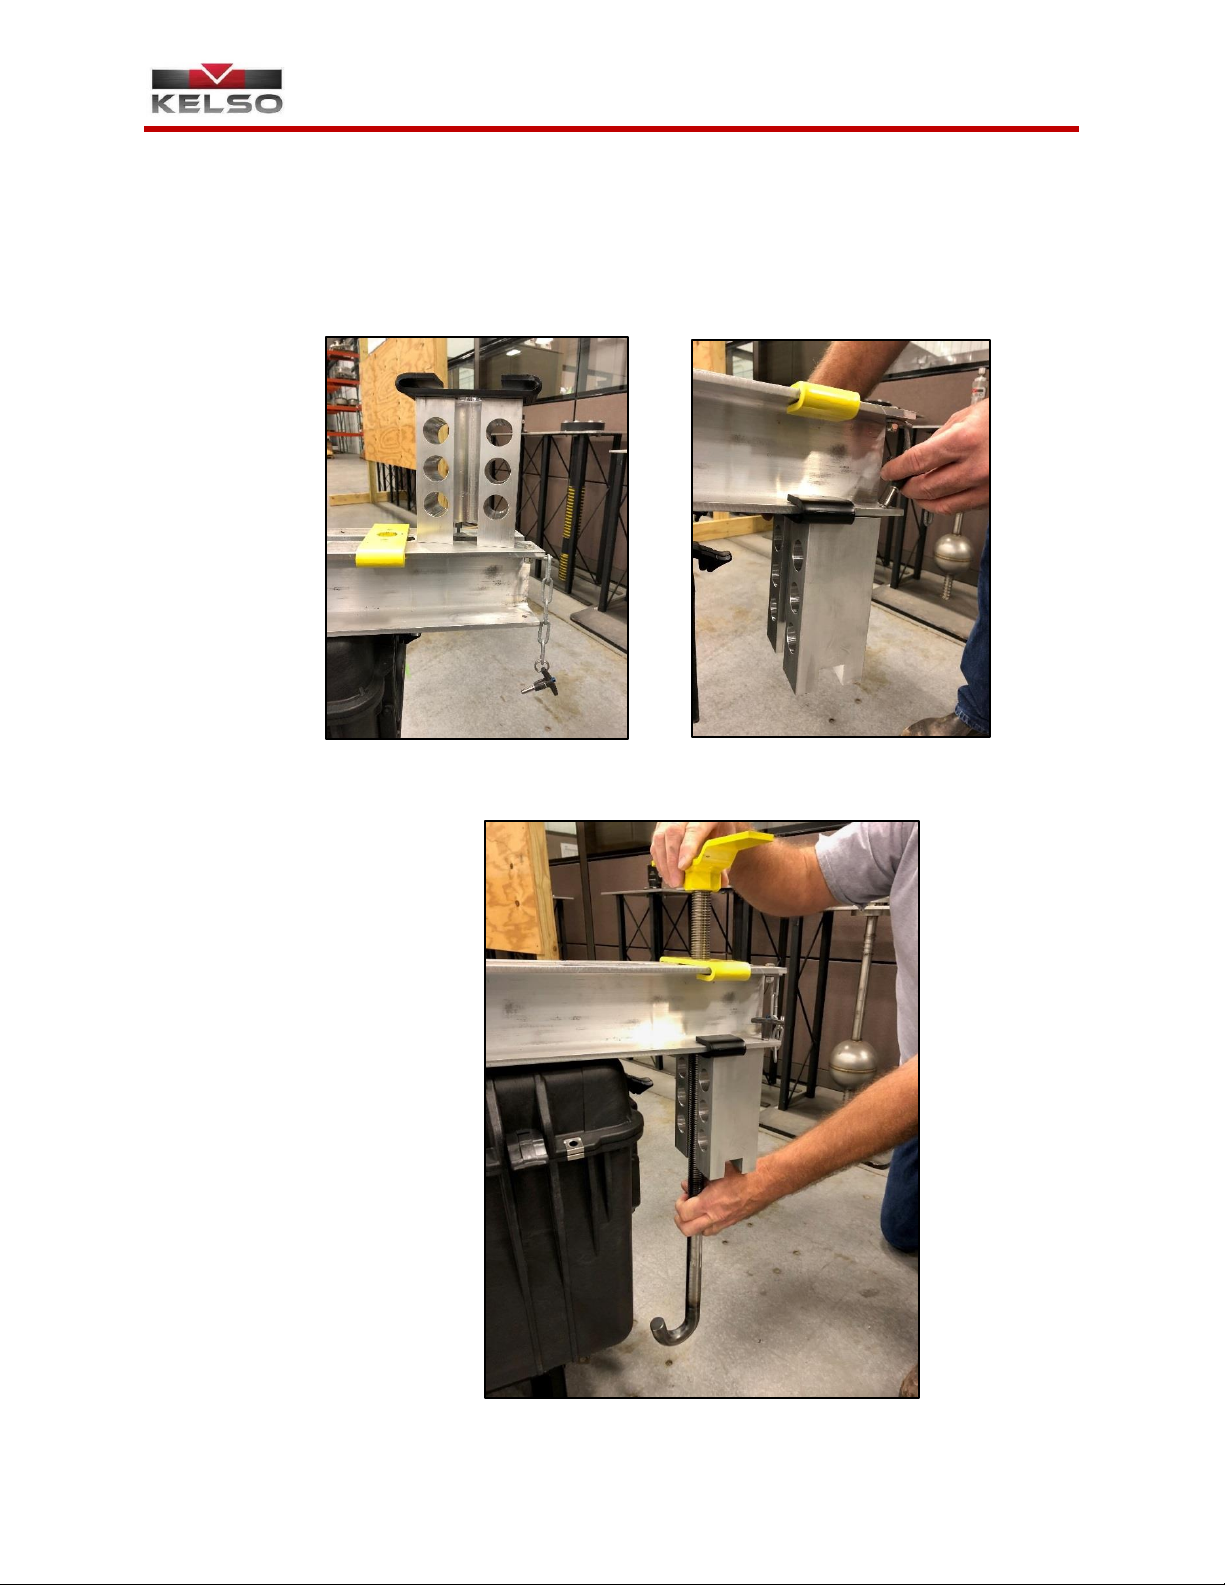
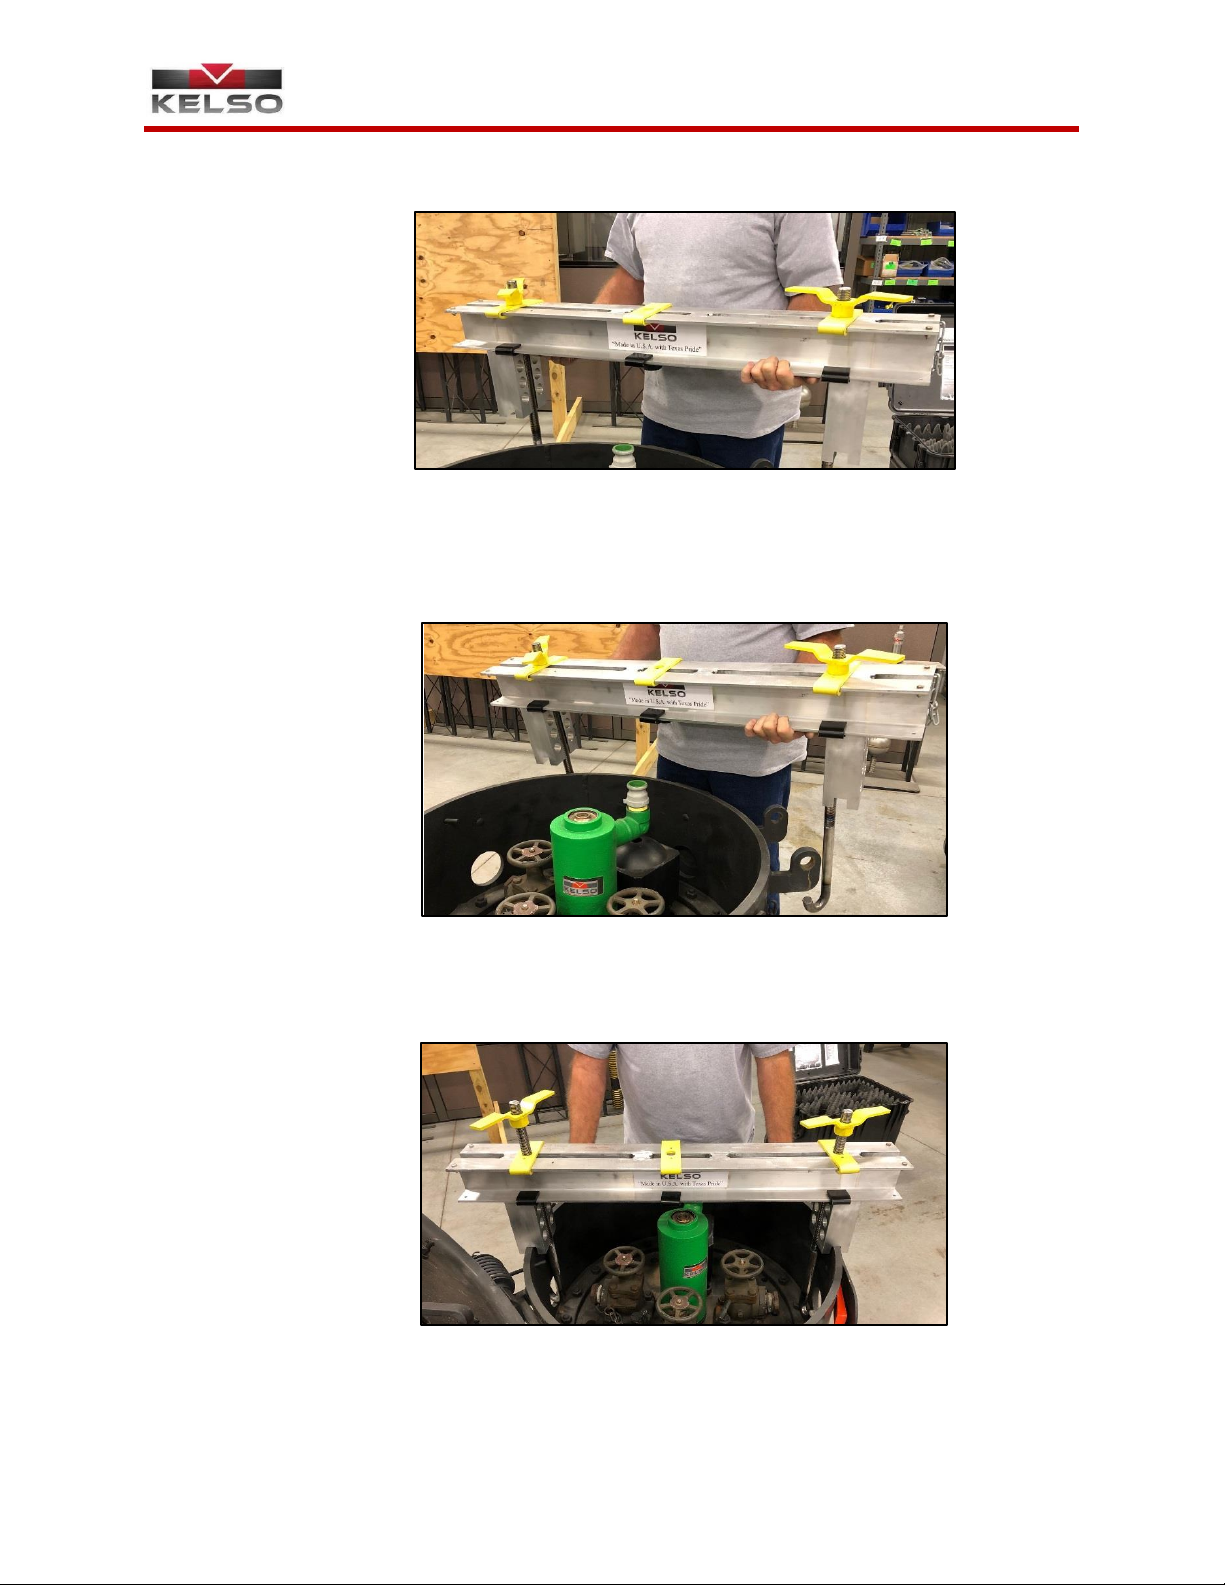
1.1.1 Only personnel which are properly qualified should install,
operate and maintain the ERK.
1.1.2 It is recommended to familiarize personnel with the contents of
the ERK and practice assembling onto tank car protective
housing.
1.1.3 Only certified parts from Kelso or one of its authorized
representatives should be used in the ERK.
1.1.4 The ERK may be installed on DOT tank cars that carry
hazardous chemicals and may travel under pressure.
Read these instructions prior to performing any work.
1.2 Regulations
Kelso products are used in contact with a variety of products, many of which are
hazardous materials. The acceptance and transportation of products are
regulated by DOT and AAR in the U.S.A. and in Canada by CTC and Transport
Canada. Regulations of other governmental bodies must be complied with. All
personnel should be familiar with and follow these regulations. Nothing in these
instructions is intended to conflict with or supersede these regulations.
Note: Specifications are subject to change without notice.

3
EMERGENCY RESPONSE KIT
© 2019 Kelso Technologies (USA) Inc. All Kelso Products Patent Protected. Detailed designs are subject to change without notice.
Kelso Technologies Inc. 1526 Texas Ave, Bonham, TX. 75418, Phone: (903) 583-9200
Document No. IOIM011
Revision 0 –(Original Release 11/1/2019)
www.kelsotech.com
Printed in U.S.A. 2019
1.3 Technical Specifications
1.3.1 Major Components
Figure 1.3.1

4
EMERGENCY RESPONSE KIT
© 2019 Kelso Technologies (USA) Inc. All Kelso Products Patent Protected. Detailed designs are subject to change without notice.
Kelso Technologies Inc. 1526 Texas Ave, Bonham, TX. 75418, Phone: (903) 583-9200
Document No. IOIM011
Revision 0 –(Original Release 11/1/2019)
www.kelsotech.com
Printed in U.S.A. 2019
ITEM NO.
QTY.
DESCRIPTION
1
1
#1 CAN - LSV CONTAINMENT CAN ASSEMBLY
2
1
#2 CAN - GD/AV CONTAINMENT CAN ASSEMBLY
3
1
#3 CAN - AV CONTAINMENT CAN ASSEMBLY
4
1
#4 CAN - GD CONTAINMENT CAN ASSEMBLY
5
1
#5A CAN - SV CONTAINMENT CAN A ASSEMBLY
6
1
#5B CAN - SV CONTAINMENT CAN B ASSEMBLY
7
2
ERK GAUGE CONNECTION
8
1
ERK BRIDGE RAIL ASSEMBLY
9
2
ERK BRIDGE SUPPORT ASSEMBLY
10
1
BRIDGE JACK SCREW ASSEMBLY
11
2
ERK J-HOOK
12
2
BRIDGE J-HOOK NUT ASSEMBLY
13
1
ERK MINI BRIDGE ASSEMBLY
Table 1.3.1
1.3.2 Pressure Gauges
QTY.
DESCRIPTION
1
0-100 PSI GAUGE WITH FEMALE QUICK CONNECT
1
0-300 PSI GAUGE WITH FEMALE QUCIK CONNECT
1
0-600 PSI GAUGE WITH FEMALE QUICK CONNECT
Table 1.3.2

5
EMERGENCY RESPONSE KIT
© 2019 Kelso Technologies (USA) Inc. All Kelso Products Patent Protected. Detailed designs are subject to change without notice.
Kelso Technologies Inc. 1526 Texas Ave, Bonham, TX. 75418, Phone: (903) 583-9200
Document No. IOIM011
Revision 0 –(Original Release 11/1/2019)
www.kelsotech.com
Printed in U.S.A. 2019
1.3.3 Gaskets
QTY.
DESCRIPTION
1
EPDM - CAN GASKET SET
1
VITON A - CAN GASKET SET
1
TRAINING - CAN GASKET SET
2
EPDM - CAM LOCK GASKET
2
VITON A - CAM LOCK GASKET
2
TRAINING - CAM LOCK GASKET
Table 1.3.3
1.4 Hand Tools
QTY.
DESCRIPTION
2
PLASTIC WEDGE - ORANGE
6
COMPOSITE WEDGE/SHIM
1
15" ADJUSTABLE WRENCH
1
14" BOLT CUTTER
1
CABLE CUTTER
1
GASKET SCRAPER
1
WIRE BRUSH
2
TEFLON PIPE TAPE - YELLOW
1
14" PIPE WRENCH
2
RATCHET STRAP
1
TORQUE MULTIPLIER
1
TORQUE MULTIPLIER SOCKET 1" X 1-5/8"
1
GORILLA SUPER GLUE
1
SAFETY ROPE 20 FT 2 SNAP LINKS
1
TOOL BAG
1
CRADLE CHAIN
Table 1.4

6
EMERGENCY RESPONSE KIT
© 2019 Kelso Technologies (USA) Inc. All Kelso Products Patent Protected. Detailed designs are subject to change without notice.
Kelso Technologies Inc. 1526 Texas Ave, Bonham, TX. 75418, Phone: (903) 583-9200
Document No. IOIM011
Revision 0 –(Original Release 11/1/2019)
www.kelsotech.com
Printed in U.S.A. 2019
2.0 Installation and Operation
2.1 Components
The Emergency Response Kit is comprised of a protective container
holding all the necessary components of the kit. A component called the
bridge assembly will be strapped to the top of the container with two
ratchet straps.
Figure 2.1
Note: Use care not to damage the Teflon protective lined
containment cans when removing or replacing parts.
2.2 Procedure
1. Using the appropriate seal that is supplied by the kit, install the seal
onto the bottom of the containment can, that is being used for your
specific application.
Figure 2.2.1

7
EMERGENCY RESPONSE KIT
© 2019 Kelso Technologies (USA) Inc. All Kelso Products Patent Protected. Detailed designs are subject to change without notice.
Kelso Technologies Inc. 1526 Texas Ave, Bonham, TX. 75418, Phone: (903) 583-9200
Document No. IOIM011
Revision 0 –(Original Release 11/1/2019)
www.kelsotech.com
Printed in U.S.A. 2019
2. If necessary, used the supplied scraper and wire brush around the
area that will be making contact with the seal.
Figure 2.2.2
3. Place the containment can over the valve to be contained.
Figure 2.2.3
4. Use a wedge supplied with the kit to assist in holding open the
inspection port.
Figure 2.2.4

8
EMERGENCY RESPONSE KIT
© 2019 Kelso Technologies (USA) Inc. All Kelso Products Patent Protected. Detailed designs are subject to change without notice.
Kelso Technologies Inc. 1526 Texas Ave, Bonham, TX. 75418, Phone: (903) 583-9200
Document No. IOIM011
Revision 0 –(Original Release 11/1/2019)
www.kelsotech.com
Printed in U.S.A. 2019
5. Slide the bridge support onto the bottom rail of the bridge, then engage t-
handle push pin. From the bottom, slide the J-Hook thru the support and
bridge. Thread the J-Hook nut onto the threaded portion of the J-Hook.
Repeat assembly for the other end of the bridge.
Figure 2.2.5.1 Figure 2.2.5.2
Figure 2.2.5.3

9
EMERGENCY RESPONSE KIT
© 2019 Kelso Technologies (USA) Inc. All Kelso Products Patent Protected. Detailed designs are subject to change without notice.
Kelso Technologies Inc. 1526 Texas Ave, Bonham, TX. 75418, Phone: (903) 583-9200
Document No. IOIM011
Revision 0 –(Original Release 11/1/2019)
www.kelsotech.com
Printed in U.S.A. 2019
6. Arrange the support blocks and J-Hooks on the ends of the bridge.
Figure 2.2.6
7. Adjust the J-Hooks by sliding along the bridge as needed before going
into housing.
Figure 2.2.7
8. Lower the bridge assembly down with the J-Hooks into the housing.
Figure 2.2.8

10
EMERGENCY RESPONSE KIT
© 2019 Kelso Technologies (USA) Inc. All Kelso Products Patent Protected. Detailed designs are subject to change without notice.
Kelso Technologies Inc. 1526 Texas Ave, Bonham, TX. 75418, Phone: (903) 583-9200
Document No. IOIM011
Revision 0 –(Original Release 11/1/2019)
www.kelsotech.com
Printed in U.S.A. 2019
9. Slide the J-Hooks outward. Tighten the wing nuts down removing play.
Make sure when the J-Hooks are securely fastened through the
inspection ports.
Figure 2.2.9
10.The containment cans in the kit are equipped with reduced friction
bearings. Make the sure that the center of the handle screw is centered
inside the center of the bearing before tightening with jack screw.
Figure 2.2.10.1
Figure 2.2.10.2

11
EMERGENCY RESPONSE KIT
© 2019 Kelso Technologies (USA) Inc. All Kelso Products Patent Protected. Detailed designs are subject to change without notice.
Kelso Technologies Inc. 1526 Texas Ave, Bonham, TX. 75418, Phone: (903) 583-9200
Document No. IOIM011
Revision 0 –(Original Release 11/1/2019)
www.kelsotech.com
Printed in U.S.A. 2019
Figure 2.2.10.3
Included in the ERK container is a torque multiplier tool set and a socket
to be used during the installation of the jack screw (T-Bolt) to assist in
applying pressure/force to seat the can with its appropriate gasket
against the sealing surface. The torque multiplier can used for cans #1
thru #4, as well as the mini bridge assembly noted in Section 2.2.12.
Figure 2.2.10.4 Figure 2.2.10.5

12
EMERGENCY RESPONSE KIT
© 2019 Kelso Technologies (USA) Inc. All Kelso Products Patent Protected. Detailed designs are subject to change without notice.
Kelso Technologies Inc. 1526 Texas Ave, Bonham, TX. 75418, Phone: (903) 583-9200
Document No. IOIM011
Revision 0 –(Original Release 11/1/2019)
www.kelsotech.com
Printed in U.S.A. 2019
11.Place the gauge connection onto the containment can cam lock and
engage the levers. The Velcro fastener is used to secure the camlock
levers to prevent accidental disconnect.
Figure 2.2.11

13
EMERGENCY RESPONSE KIT
© 2019 Kelso Technologies (USA) Inc. All Kelso Products Patent Protected. Detailed designs are subject to change without notice.
Kelso Technologies Inc. 1526 Texas Ave, Bonham, TX. 75418, Phone: (903) 583-9200
Document No. IOIM011
Revision 0 –(Original Release 11/1/2019)
www.kelsotech.com
Printed in U.S.A. 2019
12.When using the small round containment can, the mini bridge is
required. Slide the mini bridge through the brackets attached to the top
of the cans. A reduced friction bearing is mounted at the center of the
mini bridge. The handle screw is to be centered inside the center of the
bearing. Similar process that is used for the larger containment cans
#1 thru #4.
Figure 2.2.12.1
Figure 2.2.12.2

14
EMERGENCY RESPONSE KIT
© 2019 Kelso Technologies (USA) Inc. All Kelso Products Patent Protected. Detailed designs are subject to change without notice.
Kelso Technologies Inc. 1526 Texas Ave, Bonham, TX. 75418, Phone: (903) 583-9200
Document No. IOIM011
Revision 0 –(Original Release 11/1/2019)
www.kelsotech.com
Printed in U.S.A. 2019
13.Use the bolt cutter to cut away chain that may interfere with placement
of containment cans.
Figure 2.2.13
Note: It is not uncommon to remove the angle valve handle and/or
the plug in order for the can to fit over the valve. The kit is equipped
an adjustable wrench, as well as a pipe wrench, for this work.
14.A cradle chain is provided in the kit as an alternate means to secure the
bridge assembly to the housing. Adjust the chain around the bottom of
the housing using the clasp links, and adjust chains using clasp links
when engaged with the J-Hooks.
Figure 2.2.14.1
Figure 2.2.14.2

15
EMERGENCY RESPONSE KIT
© 2019 Kelso Technologies (USA) Inc. All Kelso Products Patent Protected. Detailed designs are subject to change without notice.
Kelso Technologies Inc. 1526 Texas Ave, Bonham, TX. 75418, Phone: (903) 583-9200
Document No. IOIM011
Revision 0 –(Original Release 11/1/2019)
www.kelsotech.com
Printed in U.S.A. 2019
3.0 Inspection
A Kit inspection should be made well in advance of the ERK being used, whether
for an actual emergency or when training personnel.
3.1 Components
1. Containment Cans –Inspect inside Teflon surface of cans for
scratches, dents, excessive wear, damage, etc. Replace if such
conditions exist.
2. Gaskets –With the exception of gaskets used for training, its
recommended that gaskets be replaced after they’ve been used.
3. Hand Tools –Inspect to assure that tools are in good working order
and functioning properly.
It is recommended that any replacement parts be purchased through
Kelso Technologies for form, fit and function.
.
3.2 Cleaning
Components of the Kelso kit may be cleaned using any of the following
methods:
1. Wire brushes and/or clean towel/cloth.
2. Low pressure water, glass bead, sand or soda blasting provided the
blast media is not angular in form or leaves iron content on metal parts.
3. A chemical/surfactant application, in conjunction with manufactures
prescribed instructions, to achieve a desired result. It is suggested the
chemical/surfactant be of neutral pH to ensure the integrity of the metal
composition.
4. Regardless of cleaning method, it is suggested that the parts be
double rinsed and dried (with sanitary towel) immediately after any
chemical/surfactant application.
Disposal should be managed in accordance with all applicable state
and federal regulations.

16
EMERGENCY RESPONSE KIT
© 2019 Kelso Technologies (USA) Inc. All Kelso Products Patent Protected. Detailed designs are subject to change without notice.
Kelso Technologies Inc. 1526 Texas Ave, Bonham, TX. 75418, Phone: (903) 583-9200
Document No. IOIM011
Revision 0 –(Original Release 11/1/2019)
www.kelsotech.com
Printed in U.S.A. 2019
4.0 Maintenance
Under normal operating conditions, the ERK does not require maintenance.
4.1 Components
1. Gaskets –The recommended shelf life of the gaskets is 5 years.
It is recommended that any replacement parts be purchased through
Kelso Technologies for form, fit and function.
5.0 Warranty Information
See the Warranty Terms and Conditions.
6.0 Revision Log
Revision Level
Revision Date
Summary of Change(s)
0
11/1/2019
Original Document

17
EMERGENCY RESPONSE KIT
© 2019 Kelso Technologies (USA) Inc. All Kelso Products Patent Protected. Detailed designs are subject to change without notice.
Kelso Technologies Inc. 1526 Texas Ave, Bonham, TX. 75418, Phone: (903) 583-9200
Document No. IOIM011
Revision 0 –(Original Release 11/1/2019)
www.kelsotech.com
Printed in U.S.A. 2019
7.0 Appendix
A Kelso ERK demonstration video is available on our website:
www.kelsotech.com/product/emergency-response-kit
7.1 ERK Packing Checklist
Figure 7.1

18
EMERGENCY RESPONSE KIT
© 2019 Kelso Technologies (USA) Inc. All Kelso Products Patent Protected. Detailed designs are subject to change without notice.
Kelso Technologies Inc. 1526 Texas Ave, Bonham, TX. 75418, Phone: (903) 583-9200
Document No. IOIM011
Revision 0 –(Original Release 11/1/2019)
www.kelsotech.com
Printed in U.S.A. 2019
7.2 ERK Packing Schematic
Figure 7.2

19
EMERGENCY RESPONSE KIT
© 2019 Kelso Technologies (USA) Inc. All Kelso Products Patent Protected. Detailed designs are subject to change without notice.
Kelso Technologies Inc. 1526 Texas Ave, Bonham, TX. 75418, Phone: (903) 583-9200
Document No. IOIM011
Revision 0 –(Original Release 11/1/2019)
www.kelsotech.com
Printed in U.S.A. 2019
7.3 Gasket Chemical Compatibility Chart
Figure 7.3
This manual suits for next models
1
Table of contents