Kemimoto F1107-00301 User manual

KEMIMOTO HEATED PANTS
1 Year Limited Warranty
User Guide
F1107-00301

Read all safety warnings and instructions.
Failure to follow warnings and instructions
may result in electric shock, fire and/or
serious injury. Save all warnings and
instructions for future reference.
What’s Included
IMPORTANT: Disconnect and remove the battery
from the zipper pocket, put the connector back, and
zip up before washing the pants.
Cleaning Instruction
ENGLISH - 01
LINE DRY
MACHINE WASH
GENTLE CYCLE IN COLD WATER
HAND WASH WITH COLD WATER
DO NOT IRON
DO NOT BLEACH
DO NOT DRY CLEAN
DO NOT WRING OR TWIST
RECOMMEND TO USE MESH LAUNDRY BAG
RECHARGEABLE BATTERY x1
USB POWER CABLE x1
HEATED PANTS X1

Operation Instruction
ENGLISH - 02
The heating level can be adjusted by pressing the power button. Each press will cycle through the apparel's temperature
settings. At a room temperature of 77°F/25°C, the heat will rise to 122-131°F/50-55°C on high, 113-122°F/45-50°C on
medium, and 104-113°F/40-45°C on low.
Heat Setting Indicator
PRE-HEAT
RED LED BLINKING
50~55122~131
℃℉
HIGH
RED LED
50~55122~131
℃℉ ℃℉
45~50113~122
℃℉
40~45104~113
MEDIUM
BLUE LED
LOW
GREEN LED
1. Connect the battery to the power cord in the pocket.
2. To turn on, press and hold the power button for 3 seconds; pressing the
power button will toggle the heating level between high (red LED light),
medium (blue LED light) and low (green LED light).
3. To shut down, long press the power button for 3 seconds until the LED
light turns off.
4. Turn off the light: Press the light control button to turn off the switch
button indicator light, but it is still working.
5. Protection function: When the temperature reaches 55°C, the pants stop
heating, and continue heating after the temperature drops to 55°C.
6. Automatic power-off function: When you take off your pants but forget to
turn off the button, the system detects that the pants have been in a static
state for a long time, and it will automatically turn off the system.

ENGLISH - 03
Battery Instruction BATTERY CHARGING:
NOTE :
1. Press the battery button to check the remaining
power level or charging level.
2. Remove battery from the pants before charging
and connect battery with charger.
3. It takes about 5-6 hours to fully charge a
completely empty battery.
• Do not freeze or immerse the battery in water or any other liquid.
• Do not drop, disassemble, open, crush, bend, deform, puncture, shred, microwave,incinerate or paint the battery.
• Do not store your battery with metal objects, such as coins, keys or necklaces. If the battery terminals come in contact
with metal objects, this may cause a fire.
• Recommended operating temperature of 14°F to 86°F(-10°C to 45°C).
• Fully charge before first use.
• Fully charge every 6 months if not in use to preserve the battery life.
• Keep the battery away from moisture. Store the battery pack where the relative humidity is 60 ± 15% RH.
15000mAh (3.7V)/55.5Wh
DC: 11.1V/2.5A
USB: 5V/2.1A
TYPE-C 5V/3A
9.52oz(270g)
Cell Capacity
Output
Input
Weight

APP operation pages and instructions
Open the Heatech APP and enter the main page as shown
in the figure below. (Upon first installation, location
permission will be prompted and must be allowed.)
1
ENGLISH - 04

Click on the icon in the upper left corner to enter the device page.
The App will automatically search for nearby heated clothing
devices, as shown in the figure below.
(1) The types of devices include Cloth, Glove, Vest, and other series of devices. The App
displays the device name as the type followed by the last four digits of the Mac address.
(2) In the “Available devices” module, simply click on the device name to automatically
connect to the device and display it in the “List of paired devices” module.
(3) In the “List of paired devices” module, you can view the current status and battery level of
the device, as well as modify the name, refresh, and delete operations.
- If the device is powered off or not connected, the device icon will be displayed in white. If the
device is powered on and connected, the icon will be displayed in red.
- Edit: Click Edit to edit the selected device name, up to a maximum of 14 characters. If the
name is blank when saved, it will be modified back to the default name.
- Refresh: Generally used when the device is powered on again, clicking Refresh can quickly
connect to it.
- Delete: Click Delete to delete the selected device. After deletion, the “List of paired devices”
module will no longer display the device, but it can be reconnected in the “Available devices”
module.
(4) Clicking the refresh icon at the bottom of the page can search for nearby heated clothing
devices again.
2
ENGLISH - 05

On the main page, you can perform operations such as turning the
device on or off, setting the gear position, adjusting the backlight,
and setting the countdown timer.
(1) All connected device types will be displayed on the main page. “SelectAll” can be used
to select all or deselect all.
(2) Different temperature values can be set on the temperature disk, with a default range of
35℃-55℃(95℉-131℉).
(3) When switching to different gears, the device icon will display different colors accordingly,
and the colors will be synchronized with the device's LED backlight.
(4) Click the switch to turn on/off the selected device. The device icon will turn white when
turned off and red when turned on.
(5) Click the backlight switch to turn the backlight on/off for the selected device. When the
backlight is turned off, switching gears or pressing the device button will cause it to briefly
light up for 2-3 seconds before automatically turning off.
(6) Set the countdown time and click OK to start the countdown operation. The device will
automatically shut down after the countdown ends. Currently, the minimum countdown time
is 15 minutes and the maximum is 6 hours.
3
ENGLISH - 06

How to obtain the APP
In the settings page, you can set the temperature unit and view
the "About Us" page.
(1) Static detection sensor: Users can customize the three-axis function of the device to be
turned off. After turning off, even if the device is inactive for ten minutes, it will not
automatically shut down.
(2) Temperature Unit: Set the temperature unit according to actual needs, which can be set
to ℃or ℉. After adjustment, the temperature on the main page will respond accordingly.
(3) About Us: View the "About Us" page, including the APP logo, website, and version
number.
4
ENGLISH - 07

Common issues with the APP and corresponding solutions
Serial
Number
1
2
3
4
5
6
Problem Description Solution Method
Bluetooth
connection failure
1) The device is disconnected from power.
2) The device is connected to another device.
3) Bluetooth permission issues.
1) Check the power supply and restart.
2) Exit the APP on other devices or disconnect from
the device.
3) Find the APP permission settings and allow
access to Bluetooth permissions.
Automatic
shutdown of
device
Short
backlight
lighting time
1) Power off the device.
2) Turn off the device.
3) Three-axis function of the device.
1) The backlight function has
been turned off.
1) Check the power supply and restart.
2) Press and hold the device button to power on or
use the App to turn on the device.
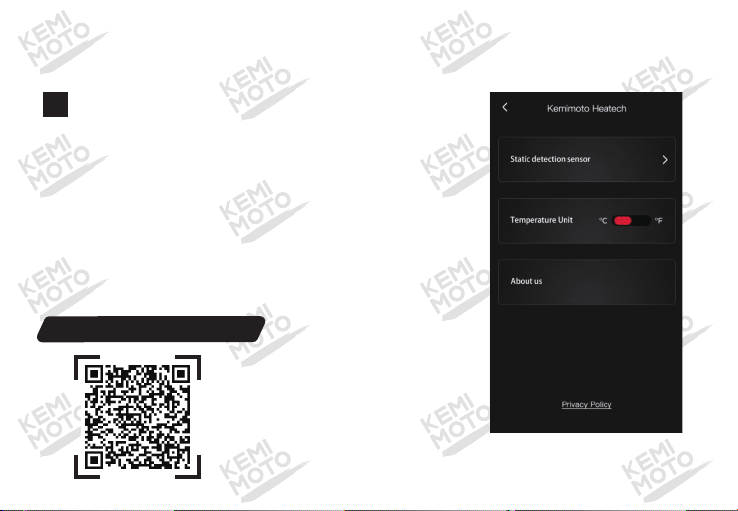
3) The device will automatically shut down after ten
minutes of inactivity. This feature can be disabled
in the settings if not needed.
1) In the App, set the backlight switch. If the backlight
is off, it will automatically turn on for 3 seconds when
using the button or setting the temperature in the App.
Device powers on
normally, but not
displayed in APP
Temperature
setting is
invalid
1) The device is not paired.
2) The device is paired but not
connected.
1) The device is not selected.
1) Add the device from the online devices to the
paired devices.
2) Click on the device in the paired devices.
1) Select the device to be set in the App, and a
white frame will appear around the selected device.
Device status
display
viewing
1) The interface displays the
status of the first selected
device by default.
1) Deselect all and only select the device in question.
2) Deselect the device first and then select it again.
Problem Cause
ENGLISH - 08

Safety Instruction
Do not try to use this product outside of its designated use, as doing so might be dangerous.
• Do not use this heated pants with an infant, child, a helpless person, or anyone insensitive to
heat, such as a person with poor blood circulation.
• If your health condition makes you sensitive to overheating, please consult your physician to
determine whether it is appropriate to use this product.
• Do not allow the cords to be pinched or forced pull out.
• Not recommended to wear over bare skin.
• Never use it if inner liner is wet.
• Turn off the power immediately if discomfort occurs.
ENGLISH - 09
Please contact us if you have any questions
[email protected] http://www.kemimoto.com

FCC Statement
This device complies with part 15 of the FCC Rules. Operation is subject to the following two conditions:
(1) This device may not cause harmful interference, and (2) this device must accept any interference
received, including interference that may cause undesired operation.
Any Changes or modifications not expressly approved by the party responsible for compliance could void
the user's authority to operate the equipment.
Note: This equipment has been tested and found to comply with the limits for a Class B digital device,
pursuant to part 15 of the FCC Rules. These limits are designed to provide reasonable protection against
harmful interference in a residential installation. This equipment generates uses and can radiate radio
frequency energy and, if not installed and used in accordance with the instructions, may cause harmful
interference to radio communications. However, there is no guarantee that interference will not occur in a
particular installation. If this equipment does cause harmful interference to radio or television reception,
which can be determined by turning the equipment off and on, the user is encouraged to try to correct the
interference by one or more of the following measures: -Reorient or relocate the receiving antenna.
-Increase the separation between the equipment and receiver. -Connect the equipment into an outlet on a
circuit different from that to which the receiver is connected. -Consult the dealer or an experienced
radio/TV technician for help.
The device has been evaluated to meet general RF exposure requirement. The device can be used in
portable exposure condition without restriction.
Table of contents
Other Kemimoto Personal Care Product manuals