manuals.online logo
Brands
  1. Home
  2. •
  3. Brands
  4. •
  5. Kensington
  6. •
  7. Computer Accessories
  8. •
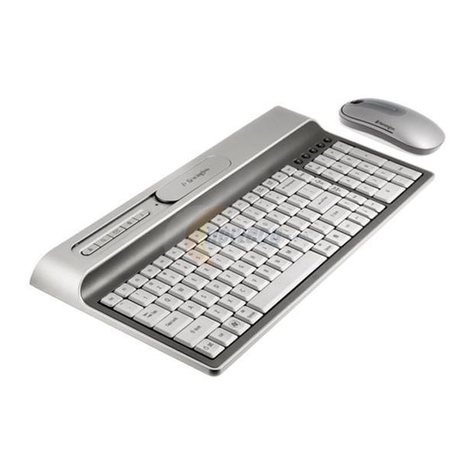
  9. Kensington 64373 User manual

Kensington 64373 User manual

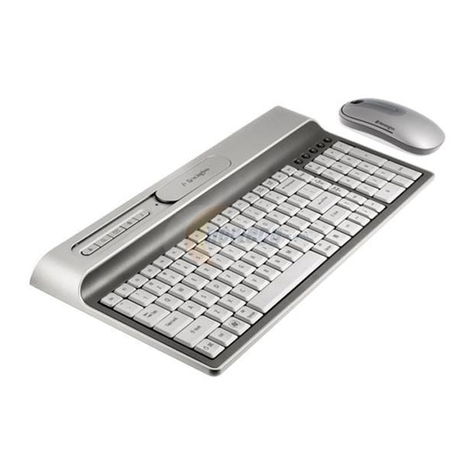
Wireless Optical Desktop
User Manual
Congratulations!
Your new Kensington Wireless Optical Desktop offers increased comfort and
the freedom to work the way you want to work. The wireless keyboard and
mouse provide a neater, more fle ible workspace. And, the row of hot keys
will allow you to activate multimedia controls with the touch of a button.
Please read this short manual to learn valuable information about the proper
use and installation of your new wireless keyboard and mouse. Register your
new products on line at www.register.kensington.com.
Wireless Optical Desktop • 1
READ FIRST!
64373_WlessOptDesktop 8/12/04 1:26 PM Page 1
Plugging in Wireless Receiver
To connect to a Do this:
P 2 port Turn off your computer.
If using the PS2 connection you must use the USB/PS2 adaptor on
the USB plug of the receiver.
Insert the green PS2 plug into the mouse port on the back of the
computer and the purple PS2 plug into the keyboard port.
Reboot your computer.
To connect to a Do this:
U B port Turn off your computer.
If you wish to use the USB port you do not need to plug in the PS2 plug
at all. The USB port works for both wireless mouse and keyboard.
Plug in the receiver into the USB port for the first time you will see
Windows perform its USB device enumerations.
Reboot your computer.
CAUTION: Never force a connection. Turn the connector until its pins match up
with the port.
Important: Computer User Health InformationImportant Battery
Information—Read This ection!
1. Always dispose of batteries properly.
2. Always replace the batteries in sets, using the same age and brand
of batteries.
3. Always Remove the batteries if you will not be using the devices for
more than two weeks.
Installing the Batteries in the Mouse and Keyboard
Please be sure that batteries are placed properly in the mouse. The
proper orientation for the batteries is indicated in the battery compart-
ment of the mouse.
Turn the keyboard over and open the battery compartment to insert the
batteries. The proper orientation for the batteries is indicated in the bottom
of the battery compartment.
2 • Wireless Optical Desktop Wireless Optical Desktop • 3
64373_WlessOptDesktop 8/12/04 1:26 PM Page 2
Wireless Receiver Placement and Positioning
Moving the position of the wireless receiver is much like adjusting the antenna
on an FM radio. Small movements can vastly improve reception. If you find that
you are not getting the normal range of operation, try adjusting the position
of the receiver.
Installing the Kensington oftware Driver (optional)
The Kensington Wireless Optical Desktop will be fully functional without
installing any software under Windows® XP, however, if you desire to further
configure your Wireless Optical Desktop, use the Kensington software to:
• provide and on-screen display of Caps Lock, Num Lock and Scroll Lock
• customize your mouse and keyboard buttons and functions
• provide complete support of the Media (Internet,) keys to prior Windows®
Operating Systems (Win 98, Me, and 2000)
Please visit our Web site: www.software.kensington.com to
download the latest version of Kensington Software. Please follow
the on-screen instruction to install the software, and refer to the
downloaded manual for instructions on using the software.
NOTE: The keyboard of this Wireless Optical Desktop does not requier futher
configuration. All keyboard features should work in default configuration.
The Wireless Keyboard and Mouse ID Codes
Connecting the unique ID codes for your keyboard and mouse to the receiver
helps prevent interference from other wireless devices.
1. Press the black button on the receiver. The receiver LED should flash.
2. Turn over the keyboard. Press the button on the bottom of the keyboard,
located underneath the left foot on the bottom of the keyboard. Once
the connection is complete, the receiver LED should be solid.
3. Repeat for the mouse. Press the button on the black button on the receiver.
The receiver LED should flash again.
4. Press the connect button on the bottom of the mouse. The receiver LED
should be solid.
5. Your Wireless Optical Desktop is now connected and ready for use.
6. If you failed to activate the wireless connection, shut down your computer
and repeat step 1 through 5.
HEALTH WARNING: Use of a keyboard or pointing device may be linked to
serious injuries or disorders. Please visit www.healthycomputing.com or
www.kensington.com for important safety tips when using this device.
4 • Wireless Optical Desktop Wireless Optical Desktop • 5
64373_WlessOptDesktop 8/12/04 1:26 PM Page 4
The Mouse croll Wheel
The scroll wheel on the mouse is both a scroll wheel and a programmable
button. Click the wheel to use it as a button.
crolling and Zooming with the croll Wheel
Task What is it? How to do it
Wheel Use wheel Scroll for precise up and To scroll up, move the wheel forward;
Scroll down movement. to scroll down, move the wheel backward.
Zoom Use Zoom to magnify or demagnify Place the cursor in a document window
the view of a document Press and hold the Ctrl key on the
keyboard. To zoom in, move the wheel
forward; to zoom out, move the wheel
backward.
Auto- Use AutoScroll to scroll through Place the cursor in a document window.
Scroll large documents. without having Press the mouse button assigned to
to move the mouse continuously. AutoScroll. Move the mouse once in the
direction you want to scroll. The farther
you move the pointer from the starting
point, the faster the scrolling.
To stop AutoScroll, press any mouse
button.
Auto Scroll works in Windows
®
95/98/Me/2000/NT/XP and Microsoft
Office
®
97/2000 compatible applications.
Zoom is supported by Microsoft Office
97/2000 compatible applications.
Using the Hotkeys
Each of the chrome hotkeys on your new keyboard has a default function and
a special function dedicated to Microsoft Office programs.
Hot Keys Icon Default Functions
Back Back to previous page
Forward Forward to ne t page
top Stop downloading the page
Refresh Refresh the page
earch Open your default search browser
Media Open your media page
Mute Stop/Start the sound volume
Volume Down Volume down
Volume Up Volume up
Play / Pause Play or pause the track
top Stop play
Previous Play the previous track
Next Play the ne t track
Favor Open Favorites menu
Web Access your home page
E-mail Open your default e-mail application
My Com Open My Computer folder
Calculator Show calculator on screen
leep Stand by or Shut down computer
6 • Wireless Optical Desktop Wireless Optical Desktop • 7
64373_WlessOptDesktop 8/12/04 1:26 PM Page 6
Cleaning your Kensington Wireless Optical Desktop
Depending on how you work and the environment in which you work,
every keyboard needs to be cleaned periodically.
To clean the keyboard:
1. Turn off your computer.
2. Use the Kensington Dust Guardian
®
Keyboard Brush to whisk away crumbs
and dirt or use the Kensington Dust Blaster
®
compressed air to blow away
dirt and dust between the keys and in crevices.
3. Wipe tops of keys and the surface of the keyboard with Kensington Surface
Guardian® Cleaning Swabs, Surface Guardian Cleaning Wipes, or a lightly
dampened cloth.
CAUTION: Never spray liquid cleaner directly on the keyboard.
4. Turn on your computer.
Your Kensington Wireless Optical Desktop requires no other maintenance.
Technical upport
In North America, technical support is available to all registered users of
Kensington products. There is no charge for technical support e cept long
distance charges where applicable. Technical Support Contact information
can be found on the back cover of this manual.
Mouse Properties ettings
From the Mouse Properties window you can customize many settings for your
mouse including button settings, scroll wheels, and cursor movement.
To open the Mouse Properties window double-click the mouse icon in the
system control panel. The Mouse Properties window is made up of five tabs.
Button Tab
Assign new functions to mouse buttons, adjust the double-click speed, and set
up your mouse for left- or right-hand use.
Pointer Tab
Change the way the cursor appears on screen. Select one of the e isting pointer
‘schemes,’ or design your own and save it using the ave As button.
Pointer Option
Adjust the way the cursor moves on screen. This tab lets you adjust:
• Pointer speed
• Automatic cursor ‘snap to default button’ in each new dialog bo .
• Sonar—locate the cursor by pressing and releasing the Ctrl key to
highlight it.
• Display pointer trails—a great option when using an LCD display that
makes the cursor difficult to see.
ettings Tab
Change settings for the mouse wheel. Define the total line scrolled from rolling
one notch of wheel.
Hardware Tab
Device property and troubleshooting wizard.
8 • Wireless Optical Desktop Wireless Optical Desktop • 9
64373_WlessOptDesktop 8/12/04 1:26 PM Page 8
Federal Communications Commission Radio Frequency
Interference tatement
Note: The Kensington Wireless Optical Desktop model no. 64373 has been tested and found
to comply with the limits for a Class B digital device, pursuant to Part 15 of the FCC Rules.
These limits are designed to provide reasonable protection against harmful interference in
a residential installation. This equipment generates, uses and can radiate radio frequency
energy and, if not installed and used in accordance with the instructions, may cause harmful
interference to radio communications.
However, there is no guarantee that interference will not occur in a particular installation. If
this equipment does cause harmful interference to radio or television reception, which can
be determined by turning the equipment off and on, the user is encouraged to try to correct
the interference by one or more of the following measures:
• Reorient or relocate the receiving antenna.
• Increase the separation between the equipment and receiver.
• Connect the equipment into an outlet on a circuit different from that to which the
receiver is connected.
• Consult the dealer or an e perienced radio/TV technician for help.
MODIFICATION : Modifications not e pressly approved by Kensington may void the user’s
authority to operate the device under FCC regulations and must not be made.
HIELDED CABLE : In order to meet FCC requirements, all connections to equipment using a
Kensington input device should be made using only the shielded cable provided.
Declaration of Conformity Compliance tatement for the
Kensington Wireless Optical Desktop
The Kensington Wireless Optical Desktop model no. 64373 complies with Part 15 of the FCC
Rules. Operation is subject to two conditions: (1) This device may not cause harmful
interference, and, (2) this device must accept any interference received, including interference
that may cause undesired operation.
As defined in Section 2.909 of the FCC Rules, the responsible party for this device is Kensington
Technology Group, 2000 Alameda de las Pulgas, Second Floor, San Mateo, CA 94403, USA,
(650) 572-2700.
Technical upport Tips
• You may find the answer to your problem in the Frequently Asked
Questions (FAQ) section of the Support area on the Kensington Web
site: www.support.kensington.com.
• Call from a phone where you have access to your computer.
• Be prepared to provide the following information
- Name, address, and telephone number
- The name of the Kensington product
- Make and model of your computer
- Your system software and version
- Symptoms of the problem and what led to them
5-Year Warranty
KENSINGTON TECHNOLOGY GROUP (“KENSINGTON”) warrants this PRODUCT against defects
in material and workmanship under normal use and service for five years from the original
date of purchase. KENSINGTON, at its option, shall repair or replace the defective unit covered
by this warranty. Please retain the dated sales receipt as evidence of the date of purchase. You
will need it for any warranty service.
In order to keep this warranty in effect, the product must have been handled and used as
prescribed in the instructions accompanying this warranty. This warranty does not cover any
damage due to accident, misuse, abuse, or negligence. This warranty is valid only if the
product is used on the computer or system specified on the product bo . Please check product
bo for details or call technical support.
Repair or replacement, as provided under this warranty, is your e clusive remedy. KENSINGTON
shall not be liable for any incidental or consequential damages. Implied warranties of
merchantability and fitness for a particular purpose on this product are limited in duration to
the duration of this warranty.
Some states/countries do not allow the e clusion or limitation of incidental or consequential
damages, so the above limitation or e clusion may not apply to you. Some states/countries
do not allow limitations on how long an implied warranty lasts, so the above limitation may
not apply to you. This warranty gives you specific legal rights, and you may also have other
rights that vary from state to state and country to country.
10 • Wireless Optical Desktop Wireless Optical Desktop • 11
64373_WlessOptDesktop 8/12/04 1:26 PM Page 10
Contacting Kensington
Troubleshooting information and answers to frequently asked questions
are available 24 hours a day on the Kensington Web site at
www.support.kensington.com.
upport by Telephone
Technical Support is available by telephone.
Please visit www.kensington.com for hours.
U.S. and Canada 800-535-4242 or 650-572-2700
Me ico 52(55)5384-0620
12 • Wireless Optical Desktop
This manual is copyright © 2004 Kensington Technology Group, a division of ACCO Brands, Inc. Any unauthorized
copying, duplicating, or other reproduction of the contents hereof is prohibited without written consent from
Kensington Technology Group. All rights reserved. 8/04
Kensington, Dust Blaster, Dust Guardian, and Surface Guardian are registered trademarks and MouseWorks is a
trademark of ACCO World Corporation. Microsoft and MS Office are registered trademarks of Microsoft. All other
registered and unregistered trademarks are the sole property of their respective owners. 901-0578-00
Kensington Technology Group
2000 Alameda de las Pulgas
Second Floor
San Mateo, CA 94403
USA
www.kensington.com
ACCO Europe PLC
Gatehouse Road
Aylesbury
Bucks, HP19 8DT
UNITED KINGDOM
ACCO Canada Inc.
5 Precidio Court
Brampton, Ontario L6S 6B7
CANADA
64373_WlessOptDesktop 8/12/04 1:26 PM Page 12

Other Kensington Computer Accessories manuals

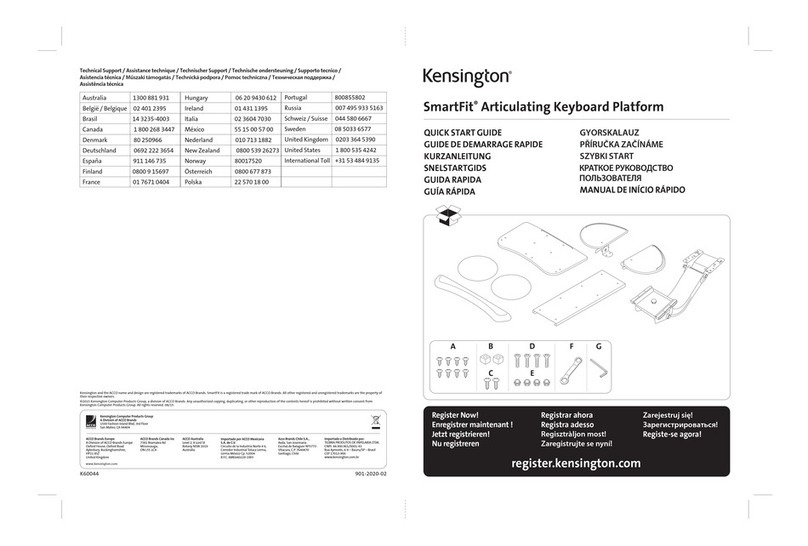
Kensington SmartFit K60044 User manual

Kensington

Kensington SmartFit K60044 User manual

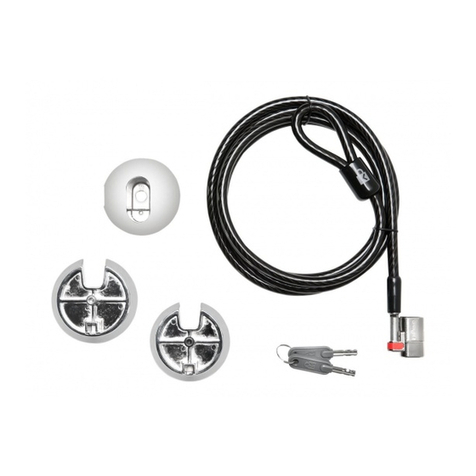
Kensington SafeDome Manual

Kensington

Kensington SafeDome Manual

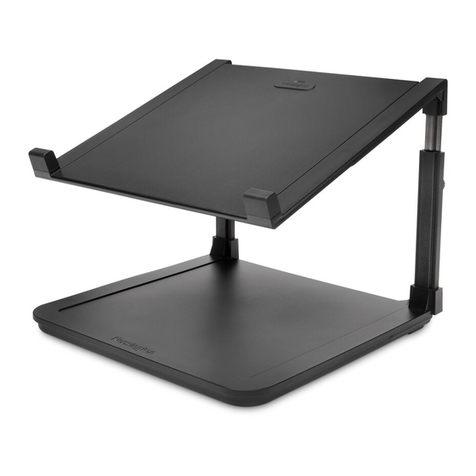
Kensington SlimBlade Manual

Kensington

Kensington SlimBlade Manual

Kensington 64373 User manual

Kensington

Kensington 64373 User manual

Kensington NanoSaver K64444 Manual

Kensington

Kensington NanoSaver K64444 Manual

Kensington 64382 User manual

Kensington

Kensington 64382 User manual

Kensington SafeGrip User manual

Kensington

Kensington SafeGrip User manual

Kensington K97367 User manual

Kensington

Kensington K97367 User manual

Kensington KeyFolio Pro User manual

Kensington

Kensington KeyFolio Pro User manual

Kensington K67833AM Manual

Kensington

Kensington K67833AM Manual

Kensington K64354 User manual

Kensington

Kensington K64354 User manual

Kensington Pro Fit Manual

Kensington

Kensington Pro Fit Manual

Kensington SafeDome Manual

Kensington

Kensington SafeDome Manual

Kensington 64391 Manual

Kensington

Kensington 64391 Manual

Kensington PilotBoard Manual

Kensington

Kensington PilotBoard Manual

Kensington Pro Fit Ergo User manual

Kensington

Kensington Pro Fit Ergo User manual

Kensington KeyStand User manual

Kensington

Kensington KeyStand User manual

Kensington SmartFit K60718 User manual

Kensington

Kensington SmartFit K60718 User manual

Kensington KeyCover User manual

Kensington

Kensington KeyCover User manual

Kensington SecureBack Enclosure User manual

Kensington

Kensington SecureBack Enclosure User manual

Kensington KeyStand User manual

Kensington

Kensington KeyStand User manual

Kensington 64390 Manual

Kensington

Kensington 64390 Manual

Kensington K64440 Manual

Kensington

Kensington K64440 Manual

Kensington keyfolio thin x3 User manual

Kensington

Kensington keyfolio thin x3 User manual

Popular Computer Accessories manuals by other brands

KWorld GM220 user manual

KWorld

KWorld GM220 user manual

IBM 29 CARD PUNCH - Maintenance manual

IBM

IBM 29 CARD PUNCH - Maintenance manual

Marvo CM370 user manual

Marvo

Marvo CM370 user manual

Bitspower Cuboid Reservoir 180 instruction manual

Bitspower

Bitspower Cuboid Reservoir 180 instruction manual

Mikroe CODEGRIP UNIVERSAL user manual

Mikroe

Mikroe CODEGRIP UNIVERSAL user manual

Cyber Power RWCCARD100 quick start guide

Cyber Power

Cyber Power RWCCARD100 quick start guide

Itek AK7500 manual

Itek

Itek AK7500 manual

Belkin F4P338 Series installation guide

Belkin

Belkin F4P338 Series installation guide

AJA io XT Installation and operation guide

AJA

AJA io XT Installation and operation guide

MGT PlusDlite user manual

MGT

MGT PlusDlite user manual

StarTech.com USB3VDOCK4DP manual

StarTech.com

StarTech.com USB3VDOCK4DP manual

Intergraph StudioZ GT RAX Setup manual

Intergraph

Intergraph StudioZ GT RAX Setup manual

Natec STINGRAY user manual

Natec

Natec STINGRAY user manual

NAG SILICON GRAPHICS (IRIX 6) DOUBLE PRECISION... user manual

NAG

NAG SILICON GRAPHICS (IRIX 6) DOUBLE PRECISION... user manual

SilverStone SST-PS12B manual

SilverStone

SilverStone SST-PS12B manual

Trust SoundeCube USB Quick installation guide

Trust

Trust SoundeCube USB Quick installation guide

Kemo Electronic M234 manual

Kemo Electronic

Kemo Electronic M234 manual

Gembird KBS-WCH-01 user manual

Gembird

Gembird KBS-WCH-01 user manual

manuals.online logo
manuals.online logoBrands
  • About & Mission
  • Contact us
  • Privacy Policy
  • Terms and Conditions

Copyright 2025 Manuals.Online. All Rights Reserved.