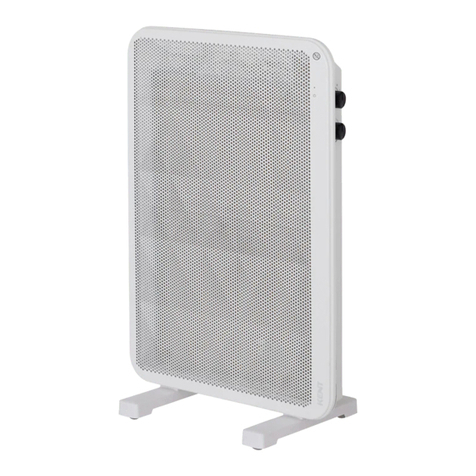
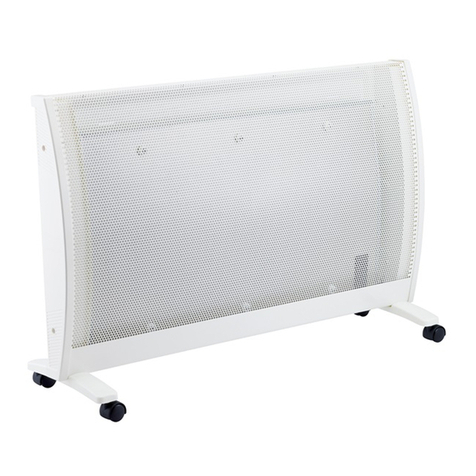
KENT KPE216-260 Setup guide

1
WARNING: DO NOT COVER in order to
avoid overheating.
To reduce the risk of fire, electrical shock or
injury to persons or property:
• To avoid overheating, keep airflow grilles
clear of dust and hair build up - especially
if you have indoor pets.
• Use only the voltage specified on the rating
label of the appliance.
• Do not cover or restrict airflow to the inlet or
outlet grilles in any manner as the appliance
may overheat and become a fire risk.
• Do not cover grilles, block entry or exits of
airflow by placing the appliance against
any surface. Keep all objects at least 1
metre from the front, side and rear of the
appliance.
• Do not locate in areas of high foot traffic,
ensure the power cord and heater are in
view to avoid accidents.
• Do not operate in areas where gasoline,
paint or other flammable liquids are used
or stored.
• This appliance heats up when in use. To
avoid burns, do not touch the front of the
appliance or any of the grilles or vents.
• Before moving the appliance, switch off the
appliance by unplugging it from the wall
and allowing it to cool.
• Do not use this appliance in the immediate
surroundings of a bath, a shower or a
swimming pool.
Congratulations on your purchase of a Kent
Portable Electric Appliance. Please read the
following instructions carefully before use and
retain for future reference.
BEFORE FIRST USE
• Read and follow all the instructions below
even if you feel you are familiar with the
appliance.
• Remove the packing and make sure that
the appliance is in tact. If in doubt do not
use the appliance and contact the place of
purchase.
• Do not leave packaging materials such as
bags and staples within reach of children.
• Dispose of packaging carefully and with
consideration for the environment.
• It is ideal to retain the appliance carton for
seasonal storage.
For your convenience record the date you
received the appliance on the warranty page
of these instructions, and attach your proof of
purchase. Retain this information in the event
that a warranty service is required.
NOTE: The rating of this appliance (as
marked on the rating label) is based on
specific loading tests. Normal use or the use
of other recommended attachments may draw
significantly less power.
IMPORTANT SAFETY INFORMATION
When using any electrically powered
appliance, these basic safety precautions
should always be followed.
4335-12/15
OWNERS INSTRUCTION MANUAL
OIL FILLED COLUMN HEATER
Model No. KPE216-260 - 7 Fins
KPE216-262 - 11 Fins

2
• Do not run the cord under carpeting, mats
or rugs etc. Arrange the cord away from
traffic areas so that it will not be tripped
over.
• Do not twist, kink or wrap the cord around
the appliance as this may cause the
insulation to weaken and split.
• This appliance is not intended for use by
persons (including children) with reduced
physical, sensory or mental capabilities,
or lack of experience and knowledge,
unless they have been given supervision or
instruction concerning use of the appliance
by a person responsible for their safety.
• Children should be supervised to ensure
that they do not play with the appliance.
• This appliance is intended for light
domestic use and not for heavy duty
commercial or industrial use.
• The appliance must not be located
immediately below or in front of a socket-
outlet.
• CAUTION: In order to avoid a hazard
due to inadvertent resetting of the thermal
cutout, this appliance must not be supplied
through an external switching device, such
as a timer, or connected to a circuit that is
regularly switched on and off by the utility.
• Never remove the cover of the appliance
– in case of a fault contact a qualified
service person.
• Use this appliance only as described in this
manual.
• Any other use is not recommended by the
manufacturer and may cause fire, electric
shock or injury.
Heater Specifications
Model No.: KPE216-260
Heat Settings: 600W / 900W / 1500W
Rating: 220-240V~, 50Hz
Model No.: KPE216-262
Heat Settings: 1000W / 1400W / 2400W
Rating: 220-240V~, 50Hz
• Do not insert or allow foreign objects or
metal utensils into any ventilation or exhaust
openings as this may cause an electric
shock, fire or damage to the appliance.
• Do not use the appliance to dry clothes.
• Do not immerse in liquid or use the
appliance near water as this could create
an electrical shock hazard.
• If the appliance accidentally comes into
contact with water switch off the power
supply and do not touch the appliance.
• Do not operate any appliance with a
damaged cord or plug or after the
appliance malfunctions or has been
dropped or damaged in any manner –
in order to avoid a hazard. Return to a
qualified electrical person for service or
repair.
• Do not operate the appliance with wet hands.
• Do not connect the appliance to the mains
voltage until completely assembled and
adjusted.
• This appliance is not intended for outdoor use.
• Always operate upright, on a flat, firm surface
only.
• CAUTION: This product is NOT suitable to
be used on long pile carpets.
• Unroll the cord before operating. Operating
with a coiled cord may cause overheating
and fire risk.
• The use of an extension cord with this
appliance is not recommended.
• Do not remove the plug from the power
socket until the appliance has been
switched off.
• Always hold the plug when removing it
from the wall, do not pull the cord.
• Always unplug the appliance when it is not
in use.
• Do not allow the cord to come in to contact
with the appliance surface during operation.

3
ASSEMBLY INSTRUCTIONS
1. Position the heater carefully upside down.
2. Take the U-bolt and insert it in between the
end and next fin.
Place the wheel base assembly over the
screw ends of the U-bolt and fix tight using
the wing nut supplied.
KPE216-262 - 11 fins
KPE216-260 - 7 fins
3. Repeat the same process at the other end of
the heater.
4. Turn the heater the right way up.
OPERATING INSTRUCTIONS
NOTE: When switched on for the first time
a slight odour may be emitted for a few
minutes. This is harmless and occurs with
most appliances as slight traces of dust
or lubricants may have collected during
manufacture.
Positioning of the Heater
The appliance must be placed on a flat, firm
surface and should only be operated at a
minimum distance of 1 metre from any wall or
other object. For best performance, position
the heater in order to optimise the air flow of
the room.
High
Power
Timer
Hours
Medium
Power
Timer
°Celsius
Low
Power
(Reset)
Continuous
Operation
Thermostat
Function
°Fahrenheit

4
OPERATION
• Place the heater on a flat, firm surface in a
stable upright position.
• Ensure the red power switch is in the OFF
(O) position.
• Unwind the power cord and plug your
heater into a power socket (observing the
instructions regarding positioning). Ensure
the voltage on the specification plate is the
same as in your home and the power cord
is lying safely on the ground.
• Turn the red power switch ON (I). The
heater will beep once, and the switch will
illuminate.
• Press the ( ) button to switch the heater
ON. The digital screen will display and the
heater defaults to the High Power ( )
setting. Press mode button for continuous
operation ( ).
KPE216-260 KPE216-262
No. of Fins 7 11
Low Power 600W 1000W
Medium Power 900W 1400W
High Power 1500W 2400W
• Press the ( ) button again to change to
Medium Power ( ) setting.
• Press the ( ) button again to change to
Low Power ( ) setting.
• Press the ( ) button again to turn the
heater OFF.
• Note that the heater will remain ON until it
is manually turned OFF unless you use the
Thermostat and/or Timer Function.
• To switch the heater off fully, press the ( )
button to switch the heater OFF, and then
press the power switch to OFF (O).
Thermostat Function
• Set the desired room temperature by
pressing the ‘MODE’ button until the
Temperature symbol ( ) illuminates.
• Use the ‘+’ or ‘-‘ button to set your desired
temperature.
• When the desired temperature is set the
Temperature symbol ( ) continues to be
illuminated.
• When the set room temperature is reached
the heater will turn-off and the Temperature
symbol ( ) will stop flashing.
• The heater will turn back on when the
room temperature drops below the set
temperature.
• Use the ‘+’ or ‘-‘ button to change the
desired room temperature at any time.
• The temperature setting can be set to
either Celsius (C) or Fahrenheit (F) by
pressing the (°C/°F) button.
24 Hour Timer Function
Note: Always set your desired temperature
prior to setting the Timer so that the heater
turns ON at the desired temperature setting.
Once operating the heater will turn ON and
OFF as per the selected desired temperature
setting.
The Auto-Off and Auto-On functions cannot be
combined.
Auto-Off: Use this function only if you want
the heater to automatically turn OFF after a
certain period of time (1 to 24 hours from the
time the function is set).
• Press the ‘MODE’ button until the ‘Timer’
() symbol flashes. The ‘AUTO OFF’ and
‘Hour’ display will appear.
• Use the ‘+’ and ‘-‘ buttons to set the heater
operation time between 1 and 24 hours.
This function will activate once the Timer
symbol stops flashing.
• The heater will automatically turn off
when the time runs out. Note that if the
heater does not set a specific time, it will
automatically turn off after 10 hours.

5
Auto-On: Use this function only if you wish to
have the heater automatically turn ON after a
delayed period of time (1 to 24 hours from the
time the function is set).
Important: Ensure you position your heater
carefully as when using this function it will turn
ON automatically after the chosen time delay.
• Press the ‘MODE’ button until the ‘Timer’
() symbol flashes. The ‘AUTO ON’ and
‘Hour’ display will appear.
• Use the ‘+’ and ‘-‘ buttons to set the heater
operation time between 1 and 24 hours.
This function will activate once the Timer
symbol stops flashing.
• The heater will automatically turn on when
the time delay expires. Note that if the
heater does not set a specific time, it will
automatically turn off after 10 hours.
Reset
• Press the MODE button until the continuous
operation symbol ( ) appears. In this
mode the Auto-Off, Auto-On and Themostat
Functions will be cancelled.
• In this mode the heater will operate to the
thermostat maximum temperature setting
( , or ).
SAFETY FEATURES
Over-Heat Protection
• This heater is protected with an over-heat
protection cut-out facility that switches it off
automatically if it over-heats.
• Overheating can be caused by obstruction
to the air intakes on the back of the heater
or the grill on the front.
• If this occurs please disconnect the heater
from the power socket and allow it to cool
for 30 minutes. Remove any obstruction
and turn the heater back on.
• The heater should operate normally.
Should the problem persist contact your
nearest service centre.
Safety Cut-Out Switch
• The heater is fitted with a safety cut-out
switch to switch the heater off if it is
knocked over.
• If the heater is knocked over and the
cut-out switch activates turn the heater off
at the power outlet and take EXTREME
care when standing the heater upright as it
will still be hot.
• Inspect the heater for damage especially to
the heating elements and supply cord.
• If any damage is visible do not operate the
heater.
CLEANING AND CARE
• IMPORTANT: Turn off the heater. Switch
off the power switch and disconnect the
heater from the power socket. Wait for
the heater to be completely cool before
cleaning.
• Vacuum clean air vents and grilles to
remove dust from these areas.
• To remove dust on external surfaces, wipe
the heater with a damp (not wet) lint-
free cloth rinsed in hot soapy water only.
• Do not use any harsh detergent or abrasive
cleaners.
• Do not spray with liquids or submerge in
liquids or water.
• Do not attempt to clean the interior of the
heater.
• Do not attempt to open the heater casing
at any time.
STORAGE
• Store the heater carefully in a dust-free
area during the off season. It is ideal
to store the heater in the carton it was
supplied in. Neatly wind the cord of the
heater around the bracket provided to
prevent damage to the cord.

6
This page has been left intentionaly blank

7
This page has been left intentionaly blank

8
Kent®is a registered trademark of Aber, Hamilton, NZ.
www.aber.co.nz
1. Appliances will be free from defects in
material and workmanship under normal
use and service when installed and used in
accordance with all applicable local laws
and regulations.
2. If, during the warranty period, a product
fails to operate properly due to defects in
workmanship or materials, Aber will either,
at its option, repair or replace the product
without charge to the purchaser.
The following circumstances or events
are either deemed to be outside the
scope of the general warranty policy
as set out above, or will invalidate
any warranty claim:
• Normal customer maintenance, including
yearly maintenance, routine maintenance,
lubrication, etc.
• Damage caused by the continued use of a
product after a fault has occurred.
• Accident, Act of God, nature or war, theft,
abuse, misuse, negligence or neglect,
including improper installation.
• Failure to operate or maintain the product in
accordance with the owner’s manual
furnished with the product.
• Any alterations or modifications, including
those affecting the product’s performance,
operation, safety, durability or changes in
its intended use.
• Additional damage to parts or components
due to consented use occurring after any of
the above conditions.
• Incorrect installation or commissioning.
WARRANTY GUIDELINES
• Incorrect electrical installation or fitment to
an inappropriate supply. Any electrical
installation (fitting and wiring of new wall
sockets etc) must be performed by a
qualified electrician.
• The warranty applies only to the goods
supplied and does not cover any other
damage incurred.
• No agent, representative, dealer or
employee of Aber or any other person has
the authority to increase or alter the
obligations of Aber under these warranties.
Proper Maintenance and Operation
The original purchaser must exhibit reasonable
care in the maintenance and operation of the
product as explained in the maintenance
section of the owner/operator’s manual. When
in doubt, the Retailer should be contacted by
the original purchaser for advice.
WARRANTY CLAIM PROCEDURES
Should a product failure occur then the original
dealer should be contacted together with proof
of purchase.
The following will apply to all products from
date of purchase by the original consumer for
use in a normal, domestic situation.
Portable Electric Heaters: 2 years from
date of purchase.
Products used for business purposes will carry
a 90 day warranty.
For full warranty terms & conditions please
refer to our website: www.kent.co.nz.
This manual suits for next models
1
Table of contents
Other KENT Heater manuals

KENT
KENT KPE216-342 Setup guide

KENT
KENT KPE216-295 Setup guide

KENT
KENT KPE216-343 Setup guide

KENT
KENT KPE216-144 Setup guide

KENT
KENT KPE216-083 Setup guide

KENT
KENT KPE216-146 Setup guide

KENT
KENT KPE216-121 Setup guide

KENT
KENT KPE216-137 Setup guide

KENT
KENT KPE216-147 Setup guide

KENT
KENT KCH205-002 User manual
Popular Heater manuals by other brands

Hyco
Hyco Ariano AR1000T Product instruction manual

Phormalab
Phormalab Hotdoor HCA01-02-03 Assembly instructions

Space-Ray
Space-Ray SRLP25 Installation, servicing and operating instructions

Kermi
Kermi T. 33 Use and Installation Instructions

CDB
CDB Goldair GCT330 operating instructions

S&P
S&P TLS-601 Instructions for use