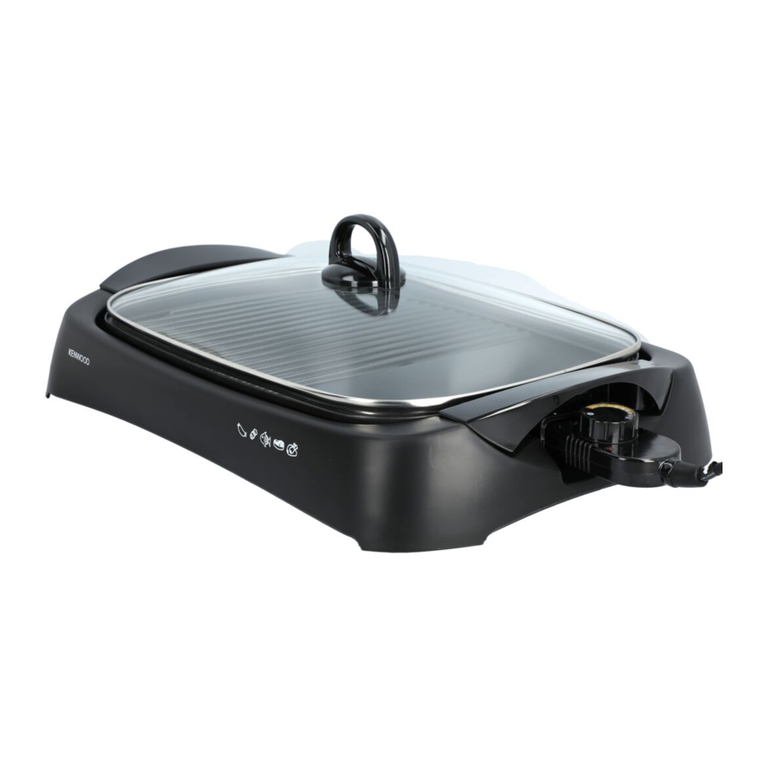
Kenwood HG184 User manual

Kenwood Limited, New Lane, Havant, Hampshire PO9 2NH, UK
www.kenwoodworld.com 57684/1

HG184/HG187
HG185/HG186
2
1
0
6
0

English 2 - 5
Nederlands 6 - 8
Français 9 - 11
Deutsch 12 - 14
Italiano 15 - 17
Português 18 - 20
Español 21 - 23
Dansk 24 - 26
Svenska 27 - 29
Norsk 30 - 32
Suomi 33 - 35
Türkçe 36 - 38
Ïesky 39 - 41
Magyar 42 - 44
Polski 45 - 47
Русский 48 - 51
Ekkgmij 52 - 54
´¸∂w
55 - 57
UNFOLD

6
0
6
5
6
0
2
1
0
6
2
1
0
0
6
0
0
AC
(a)
(b)
B

before using your Kenwood
appliance
●Read these instructions carefully and
retain for future reference.
●Remove all packaging and any
labels.
safety
●DO NOT touch hot surfaces.
Accessible surfaces are liable to get
hot during use. Always use the
handle and controls.
●Do not operate the grill without the
plates fitted.
●Do not immerse the appliance, cord
or plug in water or any other liquid.
●Do not leave the appliance
unattended when in use.
●Do not use if there is any damage to
the appliance, cord or plug. Get it
checked or repaired: see ‘service’.
●This appliance should only be used
on a flat heat resistant surface.
●Do not let the cord hang over the
edge of the worksurface or touch
hot surfaces.
●Always unplug the appliance when
not in use and allow it to cool
completely before reversing or
removing the grill plates for cleaning.
●Do not use the appliance outdoors.
●Do not place any part of this
appliance on or near a naked flame,
hot plate or in a heated oven.
●With some foods large quantities of
smoke are emitted – ensure there is
adequate ventilation.
●Do not let infirm people use the
appliance without supervision.
●Do not let children use or play with
the appliance.
●Only use the appliance for its
intended domestic use. Kenwood
will not accept any liability if the
appliance is subject to improper use,
or failure to comply with these
instructions.
before plugging in
●Make sure your electricity supply is
the same as the one shown on the
underside of your grill.
Important – UK only
●The wires in the cord are coloured
as follows:
Green and Yellow = Earth,
Blue = Neutral,
Brown = Live.
●The appliance must be protected by
a 13A approved (BS1362) fuse.
●WARNING: THIS APPLIANCE
MUST BE EARTHED.
Note:
●For non-rewireable plugs the fuse
cover MUST be refitted when
replacing the fuse. If the fuse cover
is lost then the plug must not be
used until a replacement can be
obtained. The correct fuse cover is
identified by colour and a
replacement may be obtained from
your Kenwood Authorised Repairer
(see Service).
●If a non-rewireable plug is cut off it
must be DESTROYED
IMMEDIATELY. An electric shock
hazard may arise if an unwanted
non-rewireable plug is inadvertently
inserted into a 13A socket outlet.
●This contact grill complies with
European Economic Community
Directive 89/336/EEC.
before using for the first time
●Wash the parts “see cleaning”.
2
English

key
locking catch
handle
plate retaining clips
drip tray
height adjustment control
drip spouts
temperature controls - top and
bottom plates
temperature lights
grill removal tabs
reversible grill plates
(a) waffle (HG185 & HG186)
(b) panini (HG184 & HG187)
using your grill
Note: Release the locking catch
before using the grill. The
locking catch should only be
used when storing the grill.
1 Plug in and set the temperature
controls for the top and bottom
plates to the required temperature
(the lights will flash). The grill is ready
when the temperature lights stop
flashing.
2 Add the food and position the drip
tray or other suitable container
under the drip spout .
●Cooking times required will vary
according to individual preferences
and the size/thickness of the food
being cooked.
3 The temperature light will come on
and off as the grill maintains the
correct temperature.
4 When the food is cooked, carefully
remove the food using a wooden or
plastic spatula. Do not use metal
utensils as they will scratch and
damage the non-stick surface.
5 Switch off and unplug after use.
Allow the grill to cool completely
before cleaning.
reversible plates
Your grill plates can be reversed for
use as a waffle or Panini grill
depending on the plates supplied
with your model.
●Ensure that both sides of the grill
plates are clean and dry before
reversing and cooking with the
plates.
●Use in the closed position with the
temperature control set to position 6.
The grill can be used in the following
positions: -
position A (closed position)
This position is ideal for cooking thin
cuts of meat and for toasted
sandwiches.
The two grill surfaces allow you to
cook both sides of the food at the
same time, saving time and retaining
the natural juices of the food.
●Set both temperature controls to
position 6.
●Heat the grill in the closed position
until the temperature lights stop
flashing.
●Place the food on the lower plate
and close the top plate until it rests
on the food.
position B (fully open position)
This position offers a large grilling
surface to cook many foods at the
same time, and is ideal for fish,
vegetables and kebabs.
●Set both temperature controls to
position 6.
●Heat the grill in the closed position
until the temperature lights stop
flashing.
●Open the grill, then lift the top handle
up and lower the top plate down
backwards until it lays flat on the
worksurface.
●Place the food to be cooked on the
grill surface and adjust the
temperature as required.
3

position C (adjustable height
position)
In this position the grill plates are
spaced apart and 2 different heights
are available. Ideal for cooking more
delicate foods such as fish & open
sandwiches, which could not
support the weight of the top plate.
●Set both temperature controls to
position 6.
●Heat the grill in the closed position
until the temperature lights stop
flashing.
●Place the food to be cooked on the
grill surface and adjust the
temperature as required.
●Adjust the height position required
by pushing down on both levers .
The height position selected will
depend on the thickness of the food
to be cooked.
hints
●Red meats require a higher grilling
temperature and a shorter time.
●Fish should be cooked at a lower
temperature for a longer cooking
time.
●Do not cook frozen food.
●Tender cuts of meat are more
suitable for grilling and are therefore
best used on the grill. It is best to
avoid cooking tough cuts of meat.
●Best results are obtained by cooking
thinner items and foods of a uniform
thickness.
●Grilling with an open grill takes
longer, as the food needs to be
turned over halfway through
cooking.
●Always check the food is cooked
thoroughly before serving. Cook
meat and poultry until the juices run
clear.
cleaning
●Switch off ,unplug and allow the grill
to cool down completely before
cleaning.
●Clean the grill after each use to
maintain it in a good clean working
condition.
●Use a paper towel to wipe off any
excess oil/grease and a wooden or
plastic spatula to remove any food
debris from the grill plates. Do not
use abrasive cleaners or steel wool
as they will damage the non-stick
coating.
●Wipe the outside with a damp cloth,
then dry.
●The grill is fitted with a locking catch
, which retains the plates during
storage.
grill plates
●Remove the grill plates by sliding
back the retaining clips and lifting
up by the removal tabs .
●Wash the plates in hot soapy water.
Alternatively they can be washed in
your dishwasher. Ensure the plates
are completely dry before refitting to
the grill.
●Refit the grill plates by lining up the
back of the plates with the unit first,
then slide the retaining clips back .
temperature settings
setting temperature
1 90°C
2 120°C
3 150°C
4 180°C
5 210°C
6 240°C
4

service and customer
care
●If the cord is damaged it must, for
safety reasons, be replaced by
KENWOOD or an authorised
KENWOOD repairer.
If you need help with:
●using your grill or
●servicing or repairs (in or out of
guarantee)
call Kenwood customer care on
023 9239 2333. Have your
model number ready - it's on the
underside of your grill.
●spares and attachments
call 0870 2413653.
other countries
●Contact the shop where you bought
your grill.
guarantee
If your grill goes wrong within one
year from the date you bought it, we
will repair or replace it free of charge
provided:
●you have not misused, neglected or
damaged it;
●it has not been modified (unless by
Kenwood);
●it is not second-hand;
●it has not been used commercially;
●you have not fitted a plug incorrectly;
and
●you supply your receipt to show
when you bought it.
This guarantee does not affect your
statutory rights.
5

voordat u uw Kenwood-
apparaat gebruikt:
●Lees deze instructies zorgvuldig
door en bewaar ze voor toekomstig
gebruik.
●Verwijder alle verpakking en labels
veiligheid
●Zorg ervoor dat u hete oppervlaktes
NIET AANRAAKT. Toegankelijke
oppervlaktes kunnen tijdens gebruik
heet worden. Gebruik altijd het
handvat en de bedieningsknoppen.
●Gebruik de grill niet zonder de
bevestigde platen.
●Dompel het apparaat, het snoer en
de stekker nooit onder in water of
een andere vloeistof.
●Laat het apparaat niet alleen
wanneer u het gebruikt.
●Gebruik het apparaat niet wanneer
het apparaat, het snoer of de
stekker is beschadigd. Laat het
controleren of repareren: zie
'service'.
●Dit apparaat mag alleen worden
gebruikt op een vlakke en
hittebestendige ondergrond.
●Laat het snoer nooit over de rand
van het aanrecht hangen of contact
maken met hete oppervlaktes.
●Haal de stekker altijd uit het
stopcontact wanneer het apparaat
niet in gebruik is en laat het volledig
afkoelen voor u de grillplaten
omkeert of verwijdert om ze te
reinigen.
●Gebruik het apparaat nooit buiten.
●Plaats geen enkel deel van het
apparaat in de buurt van een naakte
vlam, hete plaat of in een hete oven.
●Grote hoeveelheden voedsel kunnen
rook veroorzaken. Zorg daarom voor
voldoende ventilatie.
●Lichamelijk of verstandelijk zwakke
personen mogen dit apparaat nooit
zonder toezicht gebruiken.
●Laat kinderen nooit het apparaat
bedienen of er mee spelen.
●Gebruik het apparaat alleen voor het
huishoudelijke gebruik waarvoor het
is bedoeld. Kenwood kan niet
aansprakelijk worden gesteld in het
geval dat het apparaat niet correct is
gebruikt, of waar deze instructies
niet worden opgevolgd.
voordat u de stekker insteekt
●Zorg ervoor dat u dezelfde
stroomtoevoer gebruikt als op de
onderzijde van uw grill is
aangegeven.
●Deze contactgrill is in
overeenstemming met Richtlijn
89/336/EEG van de Europese
Economische Gemeenschap.
voordat u het apparaat voor
de eerste keer gebruikt
●Was alle onderdelen “zie 'reiniging'".
overzicht
vergrendeling
handvat
plaatklemmen
vetopvangbak
hoogteregelaar
vetgootjes
temperatuurregelaar - boven- en
onderplaten
temperatuurlampjes
grillverwijderknoppen
omkeerbare grilplaten
(a) wafel (HG185 & HG186)
(b) panini (HG184 & HG187)
uw gril gebruiken
Let op: de vergrendeling voor
u de grill gaat gebruiken,
ontgrendelen. De vergrendeling
uitsluitend gebruiken wanneer u
de grill opbergt.
1 Steek de stekker in het stopcontact
en stel de temperatuur voor de
boven- en onderplaten in op de
gewenste temperatuur (de lampjes
gaan knipperen). De grill is klaar als
de temperatuurlampjes ophouden
te knipperen.
6
Nederlands
Vouw voor het lezen a.u.b. de voorpagina met illustraties uit

2 Plaats het voedsel en positioneer de
vetopvangbak , of een andere
geschikte bak, onder de vetgootjes
.
●De kooktijd varieert en hangt af van
uw individuele voorkeur en de
grootte/dikte van het te koken
voedsel.
3 Het temperatuurlampje flitst aan en
uit wanneer de grill de juiste
temperatuur heeft bereikt.
4 Is het voedsel gekookt, verwijder het
dan voorzichtig door een houten of
plastic spatel te gebruiken. Gebruik
geen metalen keukengerei aangezien
dit voor krassen zorgt en de anti-
aanbaklaag beschadigt.
5 Na gebruik het apparaat uitzetten en
de stekker uit het stopcontact
verwijderen. Laat de grill volledig
afkoelen voordat u hem reinigt.
omkeerbare platen
Uw grillplaten kunnen omgekeerd
worden en gebruikt worden als een
wafel- of paninigrill, afhankelijk van
de platen die bij uw model geleverd
worden.
●Zorg dat de grillplaten aan beide
zijden schoon en droog zijn voor u
de platen omkeert en erop kookt.
●Gebruik in gesloten stand met de
temperatuur ingesteld op 6.
De grill kan in de volgende standen
worden gebruikt: -
stand A (gesloten positie)
Deze stand is ideaal voor het koken
van dunne lapjes vlees en tosti's.
De twee grilloppervlaktes zorgen
ervoor dat u tegelijkertijd allebei de
kanten van het voedsel kookt. Dit
bespaart tijd en bewaart de
natuurlijke voedselsappen.
●Stel beide temperatuurregelknoppen
in op stand 6.
●Verwarm de grill in gesloten stand tot
de temperatuurlampjes ophouden te
knipperen.
●Plaats het voedsel op de onderste
plaat en sluit de bovenste plaat
totdat deze op het voedsel ligt.
stand B (volledig open positie)
Deze stand biedt een groot
grilloppervlak voor het tegelijkertijd
koken van vele soorten voedsel en is
ideaal voor vis, groenten en kebabs.
●Stel beide temperatuurregelknoppen
in op stand 6.
●Verwarm de grill in gesloten stand tot
de temperatuurlampjes ophouden te
knipperen.
●Open de grill, til het handvat omhoog
en laat de bovenplaat naar
achteren zakken totdat hij plat op
het aanrecht ligt.
●Plaats het te koken voedsel op de
grilloppervlakte en stel de gewenste
temperatuur in.
stand C (verstelbare hoogte
positie)
In deze stand staan de grillplaten op
enige afstand van elkaar en beschikt
u over 2 verschillende hoogtes.
Ideaal voor het koken van fijner
voedsel, zoals vis en open
sandwiches, die het gewicht van de
bovenplaat niet kunnen verdragen.
●Stel beide temperatuurregelknoppen
in op stand 6.
●Verwarm de grill in gesloten stand tot
de temperatuurlampjes ophouden te
knipperen.
●Plaats het te koken voedsel op de
grilloppervlakte en stel de gewenste
temperatuur in.
●Pas de hoogte aan tot de gewenste
stand door op beide hendels naar
beneden te duwen.
De geselecteerde hoogte is
afhankelijk van de dikte van het te
bereiden voedsel.
7

tips
●Rood vlees heeft een hogere
grilltemperatuur en kortere tijd nodig.
●Vis moet gedurende langere tijd bij
een lagere temperatuur bereid
worden.
●Bereid geen bevroren voedsel.
●Malse stukken vlees zijn geschikt om
te grillen en kunnen dus het best op
de grill bereid worden. Het is beter
om geen taaie stukken vlees te
grillen.
●De beste resultaten worden bereikt
door dunnere stukken te koken,
alsook voedsel met een gelijkmatige
dikte.
●Grillen met een open grill duurt
langer, aangezien het voedsel
halverwege het koken moet worden
omgedraaid.
●Controleer altijd of het voedsel
volledig is gekookt voor u het
opdient. Kook vlees en gevogelte
totdat de sappen doorzichtig zijn.
reiniging
●Zet de grill uit, haal de stekker uit het
stopcontact en laat de grill volledig
afkoelen voordat u met reinigen
begint.
●Reinig de grill na ieder gebruik om
hem in een goede en schone staat
te behouden.
●Gebruik keukenpapier voor het
afvegen van achtergebleven olie/vet
en een houten of plastic spatel voor
het verwijderen van voedselresten op
de grillplaten. Gebruik geen bijtende
reinigingsmiddelen of staalwol,
aangezien deze de anti-aanbaklaag
kunnen beschadigen.
●Veeg de buitenkant eerst af met een
vochtige doek en daarna met een
droge doek.
●De grill is uitgerust met een
vergrendeling , die de platen
tijdens de opslag vasthoudt.
grillplaten
●U kunt de grillplaten verwijderen
door de klemmen terug te
schuiven en de platen bij de
verwijderknoppen op te tillen.
●Was de platen in een warm sopje. U
kunt ze ook in uw vaatwasmachine
wassen. Zorg ervoor dat de platen
volledig droog zijn voordat u ze weer
in de grill plaatst.
●U kunt de grillplaten weer
terugplaatsen door de achterkant
van de platen eerst op één lijn te
brengen met het apparaat en de
klemmen vervolgens terug te
schuiven.
service
●Als het snoer beschadigd is, dan
dient het om veiligheidsredenen door
KENWOOD, of een bevoegde
KENWOOD-reparateur, te worden
vervangen.
Wanneer u hulp nodig heeft met:
●het gebruiken van uw grill of;
●onderhoud en reparaties,
●Neem dan contact op met de winkel
waar u uw grill heeft gekocht.
temperatuurinstellingen
stand temperatuur
1 90°C
2 120°C
3 150°C
4 180°C
5 210°C
6 240°C
8

avant d’utiliser votre appareil
Kenwood
●Lisez et conservez soigneusement
ces instructions pour pouvoir vous y
référer ultérieurement.
●Retirez tous les éléments
d’emballage et les étiquettes.
sécurité
●NE touchez PAS les surfaces
chaudes. Les surfaces accessibles
sont susceptibles de s’échauffer en
cours d'utilisation. Utilisez toujours la
poignée et les organes de
commande.
●Ne faites pas fonctionner le grill
lorsque les plaques ne sont pas
insérées.
●Ne plongez pas l’appareil ni le
cordon ni la fiche d’alimentation
dans l’eau ou tout autre liquide.
●Ne laissez pas l’appareil fonctionner
sans surveillance.
●Si l’appareil, le cordon ou la fiche
d’alimentation présentent des
détériorations, en proscrire l’usage.
Faites vérifier ou réparer l’appareil :
voir « Assistance technique ».
●Cet appareil ne doit être utilisé que
sur une surface plane résistante à la
chaleur.
●Ne laissez pas le cordon dépasser
du bord du plan de travail ni entrer
en contact avec les surfaces
chaudes.
●Débranchez toujours l’appareil
lorsque vous ne l’utilisez pas et
laissez-le complètement refroidir
avant de retourner ou de retirer les
plaques du grill pour les nettoyer.
●N’utilisez pas l’appareil à l’extérieur.
●Ne placez aucune partie de l’appareil
au contact ou à proximité d’une
flamme nue ou d’une plaque chaude
ou dans un four chaud.
●Vu que la cuisson de certains
aliments s’accompagne d’un
important dégagement de fumée,
veillez à ce qu’il y ait une ventilation
appropriée.
●Ne laissez pas les personnes
handicapées se servir de l'appareil
sans surveillance.
●Ne laissez pas les enfants jouer avec
l’appareil ni l’utiliser.
●N’employez l’appareil qu’à la fin
domestique prévue. Kenwood
décline toute responsabilité dans les
cas où l’appareil est utilisé
incorrectement ou que les présentes
instructions ne sont pas respectées.
avant de brancher l’appareil
●Assurez-vous que l’alimentation
électrique correspond aux
indications figurant sur la face
inférieure du grill.
●Ce grill de contact est conforme à la
directive 89/336/CEE de la
Communauté économique
européenne.
avant d’utiliser l’appareil pour
la première fois
●Lavez les pièces. Voir « Nettoyage ».
légende
fermoir
poignée
clips de retenue de plaque
cuvette d’égouttage
bouton de réglage de la hauteur
goulottes
régulateur de température –
plaques supérieure et inférieure
voyant de température
Languettes d’extraction du grill
plaques de grill réversibles
(a) gaufre (HG185 & HG186)
(b) panini (HG184 & HG187)
utilisation de votre grill
Remarque : faire basculer le
fermoir avant d’utiliser le
grill. Le fermoir ne s’utilise que
pour le rangement du grill.
9
Français
Avant de lire, dépliez la première page pour voir les illustrations

1 Branchez l’appareil et réglez le
régulateur de température des
plaques inférieure et supérieure
sur la température voulue (les
voyants clignotent). Le grill est prêt à
l’emploi lorsque les voyants de
température cessent de clignoter.
2 Mettez en place les aliments et
positionnez la cuvette d’égouttage
ou tout autre récipient adapté
sous la goulotte .
●Les temps de cuisson nécessaires
varient selon vos préférences et la
taille/l’épaisseur des aliments à faire
griller.
3 Le voyant de température s’allume
et s’éteint à mesure que le grill réagit
pour maintenir la température
souhaitée.
4 Une fois les aliments cuits, retirez-les
délicatement à l’aide d’une spatule
en bois ou en matière plastique.
N’utilisez pas d’ustensiles en métal,
car ils risqueraient de rayer et
d’endommager la surface
antiadhésive.
5 Eteignez et débranchez l’appareil
après son utilisation. Laissez le grill
refroidir complètement avant de
procéder à son nettoyage.
plaques réversibles
Réversibles et en fonction du type
fourni avec votre modèle, les
plaques de votre grill s’utilisent aussi
bien pour les gaufres que pour les
paninis.
●Vérifiez que les deux côtés des
plaques de grill sont propres et secs
avant de les retourner et de les
utiliser.
●Utilisez-les dans la position fermée,
régulateur de température sur 6.
Le grill peut être utilisé dans les
positions suivantes : -
position A (position fermée)
Cette position convient parfaitement
à la cuisson de fines tranches de
viande et de sandwichs grillés.
Les deux surfaces du grill vous
permettent de cuire les aliments
simultanément de part et d’autre
tout en gagnant du temps et en
retenant le jus naturel alors produit
par les aliments.
●Mettez les deux régulateurs de
température sur 6.
●Faites chauffer le grill en position
fermée jusqu’à ce que les voyants
de température cessent de clignoter.
●Placez les aliments sur la plaque
inférieure et refermez la plaque
supérieure sur les aliments.
position B (position
entièrement ouverte)
Cette position libère une grande
surface de grill pour cuire
simultanément de nombreux
aliments et convient très bien aux
poissons, aux légumes et aux
kebabs.
●Mettez les deux régulateurs de
température sur 6.
●Faites chauffer le grill en position
fermée jusqu’à ce que les voyants
de température cessent de clignoter.
●Ouvrez le grill, soulevez la poignée
supérieure et abaissez la plaque
supérieure vers l’arrière jusqu’à
ce qu’elle repose à plat sur le plan
de travail.
●Placez les aliments à cuire à la
surface du grill et réglez la
température à votre convenance.
position C (réglable en
hauteur)
Dans cette position, les plaques du
grill sont écartées et deux hauteurs
différentes sont disponibles. Elles se
prêtent parfaitement à la cuisson
d’aliments plus délicats, tels que des
poissons ou des sandwichs ouverts,
qui ne pourraient supporter le poids
de la plaque supérieure.
●Mettez les deux régulateurs de
température sur 6.
10

●Faites chauffer le grill en position
fermée jusqu’à ce que les voyants
de température cessent de clignoter.
●Placez les aliments à cuire à la
surface du grill et réglez la
température à votre convenance.
●Appuyez sur les deux leviers pour
régler la hauteur de cuisson voulue
. La hauteur à choisir dépend de
l’épaisseur des aliments à cuire.
conseils
●Les viandes rouges nécessitent une
température de grillade plus élevée
et une durée de cuisson moins
importante.
●Pour le poisson, choisir une
température plus basse et cuire plus
longtemps.
●L’appareil ne convient pas aux
aliments surgelés.
●Ce grill est mieux adapté à la
cuisson de pièces de viande
tendres, qui conviennent mieux à la
cuisson au grill. Il est préférable
d’éviter la cuisson de pièces de
viande dures.
●Afin d’obtenir des résultats
optimaux, il convient de cuisiner des
morceaux d’une grande finesse et
des aliments d’une épaisseur
régulière.
●Les grillades sur un grill ouvert
prennent plus de temps, car les
aliments doivent être retournés à la
mi-cuisson.
●Assurez-vous toujours que les
aliments sont bien cuits avant de les
servir. Faites cuire la viande et les
volailles jusqu’à ce que leur jus coule
clair.
nettoyage
●Eteignez et débranchez l’appareil.
Laissez le grill refroidir complètement
avant de procéder à son nettoyage.
●Nettoyez le grill après chaque utilisation
afin qu’il soit ainsi bien propre et de
nouveau prêt à fonctionner.
●Essuyez l’huile/la graisse en excédent
à l’aide d’une serviette en papier et
retirez les restes alimentaires des
plaques du grill à l’aide d’une spatule
en bois ou en matière plastique.
N’utilisez pas de nettoyants abrasifs
ni de laine d’acier qui risqueraient
d’altérer le revêtement antiadhésif.
●Nettoyez la face extérieure à l’aide d’un
chiffon humide et laissez-la sécher.
●Le grill est muni d’un fermoir qui
sert à caler les plaques à des fins de
rangement.
plaques du grill
●Pour retirer les plaques de grill,
faites coulisser vers l’arrière les clips
de retenue et soulevez par les
languettes d’extraction .
●Lavez les plaques dans de l’eau
chaude et savonneuse. Vous pouvez
également passer les plaques au
lave-vaisselle. Assurez-vous que les
plaques sont complètement sèches
avant de les remettre sur le grill.
●Réinsérez les plaques de grill en
alignant la partie postérieure des
plaques sur l’appareil, puis en faisant
coulisser les clips de retenue .
assistance technique et
service à la clientèle
●Si le cordon d’alimentation est
endommagé, il doit être remplacé
pour des raisons de sécurité par un
réparateur de la société KENWOOD
ou habilité par ses soins.
Si vous avez besoin d’aide pour :
●utiliser votre grill ou
●le dépanner ou le réparer,
●adressez-vous au magasin dans
lequel vous avez acheté le grill.
réglages de température
paramètre température
1 90°C
2 120°C
3 150°C
4 180°C
5 210°C
6 240°C
11

Vor Gebrauch Ihres Kenwood-
Gerätes
●Lesen Sie diese Anleitung sorgfältig
durch und bewahren Sie diese zur
späteren Benutzung auf.
●Entfernen Sie jegliches
Verpackungsmaterial und alle
Aufkleber.
sicherheit
●Berühren Sie KEINE heißen
Oberflächen. Alle zugänglichen
Oberflächen neigen zu Erhitzung
während der Anwendung. Benutzen
Sie immer den Handgriff und die
Regler.
●Benutzen Sie den Grill niemals ohne
die passenden Platten.
●Tauchen Sie weder Gerät, noch
Kabel oder Stecker in Wasser oder
andere Flüssigkeiten.
●Behalten Sie das Gerät während der
Benutzung ständig im Auge.
●Ist eine Beschädigung am Gerät,
Kabel oder Stecker festzustellen,
dürfen Sie dieses nicht benutzen.
Lassen Sie es überprüfen oder
reparieren: siehe 'Service'.
●Benutzen Sie das Gerät nur auf einer
flachen, hitzebeständigen
Oberfläche.
●Achten Sie darauf, dass das Kabel
nicht über die Arbeitsfläche hängt
oder mit heißen Flächen in
Berührung kommt.
●Ziehen Sie bei Nichtbenutzung
immer den Netzstecker und lassen
Sie das Gerät komplett abkühlen,
bevor Sie die Grillplatten zum
Reinigen entfernen.
●Verwenden Sie das Gerät nicht im
Freien.
●Stellen Sie das Gerät nicht auf oder
in die Nähe einer offenen Flamme
oder einer heißen Platte oder in
einen heißen Ofen.
●Einige Nahrungsmittel neigen zu
massiver Rauchbildung – sorgen Sie
für adäquate Entlüftung.
●Gebrechliche Personen dürfen
Maschine nicht ohne Aufsicht
benutzen.
●Kinder dürfen das Gerät weder
benutzen, noch damit spielen.
●Verwenden Sie das Gerät nur für
seinen vorgesehenen Zweck im
Haushalt. Bei unsachgemäßer
Benutzung oder Nichteinhaltung
dieser Anweisungen übernimmt
Kenwood keinerlei Haftung.
Vor dem Anschluss an das
Stromnetz
●Überprüfen Sie, ob die auf der
Unterseite des Gerätes angegebene
Netzspannung der Ihres
Stromnetzes entspricht.
●Dieser Kontaktgrill entspricht den
EU-Richtlinien 89/336/EEC.
Vor der ersten Benutzung des
Gerätes
●Reinigen Sie die Teile "siehe
Reinigung".
Legende
Schnappverschluss
Handgriff
Sicherungsclips für Platte
Tropfauffang
Höhenverstellung
Saftablauf
Temperatureinstellung – obere und
untere Platten
Temperaturanzeige
Entriegelungsclips für den Grill
Wende-Grillplatten
(a) Waffel (HG185 & HG186)
(b) Brötchen (HG184 & HG187)
Benutzung Ihres Grills
Hinweis: Öffnen Sie vor
Inbetriebnahme Ihres Grills den
Schnappverschluss . Der
Schnappverschluss sollte nur
beim Lagern des Grills
geschlossen werden.
12
Deutsch
Bevor Sie die Bedienungsanleitung lesen, bitte Deckblatt mit
Illustrationen auseinander klappen

1 Stecken Sie den Grill ein und stellen
Sie die gewünschte Temperatur für
die oberen und unteren Platten ein
(die Kontrollleuchten beginnen zu
blinken). Der Grill ist betriebsbereit,
wenn die Kontrollleuchten
aufhören zu blinken.
2 Legen Sie die Nahrungsmittel in den
Grill und stellen Sie den Tropfauffang
oder einen anderen passenden
Behälter unter den Spritzablauf .
●Die Dauer des Grillvorgangs ist
unterschiedlich, abhängig vom
eigenen Geschmack und der
Größe/Dicke der Nahrungsmittel, die
Sie zubereiten wollen.
3 Während der Grill die richtige
Temperatur aufrechterhält, schaltet
sich die Temperaturanzeige ein und
aus.
4 Ist das Essen fertig, entnehmen Sie
dieses vorsichtig mit einem Schieber
aus Holz oder Kunststoff. Verwenden
Sie keine metallenen Gegenstände
dafür. Diese können die
antihaftbeschichtete Oberfläche
beschädigen.
5 Nach dem Verwenden schalten Sie
das Gerät ab und ziehen Sie den
Netzstecker. Achten Sie vor dem
Reinigen darauf, dass das Gerät
komplett abgekühlt ist.
Wendeplatten
Abhängig davon, welche Platten in
Ihrem Grill eingebaut sind, können
Sie diese wenden und so entweder
für Waffel oder Brötchen verwenden.
●Achten Sie darauf, dass die Platten
vor dem Umdrehen und vor
Grillbeginn stets sauber sind.
●Wenn Sie Ihren Grill geschlossen
verwenden, stellen Sie den
Temperaturregler auf Stufe 6.
Der Grill kann in folgenden
Stellungen verwendet werden: -
Stellung A (geschlossene
Stellung)
Diese Stellung eignet sich besonders
gut für dünne Fleischscheiben und
zum Toasten von Sandwichs.
Durch die beiden Grillflächen werden
Ihre Nahrungsmittel von beiden
Seiten gleichzeitig gegrillt. Sie sparen
Zeit und Ihre Nahrungsmittel bleiben
saftig.
●Stellen Sie beide Temperaturregler
auf Stufe 6.
●Erhitzen Sie den Grill in
geschlossener Position, bis die
Temperaturanzeige nicht mehr blinkt.
●Legen Sie die Nahrungsmittel auf die
untere Platte und schließen Sie die
obere Platte, so dass sie auf dem
Essen liegt.
Stellung B (komplett offen)
In dieser Stellung haben Sie eine
große Grillfläche und können große
Mengen gleichzeitig grillen – eignet
sich hervorragend für Fisch, Gemüse
und Kebab.
●Stellen Sie beide Temperaturregler
auf Stufe 6.
●Erhitzen Sie den Grill in
geschlossener Position, bis die
Temperaturanzeige nicht mehr blinkt.
●Öffnen Sie den Grill, heben Sie den
oberen Handgriff an und senken
Sie die obere Platte nach hinten ,
bis sie flach auf der Arbeitsplatte
aufliegt.
●Legen Sie die zu grillenden
Nahrungsmittel auf die Grillfläche
und stellen Sie die gewünschte
Temperatur ein.
Stellung C (höhenverstellbar)
In dieser Stellung sind die Platten
voneinander getrennt. Sie können
zwei unterschiedliche Höhen
einstellen. Ideal zum Kochen von
empfindlicheren Nahrungsmitteln wie
Fisch und offene Sandwichs, welche
durch das Gewicht der oberen Platte
zerdrückt würden.
●Stellen Sie beide Temperaturregler
auf Stufe 6.
13

●Erhitzen Sie den Grill in
geschlossener Position, bis die
Temperaturanzeige nicht mehr blinkt.
●Legen Sie die zu grillenden
Nahrungsmittel auf die Grillfläche
und stellen Sie die gewünschte
Temperatur ein.
●Den gewünschten Abstand, können
Sie durch runterdrücken beider
Hebel einstellen. Die ausgewählte
Höhe ist von der Dicke der zu
grillenden Nahrungsmittel abhängig.
Tipps
●Rotes Fleisch benötigt eine höhere
Grilltemperatur und kürzere
Garzeiten.
●Für Fisch sollten Sie eine niedrigere
Temperatur und längere Garzeit
einstellen.
●Garen Sie keine gefrorenen
Nahrungsmittel.
●Zarte Fleischstücke eignen sich
besser zum Grillen und somit
bestens für Ihren Grill. Zähes Fleisch
sollten Sie besser vermeiden.
●Beste Ergebnisse erzielen Sie mit
dünneren und gleichmäßig starken
Scheiben.
●Die Garzeit bei offenem Grill dauert
länger, weil Sie das Grillgut nach der
Hälfte der Garzeit einmal wenden
müssen.
●Überprüfen Sie vor dem Servieren
immer, ob das Essen gut
durchgegart ist. Fleisch und Geflügel
sollte so lange gegart werden, bis
der ablaufende Saft klar ist.
Reinigung
●Schalten Sie das Gerät aus, ziehen
Sie den Netzstecker und lassen Sie
den Grill komplett auskühlen. Erst
dann beginnen Sie mit der Reinigung.
●Reinigen Sie den Grill nach jeder
Anwendung, damit dieser immer
sauber und jederzeit betriebsbereit ist.
●Wischen Sie überschüssiges Öl/Fett
mit einem Papiertuch ab und
benutzen Sie einen Schieber aus
Holz oder Plastik zum Entfernen der
Essensreste von den Grillplatten.
Verwenden Sie kein Scheuerpulver
oder Stahlwolle. Diese können die
Antihaftbeschichtung beschädigen.
●Der Grill ist mit einem
Schnappverschluss , zum
Festhalten der Platten während des
Lagerns versehen.
Grillplatten
●Entfernen Sie die Grillplatten, durch
Zurückschieben des Sicherungsclips
und Anheben der Entnahmegriffe .
●Waschen Sie die Platten in heißem
Seifenwasser.
Alternativ dazu können diese auch in
der Spülmaschine gereinigt werden.
Achten Sie vor dem Einsetzen in den
Grill darauf, dass die Platten
vollständig trocken sind.
●Setzen Sie die Rückseite der
Grillplatten zuerst an und schieben
dann die Sicherungclips wieder
darüber .
Service und Kundendienst
●Aus Sicherheitsgründen darf ein
beschädigtes Kabel nur von
KENWOOD oder einer autorisierten
KENWOOD-Werkstatt ausgetauscht
werden.
Wenn Sie Hilfe bei:
●der Verwendung Ihres Grills oder
●Kundendienst oder Reparatur
benötigen
●setzen Sie sich mit dem Händler in
Verbindung, bei dem Sie Ihren Grill
gekauft haben.
Temperatureinstellungen
Einstellung Temperatur
1 90°C
2 120°C
3 150°C
4 180°C
5 210°C
6 240°C
14

prima di utilizzare la vostra
apparecchiatura Kenwood
●Leggere attentamente le presenti
istruzioni e conservarle come futuro
riferimento.
●Rimuovere la confezione e le
etichette
sicurezza
●NON toccare le superfici calde. Le
superfici accessibili possono
diventare roventi durante l'utilizzo.
Utilizzare sempre gli appositi manici
e tasti.
●Non utilizzare la griglia senza aver
inserito le piastre.
●Non immergere l'apparecchio, il
cavo o la spina in acqua o in altro
liquido.
●Controllare sempre l'apparecchio
durante l'uso.
●Non utilizzare l'apparecchio se è
danneggiato, oppure se sono
danneggiati il cavo o la spina. Farlo
controllare o riparare: vedere
‘assistenza'.
●Questo apparecchio deve essere
utilizzato solo su una superficie
piatta resistente al calore.
●Non lasciare il cavo sospeso sul
bordo del piano di lavoro o che
tocchi la superficie rovente.
●Scollegare sempre l'apparecchio
quando non è utilizzato e attendere
che si raffreddi completamente
prima di rovesciare o rimuovere le
griglie per la pulizia.
●Non utilizzare l'apparecchio
all'aperto.
●Non posizionare alcuna parte di
questo apparecchio sopra o in
prossimità di una fiamma, di una
piastra calda o di un forno
riscaldato.
●Con alcuni cibi può essere prodotta
una grande quantità di fumo;
garantire sempre un'adeguata
ventilazione all'ambiente.
●Non lasciare che persone non
incapaci utilizzino l'apparecchiatura
senza
●Non consentire a bambini di
utilizzare o giocare con
l'apparecchio.
●Utilizzare l'apparecchio solo per l'uso
domestico per cui è stato realizzato.
Kenwood non si assumerà alcuna
responsabilità se l'apparecchio viene
utilizzato in modo improprio o senza
seguire le presenti istruzioni.
prima di collegare la presa
●Assicurarsi che la presa elettrica
corrisponda a quella mostrata sotto
la griglia.
●Questa griglia è conforme alla
Direttiva della Comunità Economica
Europea 89/336/EEC.
prima di utilizzare
l'apparecchio per la prima
volta
●Lavare i pezzi “vedere pulizia”.
legenda
chiusura di sicurezza
manico
fermagli di sicurezza della piastra
vassoio per gocciolamento
manopola di regolazione del calore
raccolta gocciolamento
comandi della temperatura -
piastre superiore e inferiore
spie della temperatura
linguette rimovibili della griglia
piastre rovesciabili
(a) cialde (HG185 e HG186)
(b) panini (HG184 e HG187)
usare la bistecchiera
Nota: sbloccare la chiusura di
sicurezza prima di usare la
bistecchiera. La chiusura di
sicurezza dovrebbe essere usata
solamente quando si mette da
parte l’apparecchio.
15
Italiano
Prima di leggere questo manuale si prega di aprire la prima pagina, al
cui interno troverete le illustrazioni

1 Inserire la spina e impostare i
comandi della temperatura per le
piastre superiore e inferiore alla
temperatura richiesta (la spia inizierà
a lampeggiare). La bistecchiera è
pronta quando la spia della
temperatura smette di
lampeggiare.
2 Aggiungere il cibo e posizionare il
vassoio per il gocciolamento o
altri contenitori adatti sotto la
raccolta gocciolamento .
●I tempi di cottura variano in base alle
preferenze personali e alla
quantità/spessore del cibo da
cucinare.
3 La spia della temperatura si
accenderà e spegnerà in base alla
temperatura della griglia.
4 Una volta completata la cottura,
rimuovere con cautela il cibo
utilizzando un mestolo di legno o
plastica. Non utilizzare utensili
metallici perché potrebbero graffiare
e danneggiare la superficie anti
aderente.
5 Dopo l'utilizzo, spegnere
l'apparecchio e scollegare la spina.
Lasciare raffreddare completamente
la griglia prima di pulire.
piastre rovesciabili
●Le piastre della griglia possono
essere rovesciate per essere usate
come piastre per cialde o panini in
base ai tipi di piastra forniti con il
proprio modello.
●Assicurarsi che entrambi i lati delle
piastre siano puliti e asciutti prima di
rovesciarle e iniziare la cottura.
●Usare l’apparecchio in posizione
chiusa con il comando della
temperatura fissato nella posizione
6.
La griglia può essere utilizzata nelle
seguenti posizioni: -
posizione A (chiusa)
Questa posizione è ideale per
cucinare pezzi di carne sottili e
preparare sandwich.
Le due superfici della griglia
consentono di cucinare entrambi i
lati dei cibi contemporaneamente,
risparmiando tempo e conservando i
succhi naturali del cibo.
●Impostare entrambi i comandi della
temperatura nella posizione 6.
●Riscaldare la bistecchiera chiusa
finché le spie della temperatura
smettono di lampeggiare.
●Posizionare il cibo sulla piastra
inferiore e chiudere la piastra
superiore assicurandosi che tocchi il
cibo.
posizione B (completamente
aperta)
Questa posizione offre un'ampia
superficie per cucinare grandi
quantità di cibo
contemporaneamente ed è ideale
per pesce, verdure e kebab.
●Impostare entrambi i comandi della
temperatura nella posizione 6.
●Riscaldare la bistecchiera chiusa
finché le spie della temperatura
smettono di lampeggiare.
●Aprire la griglia, quindi sollevare il
manico superiore e abbassare la
piastra superiore verso l'esterno
fino a farle toccare il piano di lavoro.
●Posizionare il cibo da cucinare sulla
superficie della griglia e regolare la
temperatura come necessario.
posizione C (altezza
regolabile)
In questa posizione, le piastre della
griglia sono separate e sono
disponibili due diverse altezze. Ideale
per cucinare cibo più delicato, come
pesce e sandwich, che non
potrebbe sopportare il peso della
piastra superiore.
●Impostare entrambi i comandi della
temperatura nella posizione 6.
●Riscaldare la bistecchiera chiusa
finché le spie della temperatura
smettono di lampeggiare.
16

●Posizionare il cibo da cucinare sulla
superficie della griglia e regolare la
temperatura come necessario.
●Regolare all’altezza richiesta
abbassando entrambe le leve . La
posizione selezionata dell’altezza
dipenderà dal cibo da cuocere.
suggerimenti
●La carne rossa richiede temperature
di griglia più elevate e tempi più
brevi.
●Il pesce dovrebbe essere cotto a
temperature più basse per un tempo
di cottura maggiore.
●Non cuocere cibo congelato.
●Le carni più tenere sono più adatte
per essere grigliate e perciò sono le
carni migliori da usare nella
bistecchiera. È preferibile non
cuocere carni poco tenere.
●Per ottenere risultati migliori si
consiglia di cucinare pezzi sottili e
cibo di spessore uniforme.
●Cucinare su una griglia aperta
richiede tempi più lunghi in quanto il
cibo deve essere girato a metà
cottura.
●Prima di servire, assicurarsi sempre
che la cottura del cibo sia completa.
Cucinare carne e pollame finché
emettono succhi.
pulizia
●Spegnere, scollegare la spina e
lasciare raffreddare completamente
la griglia prima di pulire.
●Pulire la griglia dopo ogni utilizzo per
garantire che sia sempre in buone
condizioni per l'utilizzo.
●Utilizzare un panno adatto per pulire
i resti di olio/grasso e un utensile di
legno o plastica per rimuovere
eventuali residui di cibo dalle piastre
della griglia. Non utilizzare abrasivi o
pezzette ruvide che possono
danneggiare la superficie anti
aderente.
●Pulire la parte esterna con un panno
umido, quindi asciugare.
●La bistecchiera ha una chiusura di
sicurezza che fissa le piastre
quando l’apparecchio viene messo
da parte.
piastre della griglia
●Rimuovere le piastre usando il retro
scorrevole dei fermagli di
sicurezza e sollevando le linguette
per la rimozione .
●Lavare le piastre in acqua calda e
sapone. Oppure, lavarle nella
lavastoviglie. Assicurarsi che siano
completamente asciutte prima di
riposizionarle nella griglia.
●Riposizionare le piastre allineando il
retro delle stesse e in seguito
richiudere i fermagli .
assistenza e servizio
clienti
●Se il cavo è danneggiato, per motivi
di sicurezza deve essere sostituito
da KENWOOD o da un centro di
assistenza autorizzato KENWOOD.
Se si desidera assistenza per:
●utilizzare la griglia o
●assistenza o riparazioni
●Contattare il rivenditore presso il
quale è stata acquistata la griglia.
impostazioni della temperatura
impostazione temperatura
1 90°C
2 120°C
3 150°C
4 180°C
5 210°C
6 240°C
17
This manual suits for next models
3
Table of contents
Languages:
Other Kenwood Grill manuals

Kenwood
Kenwood Snack Maker User manual

Kenwood
Kenwood HG266 User manual

Kenwood
Kenwood HG166 Series User manual

Kenwood
Kenwood HG230 User manual

Kenwood
Kenwood HG230 User manual

Kenwood
Kenwood HG230 User manual

Kenwood
Kenwood HG600 Series User manual

Kenwood
Kenwood SDM401 User manual

Kenwood
Kenwood HG210 User manual

Kenwood
Kenwood HG266 Installation guide
Popular Grill manuals by other brands

Outsunny
Outsunny 846-103V94 Assembly & instruction manual

Fit4Home
Fit4Home CJ0091 user manual

ohmex
ohmex 4500 instruction manual

NewAge Products
NewAge Products KAMADO PRO Installation and operation guide

Master Forge
Master Forge GGP-2501 instruction manual

EXPERT GRILL
EXPERT GRILL GBC1849W-U owner's manual