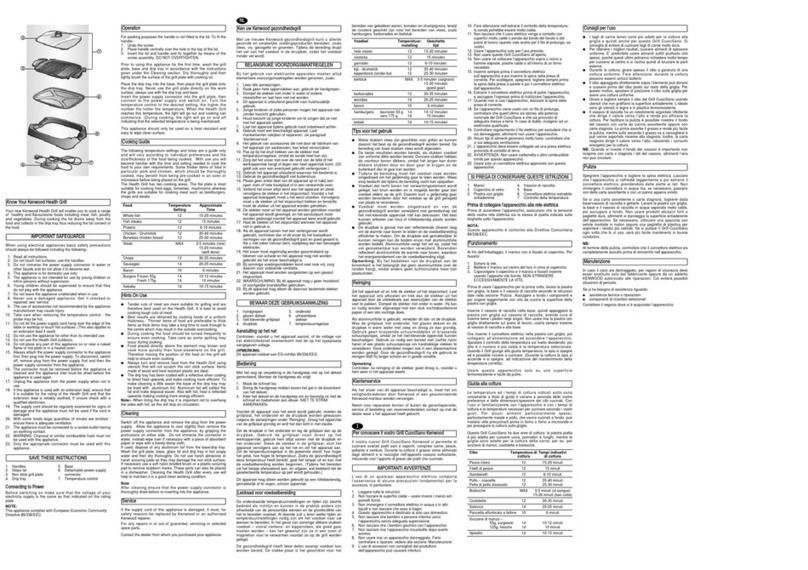
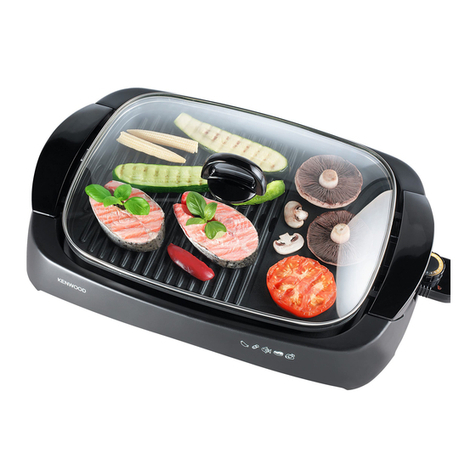
Kenwood HG210 User manual

instructions
istruzioni
instrucciones
Bedienungsanleitungen
gebruiksaanwijzing
Instrukcja obsługi
instruções
TYPE HG210

English 2 - 7
Nederlands 8 - 14
Français 15 - 21
Deutsch 22 - 28
Italiano 29 - 35
Português 36 - 42
Español 43 - 49
Dansk 50 - 55
Svenska 56 - 62
Norsk 63 - 69
Suomi 70 - 75
Türkçe 76 - 82
Česky 83 - 89
Magyar 90 - 96
Polski 97 - 103
Ελληνικά 104 - 110
Slovenčina 111 - 117
Українська 118 - 124
´¸∂w
521 - 921

2
1
7
8
5
4
3
6
2
8

Position A
Position B
Position C

safety
lRead these instructions carefully and retain for future
reference.
lRemove all packaging and any labels.
lIf the plug or cord is damaged it must, for safety
reasons, be replaced by Kenwood or an authorised
Kenwood repairer in order to avoid a hazard.
lThe symbol marked on the product indicates a
surface that can become hot during use.
lTake care when opening and closing the grill.
lDO NOT touch hot surfaces. Accessible surfaces are
liable to get hot during use. Always use the handle or
wear protective gloves if necessary.
lDo not operate the grill without the plates fitted.
Ensure the plates are completely dry before refitting
to the grill.
lNever touch the plates with sharp or abrasive items,
as this will damage the non-stick surface.
lDo not immerse the appliance, cord or plug in water
or any other liquid.
lDo not leave the appliance unattended when in use.
lDo not use if there is any damage to the appliance,
cord or plug. Get it checked or repaired: see ‘service
and customer care’.
lThis appliance should only be used on a stable, flat
heat resistant surface or table. If operating on a
surface less than 85cm high take extra care especially
when using near children.
lDo not let the cord hang over the edge of the
worksurface or touch hot surfaces.
lDo not move the unit whilst in operation or still hot.
lAlways unplug the appliance when not in use and
allow it to cool completely before storing or removing
the grill plates for cleaning.
lDo not use the appliance outdoors.
2
English

3
lDo not place any part of this appliance on or near a
naked flame,hot plate or in a heated oven.
lWith some foods large quantities of smoke are
emitted – ensure there is adequate ventilation.
l
This appliance is not intended to be operated by means
of an external timer or separate remote-control system.
lMisuse of your appliance can result in injury.
lThis appliance is designed to cook food and should
not be used for any other purposes, or modified or
tampered with in any way.
lChildren from 8 years and above can use, clean
and perform user maintenance on this appliance in
accordance with the User Instructions provided they
are supervised by a person responsible for their safety
and have been given instruction concerning the use of
the appliance and are aware of the hazards.
lPersons with reduced physical, sensory or mental
capabilities or lack of knowledge using this appliance
must have been given supervision or instruction on its
safe use and are aware of the hazards.
lChildren must not play with the appliance and both
appliance and cord must be out of reach of children
less than 8 years.
lOnly use the appliance for its intended domestic use.
Kenwood will not accept any liability if the appliance
is subject to improper use, or failure to comply with
these instructions.
before plugging in
• Make sure your electricity supply is
the same as the one shown on the
underside of the appliance.
• WARNING: THIS APPLIANCE
MUST BE EARTHED.
• This appliance conforms to EC
Regulation 1935/2004 on materials
and articles intended to come into
contact with food.
before using for the first time
• Wash the parts – see cleaning.
• Plug in and turn the temperature
control 5to setting 5 and allow
to heat up. Unplug once indicator
light 6goes out. Repeat 3 times.
• Lightly brush the cooking surface
with cooking oil before using.

3 4
key
1 support handle
2 handles
3 grill position supports
4 drainage spout
5 temperature control
6 indicator Light
7 cord storage hook
8 plate locking latches
using your contact grill
1 Plug in and turn the temperature
control 5to the required
temperature setting from 1 to 5.
The indicator light 6will come
on. Note: When turned to the
position the temperature is OFF.
2 Place a small heat proof container
under the drainage spout 4to
collect any excess cooking fat
or oil.
• The grill is ready to use once the
indicator light 6goes out.
• The temperature light will come
on and off as the grill maintains
the correct temperature
during cooking.
• Cooking times required will
vary according to individual
preferences and the size/thickness
of the food being cooked.
3 When the food is cooked, carefully
remove the food using a wooden
or plastic spatula. Do not use
metal utensils as they will scratch
and damage the non-stick surface.
4 Switch off and unplug after use.
Allow the grill to cool completely
before cleaning.
The Grill can be used in 3 positions.
(Refer to the cooking chart
for recommended times and
temperature settings.)
Position A (closed position)
Ideal for cooking thin cuts of meat
and sandwiches.
The two grill surfaces allow you to
cook both sides of the food at the
same time, saving time and retaining
the natural juices of the food.
Select the required temperature setting.
Heat the grill in the closed position
until the indicator light goes out.
Place the food on the lower plate
and close until the top plate rests on
the food.
Position B (fully open position)
Caution: In position B the grill must
be fully opened to avoid damaging
or overheating the handles.
This position offers a large grilling
surface to cook many foods at the
same time, and is ideal for fish,
vegetables and kebabs.
Heat the grill in the closed position
until the indicator light goes out.
Open the grill, then lift the top handle
up and lower the top plate down
backwards until it lays flat on the
worksurface.
Place the food to be cooked on
the grill surface and adjust the
temperature as required. Turn the
food halfway through cooking.
Position C (grill position)
In this position the grill plates are
spaced apart and ideal for cooking
larger and thicker items.
Heat the grill in the closed position
until the indicator light goes out.
Lift up the top plate by the handle
and place the food on the lower plate.
Lift up the top plate in the guide slot
and then lower until resting on the
grill position supports.

5
Recommended Cooking Times & Temperatures Chart
This chart is for guidance only and timings will vary depending on the exact
size and thickness of the food being cooked.
Defrost frozen food before grilling.
Food Type Grill Position Cooking time
(Minutes)
Temperature
Setting
A B C
Thin cuts
of meat l l Depends on
individual taste
& thickness of
meat
4 - 5
Chicken
& Turkey
Breast
Fillets
l l 15 – 25 4 – 5
Tomatoes
Onion
Mushrooms
l l 3 - 6 2 – 3
Kebabs l l 8 - 10 3 – 4
Grilled
Sandwiches
l4 - 6 4 - 5
Fish Fillets/
steaks
Salmon
Trout
Mackerel
l l 5 - 8 3 - 4
Hints
• Red meats require a higher grilling
temperature and a shorter time.
• Fish should be cooked at a lower
temperature for a longer cooking
time.
• Do not cook frozen food.
• Tender cuts of meat are more
suitable for grilling and are
therefore best used on the grill. It
is best to avoid cooking tough cuts
of meat.
• Best results are obtained by
cooking thinner items and foods of
a uniform thickness.
• Take care when grilling sausages
and burgers as excessive fat/
oil may splash and spit during
cooking.
• Grilling with an open grill takes
longer, as the food needs to be
turned over halfway through
cooking.
• Always check the food is cooked
thoroughly before serving. Cook
meat and poultry until the juices
run clear.

5 6
cleaning
• Switch off ,unplug and allow the
grill to cool down completely
before cleaning.
• Clean the grill after each use to
maintain it in a good clean working
condition.
• Use a paper towel to wipe off any
excess oil/grease and a wooden or
plastic spatula to remove any food
debris from the grill plates.
• Do not use abrasive cleaners or
steel wool as they will damage the
non-stick coating.
• Wipe the outside with a damp
cloth, then dry.
grill plates
• Remove the grill plates by pulling
the locking latch 8forward and
then lift the plates out.
• Wash the plates in hot soapy
water. Alternatively they can be
washed in your dishwasher.
• Ensure the plates are completely
dry before refitting to the grill.
• Refit the grill plates by lining up
the back of the plates with the unit
first, then press down to lock in
place.
Storage
Use the cord hook 7on the
underside to secure the cord before
storing the unit.
service and customer care
• If you experience any
problems with the operation
of your appliance, before
requesting assistance visit
www.kenwoodworld.com.
• Please note that your product
is covered by a warranty, which
complies with all legal provisions
concerning any existing warranty
and consumer rights in the country
where the product was purchased.
• If your Kenwood product
malfunctions or you find any
defects, please send it or bring
it to an authorised KENWOOD
Service Centre. To find up to date
details of your nearest authorised
KENWOOD Service centre visit
www.kenwoodworld.com or the
website specific to your Country.
• Made in Greece.

7
IMPORTANT INFORMATION FOR
CORRECT DISPOSAL OF THE
PRODUCT IN ACCORDANCE
WITH THE EUROPEAN DIRECTIVE
ON WASTE ELECTRICAL AND
ELECTRONIC EQUIPMENT (WEEE)
At the end of its working life, the
product must not be disposed of as
urban waste.
It must be taken to a special local
authority differentiated waste
collection centre or to a dealer
providing this service.
Disposing of a household appliance
separately avoids possible
negative consequences for the
environment and health deriving
from inappropriate disposal and
enables the constituent materials to
be recovered to obtain significant
savings in energy and resources. As
a reminder of the need to dispose of
household appliances separately, the
product is marked with a crossed-
out wheeled dustbin.

7 8
veiligheid
lLees deze instructies zorgvuldig door en bewaar ze
voor toekomstig gebruik.
lVerwijder de verpakking en alle labels.
lAls de stekker of het snoer beschadigd is, moet het
om veiligheidsredenen door Kenwood of een door
Kenwood geautoriseerd reparatiebedrijf vervangen
worden, om gevaar te voorkomen.
lHet symbool op een product geeft aan dat een
oppervlak heet kan worden tijdens gebruik.
lWees voorzichtig tijdens het openen en sluiten van de
grill.
lRaak hete oppervlakken NIET aan. Toegankelijke
oppervlakken kunnen tijdens het gebruik heet
worden. Gebruik altijd het handvat of draag zo nodig
handschoenen.
lGebruik de grill nooit zonder dat de platen bevestigd
zijn. Zorg ervoor dat de platen helemaal droog zijn
voordat u ze weer in de grill installeert.
lRaak de platen nooit met scherpe of krassende
voorwerpen aan, omdat u daarmee de antiaanbaklaag
beschadigt.
lDompel het apparaat, het netsnoer of de stekker
nooit in water of in een andere vloeistof onder.
lLaat het apparaat nooit onbeheerd achter wanneer
het aan staat.
lNiet gebruiken als het apparaat, het netsnoer of de
stekker beschadigd is. Zorg ervoor dat het apparaat
gecontroleerd of gerepareerd wordt: raadpleeg
‘onderhoud en klantenservice’.
lDit apparaat mag alleen op een stabiel, horizontaal en
warmtebestendig (tafel)oppervlak worden gebruikt.
Als u het apparaat bedient op een oppervlak dat
minder dan 85 cm hoog is, dient u zeer voorzichtig te
Nederlands
Vouw de voorpagina a.u.b. uit voordat u begint te lezen. Op deze manier zijn
de afbeeldingen zichtbaar

9
zijn, vooral bij gebruik in de buurt van kinderen.
lZorg ervoor dat het snoer niet over de rand van het
werkblad hangt of hete oppervlakken raakt.
lVerplaats de machine niet terwijl hij aan staat of als
hij nog heet is.
lHaal de stekker altijd uit het stopcontact wanneer
het apparaat niet wordt gebruikt en laat het volledig
afkoelen voordat u de grillplaten verwijdert om ze
schoon te maken.
lGebruik het apparaat nooit buitenshuis.
lPlaats geen enkel onderdeel van dit apparaat op of
in de buurt van een vlam of hete plaat, en plaats het
niet in een hete oven.
lSommige voedingsmiddelen die worden gegrild
veroorzaken een grote hoeveelheid rook – zorg
ervoor dat er voldoende ventilatie is.
lDit apparaat mag niet worden bediend door een
externe timer of een aparte afstandsbediening.
lMisbruik van dit apparaat kan persoonlijk letsel
veroorzaken.
lDit apparaat is ontworpen voor de bereiding
van voedingsmiddelen en mag niet voor andere
doeleinden worden gebruikt, of worden gewijzigd of
veranderd.
lKinderen van 8 jaar en ouder mogen dit apparaat
gebruiken, reinigen en gebruikersonderhoud uitvoeren
in overeenstemming met de gebruikersinstructies,
mits ze onder toezicht staan van iemand die
verantwoordelijk is voor hun veiligheid en ze
instructies hebben gekregen over het gebruik van het
apparaat en zich bewust zijn van de gevaren.
lPersonen met verminderde lichamelijke, sensorische
of geestelijke capaciteiten of gebrek aan kennis die
dit apparaat gebruiken, moeten onder toezicht staan
of instructie hebben gekregen over het veilig gebruik
van het apparaat en zich bewust zijn van de gevaren.

9 10
voordat u de stekker in het
stopcontact steekt
• Controleer of de
elektriciteitsvoorziening dezelfde
spanning heeft als op de onderkant
van het apparaat wordt aangegeven.
• WAARSCHUWING: DIT APPARAAT
MOET GEAARD ZIJN.
• Dit apparaat voldoet aan EG
Verordening 1935/2004 inzake
materialen en voorwerpen die
bestemd zijn om met levensmiddelen
in contact te komen.
voorafgaand aan het eerste gebruik
• Reinig de onderdelen - raadpleeg
‘reinigen’.
• Steek de stekker in het stopcontact
en zet de temperatuurregeling 5
op stand 5 en laat het apparaat
opwarmen. Haal de stekker uit het
stopcontact zodra het lampje 6
dooft. Herhaal dit 3 maal.
• Bestrijk de plaatoppervlakken vóór
het gebruik met een beetje bakolie.
legenda
1 handgreep
2 handvatten
3 grillstandsteunen
4 afvoergoot
5 temperatuurregeling
6 lampje
7 snoerhaak
8 plaatvergrendelingen
de grill gebruiken
1 Steek de stekker in het stopcontact
en zet de temperatuurregeling 5
op de vereiste temperatuur, 1 tot 5.
Het lampje 6gaat aan. Opmerking:
Wanneer de temperatuurregeling
naar wordt gedraaid, wordt de
temperatuur uitgeschakeld.
2 Plaats een kleine, warmtebestendige
opvangbak onder de afvoergoot 4
om al het overtollige vet of de olie
op te vangen.
• De grill is klaar voor gebruik zodra
het lampje 6dooft.
• Het temperatuurlampje gaat aan
en uit, omdat de grill de juiste
temperatuur handhaaft.
• De benodigde kooktijden variëren
al naar gelang de individuele
voorkeur en de grootte/dikte van
de voedingsmiddelen die worden
bereid.
3 Zodra het eten gaar is, haalt u het
voorzichtig met een houten of
plastic spatel van de grill af. Gebruik
nooit metalen gereedschap, omdat
dat krassen veroorzaakt en de
antiaanbaklaag beschadigt.
4 Schakel het apparaat uit en haal de
stekker uit het stopcontact. Laat de
grill helemaal afkoelen voordat u
hem gaat schoonmaken.
lKinderen mogen niet met het apparaat spelen. Het
apparaat en het snoer moeten buiten het bereik van
kinderen worden gehouden die jonger zijn dan 8 jaar.
lGebruik het apparaat alleen voor het huishoudelijke
gebruik waarvoor het is bedoeld. Kenwood kan niet
aansprakelijk worden gesteld in als het apparaat is
misbruikt of als deze instructies niet zijn opgevolgd.

11
De grill kan op 3 standen worden
gezet.
(Raadpleeg de bereidingstabel
voor de aanbevolen kooktijden en
temperatuurinstellingen.)
Stand A (gesloten stand)
Ideaal voor het bereiden van
dungesneden vlees en sandwiches.
De twee grilloppervlakken zorgen
ervoor dat de voedingsmiddelen
gelijktijdig aan weerszijden worden
verhit. Dit bespaart tijd en behoudt
de natuurlijke sappen van de
voedingsmiddelen.
Selecteer de vereiste temperatuur.
Laat de grill in de gesloten stand
opwarmen totdat het lampje dooft.
Plaats de voedingsmiddelen op de
onderste plaat en sluit het deksel
zodat de bovenste plaat op het eten
rust.
Stand B (volledig open)
Opgelet: Op stand B moet de grill
volledig geopend zijn om schade
aan of oververhitting van de
handvatten te voorkomen.
Deze stand biedt een groot
grilloppervlak voor de bereiding
van verschillende voedingsmiddelen
tegelijkertijd en is ideaal voor vis,
groenten en kebabspiesjes.
Laat de grill in de gesloten stand
opwarmen totdat het lampje dooft.
Open de grill, til het bovenste
handvat omhoog en laat de bovenste
plaat naar achteren zakken, tot hij
plat op het werkoppervlak ligt.
Leg de voedingsmiddelen die verhit
moeten worden op het grilloppervlak
en verstel de temperatuur naar
wens. Draai de voedingsmiddelen
halverwege om.
Stand C (grillstand)
In deze stand worden de grillplaten
uit elkaar gehaald, wat ideaal is voor
het bereiden grotere en dikkere
voedingsmiddelen. Laat de grill in
de gesloten stand opwarmen totdat
het lampje dooft. Til de bovenste
plaat met het handvat omhoog en
leg de voedingsmiddelen op de
onderste plaat. Zet de bovenste
plaat in de geleidesleuf en laat hem
vervolgens zakken totdat hij op de
grillstandsteunen rust.

11 12
Aanbevolen kooktijden & temperaturen
Deze tabel dient alleen als richtlijn. De tijden variëren afhankelijk van de exacte
grootte en dikte van de voedingsmiddelen die worden bereid.
Ontdooi diepgevroren voedingsmiddelen voordat u ze op de grill legt.
Soort
voedingsmiddel
Grillstand Kooktijd
(minuten)
Temperatuur-
instelling
A B C
Dungesneden
vlees l l Hangt van de
individuele
smaak en van
de dikte van
het vlees af
4-5
Kip- en
kalkoenfilets l l 15-25 4-5
Tomaten
Uien
Champignons
l l 3-6 2-3
Kebabspiesjes l l 8-10 3-4
Gegrilde
sandwiches
l4-6 4-5
Visfilets / steaks
Zalm
Zeeforel
Makreel
l l 5-8 3-4
Tips
• Rood vlees moet op een hogere
temperatuur gedurende kortere
tijd worden gegrild.
• Vis moet langer bij een lagere
temperatuur worden gegrild.
• Gebruik geen diepgevroren
voedingsmiddelen.
• Mals vlees is ideaal om te grillen.
Vermijd taaier vlees.
• Het beste resultaat wordt
verkregen wanneer dunnere
voedingsmiddelen met een
gelijkmatige dikte worden gegrild.
• Wees voorzichtig bij het grillen
van worstjes en hamburgers,
omdat het vet of de olie tijdens de
bereiding kan gaan spetteren.
• Grillen met een open grill
duurt langer, omdat de
voedingsmiddelen halverwege
omgedraaid moeten worden.
• Controleer altijd of het eten goed
gaar is, voordat u het serveert.
Gril vlees en gevogelte totdat het
vleessap helder is.

13
reinigen
• Schakel de grill uit, haal de stekker
uit het stopcontact en laat hem
volledig afkoelen voordat u hem
gaat schoonmaken.
• Reinig de grill na ieder gebruik,
zodat hij goed blijft functioneren.
• Gebruik keukenpapier om het
overtollige vet of de olie weg te
vegen en gebruik een houten of
plastic spatel om de voedselresten
van de grillplaten te verwijderen.
• Gebruik nooit schurende
reinigingsmiddelen of staalwol,
omdat hierdoor de antiaanbaklaag
beschadigd zal raken.
• Veeg de buitenkant van de grill
met een vochtige doek schoon en
droog hem daarna af.
grillplaten
• Verwijder de grillplaten door de
vergrendeling 8naar voren te
halen en de platen uit het apparaat
te tillen.
• Maak de platen met heet zeepsop
schoon. De platen kunnen ook in
de vaatwasser worden gewassen.
• Zorg ervoor dat de platen
helemaal droog zijn voordat u ze
weer installeert.
• Monteer de grillplaten door de
achterkant van de platen eerst
met het apparaat uit te lijnen en
vervolgens de platen naar beneden
te duwen om ze te vergrendelen.
opslag
Gebruik de snoerhaak 7aan de
onderkant om het snoer op te bergen
voordat u het apparaat wegzet.
onderhoud en
klantenservice
• Als u problemen ondervindt
met de werking van dit
apparaat, gaat u eerst naar
www.kenwoodworld.com voordat
u hulp inroept.
• Dit product is gedekt door een
garantie die voldoet aan alle
wettelijke regels voor bestaande
garanties en consumentenrechten
die gelden in het land waar het
product is gekocht.
• Als uw Kenwood product
niet goed functioneert of als
u defecten opmerkt, kunt u
het naar een erkend Service
Center van KENWOOD sturen
of brengen. Voor informatie
over het KENWOOD Service
Center in uw buurt gaat u naar
www.kenwoodworld.com of naar
de specifieke website in uw land.
• Gemaakt in Griekenland.

13 14
BELANGRIJKE INFORMATIE
VOOR DE JUISTE VERWIJDERING
VAN HET PRODUCT VOLGENS
DE EUROPESE RICHTLIJN
BETREFFENDE AFGEDANKTE
ELEKTRISCHE EN ELEKTRONISCHE
APPARATUUR (AEEA)
Aan het einde van de levensduur
van het product mag het niet samen
met het gewone huishoudelijke
afval worden verwijderd. Het moet
naar een speciaal centrum voor
gescheiden afvalinzameling van de
gemeente worden gebracht, of naar
een verkooppunt dat deze service
verschaft. Het apart verwerken van
een huishoudelijk apparaat voorkomt
mogelijke gevolgen voor het milieu
en de gezondheid die door een
ongeschikte verwerking ontstaan
en zorgt ervoor dat de materialen
waaruit het apparaat bestaat,
teruggewonnen kunnen worden
om een aanmerkelijke besparing
van energie en grondstoffen te
verkrijgen. Om op de verplichting
tot gescheiden verwerking van
elektrische huishoudelijke apparatuur
te wijzen, is op het product het
symbool van een doorgekruiste
vuilnisbak aangebracht.

15
sécurité
lLisez et conservez soigneusement ces instructions
pour pouvoir vous y référer ultérieurement.
lRetirez tous les éléments d’emballage et les
étiquettes.
lSi le cordon ou la prise sont endommagés, il faut
les faire remplacer, pour des raisons de sécurité, par
Kenwood ou un réparateur agréé par Kenwood pour
éviter tout accident.
lLe symbole figurant sur le produit indique
une surface dont la température est susceptible
d’augmenter en cours d’utilisation.
lIl convient d’ouvrir et de fermer le grill avec
précaution.
lVeuillez NE PAS toucher les surfaces chaudes. Les
surfaces accessibles sont susceptibles d'être chaudes
pendant l’utilisation. Utilisez toujours la poignée ou
portez des gants si nécessaire.
lNe pas utiliser le gril sans que les plaques soient
installées. Assurez-vous que les plaques soient
complètement sèches avant de les réinstaller sur le
grill.
lNe touchez jamais les plaques avec des objets
coupants ou abrasifs, cela risquerait d'endommager la
surface antiadhésive.
lNe plongez pas l'appareil, le cordon ou la prise dans
l'eau ou dans un autre liquide.
lNe laissez pas l'appareil sans surveillance lorsqu'il est
en cours d'utilisation.
lNe l'utilisez pas si vous constatez que l’appareil,
le cordon ou la prise sont endommagés. Faites-le
vérifier ou réparer : voir "Service après-vente"
lCet appareil ne doit être utilisé que sur une table ou
Français
Avant de lire, veuillez déplier la première page contenant les illustrations

15 16
une surface stable et résistante à la chaleur. En cas
d'utilisation sur une surface inférieure à 85cm de
haut, prenez des précautions supplémentaires, en
particulier si des enfants sont à proximité.
lNe laissez pas le cordon pendre au bord de la surface
de travail ni en contact avec des surfaces chaudes.
lNe déplacez pas l'appareil tant qu'il fonctionne ou
qu'il est encore chaud.
lDébranchez toujours l’appareil quand il n'est pas en
service et laissez-le refroidir complètement avant de
le ranger ou de retirer les plaques du grill pour les
nettoyer.
lN'utilisez pas l'appareil à l'extérieur.
lNe placez jamais une partie de cet appareil sur ou à
proximité d’une flamme nue, d'une plaque chauffante
ou dans un four chaud.
lAvec certains aliments de grandes quantités de
fumée sont émises – assurez-vous que la ventilation
est adéquate.
lCet appareil n’est pas destiné à être mis en
fonctionnement au moyen d'une minuterie externe ou
d'un système de télécommande.
lToute mauvaise utilisation de votre appareil peut être
source de blessures.
lCet appareil est conçu pour cuire les aliments et
ne doit pas être utilisé à d’autres fins, ni modifié ou
encore trafiqué de quelque façon que ce soit.
lLes enfants âgés de 8 ans et plus peuvent utiliser,
nettoyer et effectuer la maintenance utilisateur de cet
appareil conformément au Mode d’emploi Utilisateur,
à condition qu’ils se trouvent sous la surveillance
d’une personne responsable de leur sécurité et qu’ils
aient reçu les instructions relatives à l’utilisation de
l’appareil, et eu connaissance des risques potentiels.
lLes personnes dont les capacités physiques,

17
sensorielles ou mentales sont diminuées, ou qui ne
disposent pas de connaissances quant à l’utilisation
de cet appareil, doivent avoir été formées ou
encadrées pour son utilisation en toute sécurité et
avoir connaissance des risques potentiels.
lLes enfants ne doivent pas jouer avec cet appareil ; le
cordon et l’appareil doivent être tous deux tenus hors
de portée des enfants de moins de 8 ans.
lN’employez l’appareil qu’à la fin domestique prévue.
Kenwood décline toute responsabilité dans les cas
où l’appareil est utilisé incorrectement ou que les
présentes instructions ne sont pas respectées.
avant de brancher l’appareil
• Assurez-vous que votre
alimentation électrique correspond
à celle qui est indiquée sur la partie
inférieure de votre appareil.
• AVERTISSEMENT : CET
APPAREIL DOIT ÊTRE RELIÉ À
LA TERRE
• Cet appareil est conforme au
règlement 1935/2004 de la CE
sur les matériaux et les articles
destinés au contact alimentaire.
avant la première utilisation
• Lavez les éléments -voir nettoyage.
• Branchez et réglez la température
sur 5à l'aide de la commande
5 et laissez chauer. Débranchez
une fois que le voyant lumineux 6
s’éteint. Recommencez 3 fois.
• Badigeonnez légèrement la surface
de cuisson avec de l’huile de
cuisson avant d’utiliser.
légende
1 poignée de soutien
2 poignées
3 supports de position grill
4 bec d'écoulement
5 commande de température
6 voyant lumineux
7 crochet de rangement du cordon
8 languettes de verrouillage de
plaque
utilisation de votre grill de
contact
1 Branchez et réglez la température
à l'aide de la commande 5
selon les besoins de 1 à 5. Le
voyant lumineux 6s'allume.
Remarque : lorsqu'il est en position
, la température est OFF.
2 Placez un petit récipient
résistant à la chaleur sous le bec
d'écoulement 4pour recueillir
la graisse de cuisson ou l'huile en
excès.
• Le grill est prêt à l’emploi une fois
le voyant lumineux 6éteint.
Table of contents
Languages:
Other Kenwood Grill manuals

Kenwood
Kenwood SDM401 User manual

Kenwood
Kenwood HG230 User manual

Kenwood
Kenwood HG184 User manual

Kenwood
Kenwood HG600 Series User manual

Kenwood
Kenwood HG266 User manual

Kenwood
Kenwood Snack Maker User manual

Kenwood
Kenwood HG166 Series User manual

Kenwood
Kenwood HG266 Installation guide

Kenwood
Kenwood HG208 User manual

Kenwood
Kenwood HG230 User manual
Popular Grill manuals by other brands

Outback
Outback Cuisine Assembly and operating instructions

Sunbeam
Sunbeam ReversaGrill HG3300 Instruction/recipe booklet

TEFAL
TEFAL OptiGrill XL Instructions for use

Sunvision Scientific
Sunvision Scientific PRO 24S Assembly and user's guide

Klarstein
Klarstein Hot & Hot manual

Landmann
Landmann 520268 Assembly and operating instructions