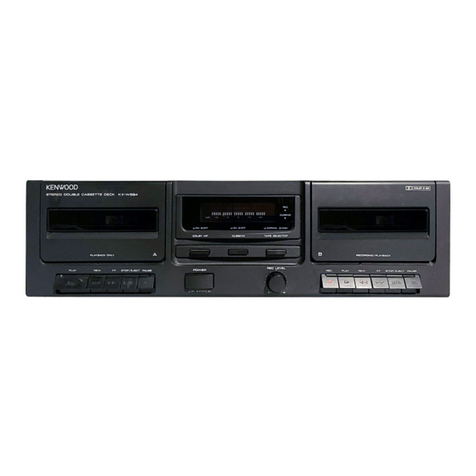
Kenwood KX-79CW User manual

CGOO/AN>A
STEREO
CASSETTE
TAPE
DECK
KX-79CW
INSTRUCTION
MANUAL
KENWOOD
CORPORATION

Introduction
Your
choice
of
this
product
indicates
that
you
are
a
devotee
to
excellence
in
sound
reproduction.
We
appreciate
your
patronage
and
take
pride
in
the
long
tradi-
tion
of
quality
components
that
our
company
represents.
So
that
you
can
get
the
most
out
of
your
unit,
we
suggest
that
you
take
the
time
to
read
through
this
manual
before
you
hook
up
and
operate
your
system.
This
will
acquaint
you
with
oper-
ating
features
and
system-connection
considerations
so
that
your
listening
pleasure
will
be
enhanced
right
from
the
start.
You
will
notice
that
in
all
aspects
of
planning,
engineering,
styling,
operating
convenience
and
adaptability
we
have
sought
to
anticipate
your
needs
and
desires.
Keep
this
manual
handy
for
future
reference.
For
your
records
Record
the
serial
number,
found
on
the
back
of
the
unit,
in
the
spaces
designated
on
the
warranty
card,
and
in
the
space
provided
below.
Refer
to
the
model
and
serial
numbers
whenever
you
call
upon
your
dealer
for
information
or
service
on
this
product.
Model
_..
SC
C—~—~—SCSSrriaki'
Number
Unpacking
Unpack
the
unit
carefully
and
make
sure
that
all
accessories
are
put
aside
so
they
will
not
be
lost.
Examine
the
unit
for
any
possibility
of
shipping
damage.
If
your
unit
is
damaged
or
fails
to
operate,
notify
your
dealer
immedi-
ately.
If
your
unit
was
shipped
to
you
directly,
notify
the
ship-
ping
company
without
delay.
Only
the
consignee
(the
person
or
company
receiving
the
unit)
can
file
a
claim
against
the
car-
rier
for
shipping
damage.
We
recommend
that
you
retain
the
original
carton
and
pack-
ing
materials
for
use
should
you
transport
or
ship
the
unit
in
the
future.
WARNING
NOTICE:
IN
MOST
CASES
!IT
IS
AN
INFRINGEMENT
OF
COPYRIGHT
TO
MAKE
COPIES
OF
TAPES
OR
DISCS
WITHOUT
THE
PERMISSION
OF
THE
COPYRIGHT
OWN-
ERS.
ANYONE
WISHING
TO
COPY
COMMERCIALLY
AVAILABLE
TAPES
OR
DISCS
SHOULD
CONTACT
THE
MECHANICAL
COPYRIGHT
PROTECTION
SOCIETY
LIMITED
OR
THE
PERFORMING
RIGHTS
SOCIETY
LIMITED.
Dolby
noise
reduction
manufactured
under
license
from
Dolby
Laboratories
Licensing
Corporation.
“DOLBY’’
and
the
double-D
symbol
J]
are
trademarks
of
Dolby
Laboratories
Licensing
Corporation.
Be"
AC
plug
adaptor
x
1
(For
the
unit
with
a
European
AC
plug
in
areas
other
than
Europe.)
Accessories
Audio
cord
x
2
[Fame
Vp
System
control
cord
x
1
Contents
A
Before
applying
POWET...............cecececc
ees
ecees
ecu
eee
cues
3
AIMPORTANT
SAFEGUARDS
.........0...000...cceeeceeeeeeees
4
SysteM
CONNECTIONS
20.0.0...
ccc
ce
ce
cec
ees
eceeeaeeeceseuceees
7
Controls
and
indicators
..................c
ccc
ceeceeceee
eee
ees
8
Listening
to
cassette
tapes
..........
00...
cecccc
cece
cece
eee
eee
9
DPSS:
Ascoeti
eet
scutes
setecdelaiedele
dare
sesidebenbverteted
ebay
11
Caution:
Read
the
pages
marked
A
carefully
to
ensure
safe
operation.
Synchro
recording..............cccccceccccesseeeeesccceneeeeass
14
CCRS
(Computer-controlled
CD
Recording
System)...
16
Dubbing
operation
.........
ccc
cccecceeeeesesecceeeeaeeeues
17
Timer
stand-by
operation
...............ccecececececeeceeeeees
18
In
case
of
difficulty
.2.00.
0...
ccc
c
eee eee
econ
eae
19
SPECIICBUONS:
225204
eee
fs
eho
red
ee
tewbetoud
coe
Back
cover
2
kx-79CW
(En)
A\Caution:
Read
this
page
carefully
to
ensure
safe
operation.
Before
applying
power
a
For
the
U.S.A.
and
Canada
For
Australia
and
Europe
Important!
Units
shipped
to
the
U.S.A.
and
Canada
are
designed
for
opera-
tion
on
120
volts
AC
only.
Safety
precaution
for
a
Polarized
AC
plug
However,
some
products
may
be
supplied
with
a
non-polarized
plug.
CAUTION:
To
PREVENT
ELECTRIC
SHOCK
DO
NOT
USE
THIS
(POLARIZED)
PLUG
WITH
AN
EXTENSION
CORD,
RECEPTACLE
OR
OTHER
OUTLET
UNLESS
THE
BLADES
CAN
BE
FULLY
INSERTED
TO
PREVENT
BLADE
EXPOSURE.
For
the
United
Kingdom
Important!
Units
shipped
to
the
U.K.
are
designed
for
operation
on
240
volts
AC
only.
The
mains
plug
must
be
removed
from
the
wall
socket
prior
to
any
internal
examination.
The
wires
in
this
mains
lead
are
coloured
in
accordance
with
the
following
code:
BIS
ic
ctiek
sade
ch
pedadbeo
sees
chew
nensents
Neutral
BROWN:
-cccsv
is
etcnsauin
is
Aowtnacee
hha
ee
an
Live
The
wires
in
this
mains
lead
must
be
connected
to
the
termi-
nals
in
the
plug
as
follows:
Wire
colour
Plug
terminal
marking
BlUSt
ee
catke
touts
otaced
hostile
te
siegulsrteds
N
or
Black
BrOWD
sauce
cssnaes
fees
Peecasaeanidis
ety
Lor
Red
(>
Brown
to
Live
Blue
to
L
Neutral
w
)
Plug
Notes:
—
eee!
1.
If
a
13-amp
plug
is
used,
this
must
be
fitted
with
a
5-amp
fuse.
2.
If
a
3-pin
plug
with
earthing
contact
is
used,
no
wire
must
be
connected
to
the
E
terminal.
|
Safety
precautions
WARNING:
TO
PREVENT
FIRE
OR
SHOCK
HAZARD,
DO
NOT
EXPOSE
THIS
APPLIANCE
TO
RAIN
OR
MOISTURE.
CAUTION
RISK
OF
ELECTRIC
SHOCK
DO
NOT
OPEN
Important!
Units
shipped
to
Australia
are
designed
for
operation
on
240
V
AC
only.
Units
shipped
to
Europe
are
designed
for
operation
on
220
V
AC
only.
For
other
countries
Important!
Units
shipped
to
countries
other
than
the
above
countries
are
equipped
with
an
AC
voltage
selector
switch
on
the
rear
panel.
Refer
to
the
following
paragraph
for
the
proper
setting
of
this
switch.
AC
voltage
selection
This
unit
operates
on
110-120
or
220-240
volts
AC.
The
AC
voltage
selector
switch
on
the
rear
panel
is
set
to
the
voltage
that
prevails
in
the
area
to
which
the
unit
is
shipped.
Before
connecting
the
power
cord
to
your
AC
outlet,
make
sure
that
the
setting
position
of
this
switch
matches
your
line
voltage.
if
not,
it
must
be
set
to
your
voltage
in
accordance
with
the
following
direction.
Note:
-
ewes
toate
tine
fo
Sis
ea
are
Our
warranty
does
not
cover
damage
caused
by
excessive
line
voltage
due
to
improper
setting
of
the
AC
voltage
selector
switch.
v
o-
.,
<@
AC110-
ac220-
"9
*
acii0-
AC220-
AC240V~
120V~
AC240V~
120V~
o~
~
Stopper
Fig.
2
=)
plate
1.
Before
plugging
in
this
unit,
make
sure
that
the
position
of
the
AC
Voltage
Selector
conforms
to
your
line
(mains)
vol-
tage.
If
not,
it
must
be
reset.
See
Figure
1.
2.
To
reset
the
selector,
slide
the
stopper
plate
to
the
opposite
side
with
a
screwdriver
or
other
pointed
tool.
See
Figure
2.
3.
Insert
the
power
cord
securely.
See
Figure
3.
CAUTION:
TO
REDUCE
THE
RISK
OF
ELECTRIC
SHOCK,
DO
NOT
REMOVE
COVER
(OR
BACK).
NO
USER-SERVICEABLE
PARTS
INSIDE,
REFER
SER-
VICING
TO
QUALIFIED
SERVICE
PERSONNEL.
THE
LIGHTNING
FLASH
WITH
ARROWHEAD
SYMBOL,
WITHIN
AN
EQUILATERAL
TRIANGLE,
IS
INTENDED
TO
ALERT
THE
USER
TO
THE
PRESENCE
OF
UNINSULATED
‘‘DANGEROUS
VOL-
TAGE"
WITHIN
THE
PRODUCT'S
ENCLOSURE
THAT
MAY
BE
OF
SUFFICIENT
MAGNITUDE
TO
CONSTITUTE
A
RISK
OF
ELECTRIC
SHOCK
TO
PERSONS.
THE
EXCLAMATION
POINT
WITHIN
AN
EQUILATERAL
TRIANGLE
IS
INTENDED
TO
ALERT
THE
USER
TO
THE
PRESENCE
OF
IMPORTANT
OPERATING
AND
MAINTENANCE
(SERVICING)
IN-
STRUCTIONS
IN
THE
LITERATURE
ACCOMPANYING
THE
APPLIANCE.
KX-79CW
(En)

IMPORTANT
SAFEGUARDS
A\
Caution
:
Read
this
page
carefully
to
ensure
safe
operation.
Please
read
all
of
the
safety
and
operating
instructions
before
operating
this
unit.
For
best
results,
follow
all
warnings
placed
on
the
unit
and
adhere
to
the
operat-
ing
and
use
instructions.
These
safety
and
operating
in-
structions
should
be
retained
for
future
reference.
1.
Power
sources
—
The
unit
should
be
connected
to
a
power
supply
only
of
the
type
described
in
the
operating
instructions
or
as
marked
on
the
appliance.
2.Power-cord
protection
—
Power-supply
cords
should
be
routed
so
that
they
are
not
likely
to
be
walked
on
or
pinched
by
items
placed
upon
or
against
them,
pay
particular
attention
to
cords
at
plugs,
convenience
receptacles,
and
the
point
where
they
exit
from
the
unit.
Never
pull
or
stretch
the
cord.
3.Grounding
or
polarization
—
The
precautions
should
be
taken
so
that
the
grounding
or
polariza-
tion
means
of
this
unit
is
not
defeated.
4.
Ventilation
—
The
unit
should
be
situated
so
that
its
location
or
position
does
not
interfere
with
its
proper
ventilation.
To
maintain
good
ventilation,
do
not
put
records
or
a
table-cloth
on
the
unit.
Place
the
unit
at
least
10
cm
away
from
the
walls.
Do
not
use
the
unit
on
a
bed,
sofa,
rug
or
similar
surface
that
may
block
the
ventilation
openings.
5.
Water
and
moisture
—
The
unit
should
not
be
used
near
water
—
for
example,
near
a
bathtub,
washbowl,
kitchen
sink,
laundry
tub,
in
a
wet
base-
ment,
or
near
a
swimming
pool,
etc.
6.
Temperature
—
The
unit
may
not
function
pro-
perly
if
used
at
extremely
low,
or
freezing
tempera-
tures.
The
ideal
ambient
temperature
is
above
+5°C
(41°F).
4
kx-79cw
(En)
7.Heat
—
The
unit
should
be
situated
away
from
heat
sources
such
as
radiators,
heat
registers,
stoves,
or
other
units
(including
amplifiers)
that
produce
heat.
8.
Electric
shock
—
Care
should
be
taken
so
that
ob-
jects
do
not
fall
and
liquid
is
not
spilled
into
the
en-
closure
through
openings.
If
a
metal
object,
such
as
a
hair
pin
or
a
needle,
comes
into
contact
with
the
inside
of
this
unit,
a
dangerous
electric
shock
may
result.
For
families
with
children,
never
permit
chil-
dren
to
put
anything,
especially
metal,
inside
this
unit.
9.Enclosure
removal
—
Never
remove
the
en-
closure.
If
the
internal
parts
are
touched
accidentally,
a
serious
electric
shock
might
occur.
10.
Magnetic
fields
—
Keep
the
unit
away
from
sources
of
magnetic
fields
such
as
TV
sets,
speaker
systems,
radios,
motorized
toys
or
magnetized
objects.
11.
Cleaning
—
Do
not
use
volatile
solvents
such
as
alcohol,
paint
thinner,
gasoline,
or
benzine,
etc.
to
clean
the
cabinet.
Use
a
clean
dry
cloth.

12.
Carts
and
stands
—
An
appliance
and
cart
com-
bination
should
be
moved
with
care.
Quick
stops,
excessive
force,
and
uneven
surfaces
may
cause
the
appliance
and
cart
combination
to
overturn.
wv
SLATS
13.Nonuse
periods
—
The
power
cord
of
the
unit
should
be
unplugged
from
the
outlet
when
left
un-
used
for
a
long
period
of
time.
14.
Abnormal
smell
—
{f
an
abnormal
smell
or
smoke
is
detected,
immediately
turn
the
power
OFF
and
pull
out
the
power
cord.
Contact
your
dealer
or
nearest
service
center.
POWER
OFF!
15.
Damage
requiring
service
—
The
unit
should
be
serviced
by
qualified
service
personnel
when:
A.
The
power-supply
cord
or
the
plug
has
been
damaged;
or
B.
Objects
have
fallen,
or
liquid
has
been
spilled
into
the
unit;
or
C.
The
unit
has
been
exposed
to
rain;
or
D.
The
unit
does
not
appear
to
operate
normally
or
exhibits
a
marked
change
in
performance;
or
E.
The
unit
has
been
dropped,
or
the
enclosure
damaged.
16.Servicing
—
The
user
should
not
attempt
to
ser-
vice
the
unit
beyond
that
described
in
the
operating
instructions.
All
other
servicing
should
be
referred
to
qualified
service
personnel.
17.
Outdoor
antenna
grounding
—
If
an
outside
an-
tenna
is
connected
to
the
receiver,
be
sure
the
an-
tenna
system
is
grounded
so
as
to
provide
some
protection
against
voltage
surges
and
built
up
static
charges.
Section
810
of
the
National
Electrical
Code,
ANSI/
NFPA
No.
70—1984,
provides
information
with
respect
to
proper
grounding
of
the
mast
and
supporting
structure,
grounding
of
the
lead-in
wire
to
an
antenna
discharge
unit,
size
of
grounding
con-
Notes:
-
-
ACaution
:
Read
this
page
carefully
to
ensure
safe
operation.
ductors,
location
of
antenna-discharge
unit,
connec-
tion
to
grounding
electrodes,
and
requirements
for
the
grounding
electrode.
See
Figure.
EXAMPLE
OF
ANTENNA
GROUNDING
AS
PER
NATIONAL
ELECTRICAL
CODE
ANTENNA
LEAD
IN
WIRE
ANTENNA
DISCHARGE
UNIT
(NEC
SECTION
810-20)
ELECTRIC
SERVICE
EQUIPMENT
GROUNDING
CONDUCTORS
(NEC
SECTION
810-21)
GROUND
CLAMPS
+
a----~—
POWER
SERVICE
GROUNDING
£LECTRODE
SYSTEM
NEC
—
NATIONAL
ELECTRICAL
CODE
(NEC
ART
250,
PART
H)
18.
Power
lines
—
An
outdoor
antenna
should
be
lo-
cated
away
from
power
lines.
1.
Item
3
is
not
required
except
for
grounded
or
polarized
equipment.
2.
Item
17
and
18
are
not
required
except
for
units
provided
with
antenna
terminals.
3.
Item
17
complies
with
UL
in
the
U.S.A.
KX-79CW
(En)
5

H@
Notes
on
cassette
tape
®@
Safety
tab
(accidental
erasure
prevention
tab):
After
an
important
recording
has
been
finished,
break
the
safety
tab,
to
prevent
the
recorded
contents
from
being
erased
or
recorded
on
accidentally.
To
re-record
Cover
with
adhesive
tape.
Notes:
—-—_--—-----
1.
120-minute
cassette
tape:
Since
a
120-minute
cassette
tape
is
very
thin,
the
tape
could
adhere
to
the
pinch
roller
or
be
easily
cut.
It
is
recommend-
ed
that
these
tapes
not
be
used
with
this
unit
to
prevent
pos-
sible
damage.
®
To
store
cassette
tapes:
Do
not
store
the
tapes
in
a
place
which
is
subject
to
direct
sunlight,
or
near
equipment
that
generates
heat.
Keep
the
cassette
tapes
away
from
any
magnetic
field.
When
there
is
slack
in
the
tape:
In
such
a
case,
insert
a
pencil
into
the
reel
hole
and
wind
the
reel
hub
to
remove
the
slack.
.
Endless
tapes:
Do
not
use
an
endless
tape,
as
this
could
damage
the
mechanism
of
the
unit.
@
Cleaning
the
head
section
Cotton
Swab
ponents:
Cleaning
the
heads
and
peripheral
com-
Demagnetizing
the
head
When
the
recording/playback
head
is
magne-
For
maintaining
the
best
condition
of
the
deck
and
for
longer
service
life,
always
keep
the
erase
head,
recording/playback
head,
capstan
and
pinch
roller
clean.
To
clean
them,
perform
tized,
the
sound
quality
will
be
detariorated.
In
such
a
case,
demagnetize
the
head
using
a
commercially
available
demagnetizer
(head
eraser).
the
following:
1.
Open
the
cassette
holder
capstan
and
pinch
roller
carefully.
Recording/
Pinch
2.
Using
a
cotton
swab
dipped
in
alcohol,
clean
playback
—
Roller
the
erase
head,
recording/playback
head,
Head
Note:
There
are
precisely
aligned
parts
around
the
heads,
including
the
tape
guides.
When
cleaning,
pay
special
attention
so as
not
to
apply
shock
to
them.
@
Beware
of
condensation
When
vapor
comes
into
contact
with
the
surface
of
cold
material,
water
drops
are
produced.
If
condensation
occurs,
correct
operation
may
not
be
pos-
sible,
or
the
unit
may
not
function
correctlly.
Thisis
not
a
malfunction,
however,
and
the
unit
should
be
dried.
(To
do
this,
turn
the
POWER
switch
ON
and
leave
the
unit
as
it
is
for
several
hours.)
Be
especially
careful
in
the
following
conditions:
@
When
the
unit
is
brought
from
a
cold
place
to
a
warm
place,
and
there
is
a
large
temperature
difference.
When
a
heater
starts
operating.
When
the
unit
is
brought
from
an
air-conditioned
place
to
a
place
of
high
temperature
with
high
humidity.
When
there
is
a
large
difference
between
the
internal
temperature
of
the
unit
and
the
ambient
temperature,
or
in
conditions
where
condensation
occures
easily.
6
kx-79cw
(En)

System
connections
Make
connection
as
shown
in
the
diagram
below.
When
connecting
the
related
system
components,
refer
also
to
the
instruction
manuals
of
the
related
components.
KX-79CW
REC/LINE
IN
jacks
PLAY/LINE
OUT
jacks
LINE
(N=
LINE
OUT
REC
PLAY
{MONITOR
REC
PLAY
Turntable
System
control
connection
(Except
for
some
areas.)
When
connected
to
an
amplifier
or
receiver
having
KENWOOD
SYSTEM
CONTROL
terminals,
system
operation
such
as
remote
control
is
made
possible.
For
details,
refer
to
the
instruction
manual
of
the
amplifier
or
receiver.
If
your
amplifier
or
receiver
is
not
equipped
with
the
SYSTEM
CONTROL
Terminals,
do
not
connect
anything
to
any
SYSTEM
CONTROL
Terminal.
Do
not
connect
the
unit
in
any
system
configuration
other
than
specified.
®@
Be
sure
to
insert
the
System
Control
cord
plugs
fully
into
the
SYSTEM
CONTROL
terminals.
@
\f
the
system
control
cord
and
audio
cords
are
not
connect-
ed
properly,
the
automatic
system
governing
remote
con-
trol
and
system
functions
will
not
operate.
System
control
cord
To
AC
outlet
SYSTEM
CONTROL
CD
player
Notes:
—
——
-
1.
2.
Connect
all
cords
firmly.
If
connections
are
loose
there
could
be
loss
of
sound
or
noise
produced.
When
plugging
and
unplugging
connection
cords
after
con-
nections
are
complete,
be
sure
to
first
remove
the
power
cord
from
the
AC
outlet.
Plugging/unplugging
connection
cords
without
removal
of
the
power
cord
can
cause
malfunctions
or
damage
to
the
unit.
KX-79CW
(En}

Controls
and
indicators
-
_
INDEX
SCAN
key
PEAK
LEVEL
METER
(A
deck)
(Refer
to
page
10.)
iINDEK
SCAN
COUNTER/RESET
key
Resets
the
counter
to
"O00".
‘Se
-Ee-
Se-
Be
wee:
ee:
ee:
-20
-10
6
3
0
M+3
+6
2a.
ee
eee.
eee.
7
e e
CCRS
key/
indicator
ipetebip
page.
42)
REC
indicator
(©)
STAND
BY
indicator
DUBBING
indicators
PAUSE
indicator
(H])
(
=»
NORMAL,
»»
HIGH)
J
EJECT
key
[4]
(B
deck)
EJECT
key
[A/(A
deck)
KX-79CW
|
TIMER
switch
Used
when
timer
recording
or
timer
playback
is
requied.
REC
LEVEL
knob
Adjust
the
recording
level
POWER
switch
with
this
knob.
Press
this
switch
to
turn
the
power
ON
and
STAND
BY.
DIRECTION
switch
(Refer
to
page
9.)
REC
BALANCE
knob
Adjust
the
recording
level
.
balance
between
the
left
DOLBY
NR
switch
and
right
channels
with
this
Select
the
B-type
or
C-type
knob.
Dolby
noise
reduction
sys-
tem
with
this
switch.
Rewind
keys
|
<<|
=
a
Fast
forward
keys
|
>>
«<
aad
«
p>
PA
Sn
Ca,
eae
ERTS
Pew
DUBBING
Play
keys
|»
Reverse
play
keys
|<]
REC/ARM
key
(B
deck)
Press
this
key
to
start
recording.
Stop
keys
[if
DUBBING
keys
(
>»
NORMAL,
>>
HIGH)
PAUSE
key
[Il]
(B
deck)
Used
when
performing
tape-
Press
this
key
to
stop
the
tape
tem-
porarily.
to-tape
dubbing.
Xe
:
J
8
kx-79Cw
(En)

Listening
to
cassette
tapes
(mr
a
I
ST
I
INDEX
SCAN
key
EJECT
key
(@i]
(A
deck)
EJECT
key
||
(B
deck)
Dolby
NR
CCAS(OPSS)
“Sherine
ev
neCOMDMCIRLAYUACK
DOLBY
NR
switch
Close
securely
by
pressing
upper
inside.
(For
both
A
and
B
decks)
STAND
BY
mode
of
POWER
switch
When
the
power
cord
of
this
system
is
plugged
into
an
AC
outlet,
the
STAND
BY
indicator
lights
up
regardless
of
the
ON/OFF
setting
of
the
POWER
switch.
This
indi-
cates
that
a
small
amount
of
current
is
being
supplied
to
the
unit
to
back
up
the
memory
contents.
This
mode
is
referred
to
as
the
Stand
By
mode.
While
the
STAND
BY
indicator
is
lit,
the
power
can
be
switched
ON/OFF
from
the
remote
control
unit
with
the
amplifier
connected
with
the
system
control
cord.
DIRECTION
switch
TIMER
switch
@
Tape
playback
operation
1.
Set
the
deck’s
TIMER
switch
to
OFF.
2.
Press
the
EJECT
key
[4]
for
the
deck
to
be
used
for
playback.
3.
Insert
a
cassette
and
close
the
cassette
holder
securely.
@
The
optimum
playback
condition
is
set
automatically
ac-
cording
to
the
type
of
tape,
i.e.
Metal,
chrome
(CrO2)
or
normal.
4.
Set
the
DOLBY
NR
switch
according
to
the
NR
mode
of
the
cassette
tape.
5.
Set
the
DIRECTION
switch
according
to
the
desired
play-
back
direction.
One-way
playback
...............e
cece
eee
cee
eee
ee
eee
ees
pra
Tape
stops
at
the
end
of
one
side.
Two-way
playback.......0.....
eee
eee
ence
eee
eee
na)
Tape
stops
after
two
sides
have
been
played.
Endless
playback
.................ccccccec
eset
reece
ee
eees
CS
Tape
playback
continues
until
the
stop
key
[I
is
pressed.
6.
Press
the
play
[>]
or
reverse
play
(<!
key.
®
The
playback
direction
indicator
lights
and
playback
starts.
@
The
peak
level
meter
lights
in
accordance
with
the
con-
tents
of
the
tape.
M@
Operation
of
fast
forward
and
rewind
Press
either
the|
|
or
|»
|
key
when
in
the
stop
mode.
@
The
tape
is
fast-forwarded
or
rewound
depending
on
the
key
pressed.
®@
When!
<4]
or
[>>
|key
is
pressed
during
PLAY,
DPSS
operates
(see
page
11).
@
Stopping
playback
Press
the
stop
key
(i
.
@
Playback
is
stopped.
®@
The
tape
is
stopped
automatically
at
the
end
of
a
one-
side
or
two-side
relay
playback,
or
when
it
has
been
com-
pletely
wound
forward
or
rewound.
KX-79CW
(En)
9

Listening
to
cassette
tapes
INDEX
SCAN
key
EJECT
key
[A]
(A
deck)
EJECT
key
|i]
(B
deck]
Doigy
NR
CCAS
IOPSS;
“Sierano
by
PEAK
LEVEL
METER,
COUNTER
RESET
REC OFF
PLAY
(Coo)
®
TIMER
B
OFF
C
DOLBY
NR
=
>»
©
(Cot)
DIRECTION
INDEX
SCAN
@
10
«x-79cw
(En)
DOLBY
NR
switch
DIRECTION
switch
TIMER
switch
@
Relay
playback
operation
Tapes
in
the
two
decks
(A
and
B)
can
be
played
alternately
and
repeatedly.
1.
2.
Set
the
deck’s
TIMER
switch
to
OFF.
Press
the
EJECT
key
[4]
for
each
deck.
.
Insert
a
cassette
tape
in
each
deck
and
close
the
cas-
sette
holders
securely.
.
Set
the
DOLBY
NR
switch
according
to
the
NR
mode
of
the
cassette
tapes.
.
Set
the
DIRECTION
switch
according
to
the
desired
play-
back
direction.
One-way
relay
playback..................c00cceeeee
=
One
side
of
A
deck,
B
deck
is
played.
Two-way
relay
playback
..................ccceeeeeee
aD)
Both
sides
of
A
deck,
B
deck
are
played.
.
Press
the
play
|>|
or
reverse
play
||
key
of
the
deck
desired
to
be
played
first.
@
Index
scan
(A
deck
only)
1.
N
1
2
Press
the
INDEX
SCAN
key.
The
tape
is
rapidly
advanced
while
the
beginning
of
each
tune
is
played
back
for
about
10
seconds.
.
When
the
desired
tune
is
found,
press
the
play
[>|
or
reverse
play
|<)
key
according
to
the
direction
of
tape
travel.
Normal
playback
operation
will
resume.
otes:
.
The
direction
of
the
index
scan
is
indicated
by
the
direction
in-
dicators.
To
change
the
direction
of
index
scan,
press
the
play
>|
or
reverse
play
<|
key,
then
press
the
INDEX
SCAN
key.
.
When
the
DIRECTION
switch
is
set
to
the
reverse
mode
(=)
or
endless
mode
((_)),
index
scan
of
both
sides
is
carried
out.

DPSS
(direct
program
search
system)
DPSS
(direct
program
search
system)
The
DPSS
function
of
the
cassette
deck
allows
you
to
perform
the
following
convenient
operations
easily
by
a
touch
of
the
corresponding
operation
key.
(Common
to
A
and
B
decks).
1.Skip
play
2.Single-tune
repeat
playback
3.Rewind
and
auto
play
4.Re-Rec
standby
(when
a
recording
needs
to
be
restarted
from
the
beginning)
5.Dash
&
play
(when
playing
while
fast-forwarded
through
non-recorded
sections
of
more
than
10
seconds)
_DPSS
and
non-recorded
sections
of
tape
(blank
intervals)
The
DPSS
function
works
by
detecting
a
non-recorded
section
(blank)
of
more
than
4
seconds
between
tunes.
:
When
making
a
new
recording
on
a
tape,
the
blank
sections
between
programs
should
be
made
according
to
‘‘How
to
pro-
vide
non-recorded
blanks
between
programs."
:
The
function
may
not
operate
correctly
when
the
following.
types
of
tape
are
used.
1.
Tapes
with
conversation,
etc.
in
which
the
sound
is
interrupted
for
more
than
4
seconds.
2.
Tapes
having
very
low
level
sections
or
non-recorded
sections
in
the
middle
of
a
tune,
such
as
in
some
classical
pieces.
3.
Tapes
in
which
high
level
noise
is
recorded
between
tunes.
4.
Tapes
having
blank
sections
of
less
than
4
seconds
between
tunes.
5.
Tapes
recorded
at
an
excessively
low
level.
@
Skip
play
in
the
forward
direction
Perform
the
following
to
play
a
tune
which
is
several
tunes
ahead
of
the
one
currently
being
played.
Forward
DPSS
selection
(
>
)
During
forward
playback,
press
the
fast
forward
key
[>>
|
:
Current
tune
During
reverse
playback,
press
the
rewind
key
|
<<]
.
@
The
number
of
tunes
skipped
(maximum:
16)
is
equal
to
the
number
of
times
the
key
is
pressed,
after
which
playback
of
the
target
tune
starts.
@
Skip
play
in
the
reverse
direction
Unrecorded
section
t
Unrecorded
section
To
play
a
tune
located
before
the
one
currently
being
played,
Head
perform
the
following.
During
forward
playback,
press
the
rewind
key
|
<4)
.
Reverse
DPSS
selection
(
<
)
During
reverse
playback,
press
the
fast
forward
key
[>>
|.
@
The
number
of
tunes
skipped
(maximum:
16)
is
equal
to
the
number
of
times
the
key
is
pressed,
after
which
playback
of
the
target
tune
starts.
Current
tune
Notes:
ee
|
>
1.
When
the
DIRECTION
switch
is
set
to
‘’
—>""
(reverse)
or
“C_)”’
t
t
*
t
L
+
t
* t
(endless),
skip
play
can
extend
to
the
other
side
of
the
tape.
Unrecorded
section
Unrecorded
section
2.
If
the
rewind
key|
<<
|
is
pressed
immediately
after
the
start
of
a
program,
the
current
tune
could
be
discounted
and
more
Head
tunes
could
be
skipped
than
is
desired.
i
Single-tune
repeat
playback
This
function
is
used
to
play
back
a
desired
tune
repeatedly.
While
the
forward
side
is
being
played
back,
press
the
play
key
||
again.
While
the
reverse
side
is
being
played
back,
press
the
reverse
play
key
«|
again.
@
The
designated
tune
will
be
played
back
repeatedly
16
times,
then
the
deck
enters
the
normal
playback
mode.
®@
To
release
single-tune
repeat
play,
press
the
stop
key
|i
.
KX-79CW
(En)
11

DPSS
OUBBINC
i
NORM
@
Rewind
&
auto
play
This
function
is
used
to
automatically
play
the
tape
from
the
first
tune
after
rewinding.
To
play
the
forward
side
of
the
tape,
press
the
play
key
>
and
rewind
key
|
<<
|
simultaneously.
To
play
the
reverse
side
of
the
tape,
press
the
reverse
play
key
[<)
and
fast
forward
key
|
»»
|
simultaneously.
@
Dash
&
play
This
function
allows
you
to
play
a
tape
repeatedly
by
fast-
forwarding
through
any
non-recorded
blank
of
more
than
10
seconds
on
the
tape.
1.
Set
the
DIRECTION
switch
according
to
the
desired
play-
back
direction.
‘‘==
"’
One
side
will
be
repeated
8
times.
‘‘C)"'
Both
sides
will
be
repeated
8
times.
2.
Press
the
fast
forward
|
»>
|and
rewind
|
<<
|
keys
simul-
taneously.
®
To
cancel
dash
&
play,
press
the
stop
key
[im
.
Notes:
—--—-
1.
If
anon-recorded
section
is
less
than
10
seconds,
this
function
may
not
work
correctly.
2.
If
cassette
tapes
are
loaded
in
both
the
A
and
B
decks
with
the
DIRECTION
switch
set
to
‘‘—>"’
(reverse),
when
the
dash
&
play
operation
finishes
on
one
deck,
it
is
then
carried
out
on
the
other
deck.
@
Re-Rec
standby
(B
deck
only)
This
function
allows
you
to
interrupt
recording,
return
the
tape
to
the
position
where
recording
started,
and
put
the
deck
in
the
stop
mode.
This
is
useful
when
you
have
start-
ed
a
recording
by
mistake.
(In
this
case,
a
four
second
blank
section
is
required
before
the
position
at
which
the
recording
is
to
start).
During
forward
recording,
press
the
rewind
key
|
<<
|.
During
reverse
recording,
press
the
fast
forward
key
|
>>
|.
@
Recording
is
interrupted,
the
tape
is
rewound
to
the
cor-
rect
starting
point,
a
non-recorded
blank
of
2
seconds
is
made
after
the
end
of
the
previous
program,
and
the
deck
enters
the
stop
mode.
When
starting
to
re-record
1.
Press
the
REC/ARM
key
twice
in
succession
to
make
a
new
non-recorded
blank.
2.
Press
the
REC/ARM
key
again
@
This
starts
a
new
recording.
12.
kx-79cw
(En)
@
How
to
provide
non-recorded
blanks
between
programs
To
make
a
non-recorded
blank
of
about
4
seconds:
Press
the
REC/ARM
key
twice
in
succession.
@
After
leaving
a
non-recorded
blank
of
about
4
seconds,
the
deck
enters
the
record-pause
mode.
To
make
a
non-recorded
blank
during
recording:
Press
the
REC/ARM
key
once
during
recording.
®
After
running
to
make
a
non-recorded
blank
of
about
4
seconds
from
the
point
where
the
key
is
pressed,
the
deck
enters
the
record-pause
mode.
Note:
4
For
normal
recording
operations,
see
the
‘‘How
to
record’
section
which
starts
on
page
13.

How
to
record
(for
B
deck
only)
Peak
level
meter
INDEX
SCAN
PEAK
LE
STAND
BY
DUBBING
o @
»
NOR.
PAUSE
indicator
(ID)
REC
indicator
(@)
@
Preparation
for
recording
Preparatory
settings
1.
Set
the
TIMER
switch
to
OFF.
2.
Press
the
EJECT
key
[4]
for
B
deck.
3.
Insert
a
cassette,
and
close
the
cassette
holder
securely.
@
The
cassette
deck
automatically
selects
the
standard
recording
conditions
for
chrome
(CrOz)
tape,
Metal
tape,
or
normal
tape.
4.
Set the
DIRECTION
switch
to
the
desired
recording
direction.
One-side
recording
..............cceceee
eee
ee
eee
ees
=
Two-side
reCording
..........
2.0
cc
cece
e
cece
c
cece
ees
=
5.
When
DOLBY
NR
is
required,
set
the
DOLBY
NR
switch
to
BorC.
Use
of
the
counter
(for
B
deck
only)
Press
the
counter’s
reset
button
before
the
start
of
recording
to
return
the
counter
to
000.
When
recording
stops
before
the
Dolby
noise
reduction
system
The
Dolby
noise
reduction
system
was
developed
to
reduce
the
tape
hiss
noise
generated
during
play
back.
The
optimum
effect
of
the
Dolby
NR
system
is
obtained
when
the
same
type
NR
system
is
used
for
both
recording
and
play-
back.
If
a
different
type
NR
system
is
used,
playback
is
not
performed
correctly.
Make
sure
that
the
same
type
noise
reduc-
tion
system
is
used
for
both
recording
and
playback.
€L
METER
HIGH
DUBBING
J
OUBBING
+3
dB
(DC)
point
COUNTER
RESET
TAPE
B
*
PAUSE
*
REC
REC/ARM
key
PAUSE
key
(BI
Mi
Usual
recording
operations
Recording
level
adjustment
After
each
of
the
settings
is
completed
set
the
recording
level.
1.
Select
the
recording
source
with
the
amplifier’s
input
selector,
and
start
playing
the
source.
2.
Press
the
PAUSE
key
[II]
and
REC/ARM
key
simultane-
ously
to
put
the
deck
in
the
record-pause
mode.
3.
While
observing
the
peak
level
meter,
adjust
the
record-
ing
level
with
the
REC
LEVEL
knob
and
REC
BALANCE
knob
so
that
the
+3
dB
([())
indicator
lights
occa-
sionally.
Starting
recording
1.
Press
the
REC/ARM
key.
2.
Play
the
recording
source.
®
To
momentarily
stop
recording,
press
the
PAUSE
key
[8M].
@
At
the
end
of
recording,
press
the
stop
key
(mi
:
@
The
tape
is
stopped
automatically
at
the
end
of
the
desig-
nated
side
for
recording.
end
of
a
tape
run,
take
note
of
the
counter
reading,
and
fast
forward
the
tape
to
that
position
for
subsequent
recording.
Dolby
B-type
NR:
The
most
popular
noise
reduction
system
used
in
home
audio
components.
Usually,
Dolby
NR
system
corresponds
to
B-type
NR.
Dolby
C-type
NR:
Dolby
C-type
NR
offers
improved
noise
reduction
performance
over
that
of
the
Dolby
B-type
NR.
It
features
a
superior
noise
reduction
effect.
Use
Dolby
C-type
NR
to
record
or
playback
with
this
unit.
It
is
recommended
that
tapes
recorded
with
the
Dolby
NR
sys-
tem
be
marked
’’B”’
or
‘‘C’‘,
so
that
they
can
easily
be
distin-
guished.
KX-79CW
(En)
13
aE
a
Nok
NR
a
Fn
a
aaah
aad
lca

Synchro
recording
Amplifier
or
Receiver
*
Turntable
(KD-58F)
(TaD)
PLAY/CUT
—_/)—-
(*KD-58F)
Recording
starts.
14
kx-79Cw
(En)
@
Synchro
recording
with
the
turntable
unit
By
connecting
the
turntable
(optional)
with
the
system
con-
trol
cord,
tape
recording
can
be
started
in
synchronism
with
the
start
of
record
play.
1.
Make
the
cassette
deck
ready
for
recording
following
the
procedure
in
the
‘‘Preparation
for
recording’
section.
2.
Place
a
record
on
the
turntable.
3.
Following
the
procedure
in
the
‘‘Recording
level
adjust-
ment”
section,
play
the
turntable
and
adjust
the
record-
ing
level.
@
When
the
PHONO
input
selector
of
the
amplifier
is
pressed,
the
turntable
starts
play
automatically.
4.
After
adjusting
the
recording
level,
set
both
the
cassette
deck
and
turntable
in
the
stop
mode.
@
if
the
recording
level
has
been
set
based
on
experience,
steps
3
and
4
are
not
necessary.
5.
Press
the
REC/ARM
key
while
holding
the
PAUSE
key
(i
depressed.
6.
On
the
turntable,
press
the
PLAY/CUT
key.
@
The
turntable
will
start
play
and,
at
the
same
time,
the
cassette
deck
will
start
recording.
@
To
pause
synchro
recording
temporarily:
Press
the
CUEING
key
of
the
turntable.
@
The
cassette
deck
will
enter
the
record-pause
mode
af-
ter
reserving
a
non-recorded
blank
of
about
4
seconds.
@
To
resume
recording
press
the
CUEING
key
of
the
turnt-
able
again.
@
To
stop
synchro
recording:
Press
the
PLAY/CUT
key
of
the
turntable.
@
The
turntable
will
stop
record
play,
and
the
cassette
deck
will
enter
the
stop
mode
after
reserving
a
non-recorded
blank
of
about
4
seconds.
*
IMPORTANT:
This
option
may
not
be
available
in
some
areas.
For
de-
tails
on
options,
consult
your
dealer.

Amplifier
or
Receiver
*
CD-Player
(DP-4020,
DP-3020,
DP-2020)
O
fom
—i—]—1—|
0
onoo
System
control
cord
|
Synchro
recording
of
CDs
After
all
of
the
recording
preparations
have been
made
manually,
synchro
start
can
be
operated
for
the
cassette
deck
and
CD
player
at
the
start
of
recording.
1.
Make
the
necessary
preparations
in
accordance
with
the
section
entitled
‘‘Preparation
for
recording’’.
2.
Load
a
CD
into
the
CD
player.
3.
Follow
the
procedure
in
the
‘‘Recording
level
adjustment”’
section
while
playing
the
CD
to
set
the
recording
level.
®@
CD
play
starts
automatically
when
the
amplifier’s
input
selector
is
set
to
CD.
4.
After
setting
the
recording
level,
stop
both
the
deck
and
CD
player.
@
|f
you
have
experience
in
setting
the
recording
level,
you
can
skip
steps
3
and
4.
5.
While
pressing
the
PAUSE
key
i
,
press
the
REC/ARM
key.
@
The
deck
enters
the
record-pause
mode.
6.
Press
the
CD
player’s
PLAY/PAUSE
key
[_>
11
|.
@
The
cassette
deck
begins
recording
simultaneously
with
the
start
of
CD
playback.
@
At
the
end
of
CD
playback,
the
cassette
deck
will
enter
the
stop
mode
after
reserving
a
non
recorded
blank
of
about
4
seconds.
@
Record-pause
Press
the
CD
player's
PLAY/PAUSE
key
|
>
/U
|.
@
The
deck
makes
a
non-recorded
blank
of
about
4
se-
conds,
and
goes
into
the
record
pause
mode.
@
Recording
is
resumed
when
the
key
is
pressed
again.
PLAY/PAUSE
@
To
stop
recording
Press
the
STOP
key
|M
on
the
CD
player.
@
The
CD
player
will
stop
playback,
and
the
cassette
deck
will
enter
the
stop
mode
after
reserving
a
non-recorded
blank
of
about
4
seconds.
(*
DP-4020,
DP-3020,
DP-2020)
Recording
is
started.
*
IMPORTANT:
This
option
may
not
be
available
in
some
areas.
For
de-
tails
on
options,
consult
your
dealer.
KX-79CW
(en)
15

CCRS
(Computer-controlled
CD
Recording
System)
When
connected
with
a
CD
player
provided
with
‘’(X$)}""
marking
through
the
system
control
cord,
this
unit
al-
lows
to
used
the
CCRS
(Computer-controlled
CD
Recording
System),
which
starts
recording
automatically
after
setting
the
optimum
recording
level
for
the
CD
and
tape
to
be
used
in
recording.
@
CCRS
(Computer-controlled
CD
Recording
System)
When
the
CCRS
key
is
pressed,
the
following
operations
oc-
cur
automatically
and
CD
sound
is
recorded
on
tape.
a.
1.
The
CD
starts
to
be
played,
and
the
peak
value
is
sam-
Cassette
deck
CCRS
pled
from
the
levels
of
the
signals
on
the
CD.
Automatic
recording
level
2.
The
optimum
recording
level
for
the
specific
CD
is
de-
setting
termined
and
set
based
on
the
peak
value
sampled.
3.
The
recording
preparation
steps
above
take
about
20
~
200
seconds,
after
which
the
actual
recording
starts.
7
4.
After
recording
(when
the
CD
player
is
stopped
or
when
|
the
tape
has
run
out),
both
the
cassette
deck
and
CD
CD
player
|
player
stop.
|
@
With
CD
players
equipped
with
the
EDIT
function,
it
is
possible
to
make
recordings
in
which
the
fast
songs
on
sides
A
and
B
are
not cut
off
in
the
middle
and
in
which
the
recording
capacity
of
the
tape
is
used
to
the
fullest
extent.
(Models
DP-4020,
DP-3020,
and
DP-2020
only.)
@
CCRS
recording
Amplifier
or
Receiver
1.
Select
the
CD
input
with
the
input
selector
switch
of
the
amplifier
or
receiver.
2.
Load
a
CD
into
the
CD
player.
3.
Insert
the
tape
to
be
used
for
recording
into
deck
B.
System
4.
Press
the
CCRS
key
on
the
cassette
deck.
control
@
The
CCRS
indicator
blinks,
and
recording
begins
after
approximatery
20~
200
seconds.
(A
non-recorded
blank
of
about
8
seconds
is
created.)
@
When
recording
is
completed,
both
the
cassette
deck
and
the
CD
player
stop
automatically.
cord
5.
How
to
cancel
CCRS
@
To
cancel
CCRS
during
the
recording
level
setting
operation,
press
the
STOP
key
_]
of
the
CD
player
or
the
stop
key
[Il
of
the
cassette
deck.
@
To
cance!
after
the
completion
of
CCRS
recording,
press
the
OPEN/CLOSE
key
[4]
of
the
CD
player.
@
When
the
CCRS
recording
has
completed,
be
sure
to
cancel
CCRS
and
ensure
that
the
CCRS
indicator
is
ex-
tinguished.
Notes:
1.
If
the
CCRS
key
is
pressed
during
CD
playback,
playback
stops
5.
The
CCRS
recording
level
setting
is
canceled
when
the
and
CCRS
operation
begins.
OPEN/CLOSE
key
[Alot
the
CD
player
is
pressed
or
when
the
2.
If
the
remaining
amount
of
tape
is
small,
CCRS
operation
may
power
is
switched
OFF.
be
canceled
in
mid-operation.
3.
Once
the
CCRS
recording
level
has
been
set,
the
recording
lev-
el
cannot
be
adjusted
while
the
CCRS
operation
is
being
car-
ried
out.
4.
The
CCRS
function
sets
the
peak
level
for
the
entire
CD
in
ap-
prox.
20
~
200
seconds.
On
very
rare
occasions,
however,
the
function
may
not
be
able
to
set
the
optimum
recording
level.
If
this
occurs,
carry
out
recording
manually
referring
to
the
“Usual
recording
operations’
section.
16
kx-79cw
(én)

Dubbing
operation
(A—B
deck
only)
Dubbing
is
the
operation
for
copying
sound
from
a
prerecorded
tape
to
another
tape.
‘CENTER
7
os
y
.
»
,
REC
@
"REC
BALANCE
l
\
y
vevee
tee)
on
t0
n
DIRECTION
switch
DUBBING
key
{
»
NORMAL,
»®
HIGH)
@
Normal
dubbing
operation
1.
Set
tapes
in
both
the
A
and
B
decks
as
shown
in
the
figure.
2.
Check
that
both
the
A
and
B
deck
tape
direction
indica-
tors
are
set
to
the
forward
direction
(
>
).
@
\f
a
reverse
direction
(
<4
}
indicator
is
lit,
set
it
to
the
forward
direction
(
»
)
in
the
following
manner.
1)
Press
the
play
key
[>].
2)
Press
the
stop
key
[fil]
.
3)
Press
the
rewind
key
[=<]
.
3.
Set
the
DIRECTION
switch
to
select
the
dubbing
mode,
either
one
side
or
both
sides.
@
One-side
dubbing
.............
cece
eee
Set
to
=.
@
Both-side
dubbing
............
eee
Set
to
=D.
4.
Press
the
»
NORMAL
key.
®
Dubbing
operation
from
A
deck
to
B
deck
starts.
@
During
dubbing,
when
any
of
the
operation
keys
of
B
deck
is
pressed,
the
dubbing
operation
will
be
released.
B
deck
will
enter
the
operation
corresponding
to
the
key
pressed,
and
A
deck
will
enter
stop
mode.
@
During
dubbing,
when
any
of
the
operation
keys
of
A
deck
is
pressed,
the
dubbing
operation
stops
temporarily.
A
deck
will
enter
the
operation
corresponding
to
the
key
pressed
and
B
deck
will
enter
record-pause
mode
after
leaving
a
non-recorded
section
of
about
4
seconds
on
the
tape.
5.
To
stop
dubbing,
press
the
stop
key
(mi
of
B
deck.
®@
Both
the
A
and
B
decks
will
enter
stop
mode.
Pause
during
dubbing
Press
the
»
NORMAL
key.
®
B
deck
enters
record-pause
mode
after
leaving
a
non-
recorded
section
of
about
4
seconds
on
the
tape.
@
To
restart
dubbing,
press
the
®
NORMAL
key
again.
Set
the
tape
for
recording
in
B
deck
Set
the
tape
for
play-
back
in
A
deck
=
Initial
tape
running
aonb
direction
=
@
High-speed
dubbing
operation
1,2,
3.
Perform
the
preparations
for
dubbing
according
to
the
operations
in
steps
1
to
3
of
the
‘Normal
dubbing
operations’
section.
4.
Press
the
>
HIGH
key.
®
The
dubbing
operation
will
be
performed
in
half
of
the
nor-
mal
dubbing
time.
At
this
time,
pressing
the
»
HIGH
key
again
will
leave
a
non-recorded
section
of
about
6
seconds
on
the
tape.
5.
To
stop
high-speed
dubbing,
press
the
stop
key
[Ml
of
B
deck.
@
Both
the
A
and
B
decks
will
enter
stop
mode.
Pause
during
dubbing
Press
the
>»
HIGH
key.
@
B
deck
enters
record-pause
mode
after
leaving
a
non-
recorded
section
of
about
6
seconds
on
the
tape.
@
To
restart
dubbing,
press
the
™®
HIGH
key
again.
Notes:
1.
The
recording
level
cannot
be
adjusted
for
dubbing.
Insert
a
tape
which
was
recorded
at
an
optimum
recording
level
in
the
A
deck.
2.
The
system
is
deactivated
during
dubbing
operation
with
the
result
that
the
dubbed
version
features
the
same
noise
reduc-
tion
as
the
original.
Example)
if
the
A
deck
tape
was
recorded
using
Dolby
B
NR,
the
tape
recorded
in
the
B
deck
will
also
be
recorded
using
Dolby
B
NR.
3.
Repeat
dubbing
leads
to
degradation
of
sound
quality.
It
is
recommended
that
the
prerecorded
tape
in
A
deck
be
an
origi-
nal
(first
generation
tape).
4.
When
a
TV
set
is
placed
near
the
system,
the
result
of
high-
speed
dubbing
could
contain
noise
from
the
TV.
To
avoid
this,
place
the
TV
as
far
as
possible
from
the
system.
5.
If
the
prerecorded
tape
was
recorded
at
a
relatively
high
record-
ing
level,
the
result
of
high-speed
dubbing
could
be
poor
sound
quality.
Use
normal
dubbing
with
such
tapes.
KX-79CW
(En)
17

Ti
mer
stand-by
operation
By
bin
1
week,
the
stored
memory
may
be
erased,
and
system
control
operation
and
timer-activated
operation
are
not
possible.
At
that
time,
press
the
POWER
switch
to
sup-
ply
power.
f
the
power
is
not
supplied
to
the
cassette
deck
for
about
Audio
timer
C4
[SSO]
To
Ac
outer
using
the
built-in
TIMER
STAND-BY
mechanism
in
com-
ation
with
an
audio
timer
(available
from
many
dealers),
the
deck
can
begin
to
record
or
play
at
any
desired
time.
1.
10.
Notes:
1.
Timer
recording
of
radio
broadcasts
Connect
the
power
cords
to
the
components
and
set
the
timer
so
that
power
is
supplied
to
each
component.
(Timer
setting
procedures
vary
with
the
type
of
timer
used.
Follow
the
instructions
of
the
timer’s
manual.)
.
Turn
on
the
power
switches
in
the
components
to
be
used
for
recording.
.
Tune
in
the
desired
station
and
set
the
recording
level.
.
Set
the
volume
control
of
the
amplifier
to
its
minimum
setting.
.
Set
the
timer
to
the
required
time
referring
to
the
timer’s
instruction
manual
so
that
the
power
will
be
switched
ON
at
the
preset
time.
.
Load
a
tape
for
recording
into
B
deck.
.
Set
the
DOLBY
NR
switch
to
B
or
C
if
the
recording
is
to
be
made
using
the
noise
reduction
system.
.
Set
the
TIMER
switch
to
REC.
REC
OFF
PLAY
(em
®
TIMER
.
Power
to
the
components
will
be
switched
ON
at
the
preset
time
and
recording
will
start.
Recording
stops
when
the
end
of
the
tape
is
reached.
10.
Timer
playback
.
Connect
the
timer
as
described
in
the
‘‘Timer
record-
ing
of
radio
broadcasts’’
section.
.
Set
the
timer
so
that
power
is
supplied
to
each
of
the
components.
.
Turn
on
the
power
switches
of
the
components
to
be
used
for
playback.
Load
a
recorded
tape
and
set
each
switch
referring
to
the
‘Tape
playback
operation’’.
.
Adjust
the
volume
control
of
the
amplifier.
.
Rewind
the
tape
to
the
start.
.
Set
the
timer
to
the
required
time.
.
Set
the
TIMER
switch
to
PLAY.
REC
OFF
PLAY
(ooo)
®
TIMER
.
The
tape
will
automatically
start
playback
at
the
preset
time.
The
relay
playback
from
B
deck
to
A
deck
can
be
also
setting
the
DIRECTION
switch
to
normal
mode
(
=
}
or
reverse
mode
(
—>)
position.
(Refer
to
the
‘‘Relay
play-
back
operation’’.)
@
|f
tapes
are
loaded
into
both
the
A
and
B
decks,
timer
playback
will
begin
with
the
B
deck.
Tuner
models
KT-89
and
KT-2020(L)
incorporate
a
built-
in
timer.
For
instructions
regarding
connection
and
oper-
ation,
see
the
Instruction
Manual
supplied
with
the
tuner.
The
KT-89
and
KT-2020{L)
models
may
not
be
availa-
ble
in
some
areas.
For
details,
consult
your
dealer.
To
ensure
that
the
cassette
deck’s
automatic
shut-off
switch
operates
before
the
power
is
shut
off,
set
the
timer
so
that
it
operates
for
a
little
longer
than
the
playing
time
of
the
tape.
.
When
operating
the
unit
other
than
the
CD
player
using
an
au-
dio
timer,
be
sure
to
remove
the
disc
from
the
CD
player.
3.
Do
not
use
a
timer
for
the
dubbing
procedure.
18
KX-79CW
(En)
In
case
of
difficulty
Pn
pe
a
What
appears
to
be
a
malfunction
may
not
always
be
serious.
If
your
unit
should
not
perform
as
expected,
consult
the
table
below
to
see
if
the
problem
can
be
corrected
before
seeking
help
from
your
dealer
or
service
representative.
Symptom
Cause
Remedy
Recording
is
impossible
by
press-
|
®
ing
the
REC/ARM
key.
The
erase
protection
tab
on
the
cassette
shell
is
broken.
Cassette
holder
is
not
closed
completely.
Record
input
level
knob
is
set
to
its
mini-
mum
position.
The
amp’s
input
selector
is
set
to
TAPE
A
or
TAPE
B.
Tape
is
wound
to
one
side.
@
Use
a
cassette
which
has
its
protection
tab
intact.
(When
recording
using
a
cas-
sette
with
a
broken
tab,
cover
the
hole
with
adhesive
tape.)
@
Close
the
cassette
holder
completely.
®
Refer
to
the
‘‘How
to
record”
section.
@
Set
the
amp’s
selector
to
the
recording
source
you
want.
@
Set
the
direction
indicator
to
the
right
direction.
Sound
is
not
heard
even
when
the
|
@
playback
key
[>]
is
pressed.
Audio
cords
are
connected
incorrectly.
@
Refer
to
the
‘‘System
connections”
section.
@
Head
is
dirty.
@
Refer
to
the
‘’Cleaning
the
head
section’’.
@
Tape
cannot
be
advanced
due
to
uneven
|
@
Replace
the
cassette.
winding.
@
Unrecorded
tape
is
used.
@
Use
a
recorded
tape.
Too
noisy.
®
Head
is
magnetized.
®
Demagnetize
the
head
using
head
eraser.
@
Noise
is
induced
from
external
|
@
Keep
the
unit
away
from
other
electrical
equipment.
equipment.
®
Recording
level
is
too
low.
@
Refer
to
the
‘‘How
to
record’’
section.
e
DOLBY
NR
encoded
tape
is
played
back
with
DOLBY
NR
switch
OFF.
Playback
or
recording
starts
when
the
power
is
turned
ON.
Operation
is
impossible
by
press-
ing
any
of
the
operation
keys.
+
TIMER
switch
is
set
to
PLAY
or
REC.
Cassette
holder
is
not
closed
completely.
An
operation
key
is
pressed
immediate-
ly
after
the
cassette
holder
is
closed.
The
operation
key
is
pressed
immediately
after
the
power
is
turned
ON
(before
3
seconds
have
elapsed).
Cassette
tape
is
not
loaded.
The
tape
cannot
be
wound
(advanced)
because
the
tape
is
wound
unevenly.
@
Set
the
DOLBY
NR
switch
to
B
or
C.
It
is
recommended
to
always
perform
recording
with
the
DOLBY
NR
switch
set
to
BorC.
Set
the
TIMER
switch
to
OFF
when
the
timer-playback
or
timer-recording
func-
tion
is
not
used.
Close
the
cassette
holder
completely.
@
Wait
a
few
seconds
after
closing
the
cas-
sette
holder
before
pressing
an
operation
key.
@
After
3
seconds
have
elapsed
after
the
power
is
turned
ON,
press
the
operation
key.
®@
Load
a
cassette.
®
Replace
the
cassette.
DPSS
does
not
function
correctly.
|
©
An
unsuitable
tape
having
short
blank
sections
between
tunes
is
used.
®@
Refer
to
the
‘‘DPSS”
section.
CCRS
does
not
operate.
e
Notes:
A
recordable
tape
is
not
loaded
in
Deck
B.
CD
is
not
loaded
in
CD
player.
CD
surface
is
dirty.
@
Insert
a
recordable
tape
in
Deck
B.
®
Load
a
disc
correctly
into
the
CD
player,
and
press
the
CCRS
key.
®@
Clean
the
CD,
load
it
into
the
CD
player
and
press
the
CCRS
key.
®@
Depending
on
the
type
of
cassette
tape,
noise
will
sometimes
be
heard
when
the
tape
stops
automatically.
This
is
not
a
malfunction
of
the
unit,
but
is
caused
to
ensure
the
certain
transport
of
the
tape.
@
120-minute
cassette
tapes
are
not
recommended
because
they
are
too
thin
and
may
be
damaged
by
repeated
use.
©
As
this
system
uses
microcomputers,
it
is
open
to
interference
from
external
noise,
and
may
sometimes
not
function
properly.
In
such
a
case,
unplug
the
power
cord
once,
and
then
plug
it
in
again.
®@
Do
not
use
contact
cleaners
because
it
could
cause
a
malfunction.
Be
specially
careful
against
contact
cleaners
containing
oil,
for
they
may
deform
the
plastic
components.
Kx-79CW
(en)
19

Specifications
a
er
EN
OT
SR
Track
System
..............
4-track,
2-channel
stereo,
Harmonic
Distortion......
Less
than
0.6%
(at
1
kHz,
0
dB
recording/playback
with
normal
tape)
Recording
System........
AC
bias
system
Wow
and
Flutter..........
0.08%
(W.R.M.S),
(Bias
frequency:
105
kHz)
+0.22%
(DIN)
Heads...
33
n.ccees
ccaca
ce
Playback/record
head
x
1
Input
sensitivity/
Playback
head
x
1
Impedance:
Erasing
head
x
1
LINE
IN
200...
77.5
mV/50
kQ
Motors
seciceeeenlenoen
DC
motor
x
2
Output
Level/
Fast
Winding
Time
.......
Approx.
90
seconds
with
C-60
Impedance:
tape
LINE
OUT.........0.0......
270
mV/3.9
kQ
Frequency
Response
(+6
dB)
—
20
dB
recording:
Normal
Tape..............
20
Hz
to
15,000
Hz
’
CrO
Tape
.................
20
Hz
to
16,000
Hz
[GENERAL]
Metal
Tape................
20
Hz
to
16,000
Hz
Power
Consumption.....
15
W
Signal-to
Noise
Ratio:
Dimensions..................
W:
440
mm
(17-5/16”)
Dolby
C
Type
NR
ON..
72
dB
(Normal
tape)
H:
119mm
(4-11/16”)
Dolby
B
Type
NR
ON..
65 dB
(Normal
tape)
D:
268
mm
(10-9/16”}
Dolby
NR
OFF............
57 dB
(Normal
tape)
Weight
(Net)................
4.6
kg
(10.1
Ib)
Note:
KENWOOD
follows
a
policy
of
continuous
advancements
in
development.
For
this
reason
specifications
may
be
changed
without
notice.
For
the
U.S.A.
FCC
WARNING:
This
equipment
may
generate
or
use
radio
frequency
energy.
Changes
or
modifications
to
this
equipment
may
cause
harmful
interference
unless
the
modifications
are
expressly
approved
in
the
instruction
manual.
The
user
could
lose
the
authority
to
operate
this
equipment
if
an
unautho-
rized
change
or
modification
is
made.
NOTE:
This
equipment
has
been
tested
and
found
to
comply
with
the
limits
for
a
CLASS
B
digita!
device,
pursuant
to
Part
15
of
the
FCG
Rules.
These
limits
are
designed
to
provide
reasonable
protection
against
harmful
interference
in
a
residential
installation.
This
equipment
may
cause
harmful
interference
to
radio
communications,
if
it
is
not
installed
and
used
in
accordance
with
the
instructions.
However,
there
is
no
guarantee
that
interference
will
not
occur
in
a
particular
installation.
If
this
equipment
does
cause
harmful
interference
to
radio
or
television
reception,
which
can
be
determined
by
turning
the
equipment
off
and
on,
the
user
is
encouraged
to
try
to
correct
the
interference
by
one
or
more
of
the
following
measures:
—-—
Reorient
or
relocate
the
receiving
antenna.
—-
Increase
the
separation
between
the
equipment
and
receiver.
-—~—
Connect
the
equipment
into
an
outlet
on
a
circuit
different
from
that
to
which
the
receiver
is
connected.
——
Consult
the
dealer
or
an
experienced
radio/TV
technician
for
help.
For
CANADA
DOC
REGULATION
“This
digital
apparatus
does
not
exceed
the
CLASS
B
limits
for
radio
noise
emissions
from
digital
apparatus
as
set
out
in
the
radio
interference
regulations
of
the
Canadian
department
of
communications."’
Note:
The
unit’s
power
supply
is
secondarily
connected.
Note
following
.
The
unit
is
not
completely
disconnected
from
the
mains
as
long
as
the
power
cord
is
connected
to
a
wall
outlet.
Observera:
Bemeerk:
Apparatens
strémfdrsdérjning
kopplas
fran
sekundart.
V.g.
ge
akt
Strammen
til
apparatet
afbrydes
pA
den
sekundezere
side.
Vear
op-
pa
fdljande.
mezerksom
pa
falgende.
Apparaten
frankopplas
inte
helt
och
hallet
fran
stromnatet
medan
Denne
enhed
er
ikke
fullstendig
koblet
fra
lysnettet
s4
lenge
stik-
apparatens
natsladd
ar
ansluten
till
vaxelstromsuttaget.
ket
er
tilsluttet
stikkontakten.
Huom:
Anmerkning:
Virta
yksikk66n
on
kytketty
pois
sekundaaripuolelta.
Huomioi
Strammen
til
apparatet
er
slatt
av
pa
sekundzersiden.
Vaer
oppmerk-
seuraava.
som
pa
det
falgende.
Tama
yksikk6
ei
ole
kokonaan
kypketty
pois
paa
virranjakajasta
kun
Dette
apparatet
koples
ikke
fullstendig
fra
nettet
s8
lenge
stopse-
paa
katkaisin
on
liitettyna
virtatiiriin.
let
stér
i
en
stikkontakt,
selv
om
strembryteren
settes
i
av-stilling.
Table of contents
Other Kenwood Tape Deck manuals

Kenwood
Kenwood KX-94W User manual

Kenwood
Kenwood KX-W6080 User manual

Kenwood
Kenwood KX-W4060 User manual

Kenwood
Kenwood KX-9050 User manual

Kenwood
Kenwood KX-97CW User manual

Kenwood
Kenwood KX-W8050 User manual

Kenwood
Kenwood KX-620 User manual

Kenwood
Kenwood KX-7030 User manual

Kenwood
Kenwood KXF-W4030 User manual

Kenwood
Kenwood CT-203 User manual

Kenwood
Kenwood KX-W4070 User manual

Kenwood
Kenwood 1050CT User manual

Kenwood
Kenwood KX-7050 User manual

Kenwood
Kenwood KX-W6030 User manual

Kenwood
Kenwood KX-W6050 User manual

Kenwood
Kenwood KX-W892 User manual

Kenwood
Kenwood CT-201 User manual

Kenwood
Kenwood KX-W6070 User manual

Kenwood
Kenwood KX-W6030 User manual

Kenwood
Kenwood KX-W8060 User manual